United States: Scientific-Atlanta, Inc., 5030 Sugarloaf Parkway,
Box 465447, Lawrenceville, GA 30042
Europe: Scientific-Atlanta Europe GmbH, Westerbachstrasse 28-32,
61476 Kronberg, Germany
Asia-Pacific: Scientific-Atlanta (Singapore) Pte. Ltd.,
1 Claymore Drive, #08-11 Orchard Towers, Singapore 229594
Latin America: Scientific-Atlanta Argentina S.A.,
Carlos Pelligrini 1149, Piso 11
o
, Capital Federal 1011,
Buenos Aires, Argentina
© 2002 Scientific-Atlanta, Inc. All rights reserved.
Printed in USA www.scientificatlanta.com
Part Number 749219 Rev A March 2002
FCC Compliance
This device complies with Part 15 of the FCC
Rules. Operation is subject to the following
two conditions: (1) This device may not cause
harmful interference, and (2) this device must
accept any interference received, including
interference that may cause undesired
operation.
Note
This equipment has been tested and found to
comply with the limits for a class B digital
device, pursuant to Part 15 of the FCC Rules.
These limits are designed to provide reason-
able protection against harmful interference in
a residential installation. This equipment
generates, uses, and can radiate radio
frequency energy and, if not installed and
used in accordance with the instructions, may
cause harmful interference to radio communi-
cation. However, there is no guarantee that
interference will not occur in a particular
installation. If this equipment does cause
harmful interference to radio or television
reception, which can be determined by turning
the equipment off and on, the user is encour-
aged to try to correct the interference by one or
more of the following measures:
• Reorient or relocate the receiving antenna.
• Increase the separation between the
equipment and the receiver.
• Connect the equipment into an outlet on a
circuit different from that to which the
receiver is connected.
• Consult the dealer or an experienced radio/
TV technician for help.
Any changes or modifications not expressly
approved by Scientific-Atlanta could void the
user’s authority to operate this equipment.
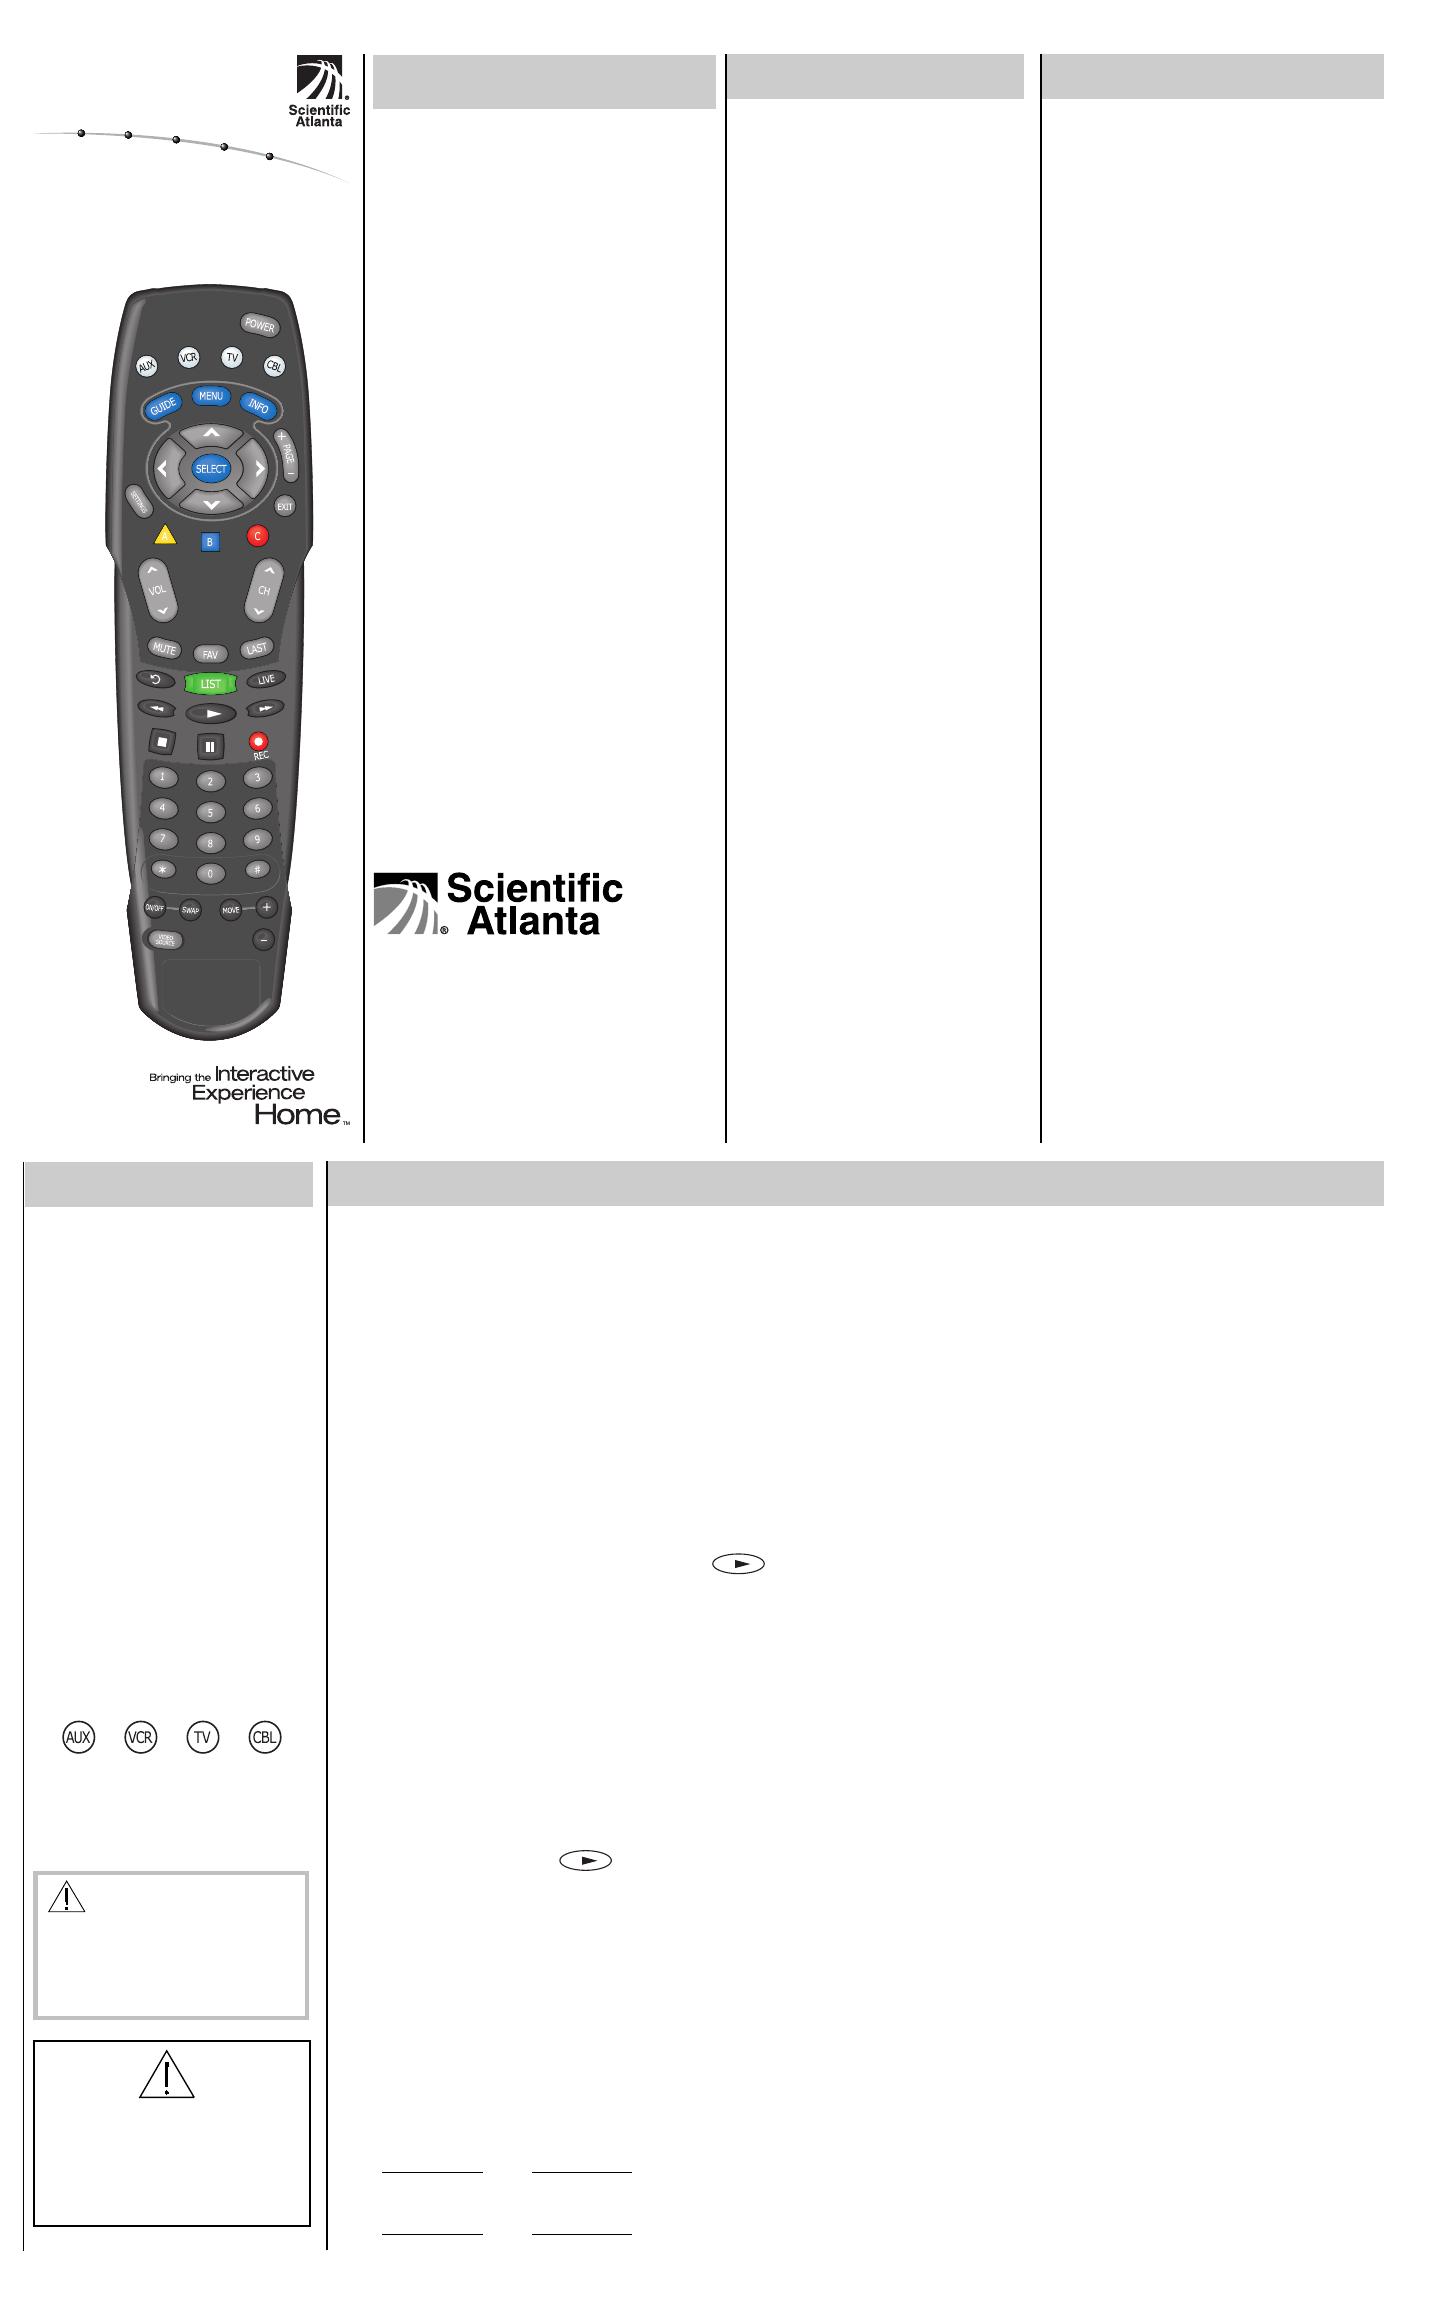
Your new AT8400 AllTouch
®
Remote
Control ("remote") functions as four
remote controls in one to operate your
TV, VCR, cable set-top device (CBL),
and an additional device (AUX), such
as a stereo receiver or an amplifier.
In addition, the remote provides
advanced features such as Personal
Video Recorder (PVR) controls for
certain cable set-top devices and the
Picture-In-Picture (PIP) feature.
Note: If you have questions or
concerns about the operation of this
remote, contact your cable service
provider.
Batteries
The remote requires two alkaline AA
batteries. A diagram inside the battery
compartment of the remote indicates
proper placement of the batteries.
Mode Keys and Setup Codes
Q: What are mode keys?
A: The mode keys switch the remote
to operate a particular device.
Q: What are setup codes?
A: Setup codes are numeric codes
that identify your brand of
equipment so that the remote can
operate that equipment.
CAUTION: The AT8400
AllTouch Remote Control is
not a toy. It should be kept out
of the reach of children under
the age of 6 years.
About Your Remote
Setting Up Your Remote
1
2
About Cable Codes
Your cable service provider may
have “locked” a valid cable code
into your remote to keep you from
changing the cable code uninten-
tionally.
If you need to program the remote to
operate a different device, use the
following steps to unlock the remote.
1. Press and hold the SELECT key
and the CBL key until the LED
blinks twice.
2. Press 9 9 6.
Note:As you press each digit,
the mode key should blink.
3. Press CH- to unlock the remote.
Result: You can now set up your
CBL key with a different cable code.
Enter all 4 digits to program the
CBL mode key.
Cable Codes
Brand–Code
ABC–0004
Contec–0008
General Instruments–0011, 0012
Gold Star–0010
Jerrold–0007, 0011, 0012, 0015
Memorex–0006
Panasonic–0006, 0009
Paragon–0006
Pioneer–0010, 0014
Pulsar–0006
Quasar–0006
Runco–0006
Scientific-Atlanta–0000, 0001, 0002,
0003, 0004, 0005, 0016
Samsung–0010
Starcom–0011
Tocom–0007
Toshiba–0006
Zenith–0006, 0013
Satellite Codes
Brand–Code
Echostar–0021
Hughes–0017, 0020
Mitsubishi–0020
RCA–0018
Sony–0019
CBL Setup Codes AUX Setup Codes
AT8400 AllTouch
®
Remote Control
User’s Guide
Home Automation Codes
Brand–Code
GE–3601
Radio Shack–3601
X10–3600
Additional Audio Codes
These codes allow you to program your
remote to control cable radio set-top
devices.
Brand–Code
Jerrold–3400, 3402
Scientific-Atlanta–3401
Starcom–3400
7
Panasonic–3202,
3204
Philips–3202
Pioneer–3200, 3203
Sony–3208
Technics–3202, 3204
Victor–3205
Wards–3200
Yahama–3206
Amplifier Codes
Brand–Code
Aiwa–3207
Carver–3202
Curtis Mathes–3203
Denon–3201
JVC–3205
Linn–3202
Magnavox–3202
Marantz–3203
Receiver Codes
Brand–Code
AADC–3012
Aiwa–3000, 3006,
3008, 3015, 3024,
3047, 3048, 3050,
3049, 3061, 3051,
3059, 3060, 3062
Capetronic–3012
Carver–3000, 3019
Denon–3016, 3018,
3063, 3064
Harman Kardon–
3000, 3065, 3005
JBL–3005
JVC–3004, 3052,
3066
Kenwood–3002,
3013, 3023, 3026,
3053
Linn–3000
Magnavox–3000,
3012
Marantz–3000, 3003,
3070
MCS–3003
Onkyo–3007, 3068
Optimus–3012, 3027
Panasonic–3003,
3010, 3025
Philips–3000
Pioneer–3001, 3012,
3067
Quasar–3003
RCA–3012, 3054
Sansui–3000
Sherwood–3011
Sony–3008, 3014,
3017, 3020, 3055,
3056
Technics–3003, 3010,
3021, 3022
Victor–3004
Wards–3000, 3001,
3008
Yamaha–3009, 3057,
3069, 3058
To Search for Codes
If none of the codes listed for your device work,
you can search through the code library for a valid
code. The remote automatically selects the proper
code.
1. Turn on the device.
2. Press and hold the SELECT key and the
appropriate mode key (AUX, VCR, TV, or
CBL) until the mode keys blink twice. For
example, to search for a TV code, press and
hold SELECT and TV.
3. Using the remote control keypad, press 9 9 1.
The mode keys blink twice.
Note:Be careful not to press these keys too
quickly. As you press each digit, the mode
key should blink.
4. Point the remote toward the device, and press
.
The remote automatically tests each code in
its library, beginning with the most common
codes. The mode key blinks once each time
the remote transmits a new code.
Note: Each of the code libraries contains
fewer than 100 codes. The mode key blinks
twice when it reaches the last code in the
library.
5. As soon as the device powers down, press
the SELECT key.
6. Verify that the new code is correct by
pressing the Power key.
7. Did the device power on again?
• If no, go back and repeat step 4.
• If yes, press SELECT to lock the code.
To Identify Programmed Codes
You can find out which code you used to program
your device by following this procedure.
1. Press and hold the SELECT key and the
appropriate mode key (AUX, VCR, TV, or
CBL) until the mode keys blink twice.
2. Using the remote control keypad, press 9 9 0.
The mode keys blink twice.
Note:Be careful not to press these keys too
quickly. As you press each digit, the mode
key should blink.
3. Press 1; then, count the number of times the
mode key blinks. That number indicates the
first digit in the code. For example, 4 blinks
indicates the first digit in the code is 4. If the
mode key does not blink, the digit is 0.
The mode keys are programmed with most of
the popular brands of electronic devices.
Therefore, before you perform these
procedures, you should test each mode key to
see if it is already programmed.
To test the mode key, turn on your device,
press the mode key for that device, and then
press POWER on the remote control to verify
that the power to the device turns off.
To Set Up a Mode Key
Follow these steps to set up a mode key:
1. Find the code(s) for your brand of device
in one of the setup code lists in this guide.
2. Turn on your device.
3. Press and hold the SELECT key and the
appropriate mode key for that device until
all the mode keys blink twice. For
example, to set up the VCR key, press
and hold SELECT and VCR.
4. Enter the setup code for the device. The
mode keys blink twice to indicate that the
code was accepted.
Notes:
• The setup codes for each mode key
appear on both the front and the back
of this guide.
• As you press each digit in the setup
code, the mode key should blink. If the
mode key does not blink, the remote
did not accept the digit. Enter that digit
again.
5. Point the remote control toward the
device and press POWER,
, or
CH+ to test the device.
6. Did the device operate correctly?
• If yes, go to step 7.
• If no, repeat steps 3 through 5 using a
different setup code.
Note: If all of the codes listed for your
brand of device fail to operate your device
properly, go to the To Search for Codes
section of this guide for instructions.
7. Repeat steps 1 through 5 for each mode
key you want to set up.
8. Write your codes here for future reference:
TV: VCR:
AUX: CBL:
4. Press 2; then, count the number of
blinks. That number indicates the second
digit in the code.
5. Press 3; then, count the number of
blinks. That number indicates the third
digit in the code.
6. Press 4; then, count the number of
blinks. That number indicates the fourth
digit in the code.
7. Write your codes for future reference in
the space provided in this guide.
To Program for Volume Control
You can program the remote to control the
volume and mute functions through any of
the devices that it controls. The default is to
control volume through your TV.
Note: For Explorer Digital Home Communi-
cation Terminals (DHCTs), use the SET-
TINGS button to go to the General Settings
menu on-screen, and make sure that the
Audio: Volume Control setting is set to
“Variable.”
1. Turn on the device.
2. Press and hold the SELECT key and the
CBL key until the mode keys blink
twice.
3. Using the remote control keypad, press
9 9 3. The mode keys blink twice.
Note:Do not press these keys too
quickly. As you press each digit, the
mode key should blink.
4. Press the mode key for the device you
want to control the volume.
5. Point the remote toward the device and
adjust the volume to confirm that the
Volume and Mute keys function as
expected.
To Join The Explorer eClub
The Explorer eClub is an online club that
provides news and information about the
Explorer DHCT and offers you a chance to
win prizes and other premium items.
To join the Explorer eClub, you must enter
the serial number of your DHCT. The
number is located on a label either on the
back panel or on the bottom of your DHCT
and begins with S/N. Write the serial number
here:_________________
You can access the Explorer eClub on the
Internet at the following Internet site:
www.scientificatlanta.com/explorerclub
This symbol is intended to alert
you of the presence of important
operating and maintenance
(servicing) instructions in the
literature accompanying this
product.
Enter all 4 digits to program the AUX
mode key.


