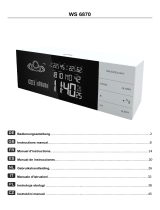
König KN-CL30 Owner's manual

Category
Wall clocks
Type
Owner's manual
15-11-2011
KN-CL30
MANUAL (p. 2)
Wall Clock
ANLEITUNG (S. 3)
Wanduhr
MODE D’EMPLOI (p. 5)
Horloge murale
GEBRUIKSAANWIJZING (p. 6)
Wandklok
MANUALE (p. 8)
Orologio da Parete
MANUAL DE USO (p. 9)
Reloj de pared
HASZNÁLATI ÚTMUTATÓ (o. 11.)
Falióra
KÄYTTÖOHJE (s. 13)
Seinäkello
BRUKSANVISNING (s. 14)
Väggklocka
NÁVOD K POUŽITÍ (s. 16)
Nástěnné hodiny
MANUAL DE UTILIZARE (p. 17)
Ceas de perete
ΕΓΧΕΙΡΙΔΙΟ XPHΣHΣ (σελ. 19)
Ρολόι τοίχου
BRUGERVEJLEDNING (s. 20)
Vægur
VEILEDNING (s. 22)
Veggklokke
2
ENGLISH
Wall Clock
First insert 2 “AA” batteries into the battery compartment after opening the battery door of the wall clock
and insert 1 “AA” battery into the compartment, then insert 2 “AAA” batteries into the sensor (transmitter)
after opening the battery door with a screw driver.
Functions and features:
- Indoor temperature display
- RF outdoor temperature display
- Weather forecast display
- RF receiving channels: CH1, CH2, CH3
- Temperature format: (°C/°F)
- Outdoor temperature range: - 20°C~50°C, Accuracy: +/-1°C
Time setting
- After putting 1 AA battery into the compartment, adjust the back wheel to set the time.
RF outdoor temperature instruction
Normal mode keys functions:
- Press the “°C/°F/DOWN” key to switch between °C/°F. The default temperature format is: °C.
- Press the “C/H/UP” key to switch between CH1, CH2 and CH3.
RF receiving
- After inserting the batteries in the clock and outdoor sensor, it will automatically enter RF mode
receiving for 3 minutes. The icon of the antenna will start to flash with 1 Hz frequency.
- In normal mode, hold the “UP” key for 2 seconds to clear the display data of the current RF channels
and renew the data again.
- If no signals are received within 60 minutes, the CH temperature will show “--.-”, and it will enter an
RF long receiving mode for 3 minutes.
- If it receives effective signals within 3 minutes, it will exit the RF long receiving mode and enter the
normal mode.
- If a signal is still not received within 3 minutes, it will exit RF receiving mode and enter the RF long
receiving mode within an hour. This will repeat every hour till it receives a signal.
- During RF receiving, the antenna icon starts to flash with 2 Hz frequency, and it will keep the icon on
screen if it receives the temperature signal. If no temperature is received, the icon will disappear.
Weather forecast functions:
- Weather forecast functions can forecast the weather conditions of the next 24 hours.
- Weather grade: Sunny/Slightly Cloudy/Cloudy/Rainy.
- Time of sensing: 30 minutes.
Wireless remote sensor (transmitter) instruction
- Transmitter frequency: 433.92 MHz.
- Batteries: 2x 1.5 V AAA.
- Use a screwdriver to remove the back of the battery compartment cover, insert the batteries into the
transmitter according to the correct polarity.
- Press the “°C/°F” button to select the temperature, either in °C or °F.
- You can put the transmitter in a garage, on an outdoor wall or window, indoor living room or garden.
- The maximum distance for the transmitter and receiver is up to 30 m (100 feet) in an open area.
3
Safety precautions:
To reduce risk of electric shock, this product should ONLY be
opened by an authorized technician when service is required.
Disconnect the product from mains and other equipment if a
problem should occur. Do not expose the product to water or
moisture.
Maintenance:
Clean only with a dry cloth. Do not use cleaning solvents or abrasives.
Warranty:
No guarantee or liability can be accepted for any changes and modifications of the product or damage
caused due to incorrect use of this product.
General:
- Designs and specifications are subject to change without notice.
- All logos brands and product names are trademarks or registered trademarks of their respective
holders and are hereby recognized as such.
- This manual was produced with care. However, no rights can be derived. König Electronic can not
accept liability for any errors in this manual or their consequences.
- Keep this manual and packaging for future reference.
Attention:
This product is marked with this symbol. It means that used electrical and electronic products
should not be mixed with general household waste. There is a separate collections system for
these products.
DEUTSCH
Wanduhr
Öffnen Sie das Batteriefach der Wanduhr und setzen Sie zuerst zwei AA-Batterien ein. Setzen Sie
außerdem eine AA-Batterie in das Batteriefach der Wetterstation ein. Benutzen Sie einen
Schraubendreher, um das Batteriefach des Außensensors zu öffnen und setzen Sie zwei
AAA-Batterien ein.
Funktionen und Eigenschaften:
- Anzeige der Innentemperatur
- Anzeige der Außentemperatur per Funk vom Außensensor
- Anzeige für die Wetterprognose
- Funk-Empfangskanäle: CH1, CH2, CH3
- Temperaturformat: (°C/°F)
- Anzeigebereich für die Außentemperatur:- 20°C bis +50°C, Genauigkeit: +/- 1°C
Einstellung der Zeit
- Nachdem Einlegen einer AA-Batterie drehen Sie das Rad an der Rückseite, um die Zeit einzustellen.
Anleitung Funk-Außentemperatur
Funktionen der normalen Betriebstasten:
- Drücken Sie die Taste „°C/°F/DOWN“, um zwischen °C und °F zu wechseln. Voreingestellt ist °C.
- Drücken Sie „C/H/UP“, um zwischen CH1, CH2 und CH3 (Kanal 1-3) zu wechseln.
Funksignal vom Außensensor
- Nachdem die Batterien in die Uhr und den Außensensor eingesetzt wurden, schaltet sich die Uhr
drei Minuten lang automatisch auf Funk-Empfang. Das Antennen-Symbol blinkt einmal pro Sekunde.
- Im normalen Betriebsmodus drücken Sie die Taste „UP“ zwei Sekunden lang, um die aktuellen
Funk-Kanäle vom Display zu löschen und die Informationen zu erneuern.
  • Page 1 1
  • Page 2 2
  • Page 3 3
  • Page 4 4
  • Page 5 5
  • Page 6 6
  • Page 7 7
  • Page 8 8
  • Page 9 9
  • Page 10 10
  • Page 11 11
  • Page 12 12
  • Page 13 13
  • Page 14 14
  • Page 15 15
  • Page 16 16
  • Page 17 17
  • Page 18 18
  • Page 19 19
  • Page 20 20
  • Page 21 21
  • Page 22 22
  • Page 23 23
  • Page 24 24

König KN-CL30 Owner's manual

Category
Wall clocks
Type
Owner's manual

Ask a question and I''ll find the answer in the document

Finding information in a document is now easier with AI