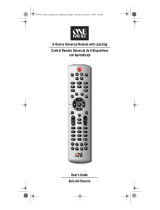
One For All OARC05G User manual

Category
Remote controls
Type
User manual

One For All OARC05G is a user-friendly universal remote control designed to simplify your home entertainment experience. With its ability to control up to five devices, including TVs, DVD players, and audio components, this remote offers seamless control over your entertainment system.

One For All OARC05G is a user-friendly universal remote control designed to simplify your home entertainment experience. With its ability to control up to five devices, including TVs, DVD players, and audio components, this remote offers seamless control over your entertainment system.

5-Device Universal
Remote Control
with Learning
Control Remoto Universal
de 5 Dispositivos
con Aprendizaje
OARC05G User’s Guide Guía del Usuario
Contents
Installing the Batteries ............................... 2
Care and Maintenance ............................... 2
Setting Up the Remote .............................. 2
Direct code setup .................................... 2
The search method .................................. 3
The Keypad ................................................. 4
Code Retrieval ............................................ 6
Quick Code Reference ................................ 6
The Learning Feature ................................. 7
Operational Reset ...................................... 8
Extra Features ............................................. 9
Volume punch through ........................... 9
Macros (Sequence of commands) ............ 10
Troubleshooting ....................................... 11
Additional Information ............................ 11
Limited Lifetime Warranty ...................... 22
Contenido
Instalación de las Baterías ........................ 12
Cuidado y Mantenimiento ....................... 12
Cómo Configurar el Control Remoto ...... 12
Configuración a través
de la entrada directa de códigos ....... 12
El método de búsqueda ........................ 13
El Teclado .................................................. 14
Recuperación de Códigos ........................ 16
Referencia Rápida de Códigos ................. 16
La Función de Aprendizaje ...................... 17
Restablecimiento de las Funciones .......... 18
Funciones Adicionales .............................. 19
Irrupción de Volumen ........................... 19
Macros (Secuencia de comandos) ............ 20
Resolución de Problemas ......................... 21
Información Adicional ............................. 21
Garantía Limitada
Durante la Vida Útil del Producto ........ 23
2
Care and Maintenance
Keep the remote dry. If it gets wet, wipe it dry
immediately.
Use and store the remote only in normal temperature
environments.
Handle the remote gently and carefully. Don’t drop it.
Keep the remote away from dust and dirt.
Wipe the remote with a damp cloth occasionally to keep
it looking new.
Modifying or tampering with the remote’s internal
components can cause malfunction and invalidate its
warranty.
The OARC05G Universal Remote Control by One For All is a
perfect way to simplify home entertainment. It lets you control
up to ve of your home entertainment devices from a single,
easy-to-use remote.
Take a minute to watch the mini-DVD that comes with the
OARC05G—it gives you a tour of the remote’s features. Then
come back to this manual to set up the remote for your home
entertainment system.
Installing the Batteries
This remote needs 2 new AA alkaline batteries (not included).
1. Remove the battery cover from the back of the remote.
2. Match the batteries to the + and - marks inside the battery
case, then insert the batteries.
3 Press the battery cover back into place.
Battery Precautions:
Do not mix old and new batteries.
Do not mix alkaline, standard (carbon-zinc) or rechargeable
(nickel-cadmium) batteries.
Always remove old, weak or worn-out batteries promptly
and recycle or dispose of them in accordance with Local and
National Regulations.
Setting up the remote
There are two ways to program this remote to control your
devices: by entering the code directly or by searching through
the codes to find the one that controls your device. Try the
Direct code setup first.
Direct code setup
1. Find the code for your device in the Code list. Codes are
listed by device type and brand name. The most popular
code is listed rst. Make sure your device is switched on (not
on standby).
2. Press the device key on this remote for the device you wish
to set up.
3. Press and hold down the SET key until the (power) key
blinks twice (the key blinks once, then twice).
3
4. Enter a ve-digit code for your device’s brand using the
number keys. The (power) key blinks twice.
Note: If the
(power) key gives one long blink instead
of two shorter blinks, you’ve entered an invalid code. Try
entering a code again.
5. Now, aim this remote at your device and press
(power).
If your device switches off, the remote is ready to operate
your device.
6. Turn your device back on and try all the remote’s functions
to ensure they are working properly. If the functions do not
work properly, repeat steps 1–5 using another code listed
for your brand.
7. If your device does not respond, follow steps 1 to 5 with each
code listed for your brand. If none of the codes listed for
your brand operate your device, or if your brand is not listed
at all, try the search method described in the next section.
Important notes:
If your device does not respond or is not functioning
properly with one of the codes, try another code listed
under your brand.
If your device’s original remote control does not have a
POWER key, press
(play) instead of (power) when
setting up your device.
Remember to press the correct device key before operating
your device. Only one device can be assigned to a device key.
If your original remote operates more than one device, you
need to set up each device separately.
The search method
If your device does not respond to this remote after you have
tried all the codes listed for your brand, try searching for your
code. The Search Method allows you to nd the code for your
device by scanning through all the codes contained in the
remote’s memory. The Search Method may also work if your
brand is not listed at all.
1. Switch your device on (not on standby).
2. Press the device key on this remote for the device you wish
to set up.
3. Press and hold down the SET key until the
(power) key
blinks twice (the key blinks once, then twice).
4. Press 9 9 1. The
(power) key blinks twice.
5. Press the number key corresponding to the device you want
to program: 0 for cable, satellite, digital TV converter, or
video accessories; 1 for a TV; 2 for a DVD player, VCR, or
PVR; 3 for an audio component (tuner, amplier, etc.).
6. Aim this remote at your device. Now press CH+ over and
over, until your device turns off (every time you press the
CH+ key the remote sends out a power signal from the next
code contained in the memory). You may have to press this
key many times (up to 150 times) so please be patient. If
you skip past a code, you can go to the previous code(s)
by pressing the CH- key. Remember to keep pointing the
remote at your device while pressing this key.
7. As soon as your device turns off, press the SET key to store
the code.
Important note:
If your device’s original remote control does not have a
POWER key, press
(play) instead of (power) in step 5.
4
The Keypad
5
(Power) The power key operates the same function it did
on your original remote control. The indicator light underneath
the power key will light up every time a key is pressed.
TV, DVD/VCR, AUDIO, CBL/SAT (DTC), AUX The device keys
determine which device you’re controlling. For example, to play
a DVD on your DVD player, press the DVD key rst. Then press
the
(play) key to start playback.
Note: DTC stands for Digital TV Converter.
Number Keys The Number keys (0-9) provide functions just
like your original remote. In AUDIO mode, these keys may (if
available on your original remote) provide an INPUT function.
If your original remote features a “function select“ or “input
select“ function you may find this under the INPUT key.
INFO The INFO key displays any available information about
the program or disc you’re watching (if your device offers this
functionality).
EXIT The EXIT key takes you out of the current menu or guide
screen.
Red, Green, Yellow, Blue Use these keys to access additional
features on your satellite receiver or cable box (consult your
satellite or cable program provider for details). Two of the keys
have additional functions in other modes:
In TV mode, the Blue Key (INPUT) goes through the inputs
on your TV. In DVD/VCR mode you will obtain the “TV/DVD”
or “TV/VCR” function, if available on your original remote.
In CBL/SAT (DTC) mode you will obtain the “TV/SAT” or “TV/
DTV” function, if available on your original remote.
In TV mode (or if controlling a digital TV converter), the Red
Key (–) lets you separate the main channel number from
a subchannel number. For example, to access channel 29.1,
press 2 9, then the – key, then 1.
GUIDE In TV, DVD/VCR and/or CBL/SAT (DTC) mode you will
obtain the “Guide” function (if available on your original
remote).
SET The SET key is used to set up this remote.
MENU The MENU key controls the same function as it did on
your original remote.
Directional Keys If available on your original remote, these
keys let you navigate through the menu mode of your device.
OK/ENTER The OK/ENTER key confirms your choice in menu
operation.
VOL +/- Keys These keys operate in the same way as the keys
on your original remote.
CH +/- Keys These keys operate in the same way as the keys on
your original remote.
LAST The LAST key takes you to the previous channel or screen
(if this function is available on your device).
MUTE The MUTE key reduces your device to its minimum
volume (if this function is available on your device).
6
(transport keys for DVDs, VCRs,
PVRs, DVRs) These keys operate the transport functions
(play, fast-forward, rewind, etc.) of your device. To prevent
accidental recording, the (RECORD) key must be pressed
twice to start recording.
In TV mode the
key activates Picture-In-Picture (if available
on your TV), and the key swaps between the main picture
and the Picture-In-Picture.
FORMAT This key provides you the (16:9) wide screen view
function (if available on your original remote).
Code Retrieval
The code retrieval feature allows you to nd out which code is
currently programmed for each device key. This is useful if you
used the Search Method to program a device key.
1. Press the device key once.
2. Press and hold down the SET key until the
(power) key
blinks twice (the key blinks once, then twice).
3. Press 9 9 0. The
(power) key blinks twice.
4. For the rst digit of your ve-digit code, press 1 and count
all the blinks. If there are no blinks, the digit is “0”.
5. For the second digit, press 2 and count all the blinks. If
there are no blinks, the digit is “0”.
6. For the third digit, press 3 and count all the blinks. If there
are no blinks, the digit is “0”.
7. For the fourth digit, press 4 and count all the blinks. If there
are no blinks, the digit is “0”.
8. For the fth digit, press 5 and count all the blinks. If there
are no blinks, the digit is “0”. Now you have your ve-digit
code.
Quick Code Reference
Device Type Code
7
The Learning Feature
If your original remotes have functions that this remote doesn’t
have, this remote can learn those functions from your original
remotes. For example, you could learn the Sleep Timer function
from your original TV remote and assign it to the ”Green” key
on this remote.
Before you start:
Make sure your original remote control is working correctly.
Make sure neither this remote nor your original remote
control is pointing at your device.
To learn a function:
1. Place both remote controls (this one and your original) on a
at surface. Make sure the ends which you normally point
at your device are facing each other. Keep the remotes at a
distance of 2 to 5 cm.
2. Press and hold down the SET key on this remote until the
(power) key blinks twice (the key will blink once, then
twice).
3. Press 9 7 5 (the
key blinks twice).
4. Press the device key on this remote to select the mode to
which you want to copy the learned function (Example:
press the TV key for a function that works with the TV).
5. Press the key on this remote where you want to place the
learned function (Example: ”Green” key). The
key will
flash rapidly.
6. Press and hold the key on your original remote that you
want to copy. Hold it down until the
key on this remote
blinks twice (Example: “Sleep” key).
7. If you want to copy other functions within the same mode,
simply repeat steps 5 and 6 pressing the next key you want
to copy by learning.
8. To exit the learning mode, press and hold down the SET key
until the
key blinks twice.
Important notes:
Learning is mode specic. To access your learned function,
press the appropriate device key first.
This remote can learn approximately 25 – 40 functions.
You can replace a learned function by placing another
learned function on top.
Upon changing the batteries, your learned functions will be
retained.
To delete a learned function:
1. Press and hold down the SET key until the
(power) key
blinks twice (the key blinks once, then twice).
2. Press 9 7 6 (the
key blinks twice).
3. Press the device key from which the function will be
deleted.
8
4. Press twice on the learned key which will be deleted (the
key blinks twice).
To delete a Shifted Learned feature, press SET before you
press the learned key to be deleted in this step.
5. If there is another learned function you wish to delete,
repeat steps 1–4.
6. The original functions of this remote will now be restored.
To delete all learned functions within a specific mode:
1. Press and hold down the SET key until the
(power) key
blinks twice (the key blinks once, then twice).
2. Press 9 7 6 (the
(power) key blinks twice).
3. Press the appropriate device (mode).
Operational Reset
The Operational Reset will erase all learned functions across all
modes and some other programmed functions like Macros.
1. Press and hold down the SET key until the
(power) key
blinks twice (the key blinks once, then twice).
2. Press 9 8 0 (the
(power) key blinks four times).
9
Extra Features
Volume Punch Through
You may be able to use some functions of your Television,
Video recorder, DVD player, Amp./Tuner, Satellite receiver
or Cable converter at the same time. For example: if you are
watching a program on your video recorder, you can adjust the
volume (a TV function) without pressing the TV mode key on
this remote.
To punch through to TV volume while in the AUX, DVD/
VCR, AUDIO, or CBL/SAT (DTC) mode:
1. Press and hold down the SET key until the
(power) key
blinks twice (the key blinks once, then twice).
2. Press 9 9 3.
3. Then press the TV key and the
(power) key blinks twice.
To cancel “Volume Punch Through” for a single mode:
1. Press the device key for the mode you want to cancel
volume punch through. For example, to cancel volume
punch through for DVD/VCR mode, press the DVD/VCR key.
2. Press and hold down the SET key until the
(power) key
blinks twice (the key blinks once, then twice).
3. Press 9 9 3.
4. Then press the VOL– key and the
(power) key will blink
four times.
The Volume keys will now control the VOL+/– and MUTE
functions on the original device (not on the TV). For example,
if you canceled volume punch through for DVD/VCR mode, you
will be able to control VOL+/– or MUTE functions of your DVD
player or VCR (provided it has volume control).
To cancel “Volume Punch Through” for all modes:
1. Press and hold down the SET key until the
(power) key
blinks twice (the key blinks once, then twice).
2. Press 9 9 3.
3. Press the VOL+ key and the
(power) key will blink four
times.
10
Macros (Sequence of commands)
Macros (Direct)
You can program this remote to issue a sequence of commands
at the press of one button. Any sequence of commands you
regularly use can be reduced to one key stroke for your
convenience. For example, you may want to make a single key
the master power off button for all of the devices this remote
controls.
To set up a master power off macro on the yellow key:
1. Press and hold down the SET key until the
(power) key
blinks twice (the key blinks once, then twice).
2. Press 9 9 5.
3. Press the key to which the Macro will be assigned (in this
case, the yellow key).
4. Next press the commands you want to be part of the macro
(in this case, TV,
, AUX, , DVD/VCR, ).
5. To store the Macro, press and hold down the SET key until
the
(power) key blinks twice (the key blinks once, then
twice).
6. Whenever you press the key you assigned to this macro (in
this case, the yellow key), the remote will automatically send
the sequence of commands you entered in step 4 (in this
case, it will turn off your TV, VCR and DVD player).
To erase the Macro from the Yellow key, press:
[SET]* [9] [9] [5] [Yellow key] [SET]*
* Here you must hold down the SET key until the
(power)
key blinks twice (the key blinks once, then twice).
Important notes:
Each MACRO can consist of a maximum of 15 key presses.
This remote can hold up to 15 macros, depending on the
complexity of each. In other words, the more complex the
macros, the fewer separate macros the remote can store.
Make sure that you program a Macro on a spare key that
you don’t use in any mode.
Once you program a Macro on a specic key, the sequence
will work regardless of the mode (TV, AUX and DVD/VCR)
you are using.
To avoid accidental recordings with this remote, you must
press the Record key twice to begin recording. Because of
this, you cannot assign a Macro to the Record key.
If you have to hold down a key for a few seconds on the
original remote control to get a function, this function may
not work in a macro on this remote.
If you program a Macro on a key, the original function will
become shifted (excluding CH+/- and VOL+/- keys). Press the
SET key then the key to access it.
11
Troubleshooting
My brand is not listed in the code section.
Try the procedure described in The Search Method section.
The remote does not operate my device(s).
Try all the codes listed for your brand.
Try the procedure described in The Search Method section.
The remote is not performing commands properly.
You may be using the wrong code. Try repeating the Direct
Setup using another code listed under your brand or start
the search method over again to locate the proper code.
Problems changing channels.
Enter the channel number exactly as you would on your
original remote.
Video not recording.
As a safety feature on this remote, you must press the
(Record) key twice.
The remote does not respond after pressing a key.
Make sure you are using new batteries and are aiming the
One For All remote at your device.
The
(power) does not blink when I press a key.
Replace batteries with 2 fresh, new AA alkaline batteries.
For additional information:
• Internet: http://www.oneforall.com
Additional Information
ONE FOR ALL® is the registered trademark of Universal
Electronics Inc. Audiovox Accessories Corporation is the
Licensee of the ONE FOR ALL® brand for North America.
© 2009 by Universal Electronics Inc. No part of this publication
may be reproduced, transmitted, transcribed, stored in any
retrieval system, or translated to any language, in any form
or by any means, electronic, mechanical, magnetic, optical,
manual, or otherwise, without the prior written permission of
Universal Electronics Inc.
The One For All® 5-Device Universal Remote Control is
compatible for use in North America, excluding Mexico.
This One For All® 5-Device Universal Remote Control is covered
by one or more of the following US Patents:
6,587,067 6,496,135 5,515,052 5,959,751 6,587,067 5,481,256
OARC05G 06/09
22
Trademark(s) Registered
Marca(s) Registrada(s)
OARC05G US IB 01
Limited Lifetime Warranty
Audiovox Electronics Corporation (the “Company”) warrants
to you the original retail purchaser of this product that should
it, under normal use and conditions, be proven defective in
material or workmanship during its lifetime while you own it,
such defect(s) will be repaired or replaced (at the Company’s
option) without charge for parts and repair labor. To obtain
repair or replacement within the terms of this Warranty, the
product is to be delivered with proof of warranty coverage
(e.g. dated bill of sale), specication of defect(s), transportation
prepaid, to the Company at the address shown below. Do not
return this product to the retailer.
This Warranty does not cover product purchased, serviced
or used outside the United States or Canada. This Warranty
is not transferable and does not extend to costs incurred for
installation, removal or reinstallation of the product. This
Warranty does not apply if in the Company’s opinion, the
product has been damaged through alteration, improper
installation, mishandling, misuse, neglect, accident, or the
simultaneous use of different battery types (e.g. alkaline,
standard or rechargeable).
THE EXTENT OF THE COMPANY’S LIABILITY UNDER THIS
WARRANTY IS LIMITED TO THE REPAIR OR REPLACEMENT
PROVIDED ABOVE AND, IN NO EVENT, SHALL THE COMPANY’S
LIABILITY EXCEED THE PURCHASE PRICE PAID BY PURCHASER
FOR THE PRODUCT.
This Warranty is in lieu of all other express warranties or
liabilities. ANY IMPLIED WARRANTIES, INCLUDING ANY
IMPLIED WARRANTY OF MERCHANTABILITY OR FITNESS FOR
A PARTICULAR PURPOSE SHALL BE LIMITED TO DURATION
OF THIS WARRANTY. IN NO CASE SHALL THE COMPANY BE
LIABLE FOR ANY CONSEQUENTIAL OR INCIDENTAL DAMAGES
WHATSOEVER. No person or representative is authorized to
assume for the Company any liability other than expressed
herein in connection with the sale of this product.
Some states/provinces do not allow limitations on how long
an implied warranty lasts or the exclusion or limitation of
incidental or consequential damage so the above limitations
or exclusions may not apply to you. This Warranty gives you
specic legal rights and you may also have other rights, which
vary from state/province to state/province.
U.S.A.: Audiovox Electronics Corporation, 150 Marcus Blvd.,
Hauppauge, New York 11788
CANADA: Audiovox Return Center, c/o Genco,
6685 Kennedy Road, Unit 3, Door 16,
Mississauga, Ontario L5T 3A5
  • Page 1 1
  • Page 2 2
  • Page 3 3
  • Page 4 4
  • Page 5 5
  • Page 6 6
  • Page 7 7
  • Page 8 8
  • Page 9 9
  • Page 10 10
  • Page 11 11
  • Page 12 12
  • Page 13 13
  • Page 14 14
  • Page 15 15
  • Page 16 16
  • Page 17 17
  • Page 18 18
  • Page 19 19
  • Page 20 20
  • Page 21 21
  • Page 22 22
  • Page 23 23
  • Page 24 24

One For All OARC05G User manual

Category
Remote controls
Type
User manual

One For All OARC05G is a user-friendly universal remote control designed to simplify your home entertainment experience. With its ability to control up to five devices, including TVs, DVD players, and audio components, this remote offers seamless control over your entertainment system.

Ask a question and I''ll find the answer in the document

Finding information in a document is now easier with AI

in other languages