Page is loading ...

4411-0097
Version 4.C
December 17, 2013
*4411-0097*

Copyright 2003-2013 Princeton Instruments, a division of Roper Industries, Inc.
3660 Quakerbridge Rd
Trenton, NJ 08619
TEL: 800-874-9789 / 609-587-9797
FAX: 609-587-1970
All rights reserved. No part of this publication may be reproduced by any means without the written
permission of Princeton Instruments, a division of Roper Industries, Inc. ("Princeton Instruments").
Printed in the United States of America.
Kapton is a registered trademark of E. I. du Pont de Nemours and Company.
LabVIEW is a registered trademark of National Instruments Corporation.
Linux is a registered trademark of Linus Torvalds.
Macintosh is a trademark of Apple Computer, Inc., registered in the U.S. and other countries.
Pentium is a registered trademark of Intel Corporation.
PI-MTE is a trademark of Roper Industries, Inc.
Scientific Imaging ToolKit and SITK are trademarks of R Cubed Software Consultants, LLC.
Swagelok is a registered trademark of Crawford Fitting Company Corporation.
TAXI is a registered trademark of AMD Corporation.
VCR is a registered trademark of Cajon Company Corporation.
Microsoft, Windows, Windows XP, Windows Vista, and Windows 7 are registered trademarks of
Microsoft Corporation.
The information in this publication is believed to be accurate as of the publication release date. However,
Princeton Instruments does not assume any responsibility for any consequences including any damages
resulting from the use thereof. The information contained herein is subject to change without notice.
Revision of this publication may be issued to incorporate such change.

iii
Table of Contents
Chapter 1 Introduction .........................................................................................9
Description .......................................................................................................................... 9
Design ................................................................................................................................. 9
Grounding and Safety ......................................................................................................... 9
Precautions ........................................................................................................................ 10
Cleaning ............................................................................................................................ 11
Repairs .............................................................................................................................. 11
Manual Overview ............................................................................................................. 11
Chapter 2 System Component Descriptions ...................................................13
PI-MTE Camera ................................................................................................................ 13
ST-133 Controller ............................................................................................................. 13
Cables ............................................................................................................................... 16
Interface Card ................................................................................................................... 17
Vacuum Port Adapter ....................................................................................................... 17
Application Software ........................................................................................................ 18
User Manuals .................................................................................................................... 18
Optional Components ....................................................................................................... 18
Chapter 3 Installation Overview ........................................................................19
Chapter 4 System Setup ....................................................................................21
Unpacking the System ...................................................................................................... 21
Checking the Equipment and Parts Inventory .................................................................. 21
System Requirements ....................................................................................................... 22
Environmental ............................................................................................................ 22
Ventilation .................................................................................................................. 22
Coolant ....................................................................................................................... 22
Power .......................................................................................................................... 23
Host Computer ........................................................................................................... 23
Verifying Controller Voltage Setting ............................................................................... 24
Installing the WinView/32 Application Software ............................................................ 25
Setting up the Communication Interface .......................................................................... 25
Setting up a PCI Interface .......................................................................................... 25
Setting up a USB 2.0 Interface ................................................................................... 27
Connecting the Interface (Controller-Computer) Cable ................................................... 30
TAXI
®
Cable (6050-0148-CE) .................................................................................... 30
USB 2.0 Cable (6050-0494) ....................................................................................... 30
Connecting the Detector-Controller Cable ....................................................................... 30
Non-Vacuum .............................................................................................................. 30
Vacuum ...................................................................................................................... 31
Entering the Default Camera System Parameters into WinView ..................................... 32
Making the Coolant Connections ..................................................................................... 33

iv PI-MTE System Manual Version 4.C
Chapter 5 Operation ...........................................................................................35
Introduction ....................................................................................................................... 35
System On/Off Sequences ................................................................................................ 37
First Light ......................................................................................................................... 37
Assumptions ............................................................................................................... 37
Cabling ....................................................................................................................... 37
Getting Started ........................................................................................................... 38
Setting the Parameters ................................................................................................ 38
Acquiring Data ........................................................................................................... 39
Powering Down Procedure......................................................................................... 40
Cooling ............................................................................................................................. 41
Introduction ................................................................................................................ 41
Condensation .............................................................................................................. 41
Exposure and Signal ......................................................................................................... 42
Introduction ................................................................................................................ 42
CCD Array Architecture ............................................................................................ 42
Exposure Time ........................................................................................................... 43
Temperature Control .................................................................................................. 43
Dark Charge ............................................................................................................... 44
Saturation ................................................................................................................... 45
Clean Cycles ............................................................................................................... 45
Continuous Cleans ..................................................................................................... 46
Readout ............................................................................................................................. 46
Introduction ................................................................................................................ 46
Full Frame Readout .................................................................................................... 46
Binning ....................................................................................................................... 47
Hardware Binning ................................................................................................ 47
Software Binning ................................................................................................. 48
Background Subtraction ............................................................................................. 49
Digitization ....................................................................................................................... 49
Introduction ................................................................................................................ 49
Digitization Rate ........................................................................................................ 49
ADC Offset ................................................................................................................ 50
Chapter 6 Advanced Topics ..............................................................................51
Introduction ....................................................................................................................... 51
Standard Timing Modes ................................................................................................... 51
Free Run ..................................................................................................................... 52
External Sync ............................................................................................................. 53
External Sync with Continuous Cleans ...................................................................... 55
Fast and Safe Modes ......................................................................................................... 56
TTL Control ...................................................................................................................... 58
Introduction ................................................................................................................ 58
TTL In ........................................................................................................................ 58
Buffered vs. Latched Inputs ....................................................................................... 59
TTL Out ..................................................................................................................... 59
TTL Diagnostics Screen ............................................................................................. 60
Hardware Interface ..................................................................................................... 60
Example ............................................................................................................... 61

Table of Contents v
Chapter 7 Troubleshooting................................................................................63
Introduction ....................................................................................................................... 63
Baseline Signal Suddenly Changes .................................................................................. 64
Camera1 (or similar name) on Hardware Setup dialog box ............................................. 64
Changing the ST-133 Line Voltage and Fuses ................................................................. 65
Controller Is Not Responding ........................................................................................... 67
Cooling Troubleshooting .................................................................................................. 67
Camera does not achieve temperature lock ................................................................ 67
Out-of-Vacuum Operation Cooling and Internal Vacuum Level ............................... 67
Camera loses temperature lock .................................................................................. 68
Data Loss or Serial Violation ........................................................................................... 69
Data Overrun Due to Hardware Conflict .......................................................................... 69
Data Overrun Occurred ..................................................................................................... 70
Error Creating Controller message ................................................................................... 70
Error Occurs at Computer Powerup ................................................................................. 71
Program Error ................................................................................................................... 73
Removing/Installing a Plug-In Module............................................................................. 74
Securing the Detector-Controller Cable Slide Latch ........................................................ 76
Serial violations have occurred. Check interface cable. ................................................... 77
Appendix A Specifications ................................................................................79
PI-MTE Camera ................................................................................................................ 79
CCD Arrays ................................................................................................................ 79
Environmental ............................................................................................................ 80
Power .......................................................................................................................... 80
Cooling ....................................................................................................................... 80
ST-133 .............................................................................................................................. 80
Appendix B Outline Drawings ...........................................................................83
Appendix C VCR and Swagelok Fittings ..........................................................87
VCR
®
Fittings ................................................................................................................... 87
Installation .................................................................................................................. 87
Gasket Replacement ................................................................................................... 88
Swaglok
®
Fittings ............................................................................................................. 88
Installation .................................................................................................................. 88
High Pressure Applications or High-Safety-Factor Systems ..................................... 89
Retightening Instruction ............................................................................................. 89
Appendix D Visible <-> Open Nose Change Instructions ...............................91
Introduction ....................................................................................................................... 91
Replacing the Visible Nose with the Open Nose ............................................................. 91
Replacing the Open Nose with the Visible Nose ............................................................. 93
Appendix E USB 2.0 Limitations .......................................................................95
Declaration of Conformity .................................................................................97

vi PI-MTE System Manual Version 4.C
Warranty & Service.............................................................................................99
Limited Warranty: ............................................................................................................ 99
Basic Limited One (1) Year Warranty ....................................................................... 99
Limited One (1) Year Warranty on Refurbished or Discontinued Products.............. 99
XP Vacuum Chamber Limited Lifetime Warranty .................................................... 99
Sealed Chamber Integrity Limited 12 Month Warranty .......................................... 100
Vacuum Integrity Limited 12 Month Warranty ....................................................... 100
Image Intensifier Detector Limited One Year Warranty ......................................... 100
X-Ray Detector Limited One Year Warranty .......................................................... 100
Software Limited Warranty ...................................................................................... 100
Owner's Manual and Troubleshooting ..................................................................... 101
Your Responsibility ................................................................................................. 101
Contact Information ........................................................................................................ 102
Index ..................................................................................................................103
Figures
Figure 1. PI-MTE Camera ................................................................................................. 9
Figure 2. Power Switch Location (ST-133A and ST-133B) ........................................... 14
Figure 3. PI-MTE System Diagram ................................................................................. 20
Figure 4. Controller Power Module ................................................................................. 24
Figure 5. WinView/32 Installation: Select Installation Type dialog .............................. 25
Figure 6. Camera Detection Wizard - Welcome dialog ................................................... 32
Figure 7. Coolant Ports .................................................................................................... 33
Figure 8. Block Diagram of Signal Path in System ......................................................... 36
Figure 9. Example of WinView Data Acquired from First Light Procedure .................. 40
Figure 10. Clean Cycles in Freerun Operation ................................................................ 45
Figure 11. Array Terms for a CCD with a Single Output Amplifier ............................... 46
Figure 12. Full Frame at Full Resolution ........................................................................ 47
Figure 13. 2 × 2 Binning for Images ................................................................................ 48
Figure 14. Timing tab page .............................................................................................. 51
Figure 15. Free Run Timing Chart, Part of the Chart in Figure 21 ................................. 52
Figure 16. Free Run Timing Diagram ............................................................................. 53
Figure 17. Chart Showing Two External Sync Timing Options ..................................... 54
Figure 18. Timing Diagram for External Sync Mode (- edge trigger)............................. 54
Figure 19. Continuous Cleans Operation Flowchart ....................................................... 55
Figure 20. Continuous Cleans Timing Diagram (- edge trigger) ..................................... 56
Figure 21. Chart of Safe Mode and Fast Mode Operation .............................................. 57
Figure 22. TTL In/Out Connector ................................................................................... 60
Figure 23. TTL Diagnostics dialog box ........................................................................... 60
Figure 24. Camera1 in Controller Type (Camera Name) Field ....................................... 64
Figure 25. Power Module ................................................................................................ 66
Figure 26. Voltage Selector Drum ................................................................................... 66
Figure 27. Fuse Holder .................................................................................................... 66
Figure 28. Data Overrun Due to Hardware Conflict dialog box ..................................... 69
Figure 29. Error Creating Controller dialog box ............................................................. 70
Figure 30. Program Error dialog box ............................................................................... 73

Table of Contents vii
Figure 31. Module Installation ........................................................................................ 74
Figure 32. Serial Violations Have Occurred dialog box ................................................. 77
Figure 33. PI-MTE Camera (3-01-06 and later) .............................................................. 83
Figure 34. PI-MTE Camera (8-01-05 and later) .............................................................. 84
Figure 35. PI-MTE Camera (8-01-05 and earlier) ........................................................... 85
Figure 36. ST-133A Controller ........................................................................................ 86
Figure 37. ST-133B Controller ........................................................................................ 86
Figure 38. VCR Fittings .................................................................................................. 87
Tables
Table 1. PCI Driver Files and Locations ......................................................................... 26
Table 2. USB Driver Files and Locations ........................................................................ 29
Table 3. Camera Timing Modes ...................................................................................... 51
Table 4. Bit Values with Decimal Equivalents: 1 = High, 0 = Low ............................... 59
Table 5. TTL In/Out Connector Pinout ........................................................................... 60
Table 6. Fuse Ratings ....................................................................................................... 65
Table 7. I/O Address & Interrupt Assignments before Installing Serial Card ................. 71
Table 8. I/O Address & Interrupt Assignment after Installing Serial Card ..................... 72
Table 9. Features Supported under USB 2.0 (continued on next page) .......................... 95

viii PI-MTE System Manual Version 4.C
This page intentionally left blank.

9
Chapter 1
Introduction
Description
The PI-MTE camera is ideally suited for
operation inside a vacuum chamber. State-
of-the-art CCD arrays are available for the
PI-MTE camera that enable outstanding
performance in a wide range of X-ray
Imaging and Spectroscopy applications.
The PI-MTE camera is also suitable for
medium-low light applications that require
small size or steel case ruggedness.
Figure 1. PI-MTE Camera
Design
PI-MTE cameras have three distinct sections. The front enclosure contains the CCD
array seated on a cold finger. This finger is in turn seated on a two-stage Peltier
thermoelectric cooler. The middle enclosure contains the heat exchanger. The rear
enclosure contains the preamplifier and array driver boards. This keeps all signal leads to
the preamplifier as short as possible, and also provides RF shielding.
Grounding and Safety
The ST-133 Controller that controls the PI-MTE camera is of Class I category as defined
in IEC Publication 348 (Safety Requirements for Electronic Measuring Apparatus). It is
designed for indoor operation only. Before turning on the controller, the ground prong of
the power cord plug must be properly connected to the ground connector of the wall
outlet. The wall outlet must have a third prong, or must be properly connected to an
adapter that complies with these safety requirements.
If the equipment is damaged, the protective grounding could be disconnected. Do not use
damaged equipment until its safety has been verified by authorized personnel.
Disconnecting the protective earth terminal, inside or outside the apparatus, or any
tampering with its operation is also prohibited.
If the PI-MTE camera system is used in a manner not specified by Princeton Instruments,
the protection provided by the equipment may be impaired.
WARNING!
WARNING!

10 PI-MTE System Manual Version 4.C
Inspect the supplied power cord. If it is not compatible with the power socket, replace the
cord with one that has suitable connectors on both ends.
Replacement power cords or power plugs must have the same polarity and power rating
as that of the original ones to avoid hazard due to electrical shock.
Precautions
To prevent permanently damaging the system, please observe the following precautions:
Do not mix and match ST-133 Controllers and cameras. The controller shipped
with your camera has been modified to operate with the camera included in the
PI-MTE system you ordered. The "System ID" number on the camera and the
controller serial labels must be the same.
Always switch off and unplug the ST-133 Controller before changing your
system configuration in any way.
The CCD array is very sensitive to static electricity. Touching the CCD can
destroy it. Operations requiring contact with the device can only be performed at
the factory.
If you are using high-voltage equipment (such as an arc lamp) with your camera
system, be sure to turn the controller power ON LAST and turn the controller
power OFF FIRST.
Use caution when triggering high-current switching devices (such as an arc
lamp) near your system. The CCD can be permanently damaged by transient
voltage spikes. If electrically noisy devices are present, an isolated, conditioned
power line or dedicated isolation transformer is highly recommended.
Never connect or disconnect any cable while the system is powered on.
Reconnecting a charged cable may damage the CCD.
Never prevent the free flow of air through the Model ST-133 by blocking the air
vents.
Never operate a liquid-assisted PI-MTE camera with coolant at a temperature
below that specified for it.
WARNING!

Chapter 1 Introduction 11
Cleaning
Turn off all power to the equipment and secure all covers before cleaning the units.
Otherwise, damage to the equipment or personal injury could occur.
Normally, PI-MTE cameras operated in vacuum will remain clean by virtue of the
vacuum. Periodic cleaning of the controller is encouraged in accordance with the
controller manual.
Although there is no periodic maintenance that must be performed on the PI-MTE
camera, users of a non-vacuum camera are advised to wipe it down with a clean damp
cloth from time to time. This operation should only be done on the external surfaces and
with all covers secured. In dampening the cloth, use clean water only. No soap, solvents
or abrasives should be used. Not only are they not required, but they could damage the
finish of the surfaces on which they are used.
Note: Some discoloration of the copper portions of the camera may occur. This is
normal and has no effect on operation.
Repairs
Save the original packing materials. Because the PI-MTE camera system contains no
user-serviceable parts, repairs must be done by Princeton Instruments. Should your
system need repair, contact Princeton Instruments Customer Support for instructions
(telephone, e-mail, and address information are provided on page 102 of this manual).
Use the original packing materials whenever shipping the system or system components.
Manual Overview
This manual provides the user with all the information needed to install a PI-MTE
camera and place it in operation. Topics covered include a detailed description of the
camera, installation, cleaning, specifications and more.
Notes:
1. The general identifier "ST-133" is used for both the ST-133A Controller and the
ST-133B Controller. Where there is a difference, the specific identifier is used.
2. "WinX" is a generic term for WinView, WinSpec, and WinXTest application
software.
Chapter 1, Introduction provides general information about the PI-MTE camera
system including information about precautions, cleaning, repairs, and the
manual structure.
Chapter 2, System Component Descriptions provides information about the
camera, controller, interface card, cables and application software.
Chapter 3, Installation Overview provides directions for setting up the system
components.

12 PI-MTE System Manual Version 4.C
Chapter 4, System Setup provides detailed directions for setting up a PI-MTE
camera for imaging applications.
Chapter 5, Operation discusses baseline signal and noise, setting and maintaining
temperature control, and verifying camera operation.
Chapter 6, Advanced Topics discusses standard timing modes (Free Run,
External Sync, and Continuous Cleans), Fast and Safe triggering modes, and
TTL control.
Chapter 7, Troubleshooting provides courses of action to take if you should
have problems with your system.
Appendix A, Specifications includes camera specifications.
Appendix B, Outline Drawings includes outline drawings of the PI-MTE camera
and the ST-133A and ST-133B Controllers.
Appendix C, VCR and Swagelok Fittings includes instructions for assembling
VCR
®
and Swagelok
®
tube fittings.
Appendix D, Visible <-> Open Nose Change Instructions includes
instructions for changing the PI-MTE nose from its visible nose (with test lens)
to its open nose configuration and vice versa.
Appendix E, USB 2.0 Limitations covers the currently known limitations
associated with operating under the USB 2.0 interface.
Declaration of Conformity is the Declaration of Conformity for MTE2 Camera
Head with ST-133 Controller (i.e., PI-MTE system).
Warranty and Service details the limited warranties for Princeton Instruments
equipment and software.

13
Chapter 2
System Component Descriptions
PI-MTE Camera
CCD Arrays: The PI-MTE:1300B and PI-MTE:2048B incorporate a back-illuminated
CCD without AR coating for very low-energy x-ray detection. With 20×20-micron
(1300B) or 13.5×13.5-micron (2048B) pixels and 100% fill factor, these systems offer a
large imaging area with very high spatial resolution and dynamic range.
Cooling: Dark current is significantly reduced in PI-MTE camera systems through
liquid-assisted Thermo-electric (TE) cooling of the CCD array.
Peltier: An internal Peltier device directly cools the cold finger on which the CCD is
mounted. The heat produced by the Peltier device is then removed by conduction to
the internal heatsink. Heat is transferred out of the camera by the flow of coolant
through the heatsink.
Coolant Ports: Two 1/4" coolant ports are located at the rear of the camera.
Connection to a vacuum flange is via VCR fittings (or Swagelok fittings) and
stainless steel, flexible hoses. Instructions for setting up coolant flow are provided on
page 32.
Controller Connector: Power, control signals, and data are transmitted between the
ST-133 and the PI-MTE camera via the 25-pin D connector located on the rear of the
camera. Controller power must be OFF before connecting to or disconnecting from
this connector or to the equivalent connector on a vacuum flange.
ST-133 Controller
Electronics: The ST-133 controller is a compact, high performance CCD Detector
Controller for operation with Princeton Instruments brand
*
detectors. Designed for high
speed and high performance image acquisition, the ST-133 offers data transfer at speeds
up to 1 megapixel per second, standard video output for focusing and alignment. A
variety of A/D converters are available to meet different speed and resolution
requirements.
In addition to containing the power supply, the controller contains the analog and digital
electronics, scan control and exposure timing hardware, and controller I/O connectors,
all mounted on user-accessible plug-in modules. This highly modularized design gives
flexibility and allows for convenient servicing.
*
The ST-133 controller must be factory configured for operation with a TE-cooled camera. For
this reason, a controller purchased for operation with a TE-cooled camera can only be used with
TE-cooled camera. It cannot be used to control an LN-cooled camera.

14 PI-MTE System Manual Version 4.C
POWER Switch and Indicator: The power
switch location and characteristics depend on the
version of ST-133 Controller that was shipped
with your system. In some versions, the power
switch, located on the front panel as shown in
Figure 2, has an integral indicator LED that lights
whenever the ST-133 is powered. In other
versions, the power switch is located on the back
of the ST-133 and does not include an indicator
LED.
Rear Panel Connectors: There are three
controller board slots. Two are occupied by the
plug-in cards that provide various controller
Figure 2. Power Switch Location
(ST-133A and ST-133B)
functions. The third, covered with a blank panel, is reserved for future development. The
left-most plug-in card is the Analog/Control module. Adjacent to it is the Interface
Control module. Both modules align with top and bottom tracks and mate with a passive
back-plane via a 64-pin DIN connector. For proper operation, the location of the modules
should not be changed. Each board is secured by two screws that also ground each
module’s front panel. The connectors and functions located on the rear panel are further
are described on the following page. Removing and inserting boards is described in
Chapter 7, page 74.
To minimize the risk of equipment damage, a module should never be removed or
installed when the system is powered.
The Analog/Control Module, which must always be located in the left-most slot,
provides the following functions.
Pixel A/D conversion
Timing and synchronization of readouts
CCD scan control
Temperature control
Exposure control
Video output control
The Interface Control Module, which must always be located in the center slot,
provides the following functions.
TTL In/Out Programmable Interface
Communications Control (TAXI or USB 2.0 protocol)
Always turn the power off at the Controller before connecting or disconnecting any cable
that interconnects the camera and controller or serious damage to the CCD may result.
This damage is NOT covered by the manufacturer’s warranty.
WARNING!
WARNING!

Chapter 2 System Component Descriptions 15
Rear Panel Features: The rear panel connector descriptions are keyed to the
accompanying figure. The Fuse/Voltage label will be above or below the Power Module.
#
Feature
120Vac
50-60Hz
FUSES: LEFT: RIGHT:
100 - 120V ~ 0.75A - T 2.50A - T
220 - 240 V ~ 0.30A - T 1.25 A- T
SHUTTER CONTROL
REMOTE
SETTING
TTL IN/OUT
AUX
VIDEO
TEMP
LOCK
EXT SYNC
SCAN
READY
ZERO
F
S
DETECTOR
TTL
IN/OUT
AUX
USB 2.0
SERIAL COM
USB 2.0TAXI
Interface Control Module
1
Temperature Lock LED: Indicates that
the temperature control loop has locked
and that the temperature of the CCD
array will be stable to within 0.05C.
2
Video/Aux Output: If labeled Video,
composite video output is provided at this
connector. The amplitude is 1 V pk-pk and
the source impedance is 75 . Note that
video output is not currently supported
under USB 2.0. If labeled Aux, this output
is reserved for future use.
3
External Sync Input: TTL input that has
a 10 k pullup resistor. Allows data
acquisition and readout to be
synchronized with external events.
Through software, positive or negative
(default) triggering can be selected.
4
Output: WinView/32 (ver. 2.4 and
higher) software selectable NOT SCAN or
SHUTTER signal. Default is SHUTTER.
10
Serial COM Connector: Provides two-way
serial communication between the controller
and the host computer. Uses TAXI protocol.
5
Output: Initially HIGH. After a
Start Acquisition command, this output
changes state on completion of the array
cleaning cycles that precede the first
exposure. Initially high, it goes low to
mark the beginning of the first exposure.
In free run operation it remains low until
the system is halted. If a specific number
of frames have been programmed, it
remains low until all have been taken,
then returns high.
11
Fan: Cools the controller electronics.
Runs continuously when the controller is
turned on.
12
Shutter Setting Selector: Sets the shutter
drive voltage. Dial is correctly set at the
factory for the camera’s internal shutter if
one is present.
6
Zero Adjustment: Bias potentiometers
control the offset values of the Fast (F) and
Slow (S) A/D converters. Preadjusted at
factory. For 2 MHz controllers, baseline
offset values are set at the factory and are
not user-changeable.
CAUTION: Do not adjust the offset
values to zero, or some low-level data
will be missed.
13
Remote Shutter Connector: Provides
shutter-drive pulses for an external shutter.
An ST-133 with the 70 V shutter option is
required for a camera with the 40 mm
shutter. A 70 V OPT label will be next to the
Remote connector when this option is
installed.
7
Detector Connector: Transmits control
information to the camera and receives
data back from the camera via the
Detector-Controller cable.
14
Power Module: Contains the power cord
socket and two fuses. Depending on the
ST-133 version, the power switch may be
located directly above the power module.

16 PI-MTE System Manual Version 4.C
#
Feature
#
Feature
8
TTL In/Out: User-programmable
interface with eight input bits and eight
output bits that can be written to or
polled for additional control or
functionality. Refer to "TTL Control",
page 58.
15
Fuse/Voltage Label: Displays the
controller’s power and fuse requirements.
This label may appear below the power
module.
9
AUX Output: Reserved for future use.
16
USB 2.0 Connector: Provides two-way
serial communication between the controller
and the host computer. Uses USB 2.0
protocol.
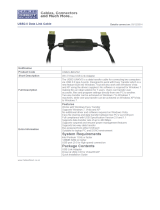
Cables
Vacuum-Compatible Camera-Vacuum Cable: This 1-meter cable has
DB-25 connectors that interconnect the DB-25 connector on the back of the camera
and a 25-pin D connector on a compatible vacuum flange. Available in Kapton
®
flat cable (6050-0467) or in low vacuum cable with braided sleeve (6050-0475).
The low vacuum cable is also available in 1.5 meter and 2 meter lengths.
Detector-Controller: (6050-0526) 50 kHz/2 MHz systems: The standard 3'
cable has DB-25 connectors (one with slide-latch locking hardware to secure at the
controller and the other with screws for securing to a vacuum flange). This cable
interconnects the Detector connector on the rear of the ST-133 and the DB-25
connector on a compatible vacuum flange.
Detector-Controller: (6050-0483) 100 kHz/1 MHz systems: The standard 6'
cable has DB-25 connectors (one with slide-latch locking hardware to secure at the
controller and the other with screws for securing to a vacuum flange). This cable
interconnects the Detector connector on the rear of the ST-133 and the DB-25
connector on a compatible vacuum flange.
Note: If the PI-MTE camera is being operated out-of-vacuum (i.e., with the visible
nose, containing a quartz window, mounted to the front of the camera for operation in a
non-vacuum environment), an optional 10' cable (6050-0321), with slide latches at both
ends, is available to directly interconnect the PI-MTE camera and the ST-133. Detector-
Controller. Cables 15' and 20' long are also available for out-of-vacuum operation.
Interface Cable: Depending on the system configuration, either a USB or a TAXI
cable will be shipped.
TAXI: The standard 25' (7.6 m) cable (6050-0148-CE) has DB-9 Male
connectors with screw-down locking hardware. The TAXI (Serial
communication) cable interconnects the "Serial Com" connector on the rear of the
ST-133 with the Princeton Instruments (RSPI) high speed PCI card installed in the
host computer. In addition to the standard length, this cable is available in 10', 50',
100', and 165' lengths. Also available are fiber optic adapters with fiber optic
cables in 100, 300, and 1000 meter lengths.
USB 2.0: The standard 16.4' (5 m) cable (6050-0494) has USB connectors
that interconnect the "USB 2.0" connector on the rear of the ST-133 with a
USB card installed in the host computer.

Chapter 2 System Component Descriptions 17
Vacuum Compatible Flexible Tubing: The stainless-steel vacuum-compatible
¼″-OD, 36″-long flexible tubing (2825-0449) interconnects between the camera
water tubings and the vacuum feed through a 2 ¾″ ConFlat flange.
Vacuum Compatible Camera Flanges: The 2 ¾″ ConFlat flange with two
pipes (¼″ OD) and VCR fittings (2825-0562) (or with Swagelok fittings
(2825-0447) for earlier systems) and the 4 ½″ ConFlat flange with 25-pin D-sub
connector (2825-0448) are included with the system.
Interface Card
PCI Card: The Princeton Instruments (RSPI) high speed PCI card is required when
the system interface uses the TAXI protocol rather than USB 2.0. The PCI card plugs-
into the host computer's motherboard and provides the serial communication interface
between the host computer and the ST-133. Through WinView/32, the card can be
used in either High Speed PCI or PCI (Timer) mode. High Speed PCI allows data
transfer to be interrupt-driven and can give higher performance in some situations. PCI
(Timer) allows data transfer to be controlled by a polling timer.
USB 2.0 Card: This interface card is required when the system interface uses the
USB 2.0 protocol rather the TAXI protocol and the computer does not have native
USB 2.0 support. The USB 2.0 card plugs-into the host computer's motherboard and
provides the communication interface between the host computer and the ST-133.
The USB 2.0 PCI card (70USB90011) by Orange Micro is recommended for desktop
computers; the SIIG, Inc. USB 2.0 PC Card, Model US2246 is recommended for
laptop computers. Refer to www.orangemicro.com or www.siig.com, respectively,
for more information.
Vacuum Port Adapter
The Vacuum Port Adapter (2518-0943) with O-ring screws into the vacuum port on
the side of the PI-MTE. This allows you to connect the camera (with visible nose) to
a vacuum pump and pump it down to at least 1 mTorr before using the camera in a
non-vacuum environment.

18 PI-MTE System Manual Version 4.C
Application Software
The Princeton Instruments WinView/32 software package provides comprehensive
image acquisition, display, processing, and archiving functions so you can perform
complete data acquisition and analysis without having to rely upon third-party software.
WinView/32 provides reliable control over most Princeton Instruments cameras,
regardless of array format and architecture, via an exclusive universal
programming interface (PVCAM
®
). WinView/32 also features snap-ins and macro
record functions to permit easy user customization of any function or sequence.
PVCAM is the standard software interface for cooled CCD cameras from
Princeton Instruments. It is a library of functions that can be used to control and
acquire data from the camera when a custom application is being written. For
example, in the case of Windows, PVCAM is a dynamic link library (DLL). Also,
it should be understood that PVCAM is solely for camera control and image
acquisition, not for image processing. PVCAM places acquired images into a
buffer, where they can then be manipulated using either custom written code or by
extensions to other commercially available image processing packages.
Scientific Imaging ToolKit™ (SITK™) is a collection of LabVIEW
®
VIs for
scientific cameras and spectrographs. This third party software can be purchased
from Princeton Instruments.
Note: Linux
®
drivers are also available.
User Manuals
PI-MTE System User Manual: This manual describes how to install and use
the PI-MTE system components. The most up-to-date version of this manual and
other Princeton Instruments manuals can be found and downloaded from
ftp://ftp.princetoninstruments.com/Public/Manuals/Princeton Instruments. The
most current versions of Acton manuals are located at
ftp://ftp.princetoninstruments.com/Public/Manuals/Acton.
WinView/32 User Manual: This manual describes how to install and use the
application program. A PDF version of this manual is provided on the installation
CD. Additional information is available in the program's on-line help.
PVCAM Manual: This manual describes PVCAM parameters and ids and
provides example code. Provided as PDF manual only.
Optional Components
ThermoCUBE with PI-MTE-compatible Hoses (PN 8243-0002): The
ThermoCUBE is a compact liquid chiller that is designed for Princeton Instruments’
Quad-RO and PI-MTE deep cooled cameras. ThermoCUBE, with a self-contained water
reservoir that provides chilled liquid circulation for efficiently cooling the cameras, is
ideal for applications that require vibration-free and/or thermally stable environments.

19
Chapter 3
Installation Overview
The list and diagrams below briefly describe the sequence of actions required to
hookup your system and prepare to gather data. Refer to the indicated references
for more information.
At the first sign of condensation on the camera's inlet and/or outlet pipes, turn off the system.
Damage to the camera as a result of condensation is not covered under warranty.
Action
Reference
1. If the system components have not already been
unpacked, unpack them and inspect their carton(s) and
the system components for in-transit damage.
Chapter 4, page 21
2. Verify that all system components have been received.
Chapter 4, page 21
3. With the ST-133 turned OFF, verify that the
appropriate line voltage and fuses have been installed in
the ST-133 controller.
Chapter 4, page 24
4. If using WinView/32 software to control your system,
install that software if it has not already been installed.
Refer to the WinView/32
manual.
5. If the appropriate interface card is not already installed
in the host computer, install it.
Chapter 4, page 25
6. With the computer and ST-133 both OFF, connect the
interface cable (TAXI or USB) to the Controller and the
interface card in the host computer. Then tighten down
the locking hardware.
Chapter 4, page 30
7. The PI-MTE camera (designed for use in a vacuum) is
shipped with a visible nose in place so you can initially
set up the camera for operation outside of a vacuum
chamber. The "First Light" procedure in Chapter 5 steps
you through verification of the camera's operation while
it is outside of the chamber. You can also practice using
the software before changing the camera nose for
vacuum chamber operation. Go to Step 9 for non-
vacuum operation. Go to Step 8 to prepare the camera
for vacuum operation.
Chapter 5, page 37
8. Skip this step for non-vacuum operation. If the camera is to
be operated in a vacuum chamber, first replace the visible
nose with the open nose in a cleanroom environment.
Then, mount the camera in the vacuum chamber.
Appendix D, page 91
WARNING

20 PI-MTE System Manual Version 4.C
Action
Reference
9. Make the tubing connections between the coolant
circulator and the camera. If the camera is being
operated in vacuum, additional tubing connections to
the intermediate vacuum flange will be required.
Chapter 4, page 32;
Appendix C
10. With the ST-133 power turned OFF, connect the male
end of the camera cable to the Detector port on the
rear of the ST-133. Connect the female end of the cable
to the connector on the vacuum flange (vacuum
operation) or to the rear of the PI-MTE camera (non-
vacuum operation). Secure both ends of the cable.
Non-Vacuum: Chapter 4,
page 30
Chapter 7 Troubleshooting,
page 76
11. If the camera is being operated in vacuum, the
additional vacuum-compatible cable will be required.
This cable is very fragile so handle it with care when
mounting it to the vacuum flange and the back of the
camera. Secure the cable at both ends.
Vacuum Chamber: Chapter 4,
page 31
Chapter 7 Troubleshooting,
page 76
12. Skip this step for non-vacuum operation. Secure and
evacuate the vacuum chamber.
13. Turn on the ST-133.
14. Turn on the computer and begin running the application
software.
Refer to the WinView/32
manual.
15. Enter the hardware setup information.
Refer to the WinView/32
manual.
16. Turn on the coolant circulator. The recommended flow
rate is 2 liters/minute.
17. Set the target array temperature.
Chapter 5, page 43
18. When the system reaches temperature lock, begin
acquiring data in focus mode.
Figure 3. PI-MTE System Diagram
/