Page is loading ...

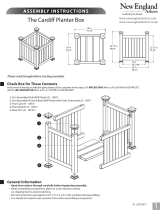
Check Box for These Contents
In the event of missing or defective parts please call our customer service dept. at
1 800 282 9346, ext #20
(Mon. to Fri. 8:00 AM to 4:00 PM EST).
1. Pre-Assembled Side Wall Panels (2)
2. Post Caps (4)
3. Floor Panels (2)
4.
Pre-Assembled Front & Back Wall Panels with Posts Connected
(2)
5. Hardware (in plastic bag)
a) 1 1/2 Self-Auguring Stainless Steel Screws (16)
b) #2 Robertson Drill Bit (1)
Tools You Will Need
• Cordless Drill
• Hammer
General Information
• Read Instructions through carefully before beginning assembly.
• When assembling components, place on a non-abrasive surface (i.e. shipping box) to avoid scratching.
• We recommend an area approx 4’x 8’ for unobstructed assembling.
• You should not need to use excessive force when assembling components.
The Barcelona Planter Box
Please read through before starting assembly.
ASSEMBLY INSTRUCTIONS
5
a
b
1
www.edenarbors.com
Not to Scale
27
20
21
17
1
21.76
STEP ONE
Layout front wall panel on the work surface.
Insert the side walls into the routed holes on the front wall
panel posts.
Connect the Front & Back Wall
to the Side Wall Panels
1
2
1
2
1
4
3
2

STEP TWO
Pressure fit into place the floor panels.
Install the four post caps
.
The Barcelona Planter Box
Insert Floor Panels & Post Caps
7
8
3
Optional
To Attach the Roman or Madrid Trellis, or the Luxembourg
Privacy Screen to this Planter Box (Purchase Separately).
Remove two post caps.
Attach trellis or privacy screen by over-sleeving the bulbed out
bottom end of the posts over the protruding posts of the planter
box until they both bottom out inside each other.
Install screws in the four pre-drilled holes at the bottom of each post.
Discard the two post caps from planter box and ground
anchoring stakes that come with trellis.
1915 Dove St., Port Huron MI USA 48060
Toll Free Phone: 1 800 282 9346 Toll Free Fax: 1 877 464 9286
www.edenarbors.com
Optional
Fit the opposite back wall panel over the side walls.
Reposition the assembled planter box so it stands upright on
the work surface. Ensure at this point the planter walls are square
to each other. This can be accomplished by making sure that
the corner to opposite corner measurement both ways are equal.
Using the screws provided, secure the side wall panels into the front
and back wall panels with 2 screws at the ends of the rails.
Ensure that panels are fully flush inside the posts and the wall
panels are square to each other. Screws should only be drilled in 1/2”
depth so that panels do not pull out of the posts when under stress.
Invert the planter box and repeat this same process at the
opposite end of each of the four post.
3
4
5
6
A
8
3
B
8
C
2
4
7
6
5
8
A
B
/