LARGE PACKAGE INSHOT BURNER IGNITER REPLACEMENT - R8GD, R8GE, R104GD,
R8HE AND R104HD UNITS
INSTALLATION INSTRUCTIONS
IMPORTANT SAFETY INFORMATION
INSTALLER: Please read all instructions before servicing
this equipment. Pay attention to all safety warnings and
any other special NOTES highlighted in the document.
Safety markings are used frequently throughout this
document to designate a degree or level of seriousness
and should not be ignored. WARNING indicates a
potentially hazardous situation that if not avoided, could
result in personal injury or death. CAUTION indicates a
potentially hazardous situation that if not avoided, may
result in minor or moderate injury or property damage.
WARNING:
ELECTRICAL SHOCK, FIRE OR
EXPLOSION HAZARD
Failure to follow safety warnings exactly could
result in serious injury or property damage.
Improper servicing could result in dangerous
operation, serious injury, death or property
damage.
• Before servicing, disconnect all electrical power
to the unit.
• When servicing controls, label all wires prior
to disconnecting. Reconnect wires correctly.
• Verify proper operation after servicing.
WARNING:
Unless noted otherwise in these instructions,
only factory authorized parts or accessory
kits may be used with this product. Improper
installation, service, adjustment or maintenance
may cause explosion, fire, electrical shock or
other hazardous conditions which may result in
personal injury or property damage.
WARNING:
Use caution when removing components or
handling this product. Personal injury can occur
from sharp metal edges present in all sheet metal
constructed equipment.
GENERAL INFORMATION
This kit replaces Nortek 632320 igniter which is in Nortek
kit 903179. The igniter included in this kit is a different
design but is an equal alternate. This kit includes (1)
igniter, (1) universal igniter bracket, (1) wire tie and (3)
fasteners. The 2 pin molex plug is pre-installed to the new
igniter for an easier installation.
First, disconnect all electrical power to the unit. Remove
the control panel to gain access to the burner assembly
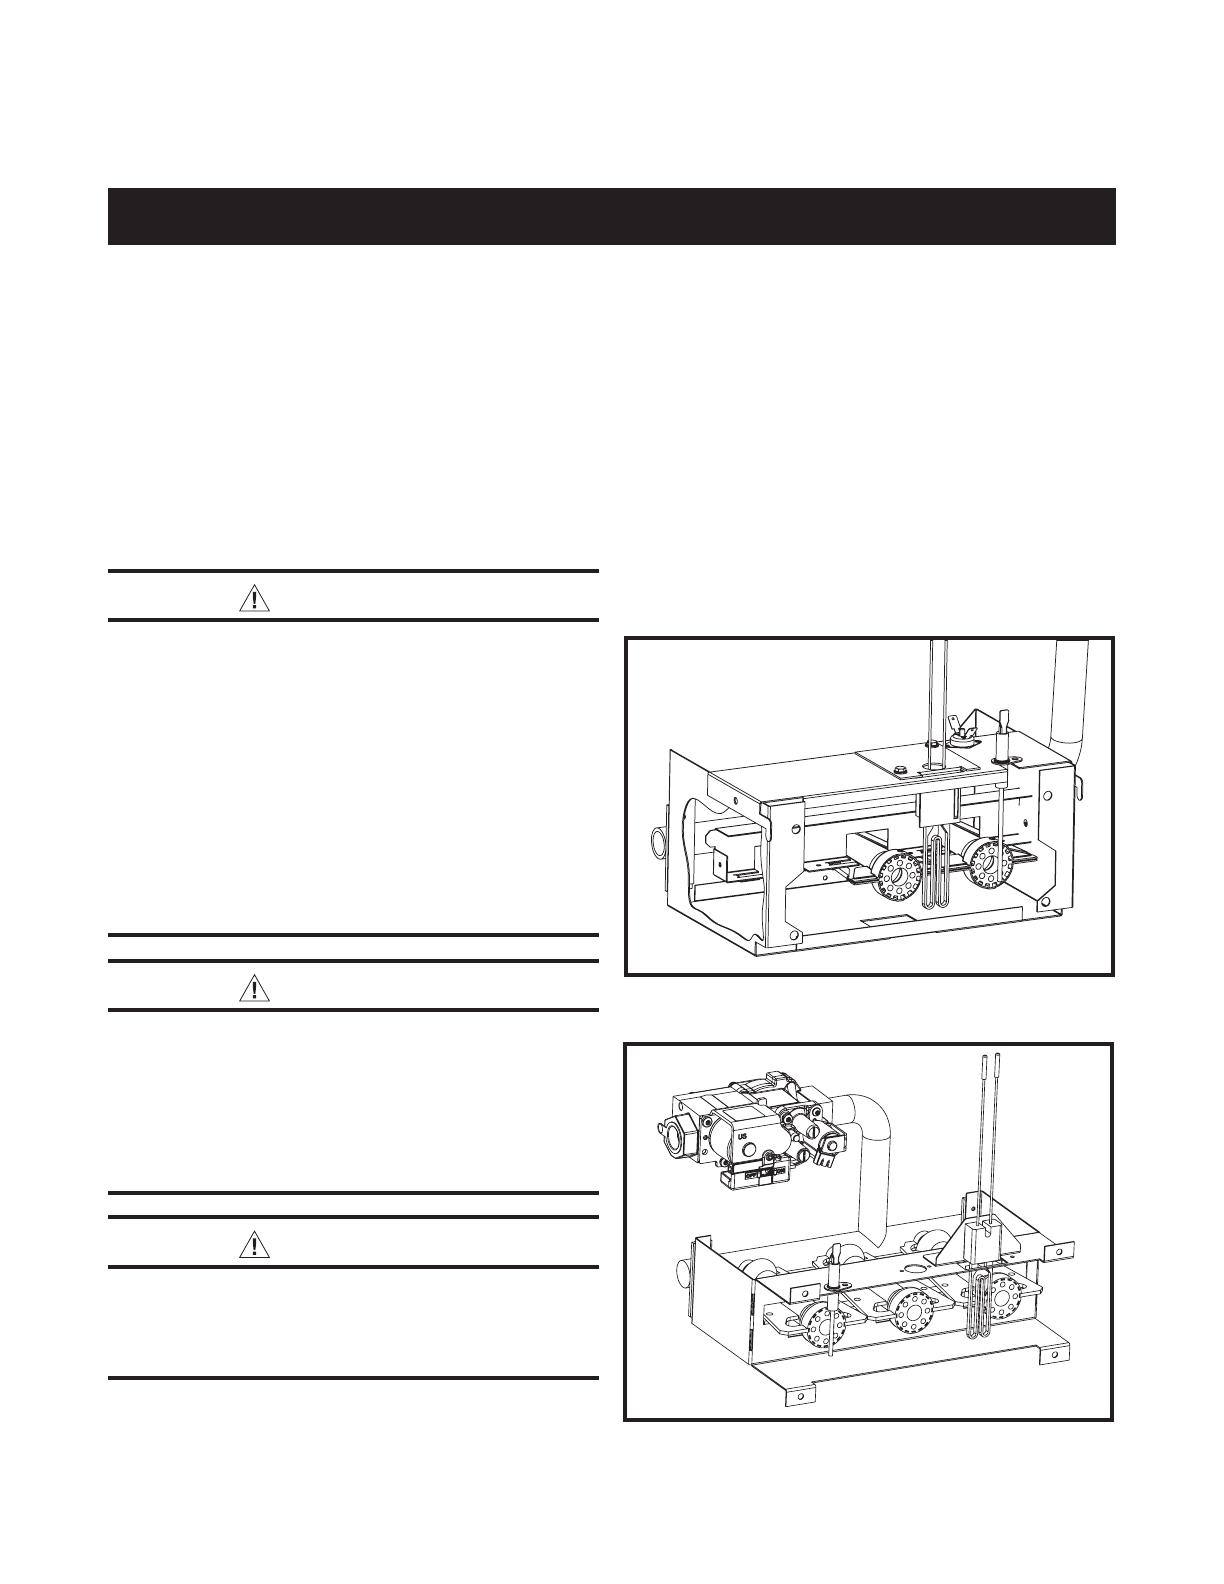
and the igniter. Establish which style of igniter bracket is
on your equipment. There are 2 styles of igniter brackets.
If your equipment has the bracket in Figure 1, refer to
the instructions in Section 1. If your equipment has the
bracket in Figure 2, refer to the instructions in Section 2.
Figure 1. R8GE, R8GD and R104GD
Figure 2. R8HE and R104HD


