Yellow Jacket Refrigerant Management System Automatic User manual
- Type
- User manual
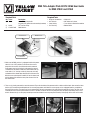
Yellow Jacket Refrigerant Management System Automatic
The Yellow Jacket Refrigerant Management System Automatic is a fully automatic refrigerant management system that can be used for a variety of applications, including:
- Evacuating and charging refrigerant systems
- Recovering and recycling refrigerant
- Purging and leak testing systems
- Transferring refrigerant between cylinders
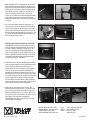
The system is easy to use and can be operated by a single person. It is also very accurate and can dispense refrigerant to within 1 ounce.
The system comes with a variety of features that make it ideal for use in the field, including:
Yellow Jacket Refrigerant Management System Automatic
The Yellow Jacket Refrigerant Management System Automatic is a fully automatic refrigerant management system that can be used for a variety of applications, including:
- Evacuating and charging refrigerant systems
- Recovering and recycling refrigerant
- Purging and leak testing systems
- Transferring refrigerant between cylinders
The system is easy to use and can be operated by a single person. It is also very accurate and can dispense refrigerant to within 1 ounce.
The system comes with a variety of features that make it ideal for use in the field, including:


-
 1
1
-
 2
2


Yellow Jacket Refrigerant Management System Automatic User manual
- Type
- User manual
Yellow Jacket Refrigerant Management System Automatic
The Yellow Jacket Refrigerant Management System Automatic is a fully automatic refrigerant management system that can be used for a variety of applications, including:
- Evacuating and charging refrigerant systems
- Recovering and recycling refrigerant
- Purging and leak testing systems
- Transferring refrigerant between cylinders
The system is easy to use and can be operated by a single person. It is also very accurate and can dispense refrigerant to within 1 ounce.
The system comes with a variety of features that make it ideal for use in the field, including:
Ask a question and I''ll find the answer in the document
Finding information in a document is now easier with AI
Related papers
-
Yellow Jacket Refrigerant Management System 3788X User manual
-
-
-
-
-
-
-
-
Other documents
-
Factory Five Racing Mk4 Roadster Assembly Manual
-
Edelbrock Edelbrock Stage 1 Supercharger Kit #15812 For 2019-20 Ford F-150 5.0L 4V W/ Tune Installation guide
-
Jaguar XJ6 Workshop Manual
-
 Factory Five Racing Mk3 Roadster Assembly Manual
-
Grizzly T27710 Owner's manual
-
 Era Replica Automobiles 427 ROADSTER User manual
-
-
Marvel MS24RA Owner's manual
-
-
Graco 333347F User manual

