Page is loading ...

USER’S GUIDE
MANUAL DE USUARIO
MODE D’EMPLOI
Model Number:
ACW-1674
v 1.3
www.impecca.com
4K Ultra HD
Acon Camera

ii
ENGLISH ESPAÑOL FRANÇAIS
TABLE OF CONTENTS
Introduction 3
Warnings 3
Product Features 3
Package Contents 4
Product Diagram 7
Getting Started 9
Setting Up Your Action Camera 10
Using Your Action Camera 16
Technical Specications 20
Troubleshooting 21
Contact Technical Support 21
One-Year Warranty 22

3
ENGLISHESPAÑOLFRANÇAIS
INTRODUCTION
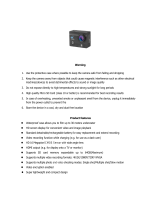
Congratulations on your purchase of the Impecca® ACW-1674 4K
Ultra HD Action Camera with WiFi®. Read these instructions before
using your Action Camera to get the most enjoyment from your
new unit. Note: The full version of this manual including French
and Spanish is available for download from the Impecca website at
www.impecca.com.
WARNINGS
PLEASE READ THIS MANUAL CAREFULLY BEFORE OPERATING AND
RESERVE IT FOR FUTURE REFERENCE. IT WILL BE HELPFUL TO YOU
IF YOU ENCOUNTER ANY OPERATING PROBLEM.
1. Keep it safe from falling and dropping.
2. Keep it away from any strong magnetic interference objects
such as electrical motors and other machinery to avoid strong
radio waves that might damage the product and aect the
sound or image quality.
3. Don’t expose the product directly to high temperatures and
strong sunlight
4. For best results, use a high-quality microSD card rated at
80MB/s or faster.
5. Don’t place your Micro SD card near strong magnetic objects to
avoid data error.
6. In case of overheating, unwanted smoke or unpleasant smell
from the device, unplug it immediately from the power outlet to
prevent hazardous re.
7. Keep the unit away from children while charging.
8. Store the unit in a cool, dry dust free location.
PRODUCT FEATURES
• With the waterproof casing (included), lm under water up to
30 meters/100 feet deep.
• 2.0’’ screen display for convenient videos and image play-
back.

4
ENGLISH ESPAÑOL FRANÇAIS
• Detachable battery for easy replacement to help extend
product lifespan.
• Record videos while charging.
• HD 16 Megapixel wide angle lens.
• HDOUT.
• PC CAM.
• Supports microSD card memory expandable up to 64GB
(Maximum).
• Supports multiple video recording formats :
4K/2.7K/1080P/720P.
• Supports MP4 recording format.
• Supports multiple photo shooting modes: single shot/
Timed/Auto/Drama Shot.
• Video encryption enabled.
• Super lightweight, small in size.
PACKAGE CONTENTS
Your Impecca® ACW-1674 4K Ultra HD Action Camera package con-
tents include the following:
ACW-1674 4K Ultra HD Action Camera (shown in
waterproof case)
Waterproof case

5
ENGLISHESPAÑOLFRANÇAIS
User Manual
Bicycle Bracket
Pedestal
Back Clip
Commutator
Switch Support
Helmet Mount

6
ENGLISH ESPAÑOL FRANÇAIS
Hook-and-Loop Straps
Adhesive Pads
USB Cable
Battery
Warranty Card
Tech Support card

9
ENGLISHESPAÑOLFRANÇAIS
GETTING STARTED
BEFORE STARTING
Your ACW-1674 4K Ultra HD Action Camera with WiFi® requires a
UHS-1 type 10 microSD card to store video and images (sold sepa-
rately). Your camera supports microSD cards up to 64GB. Purchase
a microSD card before proceeding with these instructions.
CHARGING THE CAMERA
Your Action Camera is powered by a rechargeable Li-Ion battery
that must rst be charged before using the device.
You’ll need to charge your Action Camera before rst use. To charge
your Action Camera, connect one end of the USB cable to the USB
port on the camera. Connect the other to a standard smartphone
wall charger or other USB-powered connection.
TURNING THE ACTION CAMERA ON AND OFF
To turn on your Action Camera, press and hold the Power/Mode
button on the front of the camera. The blue Status Indicator LED on
the top of the camera illuminates, and the screen turns on.
To turn your camera o, press and hold the Power/Mode button on
the front of the camera until the blue Status Indicator LED turns o.
The camera also turns o automatically aer 3 minutes of inactivity.
BEFORE FIRST USE: INSTALL AND FORMAT THE
MICROSD CARD
1. Turn the Action Camera on.
2. Insert the microSD slot into the slot on the side of the camera.
3. Press the OK button on the top of the camera.
4. A prompt appears on the camera screen asking to format the
microSD card. Use the camera Up/Down button to select Con-
rmation in the prompt. The microSD card is then formatted.
5. Once the microSD format completes, your Action Camera is
ready to use.

10
ENGLISH ESPAÑOL FRANÇAIS
SETTING UP YOUR ACTION CAMERA
The Power/Mode switch on the front of your Action Camera not
only powers the camera on, but it displays the dierent modes
available. When you rst turn on your Action Camera, clicking the
Power/Mode switch displays the following screens in order:
4k Video Mode
16M Picture Mode
720p Slow Motion Video Mode
Camera Playback Menu

11
ENGLISHESPAÑOLFRANÇAIS
Camera Settings
ADJUSTING THE SETTINGS
The Settings menu gives you complete control over your Action
Camera settings. To enter the Settings menu for your Action Cam-
era:
1. Click the Power/Mode button until the main Settings screen
appears.
2. Click the OK button to enter the Settings menu.
Once in the Settings menu, click the Power/Mode button to scroll
through each of the Settings areas. Congure the Settings areas as
described in the following sections.
Video Settings
The Video Settings menu provides access to settings related to the
video features of your Action Camera as follows:
1. Scroll to the Video Settings menu using the Power/Mode but-
ton.
2. When you see the Video Settings menu, click the OK button.
3. Use the Up/Down buttons on the side of the camera to select a
video setting to change.

12
ENGLISH ESPAÑOL FRANÇAIS
4. Click the OK button to select the video setting to change.
5. Use the Up/Down buttons to select the desired setting. Adjust
the settings as indicated in the table below.
Video Resolution 4K@30FPS, 2.7K@30FPS,
1080P@60/30FPS,
720P@120/60/30FPS
Recording Sound Select to enable recording
sound
Time-lapse Close/ 0.5S/ 1S/ 2S/ 5S/ 10S/
30S/ 60S
Loop Recording Close/ 2min/ 3min/ 5min
Slow motion 1080P@60FPS, 720P@90FPS,
720P@120FPS
6. The Up/Down buttons scroll through the available settings for
each settings category. When the setting you wish to use is
highlighted, click OK to accept it and return to the main Video
Settings menu.
7. Continue adjusting the Video Settings as described above.
When done, click the Power/Mode button to move to the next
setting, or to exit the Settings menu.
Photo Settings
The Photo Settings menu provides access to settings related to the
photography features of your Action Camera as follows:
1. Scroll to the Photo Settings menu using the Power/Mode but-
ton.
2. When you see the Photo Settings menu, click the OK button.
3. Use the Up/Down buttons on the side of the camera to select a
photo setting to change.
4. Click the OK button to select the photo setting to change.

13
ENGLISHESPAÑOLFRANÇAIS
5. Use the Up/Down buttons to select the desired setting. Adjust
the settings as indicated in the table below.
Photo Resolution 16M / 12M / 8M / 5M / 2M
Timed Close / 3S / 5S / 10S / 20S
Auto Close / 3S / 10S / 15S / 20S / 30S
Drama shot Close, 3P/S, 5P/S, 10P/S
6. The Up/Down buttons scroll through the available settings for
each settings category. When the setting you wish to use is
highlighted, click OK to accept it and return to the main Photo
Settings menu.
7. Continue adjusting the Photo Settings as described above.
When done, click the Power/Mode button to move to the next
setting, or to exit the Settings menu.
General Settings 1
The General Settings 1 menu provides access to various camera
settings:
1. Scroll to the General Settings 1 menu using the Power/Mode
button.
2. When you see the General Settings 1 menu, click the OK button.
3. Use the Up/Down buttons on the side of the camera to select a
setting to change.
4. Click the OK button to select the setting to change.
5. Use the Up/Down buttons to select the desired setting. Adjust
the settings as indicated in the table below.

14
ENGLISH ESPAÑOL FRANÇAIS
Language English/German/French/Span-
ish/Italian/
Traditional Chinese/Simplied
Chinese/
Japanese/Russian/Korean/Pol-
ish/
Dutch/Portuguese/Thai/Turkey
Exposure -3, -2, -1, 0, 1, 2, 3
White balance Auto/Sunny/Cloudy/Incandes-
cent light/
Fluorescent light
Image Rotation Enabled/Disabled
Driving Mode Enabled/Disabled
WIFI Enabled/Disabled
Light Source Frequency Auto/50HZ/60HZ
LED Indicator Light Enabled/Disabled
Auto Screen saver Close/10S/20S/30S
Auto Shutdown Close/1min/3min/5min
Time Watermark Enabled/Disabled
6. The Up/Down buttons scroll through the available settings for
each settings category. When the setting you wish to use is
highlighted, click OK to accept it and return to the main General
Settings 1 menu.
7. Continue adjusting the General Settings 1 as described above.
When done, click the Power/Mode button to move to the next
setting, or to exit the Settings menu.
General Settings 2

15
ENGLISHESPAÑOLFRANÇAIS
The General Settings 2 menu provides access to various camera
settings:
1. Use the Power/Mode button to scroll to General Settings 2.
2. When you see the General Settings 2 menu, click the OK button.
3. Use the Up/Down buttons on the side of the camera to select a
setting to change.
4. Click the OK button to select the setting to change.
5. Use the Up/Down buttons to select the desired setting. Adjust
the settings as indicated in the table below.
XDV Cam QR Code to download iOS or
Android APP
Date-time Set Date/Time format
2015/01/01 12:00:00
Format Format a new microSD card.
Conrmation/cancel.
Reset Conrmation/cancel
Firmware Version Model/Version/Updated/Manu-
facturer
6. The Up/Down buttons scroll through the available settings for
each settings category. When the setting you wish to use is
highlighted, click OK to accept it and return to the main General
Settings 2 menu.
7. Continue adjusting the General Settings 2 as described above.
When done, click the Power/Mode button to move to the next
setting, or to exit the Settings menu.
Exit the Settings Menu
The Exit Settings menu, when selected, exits the Action Camera
Settings mode. Scroll to the Exit Settings menu using the Up/Down
buttons. Press the OK button to exit Settings.

16
ENGLISH ESPAÑOL FRANÇAIS
USING YOUR ACTION CAMERA
With the microSD chip installed, you’ll get the following recording
times:
microSD 4K@30FPS 1080P@30FPS 720@120FPS
32 GB 170min 270min 180min
16 GB 90min 140min 95min
RECORDING VIDEO
Recording video is easy with your Action Cam. When one of the
three video modes is selected, pressing the OK button starts lming
video footage. When you’re done shooting the video, press the OK
button again to stop lming.
To record video:
1. Press the Power/Mode button until the camera is in video
mode, indicated by the icon.
2. Press the OK button to start video. The blue status indicator
LED ashes.
3. When done shooting video, press the OK button to stop.
TAKING PICTURES
When one of the photo modes is selected, pressing the OK button
takes a photo in the selected photo resolution.
Press the Power/Mode button until the camera is in photo mode,
indicated by the icon. Press the OK button to take a photo.
RECORDING SLOW-MOTION VIDEO
Your Action Camera can record slow-motion video, too. To record
slow-motion video:
1. Press the Power/Mode button until the camera is in slow-mo-
tion mode, indicated by the icon.
2. Press the OK button to start shooting slow-motion video. The
blue status indicator LED ashes.
3. When done shooting video, press the OK button to stop.

17
ENGLISHESPAÑOLFRANÇAIS
RECORDING TIME-LAPSE VIDEO
Your Action Camera can also record time-lapse video. To record
time-lapse video:
1. Press the Power/Mode button to enter Settings mode.
2. Select the Video Settings mode using the Up/Down buttons and
press the OK button to enter Video Settings.
3. In Video Settings mode, use the Up/Down buttons to scroll to
the Time lapse setting.
4. Press the OK button to enter the Time lapse setting.
5. Use the Up/Down buttons to select the Time lapse duration
(0.5s, 1s, 2s, 5s, 10s, 30s, or 60s).
6. Press the OK button to select the desired Time lapse duration.
7. Press the Power/Mode button to select X. Click OK to exit Set-
tings mode.
8. The time-lapse icon ( ) appears in the bottom of the display
when video mode is selected.
9. Press the OK button to start shooting video. The blue status
indicator LED ashes.
10. When done shooting video, press the OK button to stop.
PLAYING BACK VIDEO AND PHOTOS
You can play back stored videos and photos and view them on the
Action Camera display screen.
To play back video or photos:
1. Press the Power/Mode button until the camera is in Playback
mode.
2. Use the Up/Down buttons to select the video or photo you wish
to view.
3. Click the OK button to play back the video or view the photo.
CONNECTING THE ACTION CAMERA TO AN HDMI TV
You can connect the Action Camera to your HDMI-equipped TV and
play back videos and photos. To do so:
1. Obtain an HDMI-to-mini-HDMI cable.
2. Connect one end of the HDMI cable to the camera. Connect the
other end to your HDMI-equipped TV.

18
ENGLISH ESPAÑOL FRANÇAIS
3. Enter the Action Camera’s Playback mode.
4. Select the video or photo you wish to view and click OK. The
selected video or photo appears on the TV.
CONNECTING THE ACTION CAMERA TO A PC
You can connect your Action Camera to a PC and use it in the fol-
lowing ways:
• In USB mode, to download videos and photos to your PC.
• As a PC camera, to take pictures and store them directly on
your PC.
• To charge your Action Camera through the USB port.
Connect the Action Camera to your PC as follows:
1. Use the USB cable supplied with the Action Camera to connect
it to your PC’s USB port.
2. When you connect the Action Camera, a menu displays on the
camera screen displaying three options: USB Mode, PC Camera,
or Charging Mode.
3. Select a mode using the Up/Down buttons. Press the OK button
to activate the selected mode.
4. When done, disconnect the Action Camera from your PC.
USING THE SMARTPHONE APP AND WIFI
The Action Cam Smartphone app gives you the following capabili-
ties:
• Preview the Action Camera viewing screen.
• Control your Action Camera - use your Smartphone as a
remote control to shoot video and pictures, play back videos
and photos, delete videos and photos, or share them with
others.
NOTE: The Action Cam XDV App requires Android 4.1 or later, or iOS
7 and above.
Before setting up WiFi, rst download and install the app by scan-
ning the appropriate QR code with your smartphone.

19
ENGLISHESPAÑOLFRANÇAIS
For the iOS app: For the Google app:
You can also search Google Play or the iOS App Store for “XDV” to
locate and download the app.
Once you’ve installed the app, connect your smartphone to the
Action Camera as follows:
1. Turn the Action Camera on
2. Press the UP button. The WiFi icon displays, then the camera’s
WiFi SSID and password display on the camera screen.
3. On your smartphone, locate and connect to the camera’s WiFi
SSID. (“Impecca Acquire”, password Acquire)
4. Launch the XDV app on your smartphone.
5. You can now preview the shooting screen on the app, remotely
shoot video and photos, playback video and photo les, delete
les, and share them with others.
The app also prompts you to upgrade soware if necessary aer
connecting to your Action Camera.
CHARGING AND REMOVING THE BATTERY
To install the battery:
1. Press down on the battery cover to open it.
2. Insert the battery into the batter slot, taking care to observe
battery polarity.
3. Close the battery cover.
Remove the battery in the same way.
You can charge the battery in any of the following ways:

20
ENGLISH ESPAÑOL FRANÇAIS
• Connect the Action Camera to a PC or Mac USB port.
• Connect the Action Camera USB port to an automotive
smartphone charger.
• Connect the Action Camera USB port to an AC smartphone
charger.
You can shoot video or take photos while the Action Camera bat-
tery is charging.
TECHNICAL SPECIFICATIONS
LCD: 2.0 LTPS, 16 MP w/8.0MP CMOS sensor
Lens: 160 degree wide Angle lens
Language: English/German/French/Spanish/Italian/
Traditional Chinese/Simplied Chinese/
Japanese/Russian/Korean/Polish/
Dutch/Portuguese/Thai/Turkey
Video: 4K@30FPS, 2.7K@30FPS,
1080P@60/30FPS,720P@120/60/30FPS
Video format: MP4
Compression format: H.264
Photo: 16M / 12M / 8M / 5M / 2M
Memory: Micro SD up to 64GB
Video mode: Normal record/Looping record/
Time lapse/ Slow motion
Picture mode: Single/Timed/Auto/Drama Shot
Light source freq: Auto/50HZ/60HZ
USB: USB 2.0
Power: 5V 1A
Battery: 900MAH
Video type: 1080P

21
ENGLISHESPAÑOLFRANÇAIS
Charge time: About 3 hours
System : Windows XP/Vista/7 or above, Mac OS
Size: 59*41*24mm (Not including lens)
WIFI” Support
Note: Design and specications are subject to change prior notice.
TROUBLESHOOTING
Should the Action Camera freeze or stop working, remove and rein-
stall the battery to resume proper operation.
TECHNICAL SUPPORT
Visit our website to contact us, nd answers to Frequently Asked
Questions, and for other resources which may include an updated
version of this user’s guide.
For questions not answered in this manual, or for warranty service,
please contact Impecca Technical Support:
By phone: 1 866-954-4440 (9:00 AM to 6:00 PM ET)
Online: WWW.IMPECCA.COM
© 2017 Impecca, a division of LT Inc., Wilkes Barre, PA.

22
ENGLISH ESPAÑOL FRANÇAIS
Impecca
®
warrants this product against defects in
material and workmanship to the original purchaser as
specified below. Please register your product online
within fourteen (14) days of purchase.
PARTS – if the product is determined to have a
manufacturing defect, within a period of one (1)
year from the date of the original purchase,
Impecca
®
will repair or replace the product parts
at no charge (for parts) to consumers in the U.S.A.
and Canada.
LABOR – if the product is determined to have a
manufacturing defect, within a period of ninety
(90) Days from the date of the original purchase,
Impecca
®
will repair or replace the product at no
charge to consumers in the U.S.A. and Canada.
After ninety (90) days, it will be the responsibility
of the consumer.
Shipping costs to and from our warranty service center
are the sole responsibility of the consumer.
To obtain warranty service by an authorized
Impecca
®
service center,
please email us
at: [email protected] to obtain a Repair
and Maintenance Authorization (RMA) number and to
locate the Warranty Service Center nearest
you. Once authorized, you must mail the
product to the authorized Impecca
®
service
center in its original product packaging materials
or equivalent, to prevent damage while in transit.
Further, should Impecca
®
determine that the product
is outside of the Warranty terms, Impecca
®
will return
the product to sender at sender’s expense without
being repaired or replaced, unless authorized by the
consumer to service the out-of-warranty product at
consumer’s expense. All handling or restocking charges
for returns and/or replacements shall be non-
refundable.
Impecca
®
specifically excludes from this warranty any
non-electric/mechanical attachments, accessories, and
disposable parts including, but not limited to,
outside case, connecting cables, batteries, and AC
adapters. Impecca
®
reserves the right to repair
or replace defective products with the same,
equivalent, or newer models.
We reserve the right to either repair or replace
product at our discretion. Replacement may be either
new or refurbished and while every endeavor will be
made to ensure it is the same model, if same model is
not available, it will be replaced with a model of equal
or higher specification.
Normal “Wear and Tear” is not covered by this, or any
other, warranty. Further, Impecca
®
hereby reserves
the right to determine “Wear and Tear” on any and
all products. Tampering or opening the product
casing or shell will void this warranty in its entirety.
In addition, this warranty does not apply if the
product has been damaged by accident, abuse,
misuse, or misapplication; has been altered or
modified without the written permission
of Impecca
®
; has been serviced by a non-
authorized repair center of Impecca
®
; has not
been properly maintained or operated according
to the operation manual; has been used for
commercial, non-household purposes; has
been cosmetically damaged; was not imported
by Impecca
®
; was not manufactured according to
specification of the United States market; was
damaged due to improper installation or neglect
by the consumer; was damaged due to
improper packaging in shipment to the Warranty
Service Center; was damaged due to natural
disasters; or if the serial number for the
product has been removed or defaced.
ALL IMPLIED WARRANTIES, INCLUDING IMPLIED
WARRANTIES OF MERCHANTABILITY AND FITNESS FOR A
PARTICULAR PURPOSE ARE LIMITED IN DURATION TO
ONE (1) YEAR PARTS AND NINETY (90) DAYS LABOR
FROM THE DATE OF THE ORIGINAL RETAIL PURCHASE OF
THIS PRODUCT.
THESE WARRANTIES AND REMEDIES ARE THE SOLE AND
EXCLUSIVE WARRANTIES AND REMEDIES IN CONNECTION
WITH THE SALE AND USE OF THE PRODUCT. NO OTHER
WARRANTIES, ORAL OR WRITTEN, EXPRESSED OR
IMPLIED, ARE GIVEN.
IMPECCA
®
IS NOT RESPONSIBLE OR LIABLE FOR ANY
DAMAGE, WHETHER SPECIAL, INCIDENTAL,
CONSEQUENTIAL, DIRECT OR OTHERWISE, OR WHETHER
KNOWN OR SHOULD HAVE BEEN KNOWN TO IMPECCA
®
,
INCLUDING LOST PROFITS, GOODWILL, AND PROPERTY
AND PERSONAL INJURY RESULTING FROM ANY BREACH
OF WARRANTY, THE INABILITY TO USE THE PRODUCT OR
UNDER ANY LEGAL THEORY IN CONTRACT OR TORT.
IMPECCA LIABILITY IS LIMITED TO THE ACTUAL
PURCHASE PRICE PAID TO THE RETAIL SELLER OF THE
DEFECTIVE PRODUCT.
No Impecca
®
dealer, agent, or employee is
authorized to make any modification,
extension, change or amendment to this warranty
without the written consent and authorization from
Impecca
®
.
Some states do not allow the exclusion or limitation
of implied warranties or liability for incidental
or consequential damages, or do not allow a
limitation on how long an implied warranty lasts, so
the above limitations or exclusions may not apply
to you. This warranty gives you specific legal rights,
and you may have other rights, which vary from
state to state.
Note: Our Warranty Service Center ships only within
Continental U.S.A., excluding Alaska and Hawaii.
Important: Be Sure to Register Your Product at WWW.IMPECCA.COM within 14 Days
*Do not send any returns to this address, as they may be lost and this will delay your repair and service process.
ONE YEAR LIMITED WARRANTY {36590}
/