4
Step 1: Setup the Wireless HDMI Transmitter
1. Connect the Wireless HDMI Transmitter to the HDMI port
of the computer or media source.
2. Power the transmitter through one of two options:
a. If used with a Blu-Ray player or similar device, connect
the Wireless HDMI Transmitter to the USB power adapter.
b. If used with a computer, connect the Mini USB to USB
cable from the transmitter to a USB port on the computer.
Step 2: Setup the Wireless HDMI Receiver
1. Connect the USB power adapter to the Mini-USB power jack
on the receiver and a wall outlet for power supply.
2. Connect the HDMI cable to the HDMI Output on the
receiver and to the HDMI Input on the HDTV / HD projector.
3. Power on the HDTV / HD projector. Once the link has been
established between the transmitter and receiver, video from
the connected computer or HDMI media source will be
displayed on the HDTV / HD Projector.
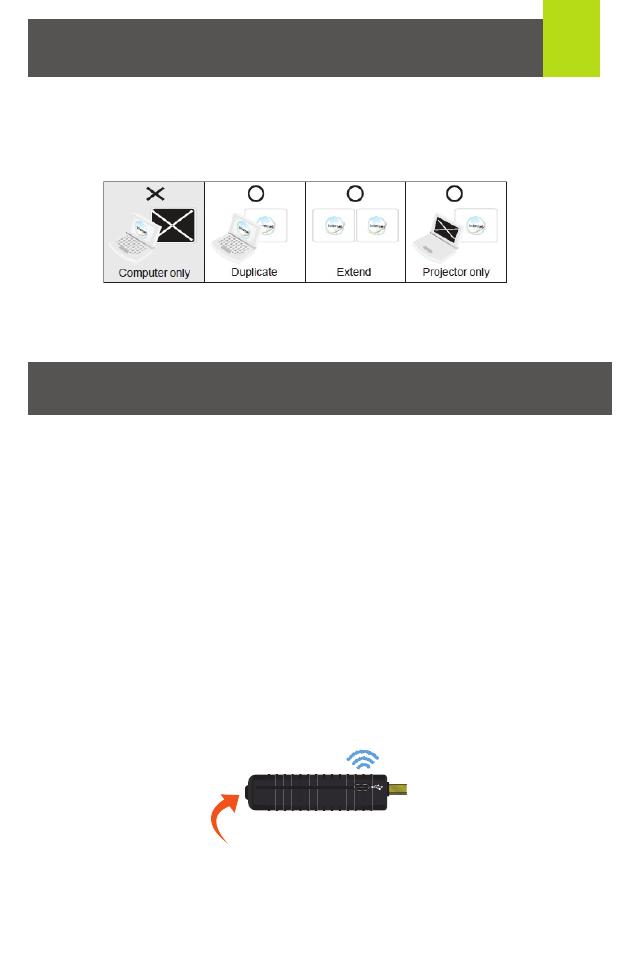
Computer Display Setting
Pairing Additional Transmitters
You can adjust your display by going to your computer screen
resolution preferences to change the display setting to “Duplicate,”
“Extend” or “Project Only” on your HDTV / HD projector.
If all operation is normal, the LED lights on both should be
static (not blinking).
The Wireless HDMI Receiver can be paired with up to 3 additional
Wireless HDMI Transmitters (Part #GWHDSTX sold separately).
Please visit http://www.iogear.com/product/GWHDSTX/ for more
information.
Pairing Mode for the Transmitter:
1. Once the transmitter is connected to the computer or source
player and is powered on, press and hold the Pairing Button.
2. The transmitter is in Pairing Mode once the Power LED
flashes slowly (1 flash/sec).
Note: When adding an additional transmitter, make
sure the power to any transmitters already linked to the
receiver is powered off before entering the receiver into
pairing mode.


