Page is loading ...

3½
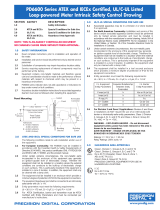
Precision Digital corPoration
DRAFT
®
One ½
Intrinsically Safe
C US

www.predig.com
2
Impact-resistant, glass-filled, polycarbonate body,
opaque; Impact-resistant, polycarbonate cover, transparent;
Polyurethane/polymer gasket; Polyamide/plastic cover screws;
NEMA 4, IP67
Removable screw terminal block, 12 to 24 AWG.
One ½" conduit hole may be provided; refer to
Ordering Information to specify hole location; request model (-Z)
for no conduit hole.
12 oz (340 g)
2 years parts & labor
The PD685 will carry the following and markings:
Ex ia IIC T4 Ga
Ex ia IIIC T135°C Da
-40°C ≤ Ta ≤ +75°C; IP67
The PD685 will carry the following markings:
-40°C ≤ Ta ≤ +75°C
Ex ia IIC T4 Ga;
Ex ia IIIC T135°C Da;
Class I, Zone 0, AEx ia IIC T4 Ga;
Class I, Zone 20, AEx ia IIIC T135°C Da;
Class I, Division 1, Groups A, B, C and D, T4;
Class II, Division 1, Groups E, F and G, T135°C; Class III;
Class I, Division 2, Groups A, B, C and D, T6;
Class II, Division 2, Groups F and G, T85°C; Class III;
Type 4X; IP67
The PD685 must be installed in
accordance with the Essential Health & Safety Requirements of
Directive 2014/34/EU, the product certificates CML 17ATEX2113X
and IECEx CML 17.0052X, and the product manual.
Under certain extreme circumstances, the non-metallic parts
incorporated in the enclosure of this equipment may generate
an ignition-capable level of electrostatic charge. Therefore, the
equipment shall not be installed in a location where the external
conditions are conducive to the build-up of electrostatic charge
on such surfaces. This is particularly important if the equipment is
installed in a zone 0 location. In addition, the equipment shall only
be cleaned with a damp cloth.
The cable entry into the enclosure shall be by means of conduit or
cable gland and shall provide a minimum degree of protection of IP5X.
Installation and service of this
device and or associated apparatus (barrier) should be performed
only by trained service personnel, and must be in accordance with the
manufacturer’s control drawing, Article 504 of the National Electric Code
(ANSI/NFPA 70) for installation in the United States, or Section 18 of the
Canadian Electrical Code for installations in Canada.
Under certain extreme circumstances, the non-metallic parts
incorporated in the enclosure of this equipment may generate an
ignition-capable level of electrostatic charge. Therefore, the equipment
shall not be installed in a location where the external conditions are
conducive to the build-up of electrostatic charge on such surfaces. This
is particularly important if the equipment is installed in a zone 0 location.
In addition, the equipment shall only be cleaned with a damp cloth.
Control equipment must not use or generate more than 250 V rms or dc
with respect to earth.
Conduit hubs and cable glands shall maintain the degree of protection,
explosion protection, and environmental rating of the PD685, and
installed in accordance with the appropriate wiring method for Class I
Division 2 and Class II Division 2 locations. Wire shall be used that is
rated for a minimum temperature of 80°C.
PD685 must be installed with a certified barrier for Class II, Division 1
locations.
0518
II 1 GD
The PD685 is an easy to use, loop-powered indicator, certified by
CSA, ATEX and IECEx as intrinsically safe. The PD685 carries
international certifications under both the Class/Division System
and Zone System, and is thereby suitable for use in gas and dust
hazardous areas worldwide. For Division 2 applications where
intrinsically safe interfaces are not needed, the PD685 is able to
be installed without barriers! To achieve this ability, the PD685
underwent a special 'nonarcing assessment' under the UL 121201
and CSA C22.2 No. 213 standards, and was determined to be a
device incapable of causing an ignition on its own. The PD685 is well-
suited for both indoor and outdoor applications and carries a variety of
environmental ratings, including NEMA 4, Type 4X and IP67.
The PD685 can be seen from considerable distance in bright sunlight
or dimly lit areas when the standard backlight feature is activated. The
fact that this meter is loop-powered means that there is no need to
run additional, costly power lines into a hazardous area. The meter
gets all of the power it needs from the 4-20 mA loop and its 1 V (4
V with backlight) drop results in a minimal burden on the loop. The
meter features a wide -40 to 75°C operating temperature range and
is available with a ½" conduit hole in a location of your choice for
easy installation. Calibration is a quick two-step process involving
the adjustment of only two sets of coarse and fine, non-interacting
potentiometers.
Except where noted all specifications apply to operation at +25°C.
4-20 mA @ 30 VDC maximum
1.1" (28 mm) LCD, 3½ digits; -1999 to +1999
Powered by 4-20 mA loop. Intensity varies with signal level
±0.1% FS ±1 count
Certified as intrinsically safe with entity, for use in Equipment
Group II, categories 1G (for Gas) and 1D (for Dust), suitable
for Zone 0, 1 & 2 (for Gas) and Zone 20, 21 & 22 (for Dust)
classified areas, and carrying the following markings:
II 1 GD. Ex ia IIC T4 Ga. Ex ia IIIC T135°C Da. -40°C ≤ Ta ≤ +75°C.
Certified as intrinsically safe with entity, to U.S. and Canadian
standards for Divisions and Zones (Gas and Dust), and
carrying the following markings:
Ex ia IIC T4 Ga; Ex ia IIIC T135°C Da; (Canada only)
Class I, Zone 0, AEx ia IIC T4 Ga; Zone 20, AEx ia IIIC
T135°C Da; (U.S. only)
Class I, Division 1, Groups A, B, C and D, T4;
Class II, Division 1, Groups E, F and G, T135°C;
Class III; Type 4X; IP67;
-40°C ≤ Ta ≤ 75°C
Certified as suitable for Division 2 without barriers, to U.S. and
Canadian Standards, and carrying the following markings:
Class I, Division 2, Groups A, B, C and D, T6;
Class II, Division 2, Groups F and G, T85°C;
Class III; Type 4X; IP67;
-40°C ≤ Ta ≤ 75°C
Ui = 30 V, Ii = 175 mA, Pi = 1 W, Ci = 0, Li = 0
User selectable via J2 jumper
4-step coarse & fine control; non-interacting zero & span
4 mA input: -1000 to +1000;
20 mA input: between 20 and 2000 counts > 4 mA display
2.5/second
30 mA
Over voltage protection to 30 V max
(between S+ and S-)
1 V @ 20 mA (4 V @ 20 mA with backlight)
-40 to 75°C
-40 to 85°C
0 to 90% non-condensing. Printed circuit
boards are conformally coated.
C US

www.predig.com
3
READ AND UNDERSTAND THE MANUAL BEFORE OPERATING.
LISEZ ET COMPRENEZ LE MANUEL AVANT DE L'UTILISER
The following warnings apply to Division 2 installations only!
EXPLOSION HAZARD – DO NOT DISCONNECT EQUIPMENT
OR REMOVE THE COVER UNLESS POWER HAS BEEN
SWITCHED OFF OR THE AREA IS KNOWN TO BE NON-
HAZARDOUS; FRANCAIS: “EXPLOSION DANGEREUSE
- NE PAS DÉBRANCHER L'ÉQUIPEMENT NI DÉPOSER LE
COUVERCLE SAUF SI L'ALIMENTATION A ÉTÉ COUPÉE OU SI
LA ZONE N'EST PAS DANGEREUSE.”
THE EQUIPMENT MUST BE CONNECTED TO A CERTIFIED
CLASS 2 POWER SUPPLY; Francais: “L'équipement doit être
raccordé à une alimentation de classe 2 CERTIFIÉE”
Entity parameters must meet the following requirements for both
CSA and ATEX/IECEx applications (except in areas where barriers
are not required, as noted below):
Division 2 installations do NOT require the use of an intrinsically-
safe barrier or intrinsically-safe entity parameters.
This information is contained within the serial number with the first four
digits representing the year and month in the YYMM format.
1. Remove the printed circuit board from the enclosure.
2. Connect appropriate size conduit fittings to the hole provided.
For enclosures without a pre-drilled hole, the installer must
make a hole in accordance with the instructions for the particular
conduit fitting being installed.
3. Connect conduit (with attached hubs) to the enclosure.
Conduit hubs must be connected to the conduit prior to being
connected to the enclosure. Use only conduit hubs that are
designed to maintain NEMA 4 or IP67 ratings.
Please read PD685 Intrinsic Safety Control Drawing (LIM685-2) for more
information pertaining to the conduit holes.
1. Remove the enclosure cover from the base.
2. Insert mounting hardware into mounting holes in enclosure base
(see Figure 7).
3. Secure the enclosure base to the mounting surface using the
inserted hardware.
4. Re-attach the enclosure cover to the base.
The only tools needed for calibration are a calibrated current
source and a small slotted/flathead screwdriver.
All controls and wiring connectors are accessed by opening the
enclosure. To access electrical connectors, remove the enclosure
cover, unscrew the two captive screws that fasten the printed circuit
board, and remove the printed circuit board from the enclosure.
To access the input terminals it is necessary to remove the enclosure
cover and the printed circuit board. This is done by loosening the four
screws on the enclosure cover and removing the cover. Completely
loosen both thumb screws that hold the printed circuit board to the
enclosure. Turn it over to gain access to the reverse side. Then,
proceed to connect a calibrated current source per Figure 1.
The decimal point jumper array J2 is located in the lower right corner
of the printed circuit board next to the display. It is labeled DDD.D,
DD.DD, and D.DDD. Place a jumper over both pins of DDD.D for a
display of 199.9, DD.DD for 19.99, or D.DDD for 1.999.
LO and HI coarse and fine calibration controls are located below
the display (see Figure 2). The meter is factory calibrated to display
-500 at 4 mA and 1500 at 20 mA. Use the HI and LO COARSE
controls for large range changes during calibration and the HI and
LO FINE controls for precision changes. Apply a 4 mA signal and
adjust the LO controls to display the desired reading. Apply a signal
between 16 and 20 mA and adjust the HI controls to display the
desired reading. Complete the calibration procedure by making
minor adjustments to the LO and HI controls as necessary.
Installation of the meter involves removing the printed circuit
board from its enclosure and connecting a ½" conduit fitting to the
hole provided. Refer to PD685 CSA, ATEX and IECEx Certified
Loop-Powered Meter Intrinsic Safety Control Drawing diagrams
(LIM685-2) for further details. Wall mounting holes are located in
each corner of the enclosure (see Figure 7).
Disconnect power to the loop and wire the meter as illustrated
in (Figures 3 & 4) for 2-wire transmitter configuration, (Figures 5
& 6) for 4-wire transmitter configurations, and the PD685 CSA,
ATEX and IECEx Certified Loop-Powered Meter Intrinsic Safety
Control Drawing diagrams (LIM685-2) supplied with the instrument.
Connect the loop return wire to S- to disable the backlight feature
or connect it to B- to enable the backlight feature.
1. Read complete instructions prior to installation and operation of the meter.
2. Installation and service should be performed only by trained service personnel.
3. Substitution of components may impair hazardous location safety.
4. Service requiring replacement of internal components must be performed at the factory.
5. Equipment contains non-metallic materials and therefore special care and consideration should
be made to the performance of these materials with respect to chemicals which may be present
in a hazardous environment.
6. PD685 indicator does not add capacitance or inductance to the loop under normal or fault
conditions.
7. Hazardous location installation instructions for associated apparatus (barrier)
must be followed when installing this equipment.
8. For safe installation of an ATEX, IECEx, and/or CSA certified transmitter in
series with the PD685 loop indicator, the hazardous location installation instructions for the
transmitter, PD685 loop indicator, and associated apparatus (barrier) must be compatible.
!

www.predig.com
4
Warning: Electrostatic hazard. Clean only with a
moist cloth. Protect enclosure from exposure to
chemical solvents and excessive ultraviolet (UV)
light (e.g. sunlight).
!
HAZARDOUS AREA NON-HAZARDOUS AREA
POWER
SUPPLY
+
-
Transmitter 4-Wire
Sig+ Sig-
P+
P-
Figure 5:
Figure 6:
HAZARDOUS AREA NON-HAZARDOUS AREA
POWER
SUPPLY
+
-
Transmitter 2-Wire
+
-
Figure 4:
HAZARDOUS AREA NON-HAZARDOUS AREA
POWER
SUPPLY
+
-
Transmitter 4-Wire
Sig+ Sig-
P+
P-
SIDE VIEW
Wall
Mounting
Holes
Beneath
Cover
Screws
E
F
FRONT VIEW
D
A C
B
Figure 3
Dimensions and Wall Mounting Information
Figure 7:
A: 3.15" (80 mm) C: 2.44" (62 mm) E: 2.75" (70 mm)
B: 5.12" (130 mm) D: 4.41" (112 mm) F: 0.79" (20 mm)
CALIBRATED
CURRENT SOURCE
+
-
S+ Signal Positive Connection
S- Signal Negative Connection
B- Signal Negative Connection
if Using Backlight
Figure 1:
Field wiring is made to the
back side of the printed
circuit board which is
mounted in the enclosure.
J2 - Decimal Point Location Selection
R4 - HI Calibration Coarse Control
R5 - HI Calibration Fine Control
R6 - LO Calibration Coarse Control
R7 - LO Calibration Fine Control
Figure 2:
HAZARDOUS AREA NON-HAZARDOUS AREA
POWER
SUPPLY
+
-
Transmitter 2-Wire
+
-
Figure 3:
S+ Signal Positive Connection
Signal Negative Connection
Signal Negative Connection
(if using Backlight).
Figures 1-6 are intended to serve as simplified wiring diagrams for
typical applications. For hazardous area applications, the PD685 must
be installed per the PD685 Intrinsic Safety Control Drawing (LIM685-2).

LIM685_H 12/18
Precision Digital corPoration
The information contained in this document is subject to change without notice. Precision Digital
Corporation makes no representations or warranties with respect to the contents hereof, and
specically disclaims any implied warranties of merchantability or tness for a particular purpose.
©2018 Precision Digital Corporation. All rights reserved.
PDA6854
Panel Mount Kit
(does not provide IP67 seal to panel)
PDA6845 2" Pipe Mounting Kit (zinc plated steel)
PDA6845-SS 2" Pipe Mounting Kit (stainless steel)
PDA-SSTAG Stainless Steel Tag
½"
PD685 CSA, ATEX & IECEx Certied Intrinsically
Safe NEMA 4, IP67 Meter with Conduit
Hole Location in Bottom of Enclosure
Bottom
PD685-X CSA, ATEX & IECEx Certied Intrinsically
Safe NEMA 4, IP67 Meter with Conduit
Hole Location in Rear of Enclosure
Rear
PD685-Y CSA, ATEX & IECEx Certied Intrinsically
Safe NEMA 4, IP67 Meter with Conduit
Hole Location in Top of Enclosure
Top
PD685-Z CSA, ATEX & IECEx Certied Intrinsically
Safe NEMA 4, IP67 Meter with no Conduit
Hole
None
Stainless Steel Tags
Laser Etched Up To 46 Characters Lead Seal & Wire
www.predig.com/pda-sstag
The PDA6845 is a pipe mounting kit with two mounting holes. It
provides all of the necessary hardware to mount the PD685 to a
2" pipe. It is available in zinc plated and stainless steel materials.
Mounting Plate
U-bolt Kit
Hex Nut
Meter not included.
The PDA6854 is a panel mounting kit for the PD685. It provides
all of the necessary hardware to mount the PD685 meter to an
equipment panel. This panel mounting kit is not intended to provide
waterproof protection to the panel.

(8'(&/$5$7,212)&21)250,7<
,VVXHGLQDFFRUGDQFHZLWK,62,(&DQG$7(;'LUHFWLYH(8
:H
3UHFLVLRQ'LJLWDO&RUSRUDWLRQ
6RXWK6WUHHW
+RSNLQWRQ0$86$
DVWKHPDQXIDFWXUHUGHFODUHXQGHURXUVROHUHVSRQVLELOLW\WKDWWKHSURGXFWV
0RGHO3'/RRS3RZHUHG0HWHU
WRZKLFKWKLVGHFODUDWLRQUHODWHVLVLQFRQIRUPLW\ZLWKWKH(XURSHDQ8QLRQ'LUHFWLYHVVKRZQEHORZ
(8 /RZ9ROWDJH
'LUHFWLYH
(8 $7(;'LUHFWLYH
(8 (0&'LUHFWLYH
(8 5R+6'LUHFWLYH
7KLVFRQIRUPLW\LVEDVHGRQFRPSOLDQFHZLWKWKHDSSOLFDWLRQRIKDUPRQL]HGRUDSSOLFDEOHWHFKQLFDO
VWDQGDUGVDQGZKHQDSSOLFDEOHRUUHTXLUHGD(XURSHDQ8QLRQQRWLILHGERG\FHUWLILFDWLRQ
6WDQGDUGV
(1
(1$
(1
(1
(1
(&7\SH([DPLQDWLRQ&HUWLILFDWH&0/$7(;;
3URGXFW0DUNLQJV ,,*'
([LD,,&7*D
([LD,,,&7&
7DPE &WR&
$7(;1RWLILHG%RG\IRU(&7\SH([DPLQDWLRQ&HUWLILFDWH &HUWLILFDWLRQ0DQDJHPHQW/LPLWHG1%
8QLW1HZSRUW%XVLQHVV3DUN1HZ3RUW5RDG
(OOHVPHUH3RUW&+/=8.
$7(;4XDOLW\$VVXUDQFH1RWLILFDWLRQ1R 6,5$$7(;0
$7(;1RWLILHG%RG\IRU4XDOLW\$VVXUDQFH6LUD&HUWLILFDWLRQ6HUYLFH1%
8QLW+DZDUGHQ,QGXVWULDO3DUN
+DZDUGHQ'HHVLGH&+868.
6LJQHGIRUDQGRQEHKDOIRI3UHFLVLRQ'LJLWDO&RUSRUDWLRQ
1DPH -HIIUH\3HWHUV
&RPSDQ\ 3UHFLVLRQ'LJLWDO&RUSRUDWLRQ
7LWOH 3UHVLGHQW
'DWH 'RFXPHQW1R'R&3'^`
/