Page is loading ...

®
839479-D
0703
English
“ ”ExportEdition
TBA Evaporative AirCooler
installationmanual

CPMD
CPMD
CPMD
CPMD
HUB1
20m
20m
20m
20m
40m
MASTER
SLAVE
SLAVE
MASTER
Standard
Breezair
WallControl
Standard
Breezair
WallControl
!
!
!
!
!
!
!
!
Coolersaresuppliedwith20mdatacablein
accessorieskit
Hubsaresuppliedwith20mdatacableinkit.
20mdatacableinre-sealablebagavailable
40mdatacableonreelavailable
Datacablesmaybeshortenedorlengthened(to
maximumsshown)usingONLY correctRJ
connectorsandcrimpingtools
CablessuppliedbyBreezairare26AWG,7/016,
4coreflat.
ALWAYSroutecablesatleast300mmawayfrom
regularpowercablesandhighpowermachines.
Crossoverpowercablesatrightangles.
Wheremaximumdatacableandsensorcable
lengthsareexceeded,orcablesarenotroutedin
accordancewithourrecommendationsSeeley
technicalsupportisnotavailableandtheproduct
warrantymaybevoided.
BreezairControlSystem
CableLengths
StandardWallControl
824130-A
0703

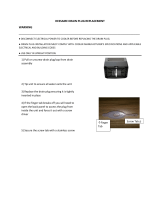
1SAFETYNOTES
Please read this manual
carefully. Your failure to do so could
result in injury to you or damage to
the cooler and property.
Disconnect electrical power at the
fuse or circuit breaker box and turn "OFF"
the isolating switch located inside the
cooler on the Electronics Module before
you begin to install the cooler.
Always comply with your local laws
and safety regulations.
•Installationofthecoolermustcomply
withlocalelectrical,watersupplyand
environmentalcodes,lawsandsafety
regulationsaswellaswithapplicable
NationalStandards.
• Dress safely. Wear non-slip shoes at all
times. Open shoes, sandals and bare feet
are NOT safe when working with tools and
machines. Do not wear loose clothing and
decorations while installing the cooler as
they can get caught in the moving parts.
• Keep long hair, loose clothing and fingers
away from moving parts.
• Do not install the cooler during rain, high
winds, or severe weather conditions.
INSTALLATION&OPERATION
•The appliance is not intended for use by
young children or infirm persons without
supervision.
•Young children should be supervised to
ensure that they do not play with the
appliance.
•
•
•Wear protective clothing when working
with power tools.
• Always ensure that electrical power
cables conform to relevant government
safety requirements.
• Always lift the cooler to its location using
safe methods and equipment.
• Never drain the cooler directly onto the
roof. Always use pipes to carry the drain
water to a proper point. Failure to do this
can stain the roof and make the roof
slippery and unsafe.
• All installation, maintenance and repair
work must be done by trained and qualified
technicians.
• The plastic packaging from the cooler
can be a safety hazard. Please dispose of it
in accordance with local laws and
regulations.
ALWAYS route cables at least 300mm
away from regular power cables and high
power machines. Cross over power cables
at right angles.
Where maximum data cable and sensor
cable lengths are exceeded, or cables are
not routed in accordance with our
recommendations Seeley technical
support is not available and the product
warranty may be voided.

2SPECIFICATIONS
ELECTRICAL
It is a requirement of Seeley International
that the electrical power supply to all
coolers is not mixed with other machines or
electrical circuits. Electrical installation
must comply with local laws and
regulations. Each cooler requires a
minimum10 amp power supply.
The electronics module is fitted with a 12
amp manual reset circuit breaker. To reset
the circuit breaker turn off the isolation
switch, remove the Electronics Module and
push the manual reset toggle switch
located underneath the Electronics
Module. The isolation switch on the
module cannot be turned on without the
securing screw being in place.
If at any time the electrical supply
cable is damaged, it must be replaced by a
special cord or assembly available from the
manufacturer or its service agent in order to
avoid a hazard.
Specification :
115V, 230V / 50Hz, 60 Hz
Single Phase (see nameplate for
exact data for this air cooler.)
WATER
Specification:
WaterConnections:1/2inchBSP
Maximum pressure: 800 KPa (115
PSI)
IMPORTANT: If the water
pressure exceeds 800KPa, then a
pressure reducing valve must be
fitted near to the air cooler by the
installer.
The air cooler will function best when clean
water is supplied. Water that contains
dissolved salts and other impurities will
cause the cooling pads to become blocked
more quickly and then they require
maintenance. The water management
devices fitted will help to control the effects
of poor quality water, BUT THEY CANNOT
ELIMINATE THE PROBLEM.

3EXPLODEDVIEWOFTHECOOLER

4COMPONENTSOFTHEAIRCOOLER
1. Transition(usedforthetransportbase,thisbecomesthetheaircooler basefor
connectiontotheduct)
2. Weatherseal(stopsairflowinginandoutwhentheaircoolerisnot
operating)
3. TransitionPlug(fittedinthefactory)
4. CoolingPadFrame
5. FlexibleHose(formainswaterconnection)
6. SolenoidValveCover
7. SolenoidValve
8. ExtensionTube(connectstheFloatValvetotheSolenoidValve)
9. WaterTank(reservoir)
10. CornerPillar
11. WaterSensor(detectsconductivityofwater)
12. FloatValve(forcontrolofmainwatersupplylevelintheWaterTank)
13. WaterPump
14. DrainValve(forreleasingwaterinthetankautomaticallyorwhenthe user
requires)
15. MotorCablewithtwoplugs
16. ElectricPowerSupplyCablewithplug
17. ElectronicsModule
18. PumpHose
19. Venturi/FanAssembly
20. Lid
21. DistributorCap(fordirectingwaterfromthepumpintothewater
distributionchannelsinthelid)

5DISMANTLINGTHEAIRCOOLER
The air cooler is designed to be partially
dismantled in order to reduce the weight for
installation.
To remove the Cooling Pad Frame, first
disengage the top clips of the pad frame
using a screw driver as shown.
Then hold the pad frame with both hands
and pull it towards you as shown. See
diagram. This disengages the side clips.
Then lift the frame up and out as shown.
See diagram. Do this with each Cooling
Pad Frame.
COOLING PAD FRAME REMOVAL

6
REMOVINGTHEVENTURI/FAN
REMOVING THE TRANSITION
IMPORTANT!Ensurethemotorplughas
beenremovedfromthecontrolbox
beforeremovingtheventuri(seepage9
forremovalofplug).
With both arms hold each side of the
Venturi/fan assembly. Press the large clips
at each side and lift the Venturi/fan
assembly upwards and carry it out of the
cabinet.
Place the Venturi/fan assembly carefully
aside until the cooler has been completely
installed.
Turn the cooler onto its side to remove the
Transition. It is held to the cabinet for
transport with big clips. the Transition can
be pulled off the cabinet with a strong pull
by the installer. If it is difficult to remove,
squeeze the clips together and then pull.
See diagram. The Transition is now ready to
be fitted onto the duct.
You cannot install the various
components of the air cooler unless
you remove the Venturi/fan assembly
first.
DISMANTLINGTHEAIRCOOLER

7INSTALLINGTHETRANSITION
The air cooler is designed to be fixed to the
first section of the duct without any
additional frame for support. Therefore
make sure the duct is fixed to the building
using a strong method.
. The top edge of the
duct must be level. The Weatherseal
requires a 270mm section of straight duct
under the air cooler before a bend is
installed. Do not penetrate the duct with
any fasteners in this section.
The best location for the cooler is where the
air is fresh and clean. Keep away from
exhaust vents from factories and
commercial kitchens. Do not locate the air
cooler near the ground where there is dust
and pollution.
The sides of the cooler should be a
minimum of 600mm from any wall.
If the cooler is located on a platform,
Place the transition onto the duct. If the roof
is sloped then make sure the transition is
located correctly according to the
diagram.
The duct size must be 550 x 550mm.
The top edge must be strong
without any flange
always build a safety rail around the
platform.

8
Use a spirit level in both directions to get
the Transition level. Screw it to the duct
using the eight (8) screws provided. There
are eight (8) V-notch locations for the
screws. See diagram.
Now break off both clips on the Transition
that retain the Weatherseal.
Check that the weatherseal flaps do not
interfere with the duct or any screws. The
flaps should move freely through 90º. See
diagram.
Lift the air cooler up and place it onto the
Transition. It will only go one way. Make
sure the clips in the four corners engage
correctly. See Diagram. Do not use any
screws to attach the air cooler.
IMPORTANT: There must be no
obstructions to the weatherseal
opening fully as that will reduce the
air cooler performance .
IMPORTANT
Do not place the venturi assembly
into the air cooler at this stage.
INSTALLINGTHETRANSITION

9INSTALLINGELECTRICCABLES
Disconnect the Electronics Module from
the Water Tank by removing the screw
under the isolation switch. See diagram.
The switch cannot function with this screw
removed.
The installation kit supplied contains your
power cable with ends ready to terminate
and a wall control cable. Take the power
cable and drop the the non-plug end down
the hole where the Electronics Module was
and pass it through the conduit adaptor
(factory fitted in the Transition).Then lock
the plug on the other end in place as shown
- see diagram. Pass the taped end of the
wall control cable through the conduit
adaptor also and leave about 0.5m in the
Water Tank.
Now pass the cables through your main
conduit and connect the main conduit to
the conduit adaptor (under the Transition).
Terminate the power cable in a junction box
installed nearby.
We
recommend the junction box is located on
the duct
Note:The
maximum length for the wall control cable
to travel alongside the power cable is 10m.
IMPORTANT: Pass the wall control
cable through the conduit first.
The fixed wiring must
be fitted with an isolation switch that
breaks active and neutral in
accordance with wiring rules.
. Do not penetrate the duct
near the Weatherseal.

10
WATERCONNECTIONS
You have the choice of installing the Drain
Valve and water management system
supplied, or not. If not, you need to install
the Bleed Funnel alternative. See later note
The function of the drain valve is to reduce
the salts and minerals in the air cooler. It
also provides overflow and water drain
features.
Assemble the drain valve into the Water
Tank as shown - see diagram. Make sure
the O-ring is fitted before putting the Drain
Valve into the hole in the Water Tank. Screw
the nut underneath tight
Attach the drain Adaptor under the Drain
Valve and attach a pipe to carry the water to
a suitable drain point.
See Diagram.
The Water Sensor protects the pump and
helps control water salinity.
Fit the Water Sensor as shown by clipping it
to the Water Tank. See Diagram. Make
sure the clip engages fully. Route the sensor
cable through the cable supports in the
Water Tank as shown. See diagram. It will
be connected later.
DRAIN VALVE ALTERNATIVE
by hand!!
Do not allow water
to run freely onto the roof - it will stain
the roof!!
.

11
If you have installed the drain
valve
Do not over-tighten
plastic threads!!
, then fit the float valve and solenoid
valve to the air cooler as shown.
Make sure all washers and o-rings are
fitted correctly.
Make sure the Float Valve is centrally
positioned and is free to move up and
down.
Screw the Solenoid Valve into the extension
tube. Check the direction of water flow with
the arrow on the back of the valve . See
diagram.
Make sure Solenoid Valve seals against the
rubber washer on the Extension Tube. Twist
the Solenoid Valve so that the cover will fit
on OK.
WATERCONNECTIONS

12
Connect the solenoid cable (supplied in the
kit) to the Solenoid Valve. Route the cable
through the hole in the Transition. See
diagram. The other end will be connected
later.
Clip the solenoid cover into place under
the air cooler. Then screw the flexible water
hose (supplied in the kit) onto the Solenoid
Valve. Make sure the rubber washer seal is
in place.
IMPORTANT: Make sure the cable does
not interfere with the Weatherseal and
that it will not be crushed by the
Venturi/fan assembly.
Important: take care when connecting
the flexible water hose to the solenoid
valve or the float valve adaptor. The
threads may become crossed and the
connection will fail.
WATERCONNECTIONS

13
BLEEDFUNNELALTERNATIVE
The bleed funnel is a simplified alternative
to the drain valve. It also provides overflow
and drain features.
Assemble the bleed funnel to the Water
Tank as shown.
Make sure the o-rings are fitted correctly.
Screw the nut tight
Attach the Drain adaptor under the
Bleed Funnel and attach a pipe to carry the
water to a suitable drain point.
The required rate of bleed will vary
according to the water quality. Set it to the
minimum rate, as shown in the following
table.
If salt starts to build up on the
Cooling Pads insert another plug. Adjust
the bleed rate until the salt build up is
minimised. The water management
devices fitted will help control the effects of
poor quality water, but they cannot
eliminate the problem.
by hand!!
Do not
allow the water to run freely onto the
roof - it will stain the roof!!
WATERCONNECTIONS
TBA2501Plugin
TBA3501Plugin
TBA4502Plugsin
TBA5502Plugsin

14
After fitting the Bleed Funnel,
Do not
over-tighten plastic threads !!
then fit
the Float Valve as shown complete with the
Extension tube and 3/4” to 1/2” adaptor.
See diagram. Make sure that all washers
and o-rings are fitted correctly.
Make sure the float on the Float Valve is
centrally positioned and is free to move up
and down.
MAIN WATER CONNECTION
Connect the main water supply to the water
inlet point under the air cooler.
Always install a shut-off valve (do not use a
non return type valve) close by the air
cooler. In areas where freezing might occur
always install a drain-down point for the
mains water supply.
The water connection is 1/2 inch BSP male
thread.
WATERCONNECTIONS

ELECTRICALCONNECTION
15
Now the Electronics Module must be re-
fitted. First take the wall control cable and
the Solenoid Valve cable (if installed) that
are loose in the Water Tank and route them
out from the Electronics Module location,
as shown.The cables must rest in the
special channel provided. See diagram.
Leave about 200mm (8”) of cable for later
connection.
Connect the motor cable into the
Electronics Module.
Fit the Electronics Module to its base in the
Water Tank and screw it in place. See
diagram.

16
Lift the flexible cover on the Electronics
Module. You will see some plug points.
Connect the wall control cable to its correct
plug point. If the drain valve, water sensor
and solenoid valve are fitted then connect
those cables also. Route the drain valve
cable as shown before connecting it.
Do not connect the pump cable yet.
Now turn on the isolation switch
and replace the pad frames (except
the front padframe to allow
access).
IMPORTANT: Ensure the cables are
connected in the correct way as shown
ELECTRICALCONNECTION

INSTALLINGTHEFANASSEMBLY
17
Carry the Venturi/Fan assembly to the air
cooler and fit it back in place. It will only fit
one way. Check that the two (2)clips are
properly engaged.

INSTALLINGTHEWALLCONTROL
18
WALLCONTROLLOCATION
Install the Wall Control station about 1.5
metres above the floor in the place where
you want the temperature to be controlled
from.
When selecting a position for the Wall
Control station avoid the following
locations:
• Direct sunlight.
• Outside walls.
• Any heat sources.
•Apositionindirectlineofacooling
outlet.
Mounting the wall control in a position near
any heat source or cooling outlet will affect
its ability to control temperature.
The Wall Control cable will plug into the
back of the Control.
/