Page is loading ...

Constant Wattage Parallel
Circuit Heating Cable Systems
INSTALLATION AND
MAINTENANCE MANUAL

1
General information 3
2
Heating cable selection 8
3
Heating cable installation 9
4
Components installation 19
5
Thermostats 21
6
Thermal insulation and marking 23
7
Power supply and electrical protection 25
8
Heating cable testing 26
9
Operation, maintenance and pipe repairs 28
10
Heating cable damage 29
11
Troubleshooting guide 34
2 | nVent.com/RAYCHEM

1 GENERAL INFORMATION
USE OF THE MANUAL
The Installation and Maintenance manual is for
nVent RAYCHEM FHT and FMT constant wattage parallel
circuit heating cable systems on thermally insulated
pipes and vessels only. For information regarding other
applications contact your nVent representative.
Heating Cable Technology
Non
Active
Heating
Zone
Active
Heating
Zone
Zone
Length
Heating Element
Node ConnectionConductor
COLD HOT
Work piece to be heated
Important
For the warranty to apply, the instructions that are included
in this manual and product packages must be followed.
The installation must also be compatible with local
requirements applicable to electric heat tracing systems.
The design of electrical resistance heat tracing systems
shall be overseen by persons knowledgeable of heat
tracing following the design methodology for explosive
atmospheres as specified by the manufacturer.
Area Classification - Ordinary
FMT Rated Voltage: 190-277 Vac
FHT2 Rated Voltage: 190-277 Vac
FHT4 Rated Voltage: 385-415 Vac
AREA CLASSIFICATION - HAZARDOUS,
ZONE 1, ZONE 2, ZONE 21 OR 22
FHT2 and FHT4 (All Types)
SGS20ATEX0044X
II 2 G Ex 60079-30-1 IIC T* Gb
II 2 D Ex 60079-30-1 IIIC T**°C Db
min –60°C (* ** see schedule)
FMT (All Types)
SGS20ATEX0044X
II 2 G Ex 60079-30-1 IIC T* Gb
II 2 D Ex 60079-30-1 IIIC T**°C Db
min –40°C (* ** see schedule)
nVent.com/RAYCHEM
|
3

FHT2 and FHT4 (All Types)
IECEx BAS 20.0007X
II 2 G Ex 60079-30-1 IIC T* Gb
II 2 D Ex 60079-30-1 IIIC T**°C Db
min –60°C (* ** see schedule)
FMT (All Types)
IECEx BAS 20.0007X
II 2 G Ex 60079-30-1 IIC T* Gb
II 2 D Ex 60079-30-1 IIIC T**°C Db
min –40°C (* ** see schedule)
TC RU C-BE.MIO62.B.05969
FMT (All Types)
1 Ex e II2 T6 ... T2 Gb X
Ex tb IIIC T85°C ... 200°C Db X IP66
–40°C .... +56°C
FHT2 and FHT4 (All Types)
1 Ex e II2 T6 ... T2 Gb X
Ex tb IIIC T85°C ... 200°C Db X IP66
–60°C .... +56°C
Specific conditions of use
1. The following limiting temperatures for the exposure of
the end seals and splices shall not be exceeded: 180°C
continuous operation and 200°C intermittent operation
for the E-150-F and CS-150-F
2. The assembly of glands, splices and end terminations
shall be carried out in accordance with the installation
instructions
3. The heating element supply circuit must include an
electrical protection device in conformity with clause
4.3 of EN/IEC 60079-30-1
4. The minimum bending radius is 25 mm for the types
FMT and FHT cables
5. The supply of the heating unit must be terminated in a
suitably certified terminal enclosure
FMT FHT
Minimum Bending
Radius at Minimum
Installation Temperature
25 mm 25 mm
Minimum Installation
Temperature
–40°C –60°C
Maximum Withstand
Temperature (continuous,
de-energised)
200°C 260°C
Temperature
Refer to design
tables below
or use nVent
design software
Refer to design
tables below
or use nVent
design software
Minimum clearance 50 mm 50 mm
4 | nVent.com/RAYCHEM

Design tables for non-hazardous areas
Maximum allowed surface temperature (°C)
(= limiter setpoint)
230 V a.c. 254 V a.c. 277 V a.c.
10FMT2-CT 158 153 144
20FMT2-CT 129 116 97
30FMT2-CT 94 71 36
10FHT2-CT 229 225 219
20FHT2-CT 209 199 187
30FHT2-CT 184 168 143
40FHT2-CT 154 130 87
Maximum allowed surface temperature (°C)
(= limiter setpoint)
385 V a.c. 400 V a.c. 415 V a.c.
10FHT4-CT 250 250 249
20FHT4-CT 224 221 218
30FHT4-CT 212 208 205
Design tables for hazardous areas
Maximum allowed surface temperature (°C)
(= limiter setpoint)
230 V a.c. T6
(85°C)
T5
(100°C)
T4
(135°C)
T3
(200°C)
T2
(260°C)
10FMT2-CT 8 26 69 147 -
20FMT2-CT - - 19 109 -
30FMT2-CT - - - 65 -
10FHT2-CT 8 26 69 147 225
20FHT2-CT - - 19 109 200
30FHT2-CT - - - 65 169
40FHT2-CT - - - 8 131
nVent.com/RAYCHEM
|
5

Maximum allowed surface temperature (°C)
(= limiter setpoint)
254 V a.c. T6
(85°C)
T5
(100°C)
T4
(135°C)
T3
(200°C)
T2
(260°C)
10FMT2-CT - 12 56 137 -
20FMT2-CT - - - 88 -
30FMT2-CT - - - 23 -
10FHT2-CT - 12 56 137 218
20FHT2-CT - - - 88 185
30FHT2-CT - - - 23 140
40FHT2-CT - - - - 81
Maximum allowed surface temperature (°C)
(= limiter setpoint)
277 V a.c. T6
(85°C)
T5
(100°C)
T4
(135°C)
T3
(200°C)
T2
(260°C)
10FMT2-CT - - 37 122 -
20FMT2-CT - - - 53 -
30FMT2-CT - - - - -
10FHT2-CT - - 37 122 207
20FHT2-CT - - - 53 161
30FHT2-CT - - - - 90
40FHT2-CT - - - - -
Maximum allowed surface temperature (°C)
(= limiter setpoint)
385 V a.c. T6
(85°C)
T5
(100°C)
T4
(135°C)
T3
(200°C)
T2
(260°C)
10FHT4-CT 34 52 94 171 249
20FHT4-CT - - 40 128 216
30FHT4-CT - - - 105 202
Maximum allowed surface temperature (°C)
(= limiter setpoint)
400 V a.c. T6
(85°C)
T5
(100°C)
T4
(135°C)
T3
(200°C)
T2
(260°C)
10FHT4-CT 30 48 90 169 247
20FHT4-CT - - 30 121 212
30FHT4-CT - - - 95 195
6 | nVent.com/RAYCHEM

Maximum allowed surface temperature (°C)
(= limiter setpoint)
415 V a.c. T6
(85°C)
T5
(100°C)
T4
(135°C)
T3
(200°C)
T2
(260°C)
10FHT4-CT 25 44 87 166 246
20FHT4-CT - - 18 112 206
30FHT4-CT - - - 82 187
Heating system documentation requirements
The heat tracing system documentation shall be retained
for each heat tracing circuit for as long as the system is in
use. As a minimum, the heat tracing system documentation
shall include the following information as applicable:
For heat tracing systems according to stabilized design
method
1. Heat tracing circuit identification.
Heat tracing system design parameters:
2. Pipe size or workpiece dimensions.
3. Temperature to be maintained or the maximum
process / exposure temperature.
4. Maximum ambient temperature.
5. Heating cable type.
6. Operating voltage.
7. Trace ratio.
8. Length or dimensions of heating cable.
9. Maximum workpiece temperature.
10. Temperature class or maximum sheath/surface
temperature as applicable.
11. Thermal insulation type, size, and thickness.
12. Thermal insulation cladding specification, if
applicable.
For heat tracing systems according to controlled design
method
1. Heat tracing circuit identification.
2. Heat tracing system design parameters:
3. Location of the sensor of the temperature controller /
limiter on the pipe / workpiece.
4. Details of the mounting of the sensor in accordance
with 4.5.3, a), b) or c).
nVent.com/RAYCHEM
|
7

5. Temperature to be maintained or the maximum
process / exposure temperature.
6. Maximum ambient temperature.
7. Temperature controller / limiter set point.
8. Heating cable type.
9. Operating voltage.
10. Trace ratio.
11. Length or dimensions of heating cable.
12. Temperature class or maximum sheath/surface
temperature as applicable.
Warning
The purchaser should make the manufacturer aware of
any external effects or aggressive substances that the
equipment may be exposed to.
As with any electrical equipment or wiring installation
operating at line voltages, heating cable and component
damage or incorrect installation that allows the
penetration of moisture or contamination can lead to
electrical tracking, arcing and potential fire hazard.
Do not connect heating cable conductors together or
this will result in a short circuit.
Any unconnected heating cable end must be sealed with
an approved end seal.
To prevent fire or explosion in hazardous areas, verify
that the maximum sheath temperature of the heating
cable is below the auto-ignition temperature of the
gases in the area. For further information, see design
documentation.
2 HEATING CABLE SELECTION
Check the design specification to make sure the proper
heating cable is installed on each pipe or vessel.
Refer to nVent product literature to select the proper
heating cable for each thermal, chemical, electrical and
mechanical environment.
8 | nVent.com/RAYCHEM

3 HEATING CABLE INSTALLATION
3.1 Heating cable storage
• Store the heating cable in a clean, dry place
• Temperature range: –40°C to +60°C
• Protect the heating cable from mechanical damage
3.2 Pre-installation checks
Check materials received:
• Review the heating cable design and compare the
list of materials to the catalogue numbers of heating
cables and electrical components received to confirm
that proper materials are on site. The heating cable
type is printed on its outer jacket.
• Temperature exposure must not exceed that specified
in the product literature. Exceeding these limits will
impair product performance. Check that expected
exposure is within these limits.
• Ensure that the heating cable voltage rating is suitable
for the service voltage available.
Do not energize cable when it is coiled or on the reel.
• Inspect heating cable and components for in-transit
damage. An insulation resistance test (see section 8)
on each reel is recommended.
Check piping to be traced:
• Ensure all pressure testing is complete and pipework
has final paint coating.
• Walk the system and plan the routing of the heating
cable on the pipe.
• Check pipework against specification drawing.
If different consult design authority.
• Inspect piping for burrs, rough surfaces, sharp
edges etc. which could damage the heating cable.
Smooth off or cover with layers of glass cloth tape
or aluminium foil.
nVent.com/RAYCHEM
|
9

3.3 Heating cable handling
Heating cable handling tips:
• Paint and pipe coatings must be dry to the touch
before heating cable installation.
• When pulling the heating cable, avoid:
• Sharp edges
• Excessive pulling force
• Kinking and crushing
• Walking on it, or running over it with equipment
Heating cable pulling tips:
• Use a reel holder that pays out smoothly with little
tension.
• Keep heating cable strung loosely but close to the pipe
being traced to avoid interference with supports and
equipment.
• Pay out designed length and mark (i.e. with fixing tape)
on cable while still on reel.
• Leave the appropriate amount of heating cable at all
power connection, splice, tee and end seal locations.
(Refer to component installation instructions)
• Add additional heating cable to trace the fittings and
supports or for spiralling as required by the design
specifications.
• Protect all heating cable ends from moisture,
contamination and mechanical damage or other
interference if left exposed before component
installation.
10 | nVent.com/RAYCHEM

3.4 Heating cable attachment recommendations
• The heating cable may be installed straight, spiralled or
in multiple runs as required by the design specification.
• Do not use metal attachments, vinyl electrical tape or
duct tape as heating cable damage may result.
• Fix in place with a minimum of two wraps of the
appropriate self-adhesive glass cloth tape
(see figure 1) or plastic cable ties at 300 mm intervals
and additionally where necessary.
• Plastic cable ties must have a temperature rating that
matches the system exposure temperature.
• The heating cable’s minimum bend radius must not be
exceeded (refer to p. 2)
The heating cable’s minimum spacing between turns
must not be exceeded (refer to p. 2)
3.4.1 Straight tracing
• Straight trace the pipe unless the design calls for
spiralling (see 3.4.2).
• On horizontal pipes fix on lower quadrant as shown in
Figure 1 and not on bottom of pipe.
• To prevent overheating, be sure the location of the
heating cable is planned so that the active heating
kit installation instructions and plan the component
location before permanently attaching the cable
to the pipe.
• Ensure that the active heating zones are located where
heat is required i.e. on the pipe.
• Thermally insulate and weatherproof to specification.
• When installing nVent RAYCHEM constant wattage
parallel circuit heating cables ensure that they do not
overlap or cross.
nVent.com/RAYCHEM
|
11

Figure 1
Glass cloth tape
(typical)
Tight on pipe
Top
Pipe
nVent
insulation
(typical)
45°
(nominal)
300 mm
nVent RAYCHEM Attachment tapes:
GT66 Self-adhesive glass cloth tape
General purpose tape. Not for stainless-steel pipes or
for installation temperatures <4°C.
GS54 Self-adhesive glass cloth tape
Recommended for use on stainless-steel
and cupra-nickel surfaces and for installation
temperatures <4°C.
Figure 2
ATE-180 Aluminium tape
Use only if the design requires it.
12 | nVent.com/RAYCHEM

3.4.2 Spiral tracing
• Alternative spiralling methods are shown in Figures 2a
and 2b.
• Only spiral heating cable on pipe when called for
by design.
• To prevent overheating, be sure the location of the
heating cable is planned so that the active heating
kit installation instructions and plan the component
location before permanently attaching the cable
to the pipe.
• Ensure that the active heating zones are located where
heat is required i.e. on the pipe.
Spiral Pich Table (mm).
NB NPS Spiral Ratio – Metres of cable per metre
of pipe
(mm) (inches) 1.1 1.2 1.3 1.4 1.5
25 1 250 170 140 110 100
32 1
1/4
310 210 170 140 130
40 1
1/2
350 240 190 160 140
50 2 430 300 240 200 180
65 2
1/2
520 360 290 240 210
80 3 630 430 350 290 260
90 3
1/2
720 490 390 330 290
100 4 800 560 440 370 330
125 5 990 680 550 460 400
150 6 1180 810 650 550 480
200 8 1520 1050 840 710 620
Example: For pipe of 80 mm NB (3” NPS) requiring
1.3 metres of heating cable per metre of pipe, pitch is
350 mm.
• Thermally insulate and weatherproof to specifications.
• When installing nVent RAYCHEM constant wattage
parallel circuit heating cables ensure that they do not
overlap or cross.
nVent.com/RAYCHEM
|
13

Figure 2a
Pipe length
Glass cloth
tape (typ-
ical)
Heating
cable
Pipe
Apply glass
cloth tape
before spiral-
ling cable on
pipe
Heating
cable length
Wrap loops
in opposite
direction
Tape after
spiralling
cable on pipe
Pitch
Heating cable length = pipe length x spiral ratio
Refer to design specification for spiral ratio
Step 1 Make starting loop as shown
Step 2 Grasp loop and wind around pipe
Step 3 Space evenly and attach to pipe
Thermally insulate and weatherproof to
specification
Figure 2b
Pipe
Heating cable
Glass cloth tape
(typical)
Pitch
• Refer to design specification for spiral pitch
• Mark the pipe at the spiral pitch or use a simple
length gauge
• Fix the heating cable as installation progresses
• Thermally insulate and weatherproof to specification
3.5 Cutting the heating cable
• Cut the heating cable to length after it is attached to
the pipe.
Before cutting it, confirm the tracing allowance as per
Sections 3.3 and 3.6.
14 | nVent.com/RAYCHEM

3.6 Typical installation details
• Typical installation details for fixing heating cable to
pipe fittings are shown hereafter.
General notes:
• Trace pipe fittings as shown to allow easy
maintenance.
• Consult the design specification for the tracing
requirements for fittings and supports.
• Follow the recommendations for cutting and stripping
heating cables; they are included in the component
installation instructions.
3.6.1 Valve
Figure 3
Heating cable
Glass tape
Valve body
Pipe
The drawing shows the
general installation method.
The heating cable configuration
will vary for different valve shapes
and heating cable lenghts.
• Refer to design specification for additional heating
cable length.
• Fix with self-adhesive glass cloth tape.
• Thermally insulate and weatherproof to specification
(including valve stem).
• No overlapping or crossing of the heating cable.
nVent.com/RAYCHEM
|
15

3.6.2 Elbow
Figure 4
Thermal insulation
Pipe
Glass cloth tape
(typical)
Heating
cable
• Fix heating cable to outside (long) radius of elbow
Fix with self-adhesive glass cloth tape
• Thermally insulate and weatherproof to specification
• No overlapping or crossing of the heating cable.
3.6.3 Flange
Figure 5
Heating cable
Glass cloth tape
(typical)
Pipe
• Additional heating cable is 2 times diameter of pipe
Fix with self-adhesive glass cloth pipe
• Thermally insulate and weatherproof to specification
• No overlapping or crossing of the heating cable.
16 | nVent.com/RAYCHEM

3.6.4 Pipe bar hanger
Figure 6
Glass cloth tape
(typical)
Bar hanger
Weatherproofing
Thermal insulation
Pipe
Heating cable
Bar hanger
Sealer
Sealer
Heating cable
• Do not clamp heating cable with support.
Heating cable must be over the support
• No additional heating cable is required for bar or
rod pipe hangers unless called for in the design
specification, then use loop length specified
• Fix with self-adhesive glass cloth tape
• Thermally insulate and weatherproof to specification
• No overlapping or crossing of the heating cable.
nVent.com/RAYCHEM
|
17

3.6.5 Pipe support shoe
Figure 7
Side view
Support
shoe
Glass cloth
tape
(typical)
Pipe
View from under
Heating
cable
Pipe
• Refer to design specification for additional heating
cable length
• Fix with self-adhesive glass cloth tape
• Thermally insulate and weatherproof to specification
• No overlapping or crossing of the heating cable.
18 | nVent.com/RAYCHEM

4 COMPONENTS INSTALLATION
General notes:
Use the Design Specification to select required
components.
nVent RAYCHEM component kits (including power
connections, splices and end seals) must be used to
satisfy Standards and Approval Body requirements.
Installation instructions included in the kit must be
followed, including those for preparation of the heating
cable conductors for connections. Before assembly, use
the guide given in the instructions to ensure that the kit is
correct for the heating cable and environment.
• nVent RAYCHEM constant wattage parallel circuit
heating cables are parallel circuit design. Do not twist
the conductors together as this will result in a short
circuit.
4.1 Components required
• For the installation of all components refer to the
relevant component installation instructions.
• Required for each heating cable run:
Power connection and insulation entry kit
End seal.
• As required:
Accessories (pipe straps, fixing tape, support brackets,
labels, etc)
4.2 Component installation hints
• On horizontal pipes locate junction boxes below pipe
wherever possible.
• Locate junction boxes for easy access but not exposed
to mechanical abuse.
• Position junction boxes so that power cable and
heating cable entries do not point upwards.
• Fix lids in place where access not required.
• Confirm junction box stopping plugs are correct for
application and fixed firmly in place.
nVent.com/RAYCHEM
|
19

• Route heating cable from junction box to insulation
entry so as to avoid possible mechanical damage.
• Do not strain heating cable as it exits/enters junction
boxes and insulation entries.
• Ensure heating cable is fixed above pipe straps such as
used for junction box support brackets.
• Fix all low profile components in place with self-
adhesive glass cloth tape.
4.3 Typical Installations
to Power Supply
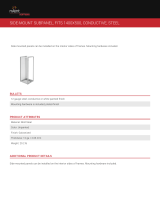
Wall Mounted
Thermostat
Junction Box and
support bracket
End
Seal
Heating
Cable
Power
Cable
Ambient Sensing System
Junction Box and
support bracket
(as required)
End
Seal
Heating
Cable
to Power
Supply
Pipe mounted thermostat
Line Sensing System
Junction Box and
support bracket
(as required)
End
Seal
Heating
Cable
to Power
Supply
pipe mounted thermostat
Line Sensing System with Temperature Limit
20 | nVent.com/RAYCHEM
/