Page is loading ...

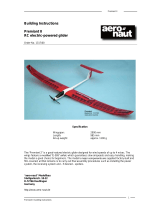
Aquila speed S2083
Technical data
Wing span: 2050 mm
Lenght: 1137 mm
Weight: 1300 g – 1800 g
Wing area: 35 dm2
Wing loading: 37 g/dm2 – 51 g/dm2
El. Motor “600” - 7/8 cells 2.000 mAh or
Mutron S89ATR600.20.10 - 10 cells
4/5 1650 mAh
Controls: Elevator, rudder, ailerons, (motor)
Introduction
Congratulations on buying your Aquila speed. Slope
soaring is a very special way of flying R/C models. Given
a good slope and a proficient glider, hours of exciting
flying is assured. Even if not for everybody and definitely
not for beginners, slope soaring means the possibility
to perform true aerobatics without the annoying noise
of the conventional engines. Your Aquila speed, with
its carefully studied aerodynamic design thanks to its
special elliptical wing will offer you a superior class
approach to this flying activity. Since a slope is
mandatory for slope soaring and not always available
for people living in flat areas, we have also supplied the
possibility to fly your Aquila speed electric. Its excellent
Astra© epoxy fuselage is really designed “around” the
electronic devices of the radio control offering the best
aerodynamic efficiency.
Before starting construction
Carefully study the exploded view as well as the building
sketches; read and understand the step by step
instructions before beginning construction, it is time
well spent. First, examine the kit to ensure nothing is
missing. Using the illustrations mark each wood part
with its corresponding number. Remove each die cut
part and sand it carefully.
Although the assembly of the model is not complicated,
it is important to carefully study the assembly
instructions and think over each step thoroughly
Equipment needed
Here’s all you need to build your Aquila speed:
- Modeling knife
- Scissors
- Sanding block and coarse, medium and fine
sandpaper
- Square
- Drill and a 1.5, 2 and 3 mm bit
- Masking tape
- Solder
- 5 minute Epoxy Glue and/or Cyanoacrylate
- Hobby saw
Glider or Electro Glider?
Aquila speed is a very versatile model. It can be
successfully flown as a tow line glider or as an electric
motor glider.
If you are building the tow line version disregard steps
5 to 7. For the electric powered version disregard steps
1 to 4.
Assembly:
1. Only for the glider version. Glue (Epoxy) the towing
hook supports [DC-9] together. Next glue towing hook
supports in place inside the fuselage [1] about 265 mm
from the nose.
2. Only for the glider version. With a drilling machine
and a 1,5 mm bit, drill a hole in the middle of the fuselage
bottom at about 280 - 285 mm from the nose. Screw the
tow hook [B1-6] to the fuselage.
3. Only for the glider version. Take from Die Cut sheet
the motor former [DC-1] and instead of removing the
wood in correspondence of the motor shaft hole, leave
it and fill with epoxy the gap of the die cut gluing them
also together. Sand slightly the glued formers in order
to fit well the inside of the fuselage [1] and glue (Epoxy)
them in place.
4. Only for the motor-glider version. Drill a 3 mm hole in
the nose of the fuselage [1] to pour the ballast (not
supplied) inside the nose of the fuselage.
5. Only for the motor-glider version. Following the cut
line on the fuselage nose, remove the nose with a hand
saw. It is better to leave some material and remove it
afterward with a sanding block.
6. Only for the motor-glider version. Glue (Epoxy) together
the two motor formers [DC-1]. With a 3 mm bit drill the
two holes for the motor fastening screws [B1-21].
Fasten the electric motor to the formers [DC-1] with the
two screws [B1-21]. Check the motor matches the
center hole. Glue (Epoxy) the motor support in place
inside the fuselage nose. Check that the motor matches
the spinner and that the alignment of the motor shaft is
precise.
7. Only for the motor-glider version. If you want to use a
more powerful motor it would be convenient to make
two cooling holes on the front part of the fuselage. As a
suggestion, you can follow the diagram. The hole on
the right side is about 12 mm more backward than the
hole on the left side.
8. With a 2 mm bit drill the holes in the servo tray [DC-
6] for the servo screws.
9. Here you can have an idea of the inner structure of
the battery and servos support, together with the formers
and the jig to locate the position of the battery support.
10. Glue (Epoxy, CA) together the battery support former

[DC-3] with the battery support [DC-2]. Glue in position the
battery support assembly inside the fuselage and, with the
help of the jig [DC-8] glue it in position. The end of the battery
suport is about 470 mm from the nose of the fuselage.
11. Glue (Epoxy, CA) together the servo’s cradle support [DC-
4] with the fuselage former [DC-5]. Insert the assembly into
the fuselage and glue (Epoxy) in position.
12. With a 3 mm bit carefully drill the exit holes for the rudder
and elevator’s linkage.
13. Insert the elevator and rudder outer tubing [B2-1], [B2-2]
into the exit holes of the fuselage and carefully glue (Epoxy)
it in place leaving a couple of cm extending from the fuselage.
14. Glue (Epoxy) together the two tailplane connecting rod
support [DC-7]. With a 3 mm bit drill a hole in the middle of
the tailplane connecting rod support [DC-7]. Glue (Epoxy)
the rod support [DC-7] inside the fuselage fin checking that
the hole is matching with the fin hole into which will be
inserted and glued in position the tailplane steel rod [B1-20]
checking that it is perpendicular both to the fin and both to
the length of the fuselage.
15. Check that the fin’s balsa trailing edge [B1-9] is matching
the fin’s slot and glue (Epoxy) it in place. When the resin has
cured, sand it flush to the fuselage’s fin.
16. With a sharpen balsa cutter cut on the fin the two slots for
the rudder’s hinges [B1-5]. Check the position with the
rudder’s pre-cut slots.
17. Glue (Epoxy) in place the two rudder’s hinges [B1-5]
checking that the rudder’s movement is free and no glue is
jamming the rudder [3] and the fin.
18. Install the nylon horn [B1-3] into the rudder [3] fastening it
by means of the horn nuts [B1-4].
19. Fasten the servos on their support [DC-6] with their screws
(not supplied).
20. Through the canopy’s opening insert the pushrods [B2-
1] and [B2-2] in the plastic tube. Fasten the “Z” end into the
servo arms and, by means of the transmitter center the ser-
vo in the neutral position.
21. Screw the snap-link [B1-13] into the threaten coupler [B1-
14] and connect it to the rudder’s control horn [B1-3] inserting
the pushrod coming out from the fuselage [B2-1] into the
hole of the threaten coupler [B1-14].
22. With the servo centered check that the rudder is centered
and solder or glue (Epoxy) the threaten coupler [B1-14] to the
rudder pushrod [B2-1].
23. Glue (Epoxy) the plastic tubes holders [B1-17] to the fuselage
sides and next glue (Epoxy) the plastic tubes [B2-1] and [B2-2]
to the groove in the holders and to the slots in the former [DC-3].
24. With a sharpen balsa cutter cut out the covering film over
the hole of the left horizontal tailplane [4]. Insert into the hole
of the tailplane [4] the fastening connector [B1-8] and insert
also the connecting rod [B1-1] into their holes.
25. When the connecting rod [B1-1] is fastened to the
connector [B1-8] with the help of the Allen screw [B1-7], glue
the connector to the tailplane. Take care to avoid that some
glue is also gluing the connecting rod. Glue has to be put
only on the connector’s sides and very sparingly.
26. When the glue has cured it is possible to release the
connecting rod loosening the screw [B1-7].
27. Glue now the connecting rod [B1-1] to the right tailplane
[5]. The exceeding part has to be about 60 mm. Install the
nylon horn [B1-3] into the right tailplane [5] fastening it by
means of the horn nuts [B1-4]
28. Complete the elevator with the fuselage and repeat the
point 21 – 22 to install the linkage.
29. Glue (Epoxy) in place the brass tube [B1-18] inserting it
first over the wing joiner [B2-3] and then inserting both of
them into the fuselage’s holes. Looking at the fuselage from
the front, check the alignment of the wing joiner rod which
has to be perpendicular to the fin. Check also that the brass
tube [B1-18] is flush with the outer surface on both sides of
the fuselage. If necessary, use a sanding block, to remove
any tubing.
30. Using the sanding block round one of each wing dowels
[B1-19]. Attach the the wing dowels to the wing, next attach
the wing to the fuselage using the wing joiner [B2-3] and
check the correct position of the wood wing dowels [B1-19].
Now carrefully glue (Epoxy) the wing dowels [B1-19] in the
holes on the both wings [2]. Check the correct position of the
wings.
31. With a sharp blade cut off the film over the holes for the
fastening screws, on the top of the wings [2].
32. Take the brass wing fastening insert [B1-12] and screw
temporary inside it the screw [B1-11]. Put some amount of
epoxy in the outer surface of the insert [B1-12] and inside the
wing’s hole. Using a screwdriver gently screw the assembly
into the wing. Allow the resin to cure and then remove the
screw [B1-11] by unscrewing it.
33. Attach the wings to the fuselage and check the alignment.
Fasten the steel wing joiner with screws [B1-7] using the
special allen wrench [B1-10].
34. Remove the tips of the nylon control horns [B1-3]
according the sketch. Insert the aileron control horns [B1-3]
into the pre-drilled holes and glue (Epoxy ) them in place.
35. Aileron servos needs a special long cable to connect
with the receiver. The cable is passing through the wing.
The aileron servo is fastened to the servo support by means
of a good bi-adhesive tape (not supplied)
36. Insert the “Z” bended connecting rod [B
1-15] into the servo arm. With the Tx on, center the servo and
scotch it to the servo support. Now screw the snap link [B1-
13] to the rod [B1-15] until it looks that when connected also
to the aileron control horn [B1-13] the aileron is in the neutral
position. Minor adjustment may be done screwing and
unscrewing the snap link over the rod.
Aquila speed S2083

12
34
56
78
265 mm
[1]
[DC - 9]
[B1 - 21]
[B1 - 6]
1,5 mm
280 - 285 mm
[1]
[1]
[1]
[1]
[DC - 1]
[DC - 1]
[1]
20 mm
8 mm
[1]
[DC - 6]

910
11 12
13 14
15 16
470 mm
[DC - 5]
[DC - 8]
[DC - 2]
[DC - 6]
[DC - 3]
[DC - 2]
[DC - 4]
[1]
[DC - 4]
[DC - 7]
[DC - 7]
[1]
[1]
[1]
[1]
90°
90°
[B1 - 9]
[1]
[1]
[B2 - 1]
[B1 - 20]

17 18
19 20
21 22
24
23
[B1 - 5]
[B1 - 3]
[3]
[1]
[1]
[1]
[1]
[B1 - 4]
[B2 - 1]
[B1 - 13]
[B1 - 14]
[B2 - 1]
[1] [B1 - 17]
[B1 - 17]
[B2 - 1]
[B1 - 7]
[B1 - 8]
[DC - 6]
[B2 - 1]
[B1 - 1]
[4]

26
27 28
29 30
31 32
25
[B1 - 4]
[B1 - 3]
[B1 - 1]
[B1 - 7]
[B1 - 18]
[B1 - 7]
[4]
[1]
[5]
[4]
[1]
[2]
[B1 - 1]
90°
[B2 - 3]
[2]
[B1 - 12]
[B1 - 19]
[B1 - 11]
[2]
60 mm
[5]

33 34
35 36
39
38
37
40
[2]
[B1 - 10]
[B1 - 7]
[B2 - 3]
8 mm
[B1 - 3]
[B1 - 15] [B1 - 13]
[B1 - 15]
[B1 - 13]
[B1 - 2]
[B1 - 2]
[2]
[1] Accu
S
Rx
Rg
M
[2]
[2]
Accu

41
45
44
43
42
47
46
[6]
S
Rx
M
[1]
[6]
45°
25°
25°
10°
10°
30°
3 mm
45°
70 - 75 mm
48
M
S
S
S
S
Rx
Accu
Reg
Reg
M

[B 2]
[B 1]
[B1 - 6]
[B1 - 4]
[B1 - 4]
[B1 - 5]
[B1 - 3]
[B1 - 3]
[B1 - 11]
[B1 - 15]
[B1 - 9]
[B1 - 21]
[B1 - 17]
[B1 - 10]
[B1 - 1]
[B1 - 20]
[B1 - 19]
[B1 - 18]
[B1 - 14]
[B1 - 13]
[B1 - 7]
[B1 - 12]
[B1 - 2]
[B1 - 16]
[B1 - 8]
[B2 - 2]
[B2 - 1]
[B2 - 3]
[2]
[6]
[5]
[4]
[3]
[1]
[2]

[DC 1]
[DC - 9]
[DC - 9]
[DC - 8]
[DC - 3]
[DC - 5]
[DC - 2]
[DC - 4]
[DC - 1]
[DC - 7]
[DC - 7]
[DC - 6]
[DC - 1]

37. Cut out the servo covers from the moulding [B1-2]. Sand
the edges.
38. Place servo covers over the servos. With a good bi-
adhesive tape secure them to the wing checking that the
pushrod is moving freely under them.
39. The motor battery may be slipped into its place through
the canopy opening.
40. Only for the motor-glider version. Refer to the drawing for
a recommended arrangement of equipment. You may lead
the receiver aerial out either from the top of fuselage behind
the canopy to the fin.
41. Only for the glider version. Refer to the drawing for a
recommended arrangement of equipment. You may lead the
receiver aerial out either from the top of fuselage behind the
canopy to the fin.
42. When connecting electronic equipment, follow the
instructions supplied.
43. With scissors, trim the canopy [6] along the outer line,
keeping a safety margin of about 1 or 2 mm. Sand the edges
of the canopy to fit the canopy to the fuselage.
44. Secure the canopy [6] with masking tape to the fuselage.
Drill two 1.5 mm holes at about 4 mm from the canopy rim
forward and rearward.
45. With the sharp kniwe cut out two slots into the canopy [6]
in order to extract the canopy by just pushing on it. This will
allow the canopy to be removed without unscrewing the
fastening screws [B1-16]
46. Use the details shown check the throw and direction of
the control surfaces. If necessary, change the position of
control rods on the servo control horns or control surface
horns.
47. Check the centre of gravity (CG) position with batteries in
place. It should lie 70 - 75 mm back from the wing leading
edge. For first flights it is recommended that the balance
point be at the forward position. Once the motor, speed
controller and receiver are installed, the battery pack can be
attached to the battery mounting plate using hook and loop
tape or similar. The battery pack can still be moved forward
or back on the battery mounting plate to allow minor changes
of the balance point. Add ballast to balance the model if
necessary.
48. If you have not applied all decals during the assembly,
now is the right moment to do so.
Flying the model.
The initial flights should take place in a complete calm or in
a very light breeze. Long grass is an advantage. Check the
model (wings, tail surfaces etc.), CG position, throw and
sense of deflection of the control surfaces and for smooth
operation of the motor / gearbox. Launch the model
horizontally or into a slight climb into wind, with the motor
running at full power. Allow the model to climb to a safe height,
reduce the throttle slightly and trim the model. Check the
response of the model to the control inputs. If your model
does not handle correctly, switch off the motor and land. If
you are a novice, ask a more experienced modeller for
assistance.
We wish you many successful flights and happy landings.
Warning!
This aircraft is designed to give you many enjoyable flights,
however if you exceed the specifications of the aircraft by
using a more powerful electric motor or more cells you may
compromise the structural integrity of the aircraft. Keep in
mind that good sense is always necessary for safe modeling
and safe flying.
The following parts are necessary to finish
the model but are not included in the kit:
-SPEED „600“ with spinner and folding propeller, S8025s
25A speed controller and a 7/8 cells 2-3000 mAh battery
pack or, for the state of the art electric flight:
- Mutron S89ATR600.20.10 with spinner and folding propeller
9”x 6” or 10”x”6, S88P25s 25A speed controller and a 10
cells 2/3 SC 1200 mAh battery pack
- 2 standard servos
- 2 mini servos
- 2 extension leads
- Battery charger
- RC system, minimum 4 channels
Content of the kit
No. Description Qty
1 Fuselage 1
2 Wing 2
3 Rudder 1
4 Left tailplane 2
5 Right tailplane 2
6 Canopy 1
Bag B1 1
Bag B2 1
Die cut DC1 1
Instruction manual 1
Decal sheet 1
S2083 Aquila speed

Scorpio s.r.l.
C.P. 750 - 38100 Trento
ITALY
Tel. +39 0461-823099
e-mail: [email protected]
Bag B1
No. Description Qty
B1-1 Tailplane conecting rod 1
B1-2 Servo cover 1
B1-3 Control horn 4
B1-4 Control horn nuts 8
B1-5 Nylon hinge 2
B1-6 Tow hook 1
B1-7 Allen screw 3
B1-8 Tailplane fastener insert 1
B1-9 Fin trailing edge 1
B1-10 Special allen wrench 1
B1-11 Temporary screw 2
B1-12 Wing fastener insert 2
B1-13 Snap link 4
B1-14 Linkage adapter 2
B1-15 Aileron pushrod 2
B1-16 Canopy screw 2
B1-17 Pushrod wood support 2
B1-18 Brass tube 1
B1-19 Wing dowel 2
B1-20 Tailplane main rod 1
B1-21 Motor screw 2
Bag B2
No. Description Qty
B2-1 Rudder pushrod 1
B2-2 Elevator pushrod 1
B2-3 Steel wing joiner 1
Die cut DC1
No. Description Qty
DC-1 Electric motor former 2
DC-2 Battery support 1
DC-3 Battery support former 1
DC-4 Servo cradle bearing 1
DC-5 Fuselage former 1
DC-6 Servo cradle 1
DC-7 Tailplane rod support 1
DC-8 Battery support reference jig 1
DC-9 Tow hook support 2
Aquila speed S2083
/