20
START
1
3
COLOUR
NIGHT
VIEW
QUICK
C.NIGHT
VIEW
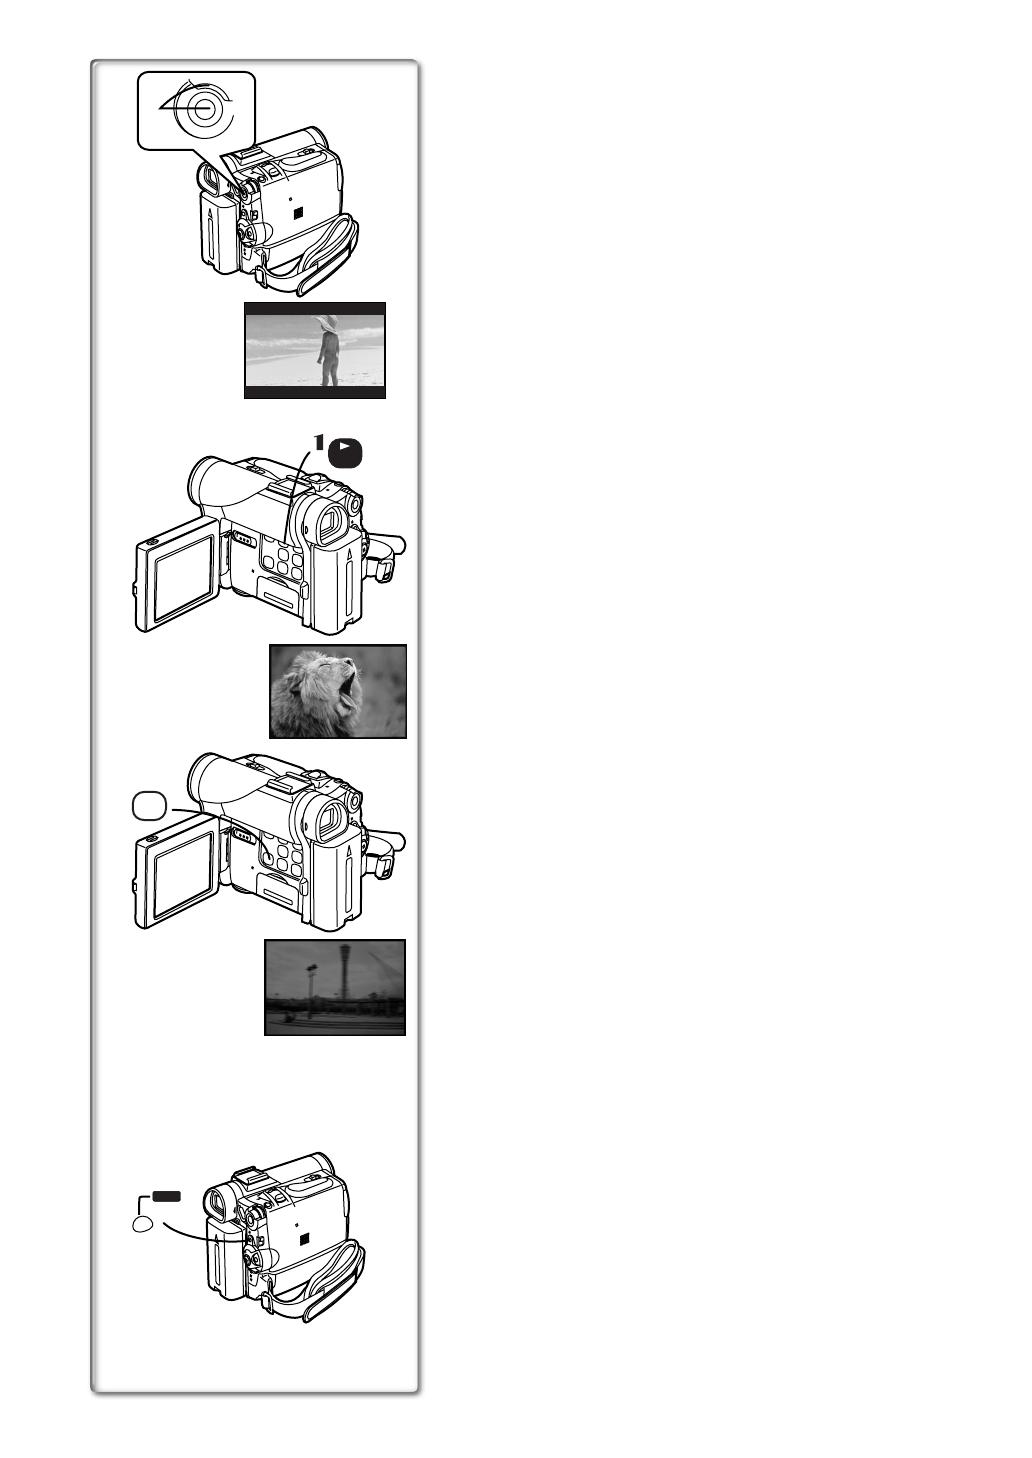
Cinema Function
This function is for recording in a cinema-like wide screen.
1
Set [CAMERA FUNCTIONS] >> [CAMERA SETUP] >> [CINEMA] >>
[ON].
≥
Black bars appear at the top and bottom of the screen.
1
To Cancel the Cinema Mode
Set [CAMERA FUNCTIONS] >> [CAMERA SETUP] >> [CINEMA] >> [OFF].
≥
For other notes concerning this item, see page 44.
~~~~~~~~~~~~~~~~~~~~~~~~~~~~
Backlight Compensation Function
This prevents a recording subject from being recorded darker in backlight. (Backlight is
the light that shines from behind a recording subject.)
1
11
1
Press the [BLC] Button.
≥
The [
ª
] Indication
2
flashes and then is displayed.
To Resume Normal Recording
Press the [BLC] Button.
≥
When the [BLC] Button is pressed, the entire screen becomes brighter.
≥
By operating the [OFF/ON/MODE] Switch, the Backlight Compensation Function is
cancelled.
≥
For other notes concerning this item, see page 44.
~~~~~~~~~~~~~~~~~~~~~~~~~~~~
Colour Night View Function
Objects can be brightly isolated from backgrounds with a luminance of 1 lux (where the
shutter speed is set to 1/2 second).
1
Press the [COLOUR NIGHT VIEW] Button.
≥
The [C.NIGHT VIEW] Indication
3
appears.
≥
In a bright place, the mode temporarily reverts to the normal recording mode.
≥
The recorded picture is presented in a time-lapse-like manner.
≥
Focusing must be adjusted manually.
≥
Use this function only in situations where there is limited light. Do not use it in brightly
lit places or aim at the sun. Otherwise, the Movie Camera will be seriously damaged.
≥
The Progressive Photoshot Function is automatically turned off.
≥
The Continuous Photoshot Function cannot be used.
≥
White Balance cannot be set.
≥
The electronic shutter cannot be adjusted.
≥
The Program AE or Digital Effect Modes in EFFECT1 cannot be set.
≥
The Image Stabilizer does not function.
≥
When recording with the Colour Night View Function, it is recommended to use the
tripod.
~~~~~~~~~~~~~~~~~~~~~~~~~~~~
Quick Start
Press the [QUICK START], and the Movie Camera will be ready for shooting in
approximately 1.5 seconds after the power is turned on.
When the Movie Camera is left in the pause status in shooting for 6 minutes, it will be
turned into the standby status of the Quick Start. To turn the power on again, turn the
power switch off and then turn it on again.
However, this function is not activated in the following cases even if the Quick Start
Recording Lamp lights:
≥
A tape is not inserted, while the tape mode is set.
≥
A Card is not inserted, while the Card mode is set.
If the [QUICK START] Button is pressed and held for approximately two seconds when
the Quick Start Recording Lamp lights, the lamp will go off and the power will completely
be turned off.
If the Movie Camera is not operated for approximately 30 minutes when the Quick Start
Recording Lamp lights, the lamp will go off and the power will completely be turned off.
≥
If the battery is replaced, etc. in the state of Quick Start ON, the Quick Start lamp will
light when the power is turned ON.
≥
During the Automatic White Balance Mode, the colour may be recorded unnaturally at
the beginning of the recording.
≥
The zoom magnification differs from when it is in the standby status and when the
recording starts.
1
CINEMA
M
E
N
U
1
2
ª
BLC


