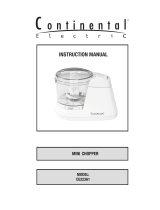
KALORIK - Team International Group Mixer CMM 39732 User manual

Category
Food processors
Type
User manual

This manual is also suitable for

Copies of the I/B. Please reproduce them without any
changes except under special instruction from Team
International BELGIUM. The pages must be reproduced
and folded in order to obtain a booklet A5 (+/- 148.5 mm
width x 210 mm height). When folding, make sure you
keep the good numbering when you turn the pages of
the I/B. Don’t change the page numbering. Keep the
language integrity. Print only what is inside the frame.
Front cover page (first page)
Assembly page 1/32
Fax +32 2 359 95 50
Multiuse 3-in-1 Stick
mixer set
3-en-1 Batidora uso
múltiple
Set Mixeur 3-en-1
multi-usages
CMM 39732
120V ~ 60Hz - 200W
www.KALORIK.com
Copies of the I/B. Please reproduce them without any
changes except under special instruction from Team
International BELGIUM. The pages must be reproduced
and folded in order to obtain a booklet A5 (+/- 148.5 mm
width x 210 mm height). When folding, make sure you
keep the good numbering when you turn the pages of
the I/B. Don’t change the page numbering. Keep the
language integrity. Print only what is inside the frame.
2 CMM 39732 - 120501
Assembly page 2/32
Fax +32 2 359 95 50
IMPORTANT SAFEGUARDS
When using electrical appliances, basic safety precautions should
always be followed, including the following:
1. READ ALL INSTRUCTIONS
2.
Check that the voltage in your home corresponds to that stated
on the rating plate of the appliance, before using.
3. To protect against electric shock do not immerse cord, plug, or
motor unit in water or other liquid.
4. Close supervision is necessary when the appliance is used by or
near children.
5. Unplug from outlet when not in use, before putting on or taking
off parts and before cleaning.
6. Avoid touching moving parts.
7. Do not operate any appliance with a damaged cord or plug or
after the appliance malfunctions, or is dropped or damaged in
any manner. Return appliance to the nearest authorized service
facility for examination, repair or electrical or mechanical
adjustment.
8. The use of accessory attachments not recommended by the
appliance manufacturer may cause injuries.
9. Do not use outdoors.
10. Do not let cord hang over edge of table or counter or touch hot
surfaces.
11. Do not place on or near a hot gas or electric burner, or in a
heated oven.
12. To disconnect, pull plug from the wall socket. Do not disconnect
with wet hands.
13. Remove the accessories from the motor unit before washing.
14. The blades of the stick mixer are sharp. Handle carefully.
15. Keep hands, hair, loose clothes and utensils away from moving
blades while processing food to reduce the risk of severe injury to
persons or damage to the appliance. A scraper may be used but
must be used only when the appliance is not running.
16. When mixing liquids, especially hot liquids, use a tall container or
make small quantities at a time to reduce spillage.
Copies of the I/B. Please reproduce them without any
changes except under special instruction from Team
International BELGIUM. The pages must be reproduced
and folded in order to obtain a booklet A5 (+/- 148.5 mm
width x 210 mm height). When folding, make sure you
keep the good numbering when you turn the pages of
the I/B. Don’t change the page numbering. Keep the
language integrity. Print only what is inside the frame.
3 CMM 39732 - 120501
Assembly page 3/32
Fax +32 2 359 95 50
Caution: Special Safeguards
Blender attachment
1. Always unplug the appliance before changing accessories or
approaching parts which move when in use.
2. Never touch the blades while the machine is plugged in.
3. Never blend hot oil or fat.
Chopper
1. Care is needed when handing the cutting blade, especially
when removing the blade from the bowl, emptying the bowl and
during cleaning. Do not touch the sharp blades!
2. Always remove the chopper blade before emptying the bowl.
3. Never remove the cover before the blade has completely
stopped.
SAVE THESE INSTRUCTIONS
HOUSEHOLD USE ONLY
POLARIZED PLUG INSTRUCTIONS
This appliances is equipped with a polarized plug (one blade is wider
than the other). To reduce the risk of electric shock, this plug will fit
into the polarized outlet only one way. If the plug does not properly
fit into the outlet at first, reverse it. If it still does not fit, contact a
competent qualified electrician. Do not attempt to modify the plug in
any way.
SHORT CORD INSTRUCTIONS
A short power supply cord is provided to reduce the hazards resulting
from becoming entangled in, or tripping over a longer cord.
Extension cords may be used if care is exercised in their use.
The electrical rating of the extension cord should be at least that
of the appliance. If the electrical rating of the extension cord is
too low, it could overheat and burn.
Copies of the I/B. Please reproduce them without any
changes except under special instruction from Team
International BELGIUM. The pages must be reproduced
and folded in order to obtain a booklet A5 (+/- 148.5 mm
width x 210 mm height). When folding, make sure you
keep the good numbering when you turn the pages of
the I/B. Don’t change the page numbering. Keep the
language integrity. Print only what is inside the frame.
4 CMM 39732 - 120501
Assembly page 4/32
Fax +32 2 359 95 50
The resulting extended cord should be arranged so that it will not
hang over the counter top or tabletop where it can be pulled on
by children or tripped over.
IMPORTANT INFORMATION
This appliance is not for professional use. You should follow the
requested breaks. Failure to follow this instruction carefully may result
in damage to the motor. Please refer to the rating label for the
maximum continuous usage time (KB xx min where xx is the maximum
usage time). The breaks should last at least 10 minutes.
Note: the KB indicates a maximum continuous motor usage time. In
general, this appliance is used using a pulse pattern, so the real
maximum usage time is actually much longer than the KB indicated
on the rating label.
PARTS DESCRIPTION
1. Stainless steel blade
2. Removable Stainless steel
shaft
3. Mixing cup
4. Chopper bowl with
stainless steel blade
5. Chopper lid
6. Accessories holder
7. Whisk base
8. Stainless steel whisk
9. Motor block / handle
10. Speed “I”
11. Speed “II”
1
2
3
4
5
9
10
11
6
7
8
Copies of the I/B. Please reproduce them without any
changes except under special instruction from Team
International BELGIUM. The pages must be reproduced
and folded in order to obtain a booklet A5 (+/- 148.5 mm
width x 210 mm height). When folding, make sure you
keep the good numbering when you turn the pages of
the I/B. Don’t change the page numbering. Keep the
language integrity. Print only what is inside the frame.
5 MS 39731 - 120501
Assembly page 5/32
Fax +32 2 359 95 50
HOW TO USE WITH THE BLENDER SHAFT
Your new stick mixer is convenient and easy to use, for powerful high
speed blending. It is great for shakes, soups, sauces, omelettes and
much, much more.
Before using for the first time, the appliance should be cleaned
with a damp cloth. Ensure the unit is unplugged first!
Screw the shaft (2) onto the screw thread at the bottom of the
motor unit (9). For this, hold the motor block and turn the shaft
counter clockwise until it locks in. Gentle pressure by hand will
ensure that the shaft is fully tightened on to the motor unit.
Put the ingredients into a suitable container such as a tall mixing
bowl, cooking pan or mixing cup. Do not overfill, to avoid
splashing when the motor is switched on.
Plug into a wall outlet.
Put the shaft’s head vertically into the ingredients before pressing
one of the switches. This will prevent splashing when the motor is
switched on.
Switch on motor by choosing “Speed I“ (10) or “Speed II” (11)
and blend but remember to use for no longer than 1 minute of
continuous motor use. The motor must then be rested for 10
minutes.
Note: we recommend starting with the lower speed setting (“I”) and
then increase the blade rotation speed by selecting speed “II” if
needed.
Tips:
Never fill the mixing cup to more than 2/3 full, to prevent over
flowing.
Always blend ingredients together with water or other liquid with
the stick blender.
Do not use the stick blender to blend dry, hard foods only, such
as coffee beans, ice cubes, sugar, cereals, chocolate etc.
Always use the appliance on a secure, dry level surface.
Copies of the I/B. Please reproduce them without any
changes except under special instruction from Team
International BELGIUM. The pages must be reproduced
and folded in order to obtain a booklet A5 (+/- 148.5 mm
width x 210 mm height). When folding, make sure you
keep the good numbering when you turn the pages of
the I/B. Don’t change the page numbering. Keep the
language integrity. Print only what is inside the frame.
6 MS 39731 - 120501
Assembly page 6/32
Fax +32 2 359 95 50
HOW TO USE WITH THE CHOPPER BOWL
Make sure the motor block is disconnected from the power
outlet.
Place the chopping blade on the center pin inside the chopper
bowl (4).
handle with caution because it is sharp!
Place the chopper bowl on an anti-slip pad.
Add food in chopper bowl, such as meat, cheese, onions, herbs,
garlic, bread crumbs or crackers, etc.
Put the chopper lid (5) on the chopper bowl (4), by inserting the
grooves on the side of the lid into the pins inside the wall of the
bowl, and locking it with a twisting motion clockwise.
Place the motor block (9) onto the chopper’s lid, and lock it in
place by applying a gentle twisting motion clockwise.
Plug the appliance into a wall outlet.
Pulse on any switch, “Speed 1” (10) or “Speed II” (11) to operate
the chopper. During the processing, hold the motor unit with one
hand and the chopper bowl with the other.
After use, unplug it and take the motor unit off of the chopper
cover (with a counter clockwise twisting motion); then remove
the chopper lid (also with a counter clockwise twisting motion)
make sure beforehand that the blades are completely stopped -
Carefully remove the blade
handle with caution because it is
sharp!
Remove the processed food from the bowl.
Note: remember to use for no longer than 1 minute of continuous
motor use. The motor must then be rested for 10 minutes. Keep food
quantity to process under 1 lb. (450g).
Copies of the I/B. Please reproduce them without any
changes except under special instruction from Team
International BELGIUM. The pages must be reproduced
and folded in order to obtain a booklet A5 (+/- 148.5 mm
width x 210 mm height). When folding, make sure you
keep the good numbering when you turn the pages of
the I/B. Don’t change the page numbering. Keep the
language integrity. Print only what is inside the frame.
7 MS 39731 - 120501
Assembly page 7/32
Fax +32 2 359 95 50
HOW TO USE WITH THE WHISK ATTACHEMENT
Make sure the motor block is disconnected from the power
outlet.
Insert the stainless steel whisk (8) gently on its base (7), until you
hear a click sound, indicating that the whisk is securely inserted.
Screw the whisk assembly (7) + (8) onto the screw thread at the
bottom of the motor unit. For this, hold the motor block and turn
the whisk assembly counter clockwise until it locks in. Gentle
pressure by hand will ensure that the whisk assembly is fully
tightened on to the motor unit.
Put the ingredients into a suitable container such as a tall mixing
bowl, cooking pan or mixing cup. Do not overfill, to avoid
splashing when the motor is switched on.
Plug the appliance into a wall outlet.
Put the whisk vertically into the ingredients before pressing one of
the switches. This will prevent splashing when the motor is
switched on.
Switch on motor by choosing “Speed I“ or “Speed II” and blend,
but remember to use for no longer than 1 minute of continuous
motor use. The motor must then be rested for 10 minutes.
CLEANING
Caution: Always unplug the unit before cleaning.
The motor unit should only be wiped down with a moist cloth.
Unscrew the shaft, or the whisk assembly, from the screw thread
at the bottom of the motor unit, by holding the motor block and
gently turning the shaft clockwise to dis-assemble it.
Wash the shaft under running water immediately after use. If it is
very dirty, it can be washed in warm soapy water.
Dry the detachable shaft thoroughly after washing.
The mixing cup, the chopper bowl, the chopper blade and the
stainless steel whisk (without its base) are dishwasher safe, or can
be cleaned in warm soapy water.
The chopper lid (5) and the whisk base (7) may be rinsed under
the tap, but do not immerse in water.
NEVER IMMERSE THE MOTOR UNIT IN WATER OR ANY LIQUID!
Copies of the I/B. Please reproduce them without any
changes except under special instruction from Team
International BELGIUM. The pages must be reproduced
and folded in order to obtain a booklet A5 (+/- 148.5 mm
width x 210 mm height). When folding, make sure you
keep the good numbering when you turn the pages of
the I/B. Don’t change the page numbering. Keep the
language integrity. Print only what is inside the frame.
8 MS 39731 - 120501
Assembly page 8/32
Fax +32 2 359 95 50
STORAGE
To store all the accessories and the unit cleanly and safely, please
proceed as follows:
Assemble the chopper, as explained in the paragraph “How to
use with the Chopper bowl”.
Place the accessory holder (6), centred on the lid of the
chopper.
Place the motor block, as explained in the paragraph “How to
use with the Chopper bowl”.
Place the whisk assembly on one of the domes of the accessory
holder, and lock it in place with a clockwise twisting motion.
Place the blending shaft on the other dome, and lock it in place
with a clockwise twisting motion.
To disassemble, proceed with reverse action and order.
Alternatively, you can hang the motor block with only the
blending shaft attached to it, using the hanging loop located
where the power cord meets the motor block.
NOTE: NEVER PUT THE MIXING CUP INTO THE MICROWAVE
Copies of the I/B. Please reproduce them without any
changes except under special instruction from Team
International BELGIUM. The pages must be reproduced
and folded in order to obtain a booklet A5 (+/- 148.5 mm
width x 210 mm height). When folding, make sure you
keep the good numbering when you turn the pages of
the I/B. Don’t change the page numbering. Keep the
language integrity. Print only what is inside the frame.
9 MS 39731 - 120501
Assembly page 9/32
Fax +32 2 359 95 50
WARRANTY
We suggest that you complete and return the enclosed Product
Registration Card promptly to facilitate verification of the date of
original purchase. However, return of the Product Registration Card is
not a condition of these warranties. You can also fill out this warranty
card online, at the following address: www.KALORIK.com
This KALORIK product is warranted in the U.S.A. for 1 year from the
date of purchase against defects in material and workmanship. This
warranty is not transferable. Keep the original sales receipt. Proof of
purchase is required to obtain warranty performance.
During this period, if the KALORIK product, upon inspection by
KALORIK, is proven defective, it will be repaired or replaced, at
Kalorik’s option, without charge to the customer. If a replacement
product is sent, it will carry the remaining warranty of the original
product.
This warranty does not apply to any defect arising from a buyer's or
user's misuse of the product, negligence, failure to follow KALORIK
instructions noted in the user’s manual, use on current or voltage
other than that stamped on the product, wear and tear, alteration
or repair not authorized by KALORIK, or use for commercial purposes.
There is no warranty for glass parts, glass containers, filter basket,
blades and agitators, and accessories in general. There is also no
warranty for parts lost by the user.
ANY WARRANTY OF MERCHANTABILITY OR FITNESS WITH RESPECT TO
THIS PRODUCT IS ALSO LIMITED TO THE ONE YEAR LIMITED WARRANTY
PERIOD.
Some states do not allow limitation on how long an implied warranty
lasts or do not allow the exclusion of incidental or consequential
damages, so the above limitations may not apply to you. This
warranty gives you specific legal rights, and you may also have other
rights which vary from state to state.
Copies of the I/B. Please reproduce them without any
changes except under special instruction from Team
International BELGIUM. The pages must be reproduced
and folded in order to obtain a booklet A5 (+/- 148.5 mm
width x 210 mm height). When folding, make sure you
keep the good numbering when you turn the pages of
the I/B. Don’t change the page numbering. Keep the
language integrity. Print only what is inside the frame.
10 MS 39731 - 120501
Assembly page 10/32
Fax +32 2 359 95 50
If the appliance should become defective within the warranty
period and more than 30 days after date of purchase, do not return
the appliance to the store: often, our Customer Service
Representatives can help solve the problem without having the
product serviced. If servicing is needed, a Representative can
confirm whether the product is under warranty and direct you to the
nearest service location.
If this is the case, bring the product, or send it, postage prepaid by
the user (all Kalorik customers are responsible for the initial shipment
back to the warranty center), along with proof of purchase and a
return authorization number indicated on the outer package, given
by our Customer Service Representatives. Send to the authorized
KALORIK Service Center (please visit our website at
www.KALORIK.com or call our Customer Service Department for the
address of our authorized KALORIK Service Center).
When sending the product, please include a letter explaining the
nature of the claimed defect.
If you have additional questions, please call our Customer Service
Department (please see below for complete contact information),
Monday through Thursday from 9:00am - 5:00pm (EST) and Friday
from 9:00am - 4:00pm (EST). Please note hours are subject to change.
If you would like to write, please send your letter to:
KALORIK Customer Service Department
Team International Group of America Inc.
1400 N.W 159th Street, Suite 102
Miami Gardens, FL 33169 USA
Or call:
Toll Free: +1 888-521-TEAM / +1 888-KALORIK
Only letters can be accepted at this address above. Shipments and
packages that do not have a return authorization number will be
refused.
Copies of the I/B. Please reproduce them without any
changes except under special instruction from Team
International BELGIUM. The pages must be reproduced
and folded in order to obtain a booklet A5 (+/- 148.5 mm
width x 210 mm height). When folding, make sure you
keep the good numbering when you turn the pages of
the I/B. Don’t change the page numbering. Keep the
language integrity. Print only what is inside the frame.
12 MS 39731 - 120501
Assembly page 12/32
Fax +32 2 359 95 50
o daños al aparato. Puede utilizar un raspador sólo cuando el
aparato esté desenchufado.
16. Cuando misture líquidos, especialmente líquidos calientes, utilice
un recipiente alto o prepare pequeñas cantidades para evitar
derrame.
Atención: Precauciones especiales
Varilla de la batidora:
1. Desenchufe siempre su aparato antes de cambiar los accesorios
o si necesita acercarse o tocar las piezas que se mueven con el
uso.
2. No toque nunca las cuchillas mientras el aparato este
enchufado.
3. No mezcle o bata nunca aceite o grasa caliente.
Picadora:
1. Hay que tener mucho cuidado cuando se maneja la cuchilla de
la picadora, especialmente cuando se quita de la taza, se vacía
el recipiente y se procede a su limpieza. Las cuchillas están muy
afiladas.
2. Retire siempre la cuchilla del recipiente antes de vaciarlo.
3. No quite nunca la tapa antes de que la cuchilla se haya
detenido completamente.
GUARDE ESTAS INSTRUCCIONES
SOLAMENTE PARA USO DOMESTICO
Copies of the I/B. Please reproduce them without any
changes except under special instruction from Team
International BELGIUM. The pages must be reproduced
and folded in order to obtain a booklet A5 (+/- 148.5 mm
width x 210 mm height). When folding, make sure you
keep the good numbering when you turn the pages of
the I/B. Don’t change the page numbering. Keep the
language integrity. Print only what is inside the frame.
14 MS 39731 - 120501
Assembly page 14/32
Fax +32 2 359 95 50
PARTES
1. Cuchilla de acero
inoxidable
2. Varilla desmontable
3. Vaso
4. Vaso de la picadora
con cuchilla de acero
inoxidable.
5. Tapa de la picadora
6. Soporte de los
accesorios
7. Base pie batidor
8. Batidor de acero
inoxidable
9. Motor
10. Velocidad “I”
11. Velocidad “II”
MODO DE EMPLEO CON LA VARILLA
Fácil, práctica y simple de limpiar, esta batidora es ideal para batir
leche, sopas, huevos, etc.
Antes de utilizar el aparato por primera vez, la varilla debe ser
limpiada con un paño húmedo.
Atornille la parte separable dentro de la rosca en la parte
inferior del bloque motor girando hacia la derecha hasta que
quede bloqueada. Haga una leve presión sólo para
asegurarse de que la varilla está totalmente acoplada a la
unidad del motor
Vierta los ingredientes en el vaso batidor o en otro recipiente
vigilando las cantidades para evitar salpicaduras.
Conecte la clavija a la red eléctrica.
Introduzca la varilla del aparato verticalmente dentro del vaso
donde se encuentran los ingredientes antes de presionar uno
de los interruptores “Velocidad I” o “Velocidad II”. Esto evitará
salpicaduras cuando el motor esté en marcha.
1
2
3
4
5
9
10
11
6
7
8
Copies of the I/B. Please reproduce them without any
changes except under special instruction from Team
International BELGIUM. The pages must be reproduced
and folded in order to obtain a booklet A5 (+/- 148.5
mm width x 210 mm height). When folding, make sure
you keep the good numbering when you turn the
pages of the I/B. Don’t change the page numbering.
Keep the language integrity. Print only what is inside
the frame.
21 MS 39731 - 120501
Assembly page 21/32
Fax +32 2 359 95 50
13. Retirez les accessoires du bloc moteur avant le nettoyage.
14. Les lames sont coupantes ; manipulez-les prudemment.
15. Gardez vos mains, cheveux, vêtements et/ou tout ustensile hors
du récipient pendant le fonctionnement de l’appareil afin
d’éviter de graves blessures et tout risque d’endommager
l’appareil. Un grattoir (pour aider à nettoyer les lames) peut
être utilisé mais seulement lorsque l’appareil est débranché.
16. Pour mixer des liquides, et tout particulièrement des liquides
chauds, utilisez un récipient avec des bords haut, ou procédez
avec de petites quantités à chaque fois pour éviter tout risque
de projection.
Attention : Instructions Spéciales
Pied pour le mixage
1. Débranchez toujours l’appareil avant de changer les
accessoires ou d’approcher des parties qui pourraient entrer en
mouvement.
2. Ne touchez jamais les lames quand lappareil est connecté à
une prise de courant.
3. Ne mixez jamais de l’huile chaude ou de la graisse chaude.
Hachoir
1. Faites particulièrement attention en manipulant la lame,
particulièrement en la retirant du bol, en vidant le bol et
pendant le nettoyage. Ne touchez pas les lames, elles sont
tranchantes !
2. Retirez toujours la lame avant de vider le contenu du bol.
3. Ne retirez jamais le couvercle du hachoir avant l’arrêt complet
des lames.
CONSERVEZ CES INSTRUCTIONS
USAGE DOMESTIQUE UNIQUEMENT
Copies of the I/B. Please reproduce them without any
changes except under special instruction from Team
International BELGIUM. The pages must be reproduced
and folded in order to obtain a booklet A5 (+/- 148.5
mm width x 210 mm height). When folding, make sure
you keep the good numbering when you turn the
pages of the I/B. Don’t change the page numbering.
Keep the language integrity. Print only what is inside
the frame.
23 MS 39731 - 120501
Assembly page 23/32
Fax +32 2 359 95 50
DESCRIPTION
1. Lame en acier
inoxydable
2. Pied amovible en
acier inoxydable
3. Gobelet de mixage
4. Hachoir avec lame
en acier inoxydable
5. Couvercle du
hachoir
6. Porte-accessoires
7. Base pour le fouet
8. Fouet en acier
inoxydable
9. Bloc-moteur
10. Vitesse “I”
11. Vitesse “II”
UTILISATION AVEC LE PIED DE MIXAGE
Facile, pratique et simple à nettoyer, ce mixeur convient
parfaitement pour préparer vos milk-shakes, soupes, purées,
omelettes et bien d’autres recettes encore !
Avant la première utilisation, l'appareil doit être nettoyé avec un
linge ou papier absorbant légèrement humide.
Vissez le pied sur le pas de vis situé au bas du moteur. Pour cela,
maintenez le bloc moteur et donnez un mouvement de rotation
au pied en acier, dans le sens contraire des aiguilles d’une
montre, jusqu’à ce qu’il soit verrouillé. Une légère pression de la
main garantira que le pied soit bien fixé au bloc-moteur.
Versez les ingrédients dans le gobelet fourni ou dans un autre
récipient à rebord haut, en dosant de façon à ne pas dépasser
un niveau tel que vous risqueriez d’être éclaboussé au moment
du démarrage du moteur!
1
2
3
4
5
9
10
11
6
7
8
Copies of the I/B. Please reproduce them without any
changes except under special instruction from Team
International BELGIUM. The pages must be reproduced
and folded in order to obtain a booklet A5 (+/- 148.5 mm
width x 210 mm height). When folding, make sure you
keep the good numbering when you turn the pages of
the I/B. Don’t change the page numbering. Keep the
language integrity. Print only what is inside the frame.
27 MS 39731 - 120501
Assembly page 27/32
Fax +32 2 359 95 50
Placez l’assemblage du fouet et de sa base (7) + (8) sur un des
dômes du porte-accessoires, et verrouillez-le en y donnant un
mouvement de rotation dans le sens des aiguilles d’une montre.
Placez le pied de mixage sur l’autre dôme, et verrouillez-le en y
donnant un mouvement de rotation dans le sens des aiguilles
d’une montre.
Pour démonter, procédez dans le sens et dans l’ordre inverse.
Sinon, vous pouvez également suspendre à un crochet le bloc
moteur (seulement avec le pied de mixage assemblé), en
utilisant l’anneau de suspension qui se situe à l’endroit où le
cordon d’alimentation rejoint le bloc-moteur.
NOTE : NE METTEZ JAMAIS LE GOBELET AU FOUR MICRO-ONDES
Copies of the I/B. Please reproduce them without any
changes except under special instruction from Team
International BELGIUM. The pages must be reproduced
and folded in order to obtain a booklet A5 (+/- 148.5 mm
width x 210 mm height). When folding, make sure you
keep the good numbering when you turn the pages of
the I/B. Don’t change the page numbering. Keep the
language integrity. Print only what is inside the frame.
30 MS 39731 - 120501
Assembly page 30/32
Fax +32 2 359 95 50
NOTES:
Copies of the I/B. Please reproduce them without any
changes except under special instruction from Team
International BELGIUM. The pages must be reproduced
and folded in order to obtain a booklet A5 (+/- 148.5 mm
width x 210 mm height). When folding, make sure you
keep the good numbering when you turn the pages of
the I/B. Don’t change the page numbering. Keep the
language integrity. Print only what is inside the frame.
31 MS 39731 - 120501
Assembly page 31/32
Fax +32 2 359 95 50
NOTES:
Copies of the I/B. Please reproduce them without any
changes except under special instruction from Team
International BELGIUM. The pages must be reproduced
and folded in order to obtain a booklet A5 (+/- 148.5 mm
width x 210 mm height). When folding, make sure you
keep the good numbering when you turn the pages of
the I/B. Don’t change the page numbering. Keep the
language integrity. Print only what is inside the frame.
32 MS 39731 - 120501
Assembly page 32/32
Fax +32 2 359 95 50
NOTES:
  • Page 1 1
  • Page 2 2
  • Page 3 3
  • Page 4 4
  • Page 5 5
  • Page 6 6
  • Page 7 7
  • Page 8 8
  • Page 9 9
  • Page 10 10
  • Page 11 11
  • Page 12 12
  • Page 13 13
  • Page 14 14
  • Page 15 15
  • Page 16 16
  • Page 17 17
  • Page 18 18
  • Page 19 19
  • Page 20 20
  • Page 21 21
  • Page 22 22
  • Page 23 23
  • Page 24 24
  • Page 25 25
  • Page 26 26
  • Page 27 27
  • Page 28 28
  • Page 29 29
  • Page 30 30
  • Page 31 31
  • Page 32 32

KALORIK - Team International Group Mixer CMM 39732 User manual

Category
Food processors
Type
User manual
This manual is also suitable for

Ask a question and I''ll find the answer in the document

Finding information in a document is now easier with AI