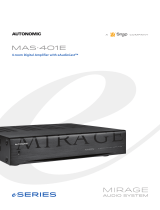
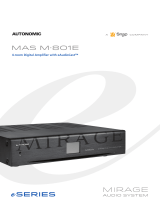
Autonomic AU-M-801E Quick start guide

Type
Quick start guide

This manual is also suitable for

Soundbar Quick Start Guide
Study Basement Guest Room Patio
IR OUTPUTS
120e Digital Amplifier
Autonomic Music Streamer
Display (optional)
Audio
LAN
KEY
Connect Devices
Connect Ethernet and power to all eSeries streamers and amps.
When using eSeries ampliers, no physical audio connection is
necessary.
Non-eSeries and non-Autonomic ampliers should be connected to
the streamer’s physical audio outputs.
Discover and Update Devices
1. Go to setup.tunebridge.com. from a browser or mobile device
that is connected to the same network. All local streamers will be
discovered.
2. Click on Cong next to a streamer to open it’s UI.
3. Without making any other changes, click on the Firmware Tab
once the UI opens to update the rmware if an update is available.
4. Repeat steps 1-3 for each streamer if more than one is in the
system.
Discover Devices and Play Music
1. Go to setup.tunebridge.com. from a browser or mobile device
that is connected to the same network. All local streamers will be
discovered.
2. Click Control next to any of the discovered streamers. The Mirage
Web UI will load.
You may need to enable Flash.
3. Turn on the zone you want to play content in.
If using eSeries amps:
Select Zones, then click the power button next to the zone you
want to turn on.
If using non-eSeries or non-Autonomic ampliers:
Click Sources, then select player A.
4. Click Streaming.
5. Scroll the services list down and select TuneIn Radio.
(TuneIn is a free service that does not require any login).
6. Select Local Radio.
7. Click FM.
8. Click one of the rst stations in the list.
9. Congratulations! Music should begin playing in the previously
selected zone (or the rst physical output if physically connected
amp).
©2006–2018 Autonomic Controls, Inc. Autonomic and TuneBridge are registered trademarks of Autonomic Controls, Inc. All other
trademarks are property of their respective owners. 190301
autonomic-controls.com
Add Services
1. Go to setup.tunebridge.com and click on the Cong link next to
your streamer.
2. Go to the Content Tab.
3. Scroll down to the Online Credentials section.
4. Click the gear beside the service you want to add and select Add
Account.
5. Follow the prompts to login to your service account.
Note: Ensure pop-ups are not blocked as some services require a
pop-up window.
Name Zones
1. Go to setup.tunebridge.com and click on the Cong link next to
your streamer.
2. Go to the System Tab.
3. If using eSeries amps:
Scroll down to the Ampliers section. This section will list all
discovered amps with the same system ID as your streamer (default
system ID is 1).
Select the gear next to your amplier and select Edit.
Under Zone Name, click the zone you want to change
Type the new name. You must press Enter for the changes to take
effect.
Click Done.
4. If using non-eSeries or non-Autonomic ampliers:
Scroll down to the Streamers section.
Select the gear next to your streamer and select Edit.
Under Output Name, click the Player you want to change.
Type the new name. You must press Enter for the changes to take
effect.
Repeat for other players.
For all other conguration details, view the user’s manual on the product
support tab at www.snapav.com.
TuneBridge
Control support for iPhone, iPad and Android devices is available by
downloading the Tunebridge app from the Apple App Store or Google
Play store.
  • Page 1 1
  • Page 2 2

Autonomic AU-M-801E Quick start guide

Type
Quick start guide
This manual is also suitable for

Ask a question and I''ll find the answer in the document

Finding information in a document is now easier with AI