Unbranded Gas Gun Motor Kit, M1 Series, CMF Series Installation guide
- Type
- Installation guide

Field Replacement Gas Gun Motor Kit, #904478
Installation Instructions
For Gas Gun Motor, M1 and CMF Series
IMPORTANT: Read these instructions and the main furnace Installation Instructions carefully before
beginning the replacement.
Contents of kits
1. Installation Instructions, #708510
2. 1- Motor, #622065
3. 1-Motor Bracket, #289141
4. 6-Screws
1/8” Drill Holes
2.25
2.25
1/8” Drill Holes
.20
.75
.25
.75
WARNING:
The replacement motor must be installed by a
qualified service technician in accordance with
these instructions and all codes having jurisdiction.
Failure to follow these instructions could result
in serious injury, property damage, or death. The
qualified service technician performing this work
assumes responsibility for this replacement.
GENERAL
These instructions are primarily intend to assist qualified
individuals with service experience. This kit to be used for
field replacement of combustion motor for manufactured
housing furnaces. These instructions are intended to
guide replacing of old motor with new motor that includes
a mounting bracket. However, these instructions do not
include disassembling of existing motor from the fan as-
sembly. Some local codes require licensed installation/
service personnel for installation of this type equipment.
Figure: Intermediate Mounting Bracket Assembly

DISASSEMBLING THE BURNER
A. Turn off gas shut-off valve and electric power
outside furnace.
B. Turn down thermo stat below room temperature.
C. Unplug burner cord from furnace
D. Disconnect thermo stat wires if applicable
E. Disconnect gas line.
F. Remove three burner mounting nuts.
G. Carefully remove burner from furnace.
INSTALLING THE KIT
A. Remove old motor from the fan motor assembly
B. Remove motor from junction box by removing
mounting strap.
C. Install new motor to the fan assembly
D. Assemble supplied bracket on the motor bracket
with two screws.
E. Remove the strap from the junction box bottom
by using tin snips. Make sure any remaining strap
lies flat on junction box.
F. Mark hole locations to dimensions shown in
Figure.
G. Drill the holes by using 1/8" bit.
H. Assemble junction box with the bracket that
installed on the motor bracket with four screws.
(See Figure). Note: Ensure if wires inside boxes
are not damage while drilling and screwing.
I. Reassemble all the items that were removed with
reverse action
CHECKING BURNER
A. Check gas line using an approved leak test
method. Note: Do not use flame
B. Run furnace per the main installation instructions
at least three times for 5 minutes before leaving
the home.
7085100 (NEW)
Specifications & illustrations subject to change without notice or incurring obligations (05/15).
O’Fallon, MO, © Nortek Global HVAC LLC 2015. All Rights Reserved.
-
 1
1
-
 2
2


Unbranded Gas Gun Motor Kit, M1 Series, CMF Series Installation guide
- Type
- Installation guide
Ask a question and I''ll find the answer in the document
Finding information in a document is now easier with AI
Related papers
Other documents
-
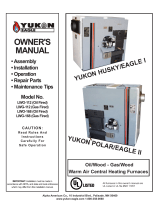 Yukon Advanced Optics Oil Furnace User manual
-
Thermo Pride GLC Owner's manual
-
Yukon LWG-168 Owner's manual
-
Bryant 393U User manual
-
-
Empire FAW-40-IP Owner's manual
-
-
 Louisville Tin and Stove W255F User manual
-
Goodman Mfg VC8 User manual
-
Rheem R96VA0852521MSBRHC Installation guide

