Page is loading ...

Installation and Operation Manual
X-DPT-Profibus-SLA5800-SLAMf-Series-RevB-MFC-PC-RT-eng
Part Number: 541B191AAG
March, 2015
Brooks
®
SLA Series-Revision B Profibus
Supplemental Manual for
Profibus Communications for
Brooks
®
MFCs/MFMs/PCs/RTs
For SLA5800/SLAMf Series
Brooks
®
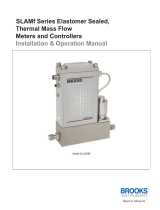
SLAMf Series
with Profibus Communications
Brooks
®
SLA5800 Series
with Profibus Communications

Installation and Operation Manual
X-DPT-Profibus-SLA5800-SLAMf-Series-RevB-MFC-PC-RT-eng
Part Number: 541B191AAG
March, 2015
Brooks
®
SLA Series-Revision B Profibus

Installation and Operation Manual
X-DPT-Profibus-SLA5800-SLAMf-Series-RevB-MFC-PC-RT-eng
Part Number: 541B191AAG
March, 2015
Brooks
®
SLA Series-Revision B Profibus
Dear Customer,
We recommend that you read this manual in its entirety as this will enable efficient and proper use of the RS485
thermal mass flow controllers and meters. Should you require any additional information concerning the RS485
thermal mass flow controllers and meters, please feel free to contact your local Brooks Sales and Service Office;
see back cover for contact information, or visit us on the web at www.BrooksInstrument.com. We appreciate this
opportunity to service your fluid measurement and control requirements, and trust that we will be able to provide you
with further assistance in future.
Yours sincerely,
Brooks Instrument

Installation and Operation Manual
X-DPT-Profibus-SLA5800-SLAMf-Series-RevB-MFC-PC-RT-eng
Part Number: 541B191AAG
March, 2015
Brooks
®
SLA Series-Revision B Profibus
THIS PAGE WAS
INTENTIONALLY
LEFT BLANK

Installation and Operation Manual
X-DPT-Profibus-SLA5800-SLAMf-Series-RevB-MFC-PC-RT-eng
Part Number: 541B191AAG
March, 2015
4
Table of Contents
1 Introduction........................................................................................................................ 5
2 Definition of Terms ........................................................................................................... 5
3 Before Starting ................................................................................................................... 6
3.1 Background & Assumptions ....................................................................................... 6
3.2 Numbers ..................................................................................................................... 6
4 Quick Start ......................................................................................................................... 7
4.1 Supported Baud rates .................................................................................................. 7
4.2 Address selection ........................................................................................................ 7
4.3 Bus and Device LEDs ................................................................................................ 8
4.4 Power Supply and analog I/O ..................................................................................... 9
5 Slave Configuration ........................................................................................................... 9
5.1 Introduction ................................................................................................................ 9
5.2 Parameterization of the slave .................................................................................... 10
5.3 Configuration of the slave ........................................................................................ 12
5.4 Device Diagnostics ................................................................................................... 19
6 DPV0 Cyclic data exchange ............................................................................................ 20
7 DPV1 Acyclic data communication ................................................................................ 21
7.1 Device Block Model ................................................................................................. 21
7.2 Slot and Index (attribute) mapping ........................................................................... 22
7.3 Identification & Maintenance Function (I&M0) ..................................................... 23
7.4 TMF Device Physical Block (Slot 0; PB_1) ............................................................ 24
7.5 TMF Sensor Transducer Block (Slot 7; TB_1) ........................................................ 25
7.5.1
Note: Attribute 0 ............................................................................................... 26
7.5.2 Note: Attribute 1 ............................................................................................... 26
7.5.3 Note: Attribute 2 ............................................................................................... 27
7.5.4 Note: Attribute 3 ............................................................................................... 27
7.6 Pressure Transducer Block (Slot 8; TB_2) ............................................................... 27
7.6.1 Note: Attribute 0 ............................................................................................... 28
7.6.2 Note: Attribute 1 ............................................................................................... 28
7.7 Analog Sensor Function Block (Slot 1; FB_1)(Slot 2; FB_2) .................................. 28
7.8 Controller Function Block (Slot 3; FB_3) (Not supported by MFM)(Slot 4; FB_4) (Not
supported by PM) ................................................................................................................. 29
7.8.1 Note: Attribute 0 ............................................................................................... 30
7.8.2 Note: Attribute 4-7 ........................................................................................... 30
7.9 Actuator Function Block (Slot 6; FB_6) (Not supported by MFM) ......................... 30
7.9.1 Note: Attribute 0 ............................................................................................... 31
7.10 Actuator Transducer Block (Slot 9; TB_3) (Not supported by MFM) ..................... 32
8 Appendices ...................................................................................................................... 32
8.1 Appendix A Data type definitions ............................................................................ 32
8.2 Appendix B Data units ............................................................................................. 33
8.3 Profibus Safe State ................................................................................................... 36

Installation and Operation Manual
X-DPT-Profibus-SLA5800-SLAMf-Series-RevB-MFC-PC-RT-eng
Part Number: 541B191AAG
March, 2015
5
1 Introduction
Many applications of Flow Controllers/Meters are moving to increasing use of automation.
Automation comes in many forms: PLC’s (Programmable Logic Controllers such as the Siemens
S7 300/4000), DCS’s (Distributed Control Systems, such as Emerson’s Digital V), and PC based
solutions (National Instrument’s Labview
TM
). Digital communications from these varied systems
and the devices they measure and control are a very effective means of not only accomplishing
more effective and rapid system integration, but also providing greatly improved system
diagnostics and maintainability. Profibus is an open, digital communication system with a wide
range of applications, particularly in the fields of factory and process automation. Brooks
Instrument has several of its devices available on this universal fieldbus technology and is a
member of the Profibus organization.
2 Definition of Terms
Abbreviation Description
MFC/MFM Mass Flow Controller/Meter device
MSB Most Significant Bit
LSB Least Significant Bit
IOM Installation and Operation Manual
NA Not Applicable

Installation and Operation Manual
X-DPT-Profibus-SLA5800-SLAMf-Series-RevB-MFC-PC-RT-eng
Part Number: 541B191AAG
March, 2015
6
3 Before Starting
3.1 Background & Assumptions
This manual is a supplement to the Brooks SLA Enhanced Series installation and operation
manual. It is assumed that the owner of these Profibus devices is thoroughly familiar with the
theory and operation of this device. If not, it is recommended that the owner reads the installation
and operation manual first before continuing with this supplement.
This manual assumes basic knowledge and understanding of Profibus (its topology and its
method of logically accessing the data or parameters contained within the device). This manual is
not intended to be a replacement to the Profibus specifications. It is recommended but not
required for the purposes of this manual, that the user obtains a copy of the Profibus
specifications (www.profibus.com).
This manual does not make any assumptions about any particular manufacturer of equipment or
custom software used by the user to communicate with the Brooks device, but assumes the user
has thorough understanding of such equipment and any configuration software. Application Notes
and FAQ’s are available at the Brooks Instrument web site (www.BrooksInstrument.com).
3.2 Numbers
Numeric values used throughout this manual will be clearly denoted as to the base numeric
system it represents. All hexadecimal numbers (base 16) will be prefixed with a 0x, like 0xA4.
All binary numbers (base 2) will be suffixed with a b, like 1001b. All other numbers not
annotated this way will be assumed decimal (base 10).

Installation and Operation Manual
X-DPT-Profibus-SLA5800-SLAMf-Series-RevB-MFC-PC-RT-eng
Part Number: 541B191AAG
March, 2015
7
4 Quick Start
This section assumes the owner of the Digital Series device has a fully operational and trouble-
free communications network with appropriate power supplies. This section also assumes that
one or two master type of devices are connected to the Profibus network capable of DPV0 cyclic
and DPV1 acyclic data communication. Both types of data communication modes are supported
by these Brooks Profibus devices.
4.1 Supported Baud rates
Data communication can be performed at a number of baud rates: 9600, 19.2K, 45.45K, 93.75K,
187.5K, 500K, 1.5M, 3M, 6M and 12M baud. The communication electronics allows for
automatic baud rate detection, thus making the need for any hardware baud rate selection
methods not required.
4.2 Address selection
A Profibus slave device needs a valid address in order to get into data exchange mode with a
Profibus master. The address range is 2..125 and can be configured using 2 rotary switches with
an arrow indicator. The MSD (Most Significant Digit) switch supports 16 positions and is used to
specify 10, 20, 30..120, the LSD (Least Significant Digit) is used to specify the 0, 1, 2.. 9. Default
the address selectors will be set to the P (Programmable) position for the MSB and the 0 position
for the LSB, see picture below. The P position allows for using the “Set Slave” functionality of a
class 2 master device to change the default address, i.e. 126, to an address in the range of 2..125.
If the rotary switches are configured into any other position than P the “Set Slave” functionality
can not be used and the address will be retrieved from the rotary switch positions.
Figure 4-1 Address switches positioned at outlet side of enclosure

Installation and Operation Manual
X-DPT-Profibus-SLA5800-SLAMf-Series-RevB-MFC-PC-RT-eng
Part Number: 541B191AAG
March, 2015
8
Table 4-1 Configuring the address switches
Scenario Current
Address
New
Address
Required Action
1 P (126),
P(2..125)
P (2..125)
Default the MSD rotary switch will be set to the P position and the LSD to the 0
position, the selected address will show up as 126 in the Profibus master. This is an
invalid address which can not be used to get a device into Profibus data exchange
mode. The P (Programmable) position allows for digitally programming the address
using the DPV1 “Set Slave Address” functionality. Once this function has been used
to change the address to an address in the range of 2..125, the device can be put into
data exchange mode using the newly programmed address without a power cycle.
Note that the rotary switch position may not be changed.
2 P (126),
P (2..125)
2..125
When the rotary switches are changed from a programmable to a hard station
address, the power must be cycled on the device in order to recognize the new
station address. The new station address is indicated by the rotary switches.
3 2..125 2..125
When the rotary switches are changed from a hard station address to another hard
station address, the power must be cycled on the device in order to recognize the
new station address. The new station address is indicated by the rotary switches.
4 2..125 P (126)
When the rotary switches are changed from a hard station address to programmable,
the power must be cycled on the device in order to recognize that the station address
is programmable. The station will show up as 126 in the Profibus master. Scenario
1 or 2 can then be used to select a valid station address.
5 P (2..125) P (126)
In case the saved station address needs to be reset to the default 126 value, the
following procedure needs to be performed:
Verify that the MSD address switch is in the P position and the device is
powered
Move any switch LSD or MSD to any new position.
If Required, turn the MSD switch back to the P position
Power cycle the device
The station address will show up as 126 in the Profibus master and scenario 1 or 2
can be used to select a valid station address.
4.3 Bus and Device LEDs
The device supports a NET and MOD LED to indicate the status of network communication and the
device. The NET LED will indicate the following:
Table 4-2 NET Led specification
Flash Code Description
Off No Network Connected
Flashing Green Network Connected
Solid Green Communications Established (DP and/or V1)
Flashing Red Configuration Error
Flashing
Red/Green
Parameterization Error
Solid Red Hardware Error or Station Address set as 0,1,
or 126-129.
The MOD LED will indicate the following:

Installation and Operation Manual
X-DPT-Profibus-SLA5800-SLAMf-Series-RevB-MFC-PC-RT-eng
Part Number: 541B191AAG
March, 2015
9
Table 4-3 MOD Led specification
Flash Code Description
Flashing
Red/Green
The device is in the Self-Test mode
Solid Green All self-tests have passed. No faults have
been detected
Flashing Red A recoverable fault has been detected or
the device has been commanded into the
Abort state
Solid Red An unrecoverable fault has occurred
4.4 Power Supply and analog I/O
Power needs to be supplied via the separate 15 pin D-Sub connector. This connector also provides
access to analog I/O signals, see the table below.
Table 4-4 Pin layout of 15 pin D-Sub connector
Pin No. Function at remote connector
1. Setpoint/RT Common
2. Flow Output (0-5V, 1-5V, 0-10V)
3. Alarm Output
4. Flow Current Output (0-20mA, 4-20mA)
5. Power Supply (13.5-27V)
6. Not Connected
7. Setpoint Input (0-20mA, 4-20mA)
8. Setpoint Input (0-5V, 1-5V, 0-10V)
9. Power Supply Common
10. Flow Output Common
11. Not Connected
12. Valve Override Input
13. AUX/RT Input (0-5V, 0-10V)
14. Not Used
15. Not Used
5 Slave Configuration
5.1 Introduction
The purpose of the Profibus field bus system is to exchange data between the master and its slave
devices. In addition to Input/Output data which are exchanged when the slave device is in data
exchange mode, also parameter, configuration and diagnostic data is transferred.
Many Profibus masters need a configuration program to setup the Profibus network and configure
slave devices, e.g. Siemens Step7 for the S7 controller. These programs require a device
configuration file called GSD file and can be retrieved from the www.profibus.com web site.
For the Profibus network configuration of the SLA Smart III devices the following GSD file is
provided:

Installation and Operation Manual
X-DPT-Profibus-SLA5800-SLAMf-Series-RevB-MFC-PC-RT-eng
Part Number: 541B191AAG
March, 2015
10
BIMF5000.GSD – SLA Series
This GSD file supports the following models:
Table 5-1 Supported device models
Model
Code
Description Abbreviation
used in this
document
SLA**5* Mass Flow Controller MFC
SLA**6* Mass Flow Meter MFM
SLA**10 Downstream Pressure Controller PC
SLA**20 Upstream Pressure Controller PC
SLA**40 Remote Transducer (Combined Mass Flow Controller and
Pressure Controller using a Remoter Pressure Transducer)
RT
5.2 Parameterization of the slave
During the initialisation phase of the slave device the master configures the slave with “user
parameters”. This part of the initialisation phase is called the parameterization. Using the master
configuration program these user parameters can be changed, giving the slave device a different
configuration during initialisation.
Table 5-2 Complete DP Parameterization
Byte0 Byte1 Byte2 Byte3 Byte4 Byte5 Byte6 Byte7 Byte8 Byte9 Byte10 Byte11 … Byte-n
As defined by
DP specification
As defined by DP-V1
specification
DP
oper-
ation
Device parameter bytes
Bit 0 (DP parameterization enable) of Byte 10 (‘DP Operation’) of the DP Parameterization
defines if parameterization over DP is enabled, or if the parameterization data is ignored to allow
configuration through acyclic data transfer. The structure of the ‘DP operation’ byte is defined as
follows.
Bit field
Bit 7 Bit 6 Bit 5 Bit 4 Bit 3 Bit 2 Bit 1 Bit 0
Reserved DP
parameter-
ization
enable
- 0 = disabled
1 = enabled
Bytes 11 through n (number of parameterization bytes depends on device type) contain the device
parameterization data that will configure the device when DP Parameterization is enabled. The bytes are
defined as follows.

Installation and Operation Manual
X-DPT-Profibus-SLA5800-SLAMf-Series-RevB-MFC-PC-RT-eng
Part Number: 541B191AAG
March, 2015
11
Table 5-3 User parameters passed during parameterization
byte Attribute Name Block Description Instance Attrib
ID
Size
(bytes)
Default Value
Dec Hex
1 0-1 Flow Data
Units
Analog Flow
Sensor FB
Flow Data Units:
Parameterizes the Data Units for
the Analog Sensor FB. Refer to
the Table 8-2 Volumetric Flow
Units Table (See section 5.2 of
Process Control Profile) for a list
of valid values.
Valid for MFC, MFM, RT
FB_1 2 2 1342 0x053e
2 2-3
Pressure Data
Units
Analog Pressure
Sensor FB
Defines the engineering units for
the Pressure Refer to Table 8-3
Pressure Units Table (See section
5.2 of Process Control Profile) for
more details.
Valid for PC, RT
FB_2 2 2
1342 0x053e
3 4-5 Temperature
Data Units
TMF Device
PB
Defines the engineering units for
the temperature. Refer to Table
8-4 Temperature Units Table (See
section 5.2 of Process Control
Profile) for more details.
Valid for MFC, MFM, RT
PB_1 2 2 1001 0x03E9
4 6 Valve Drive
Safe State
Actuator FB
In case the device is commanded
into safe state, the valve should be
put into safe mode indicated by
this setting. Refer to the Table
8-8 Valve Drive Safe State Table
for more details.
Valid for MFC, PC, RT
FB_6 7 1 1 0x01
5 7 Flow Control
Alarm Enable
Parameterizes the flow control
alarm enable.
0 = Disabled.
1 = Enabled.
Valid for MFC, RT
FB_3 9 0 0 0x00
6 8 Flow Meter
Alarm Enable
Parameterizes the flow meter
alarm enable.
0 = Disabled.
1 = Enabled.
Valid for MFC, MFM, RT
TB_1 19 1 1 0x01
7 9 Drive Valve
Alarm Enable
Parameterizes the drive valve
alarm enable.
0 = Disabled.
1 = Enabled.
Valid for MFC, PC, RT
TB_3 2
0 0 0x00
8
10-11 Flow Controller
Alarm Error
Band
Allows the controller alarm error
band to be preset in percentage
(0..140%)
Valid for MFC, RT
FB_3 10
2 1400
0x0578
9
12-13 Flow Meter
Alarm Trip
Point High
Allows the meter alarm trip point
high to be preset in percentage
(-1.0..140.0%)
Valid for MFC, MFM, RT
TB_1 20
2 1400 0x0578
10
14-15 Flow Meter
Alarm Trip
Point Low
Allows the meter alarm trip point
low to be preset in percentage
(-1.0..140.0%)
Valid for MFC, MFM, RT
TB_1 21
2 -10 0xFFF6
11
16-17 Drive Valve
Alarm Trip
Point High
Allows the drive valve alarm trip
point high to be preset in
percentage (0.0..140.0%)
Valid for MFC, PC, RT
TB_3 3
2 1400 0x0578

Installation and Operation Manual
X-DPT-Profibus-SLA5800-SLAMf-Series-RevB-MFC-PC-RT-eng
Part Number: 541B191AAG
March, 2015
12
12
18-19 Drive Valve
Alarm Trip
Point Low
Allows the drive valve alarm trip
point low to be preset in
percentage (0.0..140.0%)
Valid for MFC, PC, RT
TB_3 4
2 0 0x0000
13
20-23 Flow Control
Ramp Time
Parameterizes the flow control
ramp time. Refer to the Table
8-10 Flow Control Ramp Time
Table for more details.
Valid for MFC, RT
4 0 0x000000
00
14
24 Flow Control
Mode
Controller FB
Parameterizes the flow control
mode. Refer to the Table 8-11
Flow Control Mode Table for
more details.
Valid for MFC, RT
FB_3 8
1 0 0x00
15
25-28 Pressure
Control Ramp
Time
Parameterizes the pressure control
ramp time. Refer to the Table
8-10 Flow Control Ramp Time
Table for more details.
Valid for PC, RT
4 0 0x000000
00
16
29 Pressure
Control Mode
Controller FB
Parameterizes the pressure control
mode. Refer to the Table 8-11
Flow Control Mode Table for
more details.
Valid for PC, RT
FB_4 8
1 0 0x00
17
30-31 Flow Totalizer
Data Units
TMF Sensor TB
Defines the engineering unit for
the flow totalizer. Refer to the
Table 8-5 Flow Totalizer Data
Units Table for more details.
Valid for MFC, MFM, RT
TB_1 16
2 1036 0x040C
18
32 Multiple Input
Single Output
Switch
MISO Selection Selects the flow-0 or pressure-1
controller input.
Valid for RT
PB_1 9
1 0 0x00
19 33 Pressure
Control Alarm
Enable
Parameterizes the pressure control
alarm enable.
0 = Disabled.
1 = Enabled.
Valid for PC, RT
FB_4 9 0 0 0x00
20 34 Pressure Meter
Alarm Enable
Parameterizes the pressure meter
alarm enable.
0 = Disabled.
1 = Enabled.
Valid for PC, RT
TB_2 19 1 1 0x01
21
35-36 Pressure
Controller
Alarm Error
Band
Allows the controller alarm error
band to be preset in percentage
(0.0..140.0%)
Valid for PC, RT
FB_4 10
2 1400
0x0578
22
37-38 Pressure Meter
Alarm Trip
Point High
Allows the meter alarm trip point
high to be preset in percentage
(-1.0..140.0%)
Valid for PC, RT
TB_2 20
2 1400 0x0578
23
39-40 Pressure Meter
Alarm Trip
Point Low
Allows the meter alarm trip point
low to be preset in percentage
(-1.0..140.0%)
Valid for PC, RT
TB_2 21
2 -10 0xFFF6
24
41 Enable Legacy
Modules
0-Standard
1-Legacy
Enables selection of Legacy S-
Series Profibus modules, refer to
IOM ‘X-DPT-Profibus-Interface-
eng’ for the module descriptions
Valid for MFC, MFM
1 0 0x00
5.3 Configuration of the slave
Using the master configuration program the user can select inputs and outputs which define the
data to be exchanged in DPV0 data exchange mode. The table below lists the input and output

Installation and Operation Manual
X-DPT-Profibus-SLA5800-SLAMf-Series-RevB-MFC-PC-RT-eng
Part Number: 541B191AAG
March, 2015
13
modules which can be selected per device model. Note that if the device model is not in line with
the selected modules a configuration error will be raised by the PLC and the device will not get
into data exchange mode, see Table 5-1 Supported device models.

Installation and Operation Manual
X-DPT-Profibus-SLA5800-SLAMf-Series-RevB-MFC-PC-RT-eng
Part Number: 541B191AAG
March, 2015
14
Table 5-4 DPV0 input/output modules for device model MFC
Input Data
Configuration Byte Attribute Name Block Instance Attrib.
ID
Description Size
(bytes)
0x43,0x03,0xA9,0x06,0x01 Process Variable
(PV)
Analog
Sensor FB
FB_1 0 The amount of flow
going through the
device in engineering
units.
4
0x43,0x03,0x32,0x06,0x01 Drive Valve
Value
Actuator FB FB_3 2 The value of the
analog output signal
used to drive the
physical actuator.
4
0x43,0x03,0xA4,06,0x01 Temperature TMF Sensor
TB
TB_1 11
Temperature of the
device in engineering
units. Refer to the
Table 8-4 Temperature
Units Table (See
section 5.2 of Process
Control Profile) for
more details.
4
0x43,0x03,0x9E,0x06,0x01 Setpoint Controller FB
FB_2 1
The amount of flow
that device will control
to in engineering units.
Refer to the Table 8-2
Volumetric Flow Units
Table (See section 5.2
of Process Control
Profile) for more
details.
4
0x43,0x00,0x32,0x05,0x01 Valve Override Actuator FB
FB_3 6
The override of the
physical actuator.
Refer to the Table 8-9
Valve Override Table
for more details.
1
0x43,0x01,0xA9,0x23,0x01 Selected
Calibration
Instance
TMF Sensor
TB
TB_1 4
The active calibration
instance. Refer to the
Table 8-7 Calibration
or Application
Instance Table
for
more details.
2
0x43,0x03,0xA9,0x7E,0x01 Flow Totalizer TMF Sensor
TB
TB_1 15
The total amount of
flow through the
device as a long
integer in engineering
units. Refer to the
Table 8-5 Flow
Totalizer Data Units
Table for more details.
4
0x43,0x00,0xA9,0x1C,0x01 Sensor Zero
Status
TMF Sensor
TB
TB_1 3
Indicates the status of
the zero flow meter:
1 = In progress.
0 = Idle.
1
0x43,0x00,0xA9,0x70,0x01 Zero Flow
Meter
TMF Sensor
TB
TB_1 2 Indicates the zero flow
meter state:
1 = Zero adjust
initiated.
0 = No zero adjust.
1

Installation and Operation Manual
X-DPT-Profibus-SLA5800-SLAMf-Series-RevB-MFC-PC-RT-eng
Part Number: 541B191AAG
March, 2015
15
Configuration Byte Attribute Name Block Instance Attrib.
ID
Description Size
(bytes)
0x43,0x01,0xA9,0x7C,0x01
Totalizer
Command
TMF Sensor
TB
TB_1 17
Totalizer command
allowing to stop, run or
reset the totalizer, see
Table 8-6 Totalizer
Command Table
1
Output Data
Configuration Byte Attribute Name Block Instance Attrib.
ID
Description Size
(bytes)
0x83,0x03,0x9E,0x06,0x01 Setpoint Controller FB FB_2 1 The amount of flow the
device will control to in
engineering units.
4
0x83,0x00,0x32,0x05,0x01
Valve Override Actuator FB
FB_3 6
Specifies a direct
override of the physical
actuator, see Table 8-9
Valve Override Table
1
0x83,0x00,0xA9,0x70,0x01 Sensor Zero
Adjust
TMF Sensor
TB
TB_1 2
Initiates a Zero Adjust.
1
0x83,0x01,0xA9,0x23,0x01
Selected
Calibration
Instance
TMF Sensor
TB
TB_1 4
Selects the active
calibration instance. See
Table 8-7 Calibration or
Application
Instance
Table
2
0x83,0x01,0xA9,0x7C,0x01
Totalizer
Command
TMF Sensor
TB
TB_1 17
Totalizer command
allowing to stop, run or
reset the totalizer, see
Table 8-6 Totalizer
Command Table
1
Table 5-5 DPV0 input/output modules for device model MFM
Input Data
Configuration Byte Attribute Name Block Instance Attrib.
ID
Description Size
(bytes)
0x43,0x03,0xA9,0x06,0x01 Process Variable
(PV)
Analog
Sensor FB
FB_1 0 The amount of flow
going through the
device in engineering
units.
4
0x43,0x03,0xA4,06,0x01 Temperature TMF Sensor
TB
TB_1 11
Temperature of the
device in engineering
units. Refer to the
Table 8-4 Temperature
Units Table (See
section 5.2 of Process
Control Profile) for
more details.
4
0x43,0x01,0xA9,0x23,0x01 Selected
Calibration
Instance
TMF Sensor
TB
TB_1 4
The active calibration
instance. Refer to the
Table 8-7 Calibration
or Application
Instance Table
for
more details.
2
0x43,0x03,0xA9,0x7E,0x01 Flow Totalizer TMF Sensor
TB
TB_1 15
The total amount of
flow through the
device as a long
4

Installation and Operation Manual
X-DPT-Profibus-SLA5800-SLAMf-Series-RevB-MFC-PC-RT-eng
Part Number: 541B191AAG
March, 2015
16
integer in engineering
units. Refer to the
Table 8-5 Flow
Totalizer Data Units
Table for more details.
0x43,0x00,0xA9,0x1C,0x01 Sensor Zero
Status
TMF Sensor
TB
TB_1 3
Indicates the status of
the zero flow meter:
1 = In progress.
0 = Idle.
1
0x43,0x00,0xA9,0x70,0x01 Zero Flow
Meter
TMF Sensor
TB
TB_1 2 Indicates the zero flow
meter state:
1 = Zero adjust
initiated.
0 = No zero adjust.
1
Output Data
Configuration Byte Attribute Name Block Instance Attrib.
ID
Description Size
(bytes)
0x83,0x00,0xA9,0x70,0x01 Sensor Zero
Adjust
TMF Sensor
TB
TB_1 2
Initiates a Zero Adjust.
1
0x83,0x01,0xA9,0x23,0x01
Selected
Calibration
Instance
TMF Sensor
TB
TB_1 4
Selects the active
calibration instance. See
Table 8-7 Calibration or
Application
Instance
Table
2
0x83,0x01,0xA9,0x7C,0x01
Totalizer
Command
TMF Sensor
TB
TB_1 17
Totalizer command
allowing to stop, run or
reset the totalizer, see
Table 8-6 Totalizer
Command Table
1
Table 5-6 DPV0 input/output modules for device model PC
Input Data
Configuration Byte Attribute Name Block Instance Attrib.
ID
Description Size
(bytes)
0x43,0x03,0xA8,0x06,0x01 Process Variable
(PV)
Analog
Sensor FB
FB_2 0 The amount of
pressure measured by
the device in
engineering units.
4
0x43,0x03,0x32,0x06,0x01 Drive Valve
Value
Actuator FB FB_3 2 The value of the
analog output signal
used to drive the
physical actuator.
4
0x43,0x03,0x9F,0x06,0x01
Setpoint Controller FB
FB_4 1
The amount of
pressure that device
will control to in
engineering units.
Refer to the Table 8-3
Pressure Units Table
(See section 5.2 of
Process Control
Profile) for more
details.
4
0x83,0x00,0x32,0x05,0x01
Valve Override Actuator FB
FB_3 6
The override of the
physical actuator.
Refer to the Table 8-9
Valve Override Table
1

Installation and Operation Manual
X-DPT-Profibus-SLA5800-SLAMf-Series-RevB-MFC-PC-RT-eng
Part Number: 541B191AAG
March, 2015
17
for more details.
0x43,0x01,0xA8,0x23,0x01
Selected
Application
Instance
TMF Sensor
TB
TB_2 4
The active calibration/
application instance.
Refer to the Table 8-7
Calibration
or
Application
Instance
Table
for more
details.
2
Output Data
Configuration Byte Attribute Name Block Instance Attrib.
ID
Description Size
(bytes)
0x83,0x03,0x9F,0x06,0x01 Setpoint Controller FB FB_2 1 The amount of pressure
the device will control
to in engineering units.
4
0x83,0x00,0x32,0x05,0x01
Valve Override Actuator FB
FB_3 6
Specifies a direct
override of the physical
actuator, see Table 8-9
Valve Override Table
1
0x83,0x01,0xA8,0x23,0x01
Selected
Application
Instance
TMF Sensor
TB
TB_1 4
Selects the active
calibration/application
instance. See Table 8-7
Calibration or
Application
Instance
Table
2
Table 5-7 DPV0 input/output modules for device model RT
Input Data
Configuration Byte Attribute Name Block Instance Attrib.
ID
Description Size
(bytes)
0x43,0x03,0xA9,0x06,0x01 Flow Process
Variable (PV)
Analog
Sensor FB
FB_1 0 The amount of flow
going through the
device in engineering
units.
4
0x43,0x03,0xA8,0x06,0x01 Pressure Process
Variable (PV)
Analog
Sensor FB
FB_2 0 The amount of
pressure measured by
the device in
engineering units.
4
0x43,0x03,0x32,0x06,0x01 Drive Valve
Value
Actuator FB FB_6 2 The value of the
analog output signal
used to drive the
physical actuator.
4
0x43,0x03,0xA4,06,0x01 Temperature TMF Sensor
TB
TB_1 11
Temperature of the
device in engineering
units. Refer to the
Table 8-4 Temperature
Units Table (See
section 5.2 of Process
Control Profile) for
more details.
4
0x43,0x03,0x9E,0x06,0x01 Flow Setpoint Controller FB
FB_3 1
The amount of flow
that device will control
to in engineering units.
Refer to the Table 8-2
Volumetric Flow Units
4

Installation and Operation Manual
X-DPT-Profibus-SLA5800-SLAMf-Series-RevB-MFC-PC-RT-eng
Part Number: 541B191AAG
March, 2015
18
Table (See section 5.2
of Process Control
Profile) for more
details.
0x43,0x03,0x9F,0x06,0x01 Pressure
Setpoint
Controller FB
FB_4 1
The amount of
pressure that device
will control to in
engineering units.
Refer to the Table 8-3
Pressure Units Table
(See section 5.2 of
Process Control
Profile) for more
details.
4
0x43,0x00,0x32,0x05,0x01 Valve Override Actuator FB
FB_6 6
The override of the
physical actuator.
Refer to the Table 8-9
Valve Override Table
for more details.
1
0x43,0x01,0xA9,0x23,0x01 Selected
Calibration
Instance
TMF Sensor
TB
TB_1 4
The active calibration
instance. Refer to the
Table 8-7 Calibration
or Application
Instance Table
for
more details.
2
0x43,0x01,0xA8,0x23,0x01 Selected
Application
Instance
TMF Sensor
TB
TB_2 4
The active application
instance. Refer to the
Table 8-7
Calibration
or Application
Instance Table
for
more details.
2
0x43,0x03,0xA9,0x7E,0x01 Flow Totalizer TMF Sensor
TB
TB_1 15
The total amount of
flow through the
device as a long
integer in engineering
units. Refer to the
Table 8-5 Flow
Totalizer Data Units
Table for more details.
4
0x43,0x00,0xA9,0x1C,0x01 Sensor Zero
Status
TMF Sensor
TB
TB_1 3
Indicates the status of
the zero flow meter:
1 = In progress.
0 = Idle.
1
0x43,0x00,0xA9,0x70,0x01 Zero Flow
Meter
TMF Sensor
TB
TB_1 2 Indicates the zero flow
meter state:
1 = Zero adjust
initiated.
0 = No zero adjust.
1
Output Data
Configuration Byte Attribute Name Block Instance Attrib.
ID
Description Size
(bytes)
0x83,0x03,0x9E,0x06,0x01 Flow
Setpoint
Controller FB FB_2 1 The amount of flow the
device will control to in
engineering units.
4

Installation and Operation Manual
X-DPT-Profibus-SLA5800-SLAMf-Series-RevB-MFC-PC-RT-eng
Part Number: 541B191AAG
March, 2015
19
0x83,0x03,0x9F,0x06,0x01 Pressure
Setpoint
Controller FB FB_2 1 The amount of pressure
the device will control
to in engineering units.
4
0x83,0x00,0x32,0x05,0x01
Valve Override Actuator FB
FB_3 6
Specifies a direct
override of the physical
actuator, see Table 8-9
Valve Override Table
1
0x83,0x00,0xA9,0x70,0x01 Sensor Zero
Adjust
TMF Sensor
TB
TB_1 2
Initiates a Zero Adjust.
1
0x83,0x01,0xA9,0x23,0x01
Selected
Calibration
Instance
TMF Sensor
TB
TB_1 4
Selects the active
calibration instance. See
Table 8-7 Calibration or
Application Instance
Table
2
0x83,0x01,0xA8,0x23,0x01
Selected
Application
Instance
TMF Sensor
TB
TB_1 4
Selects the active
application instance.
See Table 8-7
Calibration or
Application
Instance
Table
2
0x83,0x01,0xA9,0x7C,0x01
Totalizer
Command
TMF Sensor
TB
TB_1 17
Totalizer command
allowing to stop, run or
reset the totalizer, see
Table 8-6 Totalizer
Command Table
1
5.4 Device Diagnostics
The device supports 2 diagnostic bytes, below the layout of these bytes.
Byte
nr
bit7 bit6 bit5 bit4 bit3 bit2 bit1 bit0
1 Pressure
Meter
High
Pressure
Meter
Low
Valve
high
Valve
low
Flow
Controller
Error band
Flow
Meter
High
Flow
Meter
Low
Pressure
Controller
Error band
2 Reserved Reserved Reserved Reserved Reserved Reserved DPV0
Pressure
Application
Instance
DPV0
calibration
instance
Figure 5-15 Device diagnostic byte
In case of a Mass Flow Meter (MFM) and Pressure Meter (PM) the Valve high/low and the
Controller Error band alarms are disabled. If the ‘Selected Calibration’ module is used in DPV0
cyclic communication, make sure that it’s set to a valid value, otherwise the ‘DPV0 calibration
instance’ diagnostic indication will be raised. If the ‘Selected Application Instance’ module is
used in DPV0 cyclic communication, make sure that it’s set to a valid value, otherwise the ‘DPV0
Pressure Application Instance’ diagnostic indication will be raised.
/