Page is loading ...

Overview
OVERVIEW
The PixeDV for Mac application allows you to do the following:
• Capture Real-Time from any video source into an MPEG1 or MPEG2 Movie
• Output MPEG1 or MPEG2 Video les to a VCR or TV
• Import other media(QuickTime, DV, Etc) into the PixeDV Album
• Manage and organize your media in the PixeDV Album
• Easily remove unwanted scenes from your captured MPEG movies.
• Built-In players allow you to play MPEG Movies or QuickTime Movies
About MPEG:
MPEG (Moving Picture Experts Group) is the international Standard Organization to generate
standards for digital video and audio compression.
MPEG1 is intended for VideoCD creation with VHS level quality.
MPEG2 features higher quality video and is used for DVD Creation. MPEG2 offers the best Video
quality in relation to le sizes.
PixeDV Capture Settings


LAUNCHING PIXEDV
If you plan to capture video, make sure the USB Instant DVD , your video sources and your Macintosh
are all connected properly. Please refer to the HARDWARE INSTALLATION section of this manual
if you need help.
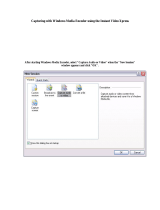
Open the USB Instant DVD folder that you may have copied to your desktop or inside your
Macintosh Hard Drive.
You will see the following icons:
USB Instant DVD for MAC

Depending on your View settings for OSX, this may appear as Icons, as a List or display in column mode.
Double Click on the PixeDV Icon on your G3 or G4 Mac. You will see this startup Screen:
You can click on any of the ve functions at any time. The buttons are not sequential. Which means it would
not matter whether you clicked Capty or Album rst.
Clicking Quit will exit the application.
When you click on CAPTY, IMPORT, ALBUM, you will always have a navigation bar on the topmost side of the
screen that can take you to all the various functions of the PixeDV for MAC application as shown below:
For best performance, since you will be dealing with large les when capturing video, turn off the screen
saver and power saving on your Mac. It would also be best that you have no other programs running
when capturing video.

CAPTURING VIDEO
Clicking on the CAPTY button will take you to this window:
The rst step is to check your capture settings. Click on the tab that says capture. This will take you to
this window:

From this window you can select:
Video Input
S-Video – Sometimes referred to as SVHS, select this input if you have a video source that is plugged into the
S-Video connector on the USB Instant DVD for MAC
Composite – Sometimes referred to as RCA jacks, select this input if you have a video source that is plugged
into the Composite connector.
Capturing Format
MPEG1
Select MPEG1 if you plan to create a VCD Movie.
Select your quality level. For a more detailed explanation about Quality Levels, check the Capture Settings
table in the USING PixeDV for MAC Overview section of the MANUAL.
MPEG2
Select MPEG2 if you plan to create a DVD Movie.
Select your quality level. For a more detailed explanation about Quality Levels, check the Capture Settings
table in the USING PixeDV for MAC Overview section of the MANUAL.
Customize
Customize your capture settings. You can select your bit rate, capture image size and change the capture
settings from CBR to VBR. This means:
CBR – Constant Bit Rate
The video stream is always encoded and xed to a constant value. High motion scenes and low motion
scenes are always allocated the same number of bits. A video stream of a an area of the sky which constantly
stays blue gets the same number of bits as a fast action scene.
VBR – Variable Bit Rate.
The video stream is encoded at variable bit rates depending on the scene being captured. High motion scenes
will be allocated more space to capture more detail.

Start capturing:
Once you have selected all your settings, you can now click on the Start Capture button to start
the capture process.
Video should start previewing on the blue area of the interface about 1 second after you click Start Capture.
This one second delay should be accounted for when you start capturing video.
With the capture process started, you will notice the status screen will start giving you specications on the le
you are capturing, how large it is and how much hard drive space you have left.

To stop the capture process, click on the STOP Capture Button. A thumbnail of the le you just captured
will appear, on the right. In the illustration shown above, 3 thumbnails are shown. This is for illustration
purposes only. When you rst start the program, you would normally not have any thumbnails shown
until after capturing.
The video that you just captured will be placed in the default album folder. Albums can be renamed, deleted,
created etc. This will be explained more under the Album section of this manual.
The one error message that you might get during the capture process will be:
This error would normally be caused by selecting the wrong video Source under capture settings. Please
make sure that you select S-Video if you have an S-Video source or Composite if you have a composite
source plugged into the USB Instant DVD.
Global Preference
The Global Preference button that appears on the
upper right side of the capture screen manages:
1 – Import File Locations: Point to the correct directory
on your Mac for importing les
2 – Points to the directory where you want to create
PLAY LIST Files. In the ALBUM section of this
manual you can create play list’s for playing several
les continuously.
3 – Slide Show Settings: You can run a slide show of
the video les or any other les in an album. The rst
frame of every video le will be shown.

EXPORTING VIDEO
To export video back to a VCR , CAMCORDER or for preview on a TV MONITOR, click on the OUTPUT
Button on the main CAPTY interface. Clicking on OUTPUT will take you to this screen.
Drag thumbnails into the output box. You can drag as many les that you want in whatever order and
play them back.
Click on the START Button to start the export process. Click on the STOP Button to stop.
Once the export process is started, you will see this activity at the bottom left of the screen:
IMPORTANT: If for some reason you don’t see video out to your TV or video is not recording on your VCR,
check your cable connections. Please consult the HARDWARE INSTALLATION GUIDE section of this manual
for more instructions.

IMPORTING VIDEO
Clicking on the IMPORT button from the MAIN SCREEN or the IMPORT button from MENU BAR will take you
to this screen:
You can browse easily to any directory on any drive (eg: local drive, rewire drives etc) and drag other media
like DV, QUICKTIME, PICTURES or MPEG les into an album.

USING THE ALBUM
Clicking on the ALBUM button from the MAIN SCREEN or the ALBUM button from MENU BAR will take you
to this screen:
ALBUM lets you organize your captured media and existing media in your Mac. It can see not only your
capture MPEG les but existing DV les, QuickTime compatible les and pictures that you have imported into
PixeDV for Mac via the IMPORT function.
On the top left you can see a series of 5 buttons that can organize the view options of the specic album
you have opened:
Clicking on ALL will show all available media in the ALBUM, click SOUND will show all Sound le in the
ALBUM and so on.
On the top right corner you can all see a series of 3 buttons that can change the view option for a specic le.

Once you have les that you captured or imported into ALBUM, hold down the CONTROL KEY on the your
KEYBOARD while you click on the thumbnail, the contextual menu options will be shown for that thumbnail:
Change Thumbnail Size – Changes the Physical size of the Thumbnails in your ALBUM
Use a Album Cover – Use the rst frame of the video or picture as your ALBUM cover thumbnail
Create a Play list le – Creates a play list of video les that can be played one after another without user
intervention. For this function to work, two or more les must be hi-lighted.
Create a browser album – Create another ALBUM where you can store, organize and capture video les into
Export – Export the hi-lighted thumbnail to any quicktime supported le format.
For Example:
� MPEG2 to DV
� MPEG2 to FLC
You can also convert existing DV FILES to MPEG2 if you have Apple Computer’s MPEG2 Codec.
For more information, please check Apples website.
Export to MPEG – Please see the Exporting Files for DVD Studio Pro Section of this Manual
MPEG Cutter – Please see the Trimming Videos with MPEG CUTTER Section of this Manual

Album Menu Options
On the upper right section of the ALBUM Screen, you can click on the ALBUM Button to manage your ALBUM.
This is where you can delete the whole ALBUM, make a NEW ALBUM, RENAME ALBUMS ETC.
You can also click on the SOURCE Button to manage the MEDIA Files that you have inside the
hi-lighted ALBUM.
Here you can Move, Copy, Delete, etc, any of the les that you might have in a specic Album.
Please remember that you must click on a le or a group of les rst to enable the SOURCE button.
You can also RUN the SLIDESHOW feature from this MENU.

TRIMMING VIDEO’S WITH MPEG CUTTER
Although the PixeDV for Mac application DOES NOT offer EDITING functions where you can ADD transitions
and titles to your Video’s, it does offer the ability to accurately trim and cut MPEG2 les.
Cutting up MPEG2 les is very hard to do and the ability to do this is a very key feature of this software
package.
To open MPEG FILES in MPEG CUTTER, hold down the CONTROL Key and click on the MPEG le that you
want to open in MPEG CUTTER.
1. Click on MPEG Cutter
2. The le will now be imported into MPEG Cutter.

Importing a le into MPEG Cutter bring up this interface:
The video le that got imported into MPEG CUTTER will be shown in the PREVIEW WINDOW.
Drag the Slider to a part of the video (A) where you want to START trimming. A frame will display in this box
(B) where you stopped the slider. Drag that frame into the box labeled START.
Drag the Slider to a part of the video where you want to STOP the trimming
process. A frame will display in this box where you stopped the slider. Drag
that frame into the box labeled END.
The process you just did above is called marking in and marking out.
Click on the scissors icon to make the cut. A record of this mark-in-mark-out
will be displayed on this window
You can undo/delete this cut mark by simply hi-lighting the time code in the
box above and clicking on Delete Selected item.
A
B

The ORIGINAL File Size versus the le size for the newly created le will be displayed just above
the EXECUTE Button.
To SAVE your trimmed video, you have to click on the EXECUTE Button. This will save the TRIMMED FILE to
your hard drive. The original le will be left untouched.
MPEG CUTTER SETTINGS:
INVERT SELECTIONS – Inverts your START – STOP Trim Selection

ONE STEP AMOUNT – Sets your step settings in relation to moving the current video frame via the one step
arrow movement buttons as illustrated below:
If you set your Step Amount at 1 Sec, clicking on the arrow Key’s will move the frame in the main PREVIEW
WINDOW forward approximately 1 second. Setting up your Step amount for 1 Minute will moved the frame
forward approximately 1 minute and so on.
Clicking on the PREVIEW Button on the upper left corner will preview the le with all the changes you just did.
Arrows

EXPORTING FILES FOR USE IN DVD STUDIO PRO
The USB Instant DVD for Mac hardware together with the PixeDV for Mac software, can capture analog video
real time into an MPEG2 or MPEG1 le.
The MPEG le that is captured is an industry standard MPEG le that can be used anywhere. Even on PC
based DVD Authoring/Publishing Systems.
Most AUTHORING/PUBLISHING Applications in the market will take a standard MPEG FILE.
Some applications though require something called an ELEMENTARY MPEG2 FILE.
This is a le format where MPEG VIDEO and MPEG AUDIO are on two separate les.
PixeDV for MAC can export the MPEG les that it captures into ELEMENTARY MPEG Streams.
Follow these steps to export MPEG FILES into
elementary MPEG STREAMS:
1. Hold down the CONTROL Key and click on the
MPEG le that you want to export into an
ELEMENTARY FILE FORMAT
2. Click on EXPORT to MPEG
3. Specify where to SAVE the ELEMENTARY MPEG2 VIDEO FILES. Click Start.

4. Browse to the location where you saved the ELEMENTARY MPEG2 FILES. PixeDV for Mac will split the
les and sequentially save them in folders called DVD SOURCE FOLDER1 and so on. If you open the
folder, you will see the MPEG2 AUDIO and VIDEO FILES.
The .AIF extension is for AUDIO MPEG FILES. The .M2V extension is for VIDEO MPEG FILES.
The les can now be easily imported into DVD Studio Pro via the File, Import Menu or you can drag the le
into the ASSETS window of DVD Studio Pro.

MPEG AND QUICKTIME PLAYERS
Clicking on the MPEG PLAYER Button from the MAIN SCREEN will take you into ALBUM Mode for MPEG
FILES in your current ALBUM. DV Files, Pictures and other Media will not be shown in this mode.
Double clicking on any of the video thumbnails will play the le in the MPEG PLAYER shown below.
You can resize the window, change the volume level and start, pause and stop the video playback.
The MPEG PLAYER will only PLAYBACK MPEG Files capture by USB Instant DVD for MAC.
The QuickTime player can be accessed from album mode to play back QuickTime compatible les
like DV or MPEG4.
/