Page is loading ...

IMPORTANT SAFEGUARDS
WARNING: To guard against injury, basic safety precautions should be observed, including the following:
READ AND FOLLOW ALL
SAFETY INSTRUCTIONS
DANGER: To avoid possible electric shock, special care should be taken in the use of
aquarium equipment. For each of the following situations, do not attempt repairs yourself.
Return the appliance to an authorized service facility for service or discard the appliance.
1. A. If the appliance falls into the water, DON’T reach for it. First unplug it and then
retrieve it. If electrical components of the appliance get wet, unplug it immediately.
B. If the appliance shows any sign of abnormal water
leakage, immediately unplug from the power source.
C. Carefully examine the appliance after installation. It
should not be plugged in if there is water on parts not
intended to be wet.
D. Do not operate any appliance if it has a damaged cord
or plug, or if it is malfunctioning or if it is dropped or
damaged in any manner.
E. To avoid the possibility of the appliance plug or
receptacle getting wet, position aquarium stand and
tank to one side of a wall mounted receptacle to
prevent water from dripping onto the receptacle or
plug. A
“drip loop”
, shown in the figure at right,
should be arranged by the user for each cord
connecting an aquarium appliance to a receptacle. The“drip loop” is that part
of the cord below the level of the receptacle or the connector, if an extension cord
is used, to prevent water from traveling along the cord and coming in contact with
the receptacle. If the plug or receptacle does get wet, DON’T unplug the cord.
Disconnect the fuse or circuit breaker that supplies power to the appliance. Then
unplug and examine for presence of water in the receptacle.
2. Close supervision is necessary when any appliance is used by or near children.
3. To avoid injury, do not contact moving parts or hot parts such as heaters, reflectors,
lamp bulbs, etc.
4. Always unplug an appliance from an outlet when not in use, before putting on or
taking off parts, and before cleaning. Never yank cord to pull plug from outlet.
Grasp the plug and pull to disconnect.
5. Do not use an appliance for other than intended use. The use of attachments not
recommended or sold by the appliance manufacturer may cause an unsafe condition.
6. Do not install or store the appliance where it will be exposed to the weather or to
temperatures below freezing.
7. Make sure an appliance mounted on a tank is securely installed before operating it.
8. Read and observe all the important notices on the appliance.
9. If an extension cord is necessary, a cord with a proper rating should be used. A cord
rated for less amperes or watts than the appliance rating may overheat. Care should
be taken to arrange the cord so that it will not be tripped over or pulled.
10. This appliance has a polarized plug (one blade is wider than the other). As a safety
feature, this plug will fit in a polarized outlet only one way. If the plug does not fit
fully in the outlet, reverse the plug. If it still does not fit, contact a qualified electrician.
Never use with an extension cord unless plug can be fully inserted. Do not attempt
to defeat this safety feature.
SAVE THESE INSTRUCTIONS
APPLIANCE
AQUARIUM
POWER
CORD
DRIP
LOOP
SYMPTOM COMMENTS/SOLUTIONS
If your filter fails to
pump water or flow
has slowed. . .
If your filter makes
excessive mechanical
noise. . .
If the water level in the
filter box is low. . .
If there are excessive
bubbles or scum on the
surface of the water. . .
If the water flow is too
strong. . .
If water is flowing over the
Back Panel. . .
If the LED Light
seems dim. . .
If the canopy becomes
difficult to slide. . .
If the BioFoam
®
Insert
becomes discolored
or dirty. . .
Adjust the flow of
the pump
Access the impeller
Perform a water change
Feed your fish
Change your cartridge
• Lift the Cartridge out of the Cartridge Carrier to see if water flow is restored.
If so, your Cartridge is clogged and must be replaced.
• Make sure the water level is between the Min/Max Fill Lines.
• Make certain the Power Cord is functioning properly. Unplug the electrical
cord momentarily, then reconnect it to the power source to restart the
Impeller.
• Make sure the adjustable Filter Pump is set to the desired flow.
• Check the Impeller Assembly to ensure it is working properly.
• The Filter Pump may be running dry. Make sure the water level is between
the Min/Max Fill Lines engraved on the back wall of the tank.
• Lift the Cartridge out of the Cartridge Carrier to see if water flow is restored.
If so, your Cartridge is clogged and must be replaced.
• Check the Impeller Assembly for debris.
• Lift the Cartridge out of the Cartridge Carrier to see if water level is restored.
If so, your Cartridge is clogged and must be replaced.
• Make sure the water level is between the Min/Max Fill Lines. This will ensure
the surface of the water is skimmed.
• Adjust the flow of the Filter Pump (see the “How To” section for instructions).
• Change the Cartridge and ensure the water level is between the Min/Max Fill
Lines labeled on the Back Panel.
• Wipe the cover of the LED Light and the Glass Canopy with a clean wet cloth,
and make sure the DC Jack is properly attached to the Light Transformer.
• Wipe the Canopy Rails and Tank edges with a clean wet cloth.
• This is not a problem. It indicates the growth of beneficial biological bacteria
which remove toxic ammonia and nitrite from aquarium water. As long as the
BioFoam is not damaged, it does not need to be replaced.
1A. To access the Filter Pump, first unplug it from the wall outlet. Remove the
Filter Cover, grasp the Elbow that connects to the Flow Nozzle, and pull the
Elbow off of the Flow Nozzle. This will allow you to pull the Pump out of the
Filter Box.
1B. Turn the Flow Adjustment Knob counterclockwise to decrease flow or
clockwise to increase flow.
2A. To disassemble the Filter Pump, remove the Pump Cover, and then the
Impeller Cover by gripping and pulling off. Remove the Impeller Assembly
by pulling it out of the Main Pump Body (note: magnets hold the Impeller
in place).
2B. To assemble the pump, install the Impeller Assembly by inserting it into the
Main Pump Body. Install Impeller Cover with tab pointed at 3:00 (see
diagram). Install Pump Cover by snapping into Main Pump Body.
3. Once a month (or as often as needed depending on the bio-load), remove
50% of the water using a gravel cleaner. It’s usually easiest to remove décor
before you begin. Add room temperature water treated with Marineland
®
Aquarium Conditioner to remove chlorine.
4. Feed your fish two to three times daily, being careful not to overfeed. Only
put as much food into the tank as your fish can consume in several minutes.
To reduce the amount of food that is caught in the filter, you may
want to unplug the filter before you begin feeding.
5A. Every two to four weeks, remove the old Cartridge from the Cartridge
Carrier. After removing the new Cartridge from the packaging, rinse with
clean water before sliding into the Cartridge Carrier with the blue floss
facing forward.
5B. Note: some models of the Rite-Size Z Cartridge have a plastic tab on the side
that should be snapped off to enable it to fit in the carrier.
Troubleshooting Guidelines
How To
Impeller Cover
Tab Facing
3:00
Impeller
Assembly
Main Pump
Body
Pump
Cover
Flow
Adjustment
Knob
Impeller
Cover
Remove Plastic
Tab on Cartridge
2B
5B
IMPORTANT:
Always unplug your
Aquarium Kit when inspecting
or disassembling for
any reason.
How To Diagrams
Portrait
Aquarium Kit
For Optimum Performance
Replace Filter
Cartridge
Monthly
Perform Monthly
Water Changes
Test Water Weekly to
Monitor Water Chemistry
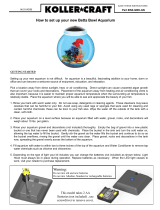
PLEASE READ THESE INSTRUCTIONS BEFORE UNPACKING BOX
With Hidden Filtration
See Other Side For Quick Setup Guide

Quick Setup Guide
Start Here - Portrait Aquarium Kit
1
2
3
4
5
A. Remove the Glass Canopy from the top of the Styrofoam, then lift
the Styrofoam out of the box.
B. Lift the glass Tank out of the box.
C. Remove the LED Light and cardboard tray from the bottom
of the Tank.
D. Remove the Pump Power Cord from the Filter Box in the back of
the Tank, but do not plug the Filter in until step 4G.
E. Remove Filter Cartridge from the plastic bag and set the
Cartridge aside.
F. Lift the Styrofoam from the bottom of the box to access the
Tank Base.
A. Set the Flow Adjustment Knob on the Filter Pump to the max setting.
Once your Tank is running, refer to the “How To” section on reverse
side to adjust the flow if needed.
B. Make sure Pump Tube is connected to Filter Pump, Elbows and
Flow Nozzle.
C. Rinse Filter Cartridge thoroughly and install as shown
(blue side toward front of aquarium).
D. Route the power cord over the back of the Tank, but do not plug
Filter Pump in until step 4F.
A. First clean the Tank by using clean water and
paper towels. Do not use chemicals not intended
for aquarium use.
B. Place the Base on a flat surface in your desired
location away from direct sunlight and air vents,
then place the Tank on top.
C. After rinsing your gravel and décor thoroughly,
decorate your aquarium before adding water to
avoid over-filling.
D. Locate the Min and Max Fill Lines on the
Back Panel of the Tank. Fill the Tank with room
temperature tap water treated with Marineland
®
Aquarium Conditioner to remove chlorine.
E. Add the LED Light to the back of the Tank as
shown.
F. Place the Glass Canopy on the aquarium.
When installed properly, the Glass Canopy
slides back under the Filter Cover to provide easy
access to the front of the Tank for feeding and
maintenance.
G. Plug Filter Pump and LED Light into outlet.
H. If adding a heater (not included), do not place
it in the filter box since the water level can drop
causing the device to over-heat. Place the heater
inside the main tank as shown, and always follow
the manufacturer’s directions for use.
I. Make drip loops for safety.
A. Replace the Filter Cartridge every two to four weeks.
B. Top off water to maintain water level between Min and Max Lines as needed
(always treat water with Marineland
®
Aquarium Conditioner to remove chlorine).
C. Perform water changes monthly or as often as needed.
D. Use Marineland
®
pH Regulator weekly to maintain optimal aquarium chemistry.
Filter Setup Tank Setup
Maintenance
Unpack the Aquarium
Parts Check
B
C
A
D
E
F
H
I
United Pet Group, Inc.
Cincinnati, OH 45230
1.800.322.1266
www.marineland.com
©2014 United Pet Group, Inc.
® Registered Trademark of
United Pet Group, Inc.
Questions or Missing Parts:
Call Customer Service at
(800) 322-1266
LIMITED WARRANTY: Within two years from the date of original purchase, United Pet
Group, Inc. will repair or replace, at its option, any Portrait Kit which is deemed defective
in workmanship or materials. Please return the unit, together with proof of date of purchase.
Call (800) 322-1266 for return authorization and shipping address.
Damage or injuries resulting from negligence or misuse are not covered by this warranty.
Incidental or consequential damages are specifically excluded.* This warranty gives you
specific legal rights. You may also have other rights which vary from state to state.
*Because some states do not allow the exclusion of incidental or consequential damages, this exclusion may not apply to you.
01/14 P/N 90609-908 Rev. A
Filter Cover
Glass Canopy
Canopy Rails
Filter Box
LED Light
Tank
Flow
Nozzle
Base
Pump
Tube
Filter Cartridge
(Rite-Size Z)
Bio-Foam
®
(pre-assembled)
Min/Max
Fill Lines
Cartridge
Carrier
Elbows
Filter Pump
Back Panel
Pump Power
Cord
LED Light
Transformer
DC Jack
On/Off
Switch
Replacement Parts Diagram & Identification
KEY ITEM DESCRIPTION MODEL
1 5g Pump, Tube ML90625
2 Bio-Foam
®
Insert
ML90626
3 Nozzle & Elbows ML90627
4 LED Light ML90628
5 Sliding Glass Canop ML90632
Replacement Parts List
5
1
2
3
4
/