Page is loading ...

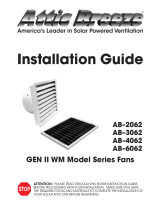
Thank you for purchasing your new solar powered fan from Attic Breeze. Our retrofit-style solar fans have
been carefully designed to provide easy installation with minimal tools or experience required. Before
beginning, please completely review this guide and the tools required for installation.
Retrofit-Style Solar Fan Installation Guide
Getting Started
Application
This guide applies to attic gable wall installations only behind an existing passive vent. Please consult your
Attic Breeze dealer for more information regarding alternate installation methods.
Parts & Equipment
The following parts and equipment are included for your installation:
(1)
(1)
(1)
What’s Needed
cordless drill with nut driver attachments
self-tapping screws and woodscrews
roofing-grade weatherproof sealant
lumber (2x4)
tape measure
reciprocating saw
Customer Service Hours
Mon-Fri 8:30AM - 5:30PM CST
voice
email
web
254-865-9999
www.atticbreeze.net
solar panel mounting bracket kit
15 foot power cable
power cable splitter (40W models only)
(1)
(1)
Attic Breeze solar powered fan with retrofit-
style gable mount flashing
remote mount monocrystalline solar panel
(additional solar panel with 40W models only)
To ensure optimum performance from your Attic Breeze solar
attic fan, attic air intake ventilation must be evaluated prior to
installation. The minimum recommended net free area of
intake ventilation for your product model is shown in Figure 1.
Your installation should either meet or exceed these
recommendations for optimum fan performance. For
assistance in determining proper intake ventilation
requirements, please consult your local Attic Breeze dealer or
visit our website for more information.
NOTE: Lack of proper attic air intake ventilation will result in
poor fan performance. Additionally, the gable vent where
your fan will be installed must be have the same venting
area or larger than the fan itself for optimum performance.
Figure 1 - Air Intake Ventilation Requirements
Attic Breeze
Fan Model
Minimum Required
Intake Ventilation
20 watt 4.5 sqft net free area
25 watt 5.2 sqft net free area
40 watt 6.0 sqft net free area
60 watt 6.8 sqft net free area
Choose a location on your roof to install the solar panel that will offer optimum sun exposure throughout the
day. For best results, pick an area that is oriented in a southern direction and is not shaded or otherwise
blocked from the sun for extended periods. If an installation location on the southern side of your roof is not
available, please consult your Attic Breeze dealer for additional solar panel mounting options.
Your solar attic fan should not be installed any closer than within 10 feet to an existing passive vent, ridge
vent, or additional fan unit. If installed in combination with a ridge vent, it may be necessary to block off a
portion of the vent close to the fan to achieve optimum attic ventilation performance.
Finally, consider sealing your attic space to prevent air exchange with the inside of your home. Eliminating air
leaks increases both your attic insulation efficiency and the performance of your Attic Breeze solar fan.

Next, install the Attic Breeze retrofit-style solar fan flush to
the mounting box (see Figure 3). The fan housing
(cylinder) should be positioned facing toward the attic
space. Secure the fan unit to the mounting box with self
tapping screws.
Installing the Fan Unit
Figure 3 - Mounting the Fan Unit
Install the solar panel mounting brackets per the instructions included with your specific Attic Breeze bracket
kit. Plug in the power cord to the connector on back of the remote solar panel. Securely mount the solar
panel as required to your roof or structure.
Solar Panel Mounting
Routing the Power Cable
Next, plug the power cable into the power cable connector located on the fan unit. If installing a Breeze
Mate® control system, first plug the Breeze Mate® cable into the fan’s control cable connector, and then plug
the power cable into the Breeze Mate® controller per the instructions included with that product.
NOTE: If installing a 40W solar attic fan, plug the power cable splitter into the power cable connector
located on the fan unit and then connect the two power cables to the splitter. For Breeze Mate®
installations, the power cable splitter must be plugged into the Breeze Mate® controller.
Route the power cable through the attic, starting from the fan unit to the location where your remote solar
panel will be installed. Secure the power cable in place. The power cable may be routed out of the attic by
bringing the cable through an existing passive vent, penetrating a gable wall and running the cable along the
roof eve, or simply routing the power cable directly through the roof. When making any wall or roof
penetration, caulk around the penetration using a roof-grade weatherproof sealant.
Begin by building a mounting box around your existing
gable or passive vent inside the attic. Measure the length
between the studs adjoining the vent and cut the 2x4
boards to complete the box as shown in Figure 2. Secure
the boards in place using woodscrews.
NOTE: Mounting box should be no larger than 21”x21”.
If gable or passive vent extends beyond this area,
block off excess venting area to prevent backflow
of exhaust air.
When completed, the mounting box should provide an air
channel for the gable fan to properly exhaust through.
Figure 2 - Building the Mounting Box
Building the Mounting Box
www.atticbreeze.net
Copyright © 2015 Attic Breeze, LLC. All rights reserved.
Locate the power cable include with your Attic Breeze
solar attic fan. Make sure the power cable is long enough
to reach the location where the remote solar panel will be
installed.
NOTE: If additional power cable length is needed for your
installation, Attic Breeze offers a 40 foot extended
power cable as an available option.
/