Page is loading ...

French 4
Pièces de rechange
Si vous avez besoin de pièces de rechange, contactez le service à la
clientèle au
1-844-318-6168, du lundi au vendredi de 8 h à 16 h 30 HNE.
Veuillez fournir les informations suivantes, si possible:
Le modèle complet ou le numéro de catalogue de votre
produit
Une description du produit
La description de la pièce nécessaire
GARANTIE LIMITÉE D'UN AN
Pour une période d'un (1) an à compter de la date d'achat, le fabricant
remplacera cette couverture de fenêtre par une valeur égale ou supérieure, si
ce revêtement de fenêtre se révèle défectueux en matériau ou en main-
d'œuvre. Pour obtenir le service sous garantie, communiquez avec notre
service à la clientèle au 1-844-318-6168. Cette garantie ne couvre pas les
dommages causés par ou résultant d'un entretien inadéquat, d'une utilisation
négligente ou inappropriée, d'une utilisation abusive, d'une négligence, d'un
accident, d'une altération, d'une utilisation commerciale, de l'in
stallation, du
retrait ou de la réinstallation.
Cette garantie est limitée à l'usage normal des consommateurs aux États-Unis
et au Canada. LE MANUFACTURIER NE SERA PAS RESPONSABLE DES
DOMMAGES INDIRECTS OU CONSÉCUTIFS. CERTAINS ÉTATS NE
PERMETTENT PAS L'EXCLUSION OU LA LIMITATION DE DOMMAGES
ACCESSOIRES OU CONSÉCUTIFS, LA LIMITATION OU L'EXCLUSION CI-
DESSUS PEUT NE PAS S'APPLIQUER À VOUS. Cette garantie vous donne
des droits légaux spécifiques, et vous pouvez également avoir d'autres droits,
qui varient d'un état à l'autre.
LES QUESTIONS?
Communiquez avec le service à la clientèle au 1-844-318-6168, du lundi
au vendredi de 8 h à 16 h 30 HNE.
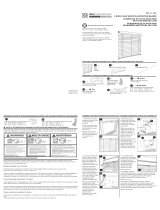
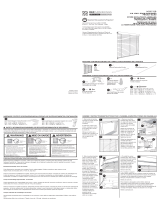
Insulating Blackout Roman Shade
Please r
ead and understand these instructions before attempting to
assemble, install, or operate this product.
INSTALLATION INSTRUCTIONS
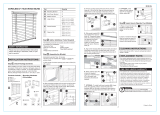
Step 1: Check Package Contents
Before
installing your shade, make sure all parts listed below are present. If any
part is missing or damaged, ple
ase do not assemble, install, or operate.To
request replacement
parts, contact customer service at 1-844-318-6168,
Monday through Friday from 8:00 a.m. to 4:30 p.m. EST.
Contents include:
x Roman Shade
x
Mounting Hardware Kit
Head Rail
Roman Shade
Bottom Rail
1
Mounting
Hardware Kit includes:
Part
a.
Mounting Bracket͒
Quantity
2 (for shades
up to 38
in. wide)
3 (for shades
39 in. to 56 in. wide)
4 (for shades
57 in. to 72 in. wide)
b. 1 3/8-inch Screws 2 per bracket
c. Handle for Bottom Rail 1
d. Hold-Down Brackets 2
e. 3/8-inch Screws
4
(for Hold-Down Brackets)͒
Note: 1 extra
screw of each noted size
is included for your convenience
a
b
c
d
e

Étape 4. Fixer le rail principal
Placez le rail de tête sur les supports comme décrit à l'étape 3 ci-dessus et verrouillez-
le en place. Vérifiez soigneusement que chaque support est correctement fixé.
French 3
Étape 5. Fixez la poignée
Fixez la poignée au rail inférieur comme illustré. La poignée est conçue pour minimiser
le contact avec le tissu de l'ombre. Toujours soulever et abaisser l 'ombre
LENTEMENT pour s'assurer que le tissu plissé empile soigneusement.
Abaisser l'ombre: saisir le rail inférieur / poignée et tirer lentement vers le bas.
Pour lever l'ombre: mettre la (les) main (s) sous le rail inférieur (la paume
orientée vers le haut) et lever lentement jusqu'à atteindre la hauteur désirée.
Étape 6. Installer les supports de retenue
Les supports de maintien sont fournis pour une utilisation en option et sont
généralement utilisés sur les portes avec des fenêtres telles que les portes françaises.
Ces supports sont destinés à être utilisés uniquement si l'ombre doit être dans une
position abaissée de façon permanente. Avec l'ombre complètement abaissée, faites
des marques de crayon aux extrémités extérieures du rail inférieur. Les supports
doivent être alignés sur les marques de crayon et vissés en place à l'aide des vis de
3/8-inch. Insérez les goupilles faisant saillie des supports dans les trous des deux
extrémités du rail inférieur (voir illustration).
INSTRUCTIONS DE NETTOYAGE
Le rail de tête en vinyle et le rail inférieur peuvent être essuyés à l'aide d'une
éponge humide. Pour nettoyer le tissu de l'ombre, utilisez un plumeau ou un
aspirateur léger à l'aide d'une brosse douce.
Pour enlever les rides ou les plis, vaporisez l'avant de l'ombre sur un réglage
de lumière. Ne pas repasser.
Step 2: Gather Additional Tools Required
The following tools are not included, but will be needed to complete your
installation.
x Screwdriver
x Measuring tape
x Drill
x Pencil
x Step ladder
Tip: Use #6 plastic anchors for dry wall or plaster mounting (not included)
Tip: For screws, use a 3/32-inch dri
ll bit; for wall anchors, use 1/4-inch drill bit.
Step 3: Install the Mounting Brackets
The shade
may be installed eithe
r inside or ou
tside the window
frame. A
mounting bracket should be positioned
about one to six inches from each end of
the head rail. For wider shades that require three or more brackets, these should
be spaced evenly between the two outermost brackets. Always position the
brackets where there is no interference with the cords and mechanisms inside
the head rail. The procedure outlined below will assure proper bracket placement.
2
To attach the brackets position head rail where the inner front
edge of head rail
slides into slot at the fr
ont of
mounting bracket. Push head
rail upward until
flexible tab at the bottom of bracket snaps in place.
For outside mounting, attach the brackets to the head rail as described above.
Hold the shade level at the height desired and center it over the window opening.
Mark the exact location of each bracket with a pencil. Remove the brackets from
the head rail and position the top of each bracket at the marked location and
screw each bracket into the wall or window molding using the 1 3/8-inch screws,
pre-drilling the screw holes using a 3/32-inch drill bit.
For inside mounting, clip the brackets onto the head rail as described above.
Hold the shade in place and make a pencil mark at the rear of each bracket
where it contacts the inside of the window frame.
Remove the brackets from the head rail and align them with the m
arks. Attach
each bracket using the 1 3/8-inch screws, pre-drilling the screw holes using a
3/32-inch drill bit.

Étape 2: Rassembler les outils supplémentaires nécessaires
Les outils suivants ne sont pas inclus, mais seront nécessaires pour terminer
votre installation.
Tournevis
Mètre ruban
Percer
Crayon
Escabeau
Astuce: Utilisez des ancrages en plastique # 6 pour la pose de plâtre ou de
plâtre (non inclus)
Astuce: Pour les vis, utilisez un foret de 3/32-inch; Pour les ancres murales,
utilisez un foret de 1/4-inch.
Étape 3: Installation des supports de montage
L'ombre peut être installée à l'intérieur ou à l'extérieur du cadre de fenêtre.
Un support de montage doit être positionné à environ un à six pouces de
chaque extrémité du rail de tête. Pour les nuances plus larges qui exigent
trois ou plusieurs supports, ceux-ci devraient être espacés également entre
les deux supports externes. Toujours placer les supports où il n'y a pas
d'interférence avec les cordons et les mécanismes à l'intérieur du rail de tête.
La procédure décrite ci-dessous garantira un placement correct des supports.
French 2
Pour fixer les supports, positionnez le rail de tête où le bord avant intérieur du
rail de tête glisse dans la fente à l'avant du support de montage. Pousser le
rail de tête vers le haut jusqu'à ce que la patte flexible au bas du support
s'enclenche en place.
Pour le montage extérieur, fixez les supports au rail de tête comme décrit ci-
dessus. Maintenez le niveau de teinte à la hauteur désirée et centrez-le sur
l'ouverture de la fenêtre. Marquez l'emplacement exact de chaque support
avec un crayon. Retirer les supports du rail de tête et positionner le haut de
chaque support à l'endroit marqué et visser chaque support dans le moulage
de la paroi ou de la fenêtre en utilisant les vis de 1 3/8 ", en perçant les trous
de vis en utilisant un 3 / Pouce.
Pour le montage intérieur, fixez les supports sur le rail de tête comme décrit ci-dessus.
Maintenir l'ombre en place et faire une marque de crayon à l'arrière de chaque support
où il contacte l'intérieur du cadre de fenêtre.
Retirez les supports du rail de tête et alignez-les avec les marques.
Fixez chaque support à l'aide des vis de 1 3/8 po, en perçant les trous
de vis à l'aide d'un foret de 3/32-inch.
Step 4. Secure the Head Rail
Place the head rail on the brac
kets as described in Step 3 above, and lock
in place. Check carefully to assure that each bracket is properly secured.
3
Step 5. Attach the Handle
Attach
the handle to the bottom rail as illustrated. The handle is designed
to minimize contact with the shade's fabric. Always raise and lower the
shade SLOWLY to assure that the pleated fabric stacks neatly.
x To lower the shade: grip the bottom-rail/handle and slowly pull straight down.
x To raise the shade: put your hand(s) under the bottom rail (palm facing up) and
lift slowly until the desired height is reached.
Step 6. Install the Hold-Down Brackets
Hold-down br
ackets are prov
ided for optional use and
are typica
lly
used on
doors with windows such as French doors. These brackets are intended to be
used only if the shade is to be in a permanently lowered position. With the shade
fully lowered, make pencil marks at the outside ends of the bottom rail. Brackets
should be lined up to the pencil marks and screwed into place using the 3/8-inch
screws. Insert the pins protruding from the brackets in the holes on both ends of
the bottom rail (see illustration).
CLEANING INSTRUCTIONS
The vinyl head
rail and bottom rail can be wiped clean with a damp sponge. To
clean the shade's fabric, use a feather duster or vacuum lightly using a soft
brush attachment.
To remove wrinkles or creases, steam the front of
the shade on a light setting.
Do not iron.

Panneau isolant occultant
Veuillez lire et comprendre ces instructions avant de tenter de
monter, installer ou utiliser ce produit.
INSTRUCTIONS D'INSTALLATION
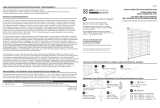
Étape 1: Vérification du contenu de l'emballage
Avant d'installer votre store, assurez-vous que toutes les pièces ci-dessous sont
présentes. Si une pièce est manquante ou endommagée, veuillez ne pas monter,
installer ou faire fonctionner. Pour demander des pièces de rechange, contactez le
service à la clientèle au
1-844-318-6168, du lundi au vendredi de 8h00 à 16h30 EST.
Contenu:
Ombre romaine
Kit de montage
Rail de tête
Ombre romaine
Rail inférieur
French 1
Matériel de montage Le kit comprend:
Partie
a.
Support de montage
Quantité
2 (pour les nuances jusqu'à 38 po)
3 (pour les nuances de 39 po à 56 po)
4 (pour les nuances de 57 po à 72 po)
b.
1 vis de 3/8 po
2 Par support
c.
Poignée pour rail inférieur 1
d.
Supports de retenue 2
e.
Vis 3/8-inch
4 (pour les supports de retenue)
Remarque: 1 vis supplémentaire de chaque taille notée est incluse pour votre commodité
a
b
c
d
e
REPLACEMENT PARTS
If you require replacement parts, contact customer service at
1-844-318-6168, Monday through Friday from 8:00 a.m. to 4:30 p.m. EST.
Please be sure to provide the following information, if possible:
x The complete model or catalog number of your product
x
A description of the product͒
x
The description of the part needed
ONE-YEAR LIMITED WARRANTY
For a period of one
(1) year from the date of purchase, the manufacturer will
replace this window covering with one of equal or superior value, if this window
covering is found to be defective in material or w
orkmanship. To obtain
warranty service, contact our customer service department at 1-844-318-6168.
This warranty does not cover damage of defects caused by or resulting from
improper maintenance, negligent or improper use, abuse, misuse, neglect,
accidents, act of God, alteration, commercial use, installation, removal, or
reinstallation.
This warranty is restricted to normal consumer use within the United States and
Canada. MANUFACTURER WILL NOT BE LIABLE FOR INCIDENTAL OR
CONSEQUENTIAL DAMAGES. SOME STATES DO NOT ALLOW THE
EXCLUSION OR LIMITATION OF INCIDENTAL OR CONSEQUENTIAL
DAMAGES, SO THE ABOVE LIMITATION OR EXCLUSION MAY NOT APPLY
TO YOU. This warranty gives you specific legal rights, and you may also have
other rights, which vary from state to state.
QUESTIONS?
Contact customer service at 1-844-318-6168, Monday
through Friday from
8:00 a.m. to 4:30 p.m. EST.
4
/
