Page is loading ...

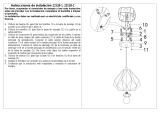
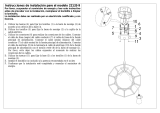
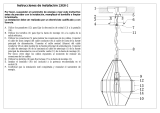
Instrucciones de instalación 22135-2
Por favor, suspender el suministro de energía y leer este instructivo
antes de proceder con la instalación, reemplazar el bombillo o limpiar
la luminaria.
La instalación debe ser realizada por un electricista cualificado y con
licencia.
A. Utilizar el alicate y el destornillador para abrir la argolla en los dos extremos
de la cadena (1). Fijar la cadena (1) a la argolla del cuerpo de la luminaria (2) y
la base (3). Pasar el cable conductor (9) a través de la cadena (1) y extraer a
través de la argolla de la base (3).
B. Utilizar las tuercas (6) para fijar los dos tornillos (4) a la barra de montaje (5)
de acuerdo a los orificios de la base (3).
C. Utilizar los tornillos (7) para fijar la barra de montaje (5) a la cajilla de la
salida eléctrica.
D. Utilizar los conectores (8) para realizar las conexiones de los cables. Conectar
el cable de línea (negro) del cable conductor (9) al cable de línea de la fuente
principal de alimentación. Conectar el cable (blanco) del cable conductor (9) al
cable neutral de la fuente principal de alimentación. Conectar el cable de
aterrizaje (11) del cable conductor (9) al cable de aterrizaje (12) de la fuente
principal de alimentación con el tornillo verde (10) de la barra de montaje (5).
Por favor, evite dejar los cables expuestos al momento de realizar las
conexiones de los cables.
E. Utilizar las tuercas (13) para fijar la base (3) a los tornillos (4) de la barra de
montaje (5).
F. Instalar el bombillo (no incluido) a la potencia recomendada en el socket.
G. Confirmar que la instalación esté completada y reanudar el suministro de
energía.

Installation Instruction for Item 22135-2
Please turn off power and read this instruction before installation, changing
the bulb or cleaning the fixture.
The installation must be handled by a qualified electrician with license.
A. Use the plier and screwdriver to pry open the loops on two ends of chain (1).
Fix chain (1) to the loops of lamp body (2) and canopy (3). Thread lead wire
(9) through chain (1) and out from the loop of canopy (3).
B. Use nuts (6) to fix screws (4) to mounting bar (5) according to the matching
holes of canopy (3).
C. Use screws (7) to fix mounting bar (5) to the junction box.
D. Make the wire connection with connectors (8). Connect the live wire (black) of
lead wire (9) to the live wire from main power supply. Connect the neutral
wire (white) of lead wire (9) to the neutral wire from main power supply.
Connect the earth wire (11) of lead wire (9) to the earth wire (12) from main
power supply with green screw (10) on mounting bar (5). Please pay close
attention to avoiding the wires exposing outside when wiring connection.
E. Use cap nuts (13) to fix canopy (3) to screws (4) of mounting bar (5).
F. Install the bulb (not included) at recommended wattage to the socket.
G. Check if the installation is completed and turn on the power.
/


