Page is loading ...

©2011 BERNINA of America, Inc. jpl Page 1 of 10
Create an adorable quilt for
baby, youngster, or the young
at heart using OESD Crafter’s
Collection Snuggle Up and the
Benartex Habitat Fabric Collec-
tion. A menagerie of whimsical
animal designs are blended
with story-time elements to
make this a much-loved quilt
for snuggling!
Some of the designs in this
collection are appliqué designs
—so easy to accomplish in em-
broidery! Plus, the BERNINA
Bias Binder Attachment #88
makes this a quick quilt to put
together.
Finished size: 39” x 49”
Created by Kay Hickman
Snuggle Up
Baby Quilt
Supplies
Machine & Accessories
BERNINA Sewing & Embroidery System
Large Oval Hoop
Bias Binder Attachment #88 with Foot #95
Piping Foot #38
BERNINA Stitch Regulator #42
Optional feet for quilting:
Roller Foot #55
Edgestitch Foot #10/10D
Walking Foot #50 with Center Guide Sole
BERNINA Embroidery Software v6 (optional)
Embroidery Collection
OESD Snuggle Up Crafter’s Collection #014
Notions
OESD Ultra Clean & Tear Stabilizer
OESD Applique Fuse & Fix (for appliques)
OESD Fuse & Fleece (for circles)
505 Temporary Adhesive Spray
OESD Bobbin Thread
Organ Embroidery needles, size 80/12
Isacord Embroidery Thread
Best Press Starch Alternative
“The Binding Tool” by TQM Products
Construction thread
Ballpoint awl
Glue stick
Fabric marker
Quilt-basting pins or safety pins
Rotary cutter and mat
7” x 14” “Cut for the Cure” ruler
Fabrics
Benartex Blush Fabric Collection:
½ yard (or 2 fat quarters) of green
1 yard (or 3 fat quarters) of ivory
▫ Cut three? Four? 10” x 14” rectangles
▫ Cut one 14” x 20” rectangle
1¼ yards (or 4 fat quarters) of yellow moss
▫ Cut one 10” x 14” rectangle
▫ Cut three 14” x 20” rectangles
Benartex Habitat Fabric Collection:
4 different fat quarters for binding circles
1 yard of brown dot for outer border and bind-
ing
▫ Cut into 2½” x width of fabric strips
(One for top border, one for bottom bor-
der, three for sides, and five for binding.)
1½ yards of dandelion olive for the quilt top
Cut one 34½” x 44½” rectangle
1½ yards of fabric for backing
▫ Cut one 40” x 50” rectangle
Low loft batting — one 40” x 50” rectangle

©2011 BERNINA of America, Inc. jpl Page 2 of 10
Stitch the Embroidery & Appliqués
Note: You may stitch the designs of your choice
or refer to the section “Planning Circles” for the
specific designs, design combinations, and fabric
colors used for each block, as well as how to
combine designs in BERNINA Embroidery Soft-
ware v6.
Adhere two hoop-sized rectangles of OESD
Ultra Clean & Tear stabilizer together with 505
Temporary Adhesive Spray.
Spray the top of the layered stabilizer with addi-
tional 505 and adhere the stabilizer to the wrong
side of one of the fabric pieces for embroidery.
Refer to the “Planning Circles” section for color
and size of fabric for the individual designs.
Attach the hoop to the embroidery machine and
embroider the first design.
Note: Some of the designs from the “Snuggle Up”
collection are appliqué designs. To stitch these
designs, follow the instructions in the Embroi-
dered Appliqué sidebar.
After the design has finished stitching, remove
the excess stabilizer from the back of the piece.
Place the embroidered fabric right side down on
a fluffy towel and press. Allow the item to cool
before moving it.
Repeat for each of the twelve designs.
Cut and Bind the Circles
Refer to the section “Planning Circles” for sugges-
tions on the particular binding fabric to be used
with each design.
Cut each of the embroidered designs into a
9” circle, keeping the designs centered. Fuse
a 9” circle of OESD Fuse & Fleece to the wrong
side of each embroidered circle.
TIP: You may find it easier to cut the Fuse & Fix
into a 10” squares and then center and fuse it to
the back of the embroidered fabric pieces. The
circles can then be cut through both fabric and
batting, which will guarantee that the cut edges
will match.
Embroidered Appliqué
Stitch the placement line (color 1). Remove the
hoop from the machine. DO NOT remove the
fabric from the hoop.
Print the appliqué shape pattern from the PDF
provided with the design collection. Roughly cut
around the pattern piece.
Cut a rectangle of Appliqué Fuse & Fix slightly
larger than the pattern piece. Fuse the shiny
side (the non-paper side) to the wrong side of
the appliqué fabric.
Spray the wrong side of the paper pattern
lightly with 505 Temporary Adhesive Spray and
position the sprayed side of the paper on the
right side of the appliqué fabric.
Carefully cut out
the fabric with a
very sharp pair of
scissors. Remove
the paper pattern.
Turn the appliqué
piece over and
score an “X”
through the paper
only. Gently re-
move the paper to
reveal the adhesive
surface.
Position the
adhesive side of
the appliqué piece
inside the stitched
placement lines.
Attach the hoop to the machine and finish
stitching the design.
Repeat the process if there is more than one
appliqué piece in the design.

©2011 BERNINA of America, Inc. jpl Page 3 of 10
Lower the presser foot so it rests on the folded
bias strip.
Position a test circle of fabric / Fuse & Fleece
right side up in the binder attachment so the
stitching will catch all layers. Stitch around the
edge of the circle, adjusting the needle position if
necessary. Note: The needle position for a circle
may be one click to the right of the position used
when binding a straight edge.
AFTER adjusting the needle position on your test
circle you are ready to start stitching the bias
strips to your embroidered circles.
Insert the bias strip into the binder attachment.
Insert the edge of the circle into the binder and
gently push the circle edge under the needle
while pulling gently on the wrapped bias end of
the strip.
TIP: Start stitching with the foot completely on
the circle, with the needle in the correct position
(very slightly to the right of the upper fold). The
bias should wrap completely around the edge, but
don’t worry too much about this — as you come
back around, you can easily “un-stitch” a few
stitches if needed.
Cut 1⅛”-wide bias strips from each of the four fat
quarters until you have approximately 3 yards of
bias strips from each fabric. Piece the short ends
together with a 45° seam to form one long strip.
TIP: Cut extra strips to use for testing.
Press seam allowances open. Spray the strips
with Best Pressed Starch Alternative; press.
Set up the sewing machine as follows. Test the
settings on a practice circle before stitching the
embroidered circles.
Install Bias Binder #88 and Foot #95 following
the instructions included with the attachment.
Select a straight stitch and set the length at
2.75mm.
Set the needle position one step from far right.
(Adjust as needed during testing.)
Puddle the bias strip on the bed of the machine.
Swing the front of the binder attachment toward
you and to the right for easier access. With the
wrong side of the bias strip facing you, insert
the tip of the strip into the slot of the binder.
Use a blunt instrument such as a ball point awl
or a wooden stick to help feed the strip through
the slot.
TIP: It’s easier to start the bias through the binder if
the “point” of the strip is at the top.
As the strip is pulled through the binder, the cut
edges will begin to fold toward the center of the
resulting fold. Pull a couple of inches of bias
through the binder and swing the attachment
back into position.

©2011 BERNINA of America, Inc. jpl Page 4 of 10
Continue to stitch around the circle, making sure
the cut edge of the circle stays in position and the
bias continues to wrap the edge.
Stop the machine as the beginning tail comes
into view. Clip the excess beginning tail of the
bias strip at a right angle to the edge of the circle.
(This is where you would “un-stitch” if necessary.)
Mark a line 4¾” from
the edge you just cut.
Continue binding the
circle, stopping with the
needle down when it
reaches the mark.
Cut the excess bias strip at an angle about ½”
beyond the end of the binder. Use a glue stick
and finger press the cut edge to the wrong side.
Clip the point off
even with the lower
edge of the strip.
Fold the lower cut edge to the wrong side about
¼”. Clip the tail that extends to the right. Unfold.
Continue stitching as the end of the point is fed
through the binder. The new end should overlap
the original start point.
Repeat for each of the twelve circles.
Attach Circles to the Quilt Top
Refer to Diagram 1 and Top Photo 2 for placement
suggestions.
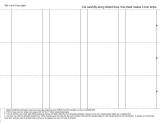
Place the 34½” x 44½” quilt top fabric right side
up on a flat surface and position the circles as
shown in the diagram. When you are satisfied
with the placement, spray the back of each circle
(fleece side) with a small amount of 505 Tempo-
rary Adhesive Spray. Further secure the circles
by pinning them in place with safety pins.
TIP: Place the outer 4 corners first, with each circle
edge 2¼” from the cut edges. Place the upper and
lower center circles equidistant between the outer
circles. This distance is about 1½”. Place the 2
middle circles on the left row equidistant from each
other. However, this distance can vary slightly de-
pending on the fabric, binding, and batting choices.
Attach Piping Foot #38 to the machine. Place the
thin side of the foot over the circle’s binding. The
thick side of the foot should butt up next to the
edge of the binding. Stitch each circle in place
with a straight stitch and a stitch length of 3mm.

©2011 BERNINA of America, Inc. jpl Page 5 of 10
Quilt the layers together using one or more of
the following suggestions:
Echo quilt around the circles using Leather
Roller Foot #55.
Stitch-in-the-ditch along the outside borders
using Edgestitch Foot #10 (10D for the
BERNINA 830 with BERNINA Dual Feed) or
Walking Foot #50 with the new Center Guide
Sole.
Use the BERNINA Stitch Regulator #42
to stipple quilt around each of the animals
inside the circles.
Stitch the short ends of the five 2½” x width of
fabric strips for the binding together to form one
long strip.
TIP: Cutting and seaming the ends diagonally will
help hide the seams in the binding.
Press the seam allowances open. Fold the long
strip in half with wrong sides together; press.
Stitch the Borders
Use a ¼” seam allowance to stitch the 2½” x
width of fabric top border strip to the top cut edge
of the quilt. The extra length of the border fabric
will allow the border fabric to extend past the
beginning and ending of the stitching.
Press the seam flat and then press the seam
allowances toward the border. Use a ruler and
rotary cutter to trim the ends of the border strip
even with the quilt top.
Repeat to attach the bottom border.
Stitch the three 2½” x width of fabric strips for the
side border together. Cut the strip into two equal
lengths.
TIP: Stitching the ends together with a diagonal
seam will help hide the border seams.
Use a ¼” seam allowance to stitch the strips to
both the right and left cut side edges of the quilt.
Allow the ends of the border strip to extend pass
the beginning and ending of the stitching.
Press the seams flat, then press the seam allow-
ances toward the border.
Stitch the Quilting and Binding
Adhere the wrong side of the fabric backing to the
low loft batting using 505 Temporary Adhesive.
Spray the top of the batting with additional 505
and center the wrong side of the quilt top over the
batting. Further secure the layers by pin-basting
and edgestitching the quilt top to the batting. (The
batting and backing will extend beyond the edges
of the quilt top at the point.)

©2011 BERNINA of America, Inc. jpl Page 6 of 10
Remove the pin
and stitch again
beginning at the
fold.
Repeat the steps above until all four corners
have been stitched.
Stop stitching when you reach the first mark you
made on the first side. Trim the excess length of
binding, leaving a 10” tail.
Use “The Binding Tool” from TQM Products to
create the perfect ending seam. Just follow the
instructions for cutting and sewing and your end-
ing seam will be perfect every time.
Trim batting and backing even with edge of
binding. Take care that you do not cut the folded
edge at each of the corners.
Wrap the binding around to the back of the quilt
and hand stitch (or stitch-in-the-ditch) it in
place.
Mark a dot approximately 12” down from the right
edge of the quilt.
Mark a dot 12” from the first dot. Leave a 10” tail
of binding, begin stitching the binding to the side
edge of the quilt top at this dot. NOTE: The bat-
ting and backing fabric will extend past the edge
at this point.
As you near the bot-
tom edge, use a fab-
ric marker and ruler
to precisely mark a
line ¼” up from and
parallel to the bottom
cut edge of the quilt
top (not the batting).
Continue stitching until the needle reaches that
mark, then raise the needle and the presser foot
and clip the threads.
Maneuver the quilt
top so you can fold
the binding at a 45°
angle. The cut edge
line up with the
bottom edge.
Place a pin through
all layers at the cut
edge of the first
side, then fold the
bias strip down on
itself. The fold should
be even with the cut
edge of the first side.
Planning the Circles
The instructions on the following pages are the blocks (and adaptations) for the quilt pictured. Using
BERNINA Embroidery Software v6 will make placing the designs easy. Although specific directions are
given for placement and sizing of the blocks shown on the quilt, feel free to experiment with your own
placement. The only guideline is that they must fit within a circle of approximately 8” in diameter. If you
do not have embroidery software, print the individual templates from the PDF provided on the embroi-
dery collection CD or USB stick and arrange them as shown on the quilt. Mark the center point of each
design, and hoop and stitch each design separately.

©2011 BERNINA of America, Inc. jpl Page 7 of 10
Click on the Write to Machine icon and send the
design to a USB stick or your embroidery sys-
tem.
Monkeys Chasing Tails
(14” x 20” moss yellow fabric; bind with bias color 2)
Open design
BC01402 — the
small monkey.
Right click on the
Show Hoops icon.
Select Jumbo Hoop
#26 and place a check in the box next to Display
Hoops. Click OK.
Note: If you do not have an 830 with the Jumbo
Hoop, continue to work in the Large Oval Hoop.
The design will be too large to stitch in one hoop-
ing, so you will need to reposition the designs to
fit, or use the Multi-Hooping feature of BERNINA
Embroidery Software 6.
Click View > Zoom Out 2x.
Select the monkey and click the Wreath icon.
Change the number in the box to 5.
Move the mouse without clicking until the tail of
one monkey is near the cheek of the following
monkey. Click the mouse when you are satisfied
with the placement.
Press “C” on the computer keyboard to view the
design in the center of the workspace.
Save the design as Monkeys Chasing
Tails.ART.
Click on the Write to Machine icon and send
the design to a USB stick or your embroidery
system.
Monkey Sitting on Turtle
(10” x 14” green fabric; bind with bias color 1)
Open design
BC01414 — the
monkey and turtle
group.
Right click on the
Show Hoops icon.
Select the artista
255 x 145 Oval Hoop
from the drop down
menu and place a
check in the box next to Display Hoops. Click OK.
Select File > Insert Design and select design
BC01419 — the plant. Move it to the right of the
monkey and turtle design. Visually align the lower
edges of the two designs.
Select File > Insert Design and select design
BC01410 — the sun. Move it between, and
slightly higher than, the monkey and the plant.
Click the Show All icon to see the entire design.
Save the design as Monkey Sitting on Turtle
Grouping.ART.
Click on the Write to Machine icon and send the
design to a USB stick or your embroidery system.
Stork & Turtle
(10” x 14” ivory fabric; bind with bias color 2)
Open design
BC01427 — the
turtle.
Select File > Insert
Design and select
design BC01424 —
the stork. Move it to
place its feet on the
turtle’s back.
Click the Remove Overlaps icon.
Save the design as Stork and Turtle.ART.
Planning the Circles in BERNINA Embroidery Software 6
Visit www.berninausa.com
for additional BERNINA projects,
product information, and promotions!

©2011 BERNINA of America, Inc. jpl Page 8 of 10
With the plant selected, click on the Mirror
Merge—Horizontal icon. Move the mouse with-
out clicking until the second plant is on the left
side of the hippo. Click the mouse when you are
satisfied with the placement. Click on an open
area of the screen to deselect the plants.
Select the plant on the left and use the corner
sizing handles to reduce the size to approxi-
mately 82%.
Select the right plant. Click the Remove Over-
laps icon.
Select the Hoop Layout menu. If any part of the
design does not fit in the hoop, it will appear in
black. If this happens, select the hoop on the
screen and right click on the Rotate Hoop icon
two times (turns hoop 90°).
Save the design as Hippo with Plants.ART.
Click on the Write to Machine icon and send
the design to a USB stick or your embroidery
system.
Circle of Zebras
(14” x 20” moss yellow fabric; bind with bias color 3)
Open design
BC01406 — the
zebra.
Right click on the
Show Hoops icon.
Select Jumbo Hoop
#26 and place a
check in the box
next to Display
Hoops. Click OK.
Note: If you do not have an 830 with the Jumbo
Hoop, continue to work in the Large Oval Hoop.
The design will be too large to stitch in one hoop-
ing, so you will need to reposition the designs to
fit, or use the Multi-Hooping feature of BERNINA
Embroidery Software 6.
Click View > Zoom Out 2x. Repeat until you can
see the zebra and the sides of the hoop.
Mushroom and Snail
(10” x 14” green fabric;
bind with bias color 4)
Open design
BC01421 — the
mushroom.
Select File > Insert
Design and select design BC01423 — the snail.
Move it to the lower right of the mushroom.
Select File > Insert Design and select design
BC01413 — the small sun. Move it to the upper
right of the mushroom.
Click the Show All button to view the entire
design.
Right click on the Show Hoops icon. Select the
artista 255 x 145 hoop and place a check in the
box next to Display Hoops. Click OK.
If necessary, select and move any or all of the
designs so they fit into the Oval Hoop.
Save the design as Mushroom and Snail.ART.
Click on the Write to Machine icon and send the
design to a USB stick or your embroidery system.
Hippo with Plants
(10” x 14” green fabric; bind with bias color 4)
Open design
BC01425 — the
hippo.
Right click on the
Show Hoops icon.
Select the artista
255 x 145 hoop and
place a check in the
box next to Display
Hoops. Click OK.
Select File > Insert Design and select design
BC01420— the plant design. Move it to the right
of the hippo. Align the bottom of the plant with the
feet of the hippo and lap the left leaf over the
hippo’s body.

©2011 BERNINA of America, Inc. jpl Page 9 of 10
With the elephant still selected, move it down in
the hoop until its rear feet are aligned with the
plant.
Select File > Insert Design and select design
BC01406 — the small zebra. Move it to the
left of the plant. Click the zebra design again
drag the upper right hollow handle to rotate the
design clockwise approximately 59°.
With the zebra still selected, move it down until
its front hooves are aligned with the plant.
Save the design as Circle of Animals.ART.
Click on the Write to Machine icon and send the
design to a USB stick or your embroidery sys-
tem.
Coconut Tree and Monkey
(10” x 14” green fabric; bind with bias color 2)
Open design
BC01417 — the
coconut tree.
Select File > Insert
Design and select
design BC01423 —
the snail. Move it to
the lower right of the mushroom.
Right click on the Show Hoops icon. Select the
artista 255 x 145 hoop and place a check in the
box next to Display Hoops. Click OK.
Select File > Insert Design and select design
BC01415 — the monkey. Move it to the right of
the coconut tree.
Save the design as Coconut Tree and Mon-
key.ART.
Click on the Write to Machine icon and send
the design to a USB stick or your embroidery
system.
With the zebra selected, click on the Wreath tool
and select “6” from the drop down menu.
Move the mouse without clicking until the zebras
are positioned in a circle with the front feet of
one zebra close to, but not overlapping, the next
zebra. Click the mouse when satisfied with the
placement.
Save the design as Circle of Zebras.ART.
Click on the Write to Machine icon and send the
design to a USB stick or your embroidery system.
Circle of Animals
(14” x 20” moss yellow fabric; bind with bias color 2)
Open design
BC01418 — the
small plant.
Right click on the
Show Hoop icon.
Select the Jumbo
Hoop #26 and place
a check in the box next to Display Hoops.
Click OK.
Note: If you do not have an 830 with the Jumbo
Hoop, continue to work in the Large Oval Hoop.
The design will be too large to stitch in one hoop-
ing, so you will need to reposition the designs to fit,
or use the Multi-Hooping feature of BERNINA Em-
broidery Software 6.
Click the Show All icon.
Select File > Insert Design and select design
BC01408 — the small hippo. Move it above the
plant.
Select File > Insert Design and select design
BC01402 — the small monkey. Move it below the
plant.
Select File > Insert Design and select design
BC01404 — the small elephant. Move it to the
right of the plant. Click the elephant design again
and the sizing handles will become hollow. Click
and drag the upper right hollow handle and rotate
the design clockwise approximately -40°. (Watch
the coordinates in the lower prompt bar.)

©2011 BERNINA of America, Inc. jpl Page 10 of
from your embroidery machine. Consult your
machine manual for specific instructions.
However, if you have purchased the CD version
of the collection, you may wish to use BERNINA
Embroidery Software 6 as a transfer device to
transfer designs from the computer to the ma-
chine.
Animals Reading
(10” x 14” ivory fabric; bind with bias color 1)
Open design BC01433 —
the animals reading.
If you wish to save a
duplicate design, select
File > Save As and save the design as Animals
Reading.ART.
Click on the Write to Machine icon and send
the design to a USB stick or your embroidery
system.
Elephant and Monkey
(10” x 14” ivory fabric; bind with bias color 4)
Open design BC01422 — the
elephant with the monkey.
If you wish to save a duplicate
design, select File > Save As and
save the design as Elephant
and Monkey.ART.
Click on the Write to Machine icon and send
the design to a USB stick or your embroidery
system.
Turtle Parade
(10” x 14” moss yellow fabric; bind with bias color 1)
Open design BC01431 —
the three turtles.
If you wish to save a duplicate design, select
File > Save As and save the design as Turtle
Parade.ART.
Click on the Write to Machine icon and send
the design to a USB stick or your embroidery
system.
Monkey Wreath with Initials
(14” x 20” ivory fabric; bind with bias color 3)
Open design
BC01429 — the
monkey wreath.
Right click on the
Show Hoop icon.
Select the Jumbo
Hoop #26 and place
a check in the box next to Display Hoops.
Click OK.
Note: If you do not have an 830 with the Jumbo
Hoop, continue to work in the Large Oval Hoop.
The design will be too large to stitch in one hoop-
ing, so you will need to reposition the designs to
fit, or use the Multi-Hooping feature of BERNINA
Embroidery Software 6.
Right click on the Monogramming icon. Select the
Lettering Tab and type the desired initials in the
boxes. Use Letter 1 for the first initial, Letter 2 for
the last initial, and Letter 3 for the middle initial.
Click the radio button next to All.
Use the drop down arrow and select Child’s Play
from the Alphabet menu.
Select Style 5 by clicking on the Style Box and
dragging to select Style 5. Click OK.
Click the Show All button to view the entire
design.
Select Edit > Select All, then click the Align
Centers icon.
Save the design as Monkey Wreath.ART.
Click on the Write to Machine icon and send the
design to a USB stick or your embroidery system.
NOTE: The following designs are stitched “as is,”
just as they appear in the collection.
If you have purchased the USB version of “Snuggle
Up” and have an embroidery machine with USB
capabilities, you may simply insert the USB stick
into the machine and access the designs directly
/