Page is loading ...

Instruction manual
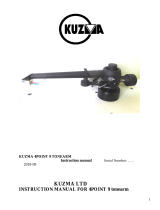
KUZMA STOGI REF 313 TONEARM
Serial Number: ….
2011-5
1

KUZMA LTD
INSTRUCTION MANUAL FOR STOGI REF 313 tonearm
The Stogi Ref 313 tonearm is very precisely engineered pieces of audio equipment. However
the construction is robust and requires minimal maintenance for optimal performance.
Fig 1.
CONTENTS: Page
1.0. General description 3
2.0. Unpacking 4
3.0. Tonearm Setup 4-7
4.0. Tonearm adjustment 8-12
4.1. Adjustment of tracking force 8
4.2. Adjustment of tangential geometry 8-9
4.3. Adjustment of VTA 9
4.4. Adjustment of azimuth 10-11
4.5. Bias adjustment 11
4.6. Adjustment of cueing device 11-12
5.0. Maintenance 12
6.0. Transport 13
7.0. Troubleshooting 13-14
2
Azimuth adjustment
Azimuth fixing

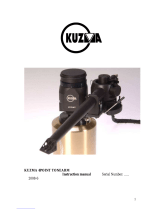
1.0. General description:
The Stogi Ref 313 tonearm has the same basic construction as the Stogi Ref arm. The main
difference is that Stogi Ref 313 has q 12 inch ( 313mm) long tonearm tube.
The Stogi Ref 313 has a very sophisticated, precise and repeatable azimuth adjustment
mechanism with zero play and a very rigid locking mechanism.
The main structure, conical tube and headshell are machined from solid aluminum blocks. Our
own unique detachable headshell is incorporated.
The quality ball bearings are carefully selected and individually checked and tested before
assembly. They can each support 20 Kg and are mounted free of play with minimal friction in
all planes.
Stogi Ref 313 arms incorporate features such as an adjustable height cueing device, precisely
calibrated counterweight and simply adjustable bias.
The arm is wired throughout with high quality Cardas wires and comes equipped with its own
full accessories kit. It will accept all cartridges and can be fitted on most quality turntables.
Technical data:
Mass: 980 gr
Effective length : 313 mm
Mounting distance: 300 mm
Offset angle: 17.4 degrees
Effective mass: 13 g
VTA adjustment: yes
Azimuth adjustment: yes worm drive
Bias adjustment: yes
Cables: single
Arm mount: Kuzma & Stogi
3

2.0.0. Unpacking:
2.1.0. Packing list:
Tonearm with fingerlift; counterweight; armbase; instruction manual; protractor for cartridge
geometry adjustment and a bag containing:
Bag:
Sets of 3 socket head screws M6x16 mm, M6x20 mm, M6x25 (for Stabi Ref), M6x 30 mm,
three washers, three spring washers (wooden armboards) for fixing base.
Allen keys: 5 mm for attaching armbase to armboard, 3 mm for height adjustment
(VTA), 2mm for cartridge and azimuth, 1,5 mm for fixing counterweight, bias and cueing
device adjustment.
Small bag containing 2 headsocket screws M2.5 x 5mm, M2.5x8 mm, M2.5x 12mm and nuts
for fixing cartridge plus Allen key 0.7 mm for removing fingerlift.
Open the box carefully and remove the top cover. Ensure that the armboard on the turntable has
the correct cut-out (main central hole must be 30- 40mm in diameter).
Remove the armbase and prepare it for fixing onto the turntable.
Holding the pillar not the tube, lift the tonearm out. Observe bias and thread while so doing.
The tonearm can be rested upside down on the C shape.
Remove all other parts.
3.0.0. Tonearm Setup:
3.1.0. Armbase Setup:
3.1.1. Armboard cutout:
Take the tonearm mounting protractor and place on spindle of turntable. The Stogi cut-out is
similar to the standard Linn cut-out but with a 300mm pivot to spindle distance.(You can also
use a Kuzma cutout)
Mark the position of holes on the tonearm mounting board as indicated on protractor.
Ensure that there is adequate space in front for tube and headshell and behind for
counterweight, in order to avoid problems of lid closure. Check also that screw
positions will be over the cut-out on subchassis, unless screws are to be sunk. It is wise
before cutting to hold tonearm in position over marks and judge the position of the
tonearm on the board will be correct, bearing in mind these criteria. Otherwise the
precise position of the tonearm is unimportant providing it lies on the protractor arc.
The height of the tonearm with cartridge mounted is 55mm above record.
Remove tonearm board from turntable and check that the thickness of board is between 6 mm
and 22 mm, if so make cuts as marked.
4

3.1.2. Armbase mounting:
To fix armbase to armboard you will need the correct length of three socket head screws,
washers and Alley key 5 mm. Fit washers on screws and insert into underside of tonearm board
and up into tonearm base. Position base so that height adjustment (VTA adjustment) screw is at
top right position, i. e. 2 o’clock and tighten screws using Allen key.
Remember that the screws are of harder material than the armbase (aluminum) so do not over
tighten as this could damage the base.
Note: if armboard is thicker then 22 mm:
Either obtain screws of a length that will go through the armboard and into the base to a depth
of approximately 5mm, or sink the screw heads by first drilling a large hole of about 9 mm with
a drill and then drilling a hole of smaller dimension through this.
Put tonearm board back on turntable.
3.2. Tonearm mounting:
Note: Be sure that the tonearm is not too low.
Insert tonearm cable through hole in armbase, then the pillar and fix it at a suitable height using
Allen key 3 mm at the height adjustment screw in the base.
Screw on counterweight so that the thread is covered.
It may now be necessary to adjust the suspension on the turntable due to the added
weight of the tonearm.
Fix tonearm cable onto the turntable ensuring that there is adequate cable to allow for
height adjustment. If the turntable has a suspended subchassis, position cable in such a way that
the subchassis has freedom of movement.
The phono plugs are marked in the standard way: left - white, right - red, and
should be inserted into phono inputs. The connector at the end of the grounding
wire should be connected to GND on preamplifier.
Check that the bias and thread are correctly positioned (it may have tangled during
handling).
For optimum performance you may wish to forego the convenience of the finger lift. If so, this
should now be removed using Allen key 0.7mm, loosening screw
and easing out lift. Replace screw in hole.
Remove wire securing arm tube.
5

3.3. Setting up the tonearm:
3.3.0. Headshell removal and fixing:
This tonearm has a detachable headshell and fixing and positioning it has no negative effect on
tonearm performance. The whole headshell is fixed with one Allen key 2 mm. Insert it in the
top hole and release screw with Allen key for at least one turn (ACW). (Fig.2&3)
Disconnect cartridge pins, remove Allen key and pull out the headshell. (Fig.4)
Fix the cartridge and return headshell back into the tube. If it can not be inserted easily, rotate
the screw a little more in ACW direction. Then fix it back in CW direction with gentle force,
around one turn.
Fig.2 Locked Fig.3 Unlocked
Note: Do not over-tighten the screw which locks the headshell.
Fig.4 Removing headshell
3.3.1. Connecting tonearm:
Check the horizontal movement of the tube to ensure that the headshell will reach the inner
grooves.
Due to the high tonearm mass, turntable leveling and suspension should be checked and
adjusted according to the turntable manual.
6

3.3.2. Cartridge mounting:
You will need Allen key 2 mm plus the two screws and nuts M 2.5 (some cartridges have
threads and nuts will not be needed).
Mount the cartridge with the appropriate set of 2.5mm screws and check its travel above the
record with the cueing device in the “up” position! Starting overhang is achieved, if the needle
is in line with the front edge of the headshell.
Keeping the stylus guard on the cartridge, insert screws from underneath the cartridge through
the slots in the headshell. Screw on the two nuts manually. The tip of the
cantilever should be level with the end of the headshell (viewed from side).
Fix by slightly tightening the screws using Allen key. Ensure that the nuts have fitted into the
ledge around the slots.
Note: It may be found easier to remove the tube from the armrest to give a little
more room below the headshell.
Using tweezers push the pin connectors into the cartridge according to code
Red - right
Green - right ground
White - left
Blue - left ground
The connectors will slip snugly onto the pins of the majority of cartridges, but:
Pins too fat: with tweezers firmly push the connector onto pin. Connector will
open slightly. Do be careful, however, that tweezers do not slip and damage the
cantilever.
Pins too thin: connectors should be squeezed with tweezers to make the hole
slightly smaller.
Put cueing device into ‘play’ position, ie. down, release tube from the armrest and
Adjust the counterweight until the tube is balanced ie. floats in a horizontal position slowly back
towards the armrest. Prior to final balancing remove the stylus guard.
3.3.3. Balancing of the tonearm:
Balance the tonearm to zero tracking force by rotating the counterweight along the thread.
The instructions with your cartridge will recommend a suitable tracking force. We recommend
you choose the highest force given and set the arm to that amount. A higher tracking force
causes less damage to the record as the stylus maintains more stable contact with the sides of the
grooves.
The counterweight is marked with five red dots. One full rotation of the counterweight increases
tracking force by 0.5grams, therefore distance from one dot to another corresponds to 0.1 grams.
But precise tracking force should be adjusted with the use of a balance scale.
With the cueing device in the ‘up’ position and the tube in the armrest the counterweight is
turned anticlockwise (from front view) to increase the tracking force.
7

4.0. Tonearm adjustments:
4.1. Adjustment of tracking force:
4.1.1. Balance scale:
Set up the cartridge tracking force with the balance scale, which must be at record height.
Rotate the counterweight towards the tube to increase tracking force.
4.1.2. Manually:
Balance tonearm to zero. Then the position of one dot should be noted and taken as zero, (any
dot will do, so choose the most easily visible). Then simply turn the counterweight
anticlockwise counting each dot that passes that position as an increased tracking force of
approximately 0.1gram. For example a tracking force of 1 gram will necessitate turning the
counterweight past 10 dots or two complete turns the counterweight.
4.1.3. Counterweight fixing:
The counterweight is secured by gently turning one of the three screws M3 with the Allen key
1.5mm. Do not, however fix securely at this stage until tangentional tonearm adjustments are
completed.
4.2. Adjustment of tangential geometry:
4.2.1. Tonearm height adjustment (rough Vertical Tracking Angle-VTA):
Note: Do not drop the tonearm in the armbase.
Put a record on the platter and adjust height of the tonearm’s VTA in such a way, that the
central axis of the tube will be parallel to the record. This is only a starting point for VTA.
Position the needle carefully in the normal playing position above the record with the lift still
“up”, to ascertain how low or high the arm is.
If tonearm is too low, then the tonearm must be raised by releasing the screw in the base while
holding the tonearm by the ‘C’ shape and lifting it up. Tighten VTA screw when the tonearm is
in position, though do not over tighten.
Repeat process until the arm is high enough to clear the record.
The needle should be in the groove. If not the tonearm is too high and should be lowered.
Note: Ensure the needle is properly in the groove; observe the cartridge body reflection on a
record surface. This is more easily seen if the stylus is in the middle grooves of the record side.
4.2.2. Tangential geometry adjustment:
Note: Do not adjust the cartridge by observing the body of the cartridge only. Observe the
cantilever.
Once the cartridge has been mounted, it is necessary to ensure that the cartridge is tangentional
to the record grooves in order to minimize tracking distortion during playing. As the cartridge
moves in an arc across the record, tracking distortion occurs and is minimized by the tonearm
geometry and the angle of the cartridge in the headshell.
With optimum tonearm geometry very low distortion levels (below 1 %) can be obtained across
the entire playing surface. Cartridges have zero distortion at two points on a record and these
8

points are used when aligning the cartridge. In practice these points lie at 66mm and 121mm
from the record centre (see protractor).
Other protractors make use of different zero points due to the use of different parameters in
calculation. In this case 60mm has been chosen as the inner groove and 146 mm as the outer
groove which still has optimum tracking distortion.
For a distance of 212mm from the record centre to the centre of the tonearms horizontal
rotation, the optimum overhang is 18mm and the effective length, ie. the distance from the
centre of the tonearm horizontal bearing to the tip of the cartridge is 230mm. This is gained
with offset angle of 24°, and gives a maximum tracking error of less than 2° and the distortion
of less than 1 %. These are harmonics of the second order which are not as irritating as the
third, which are very common in
amplifiers.
Ensure that bias is on minimum and place the protractor over the spindle on the platter.
Using the protractor, adjust geometry at two null points. Rough guidance is by the edges of the
cartridge body, but accurate adjustment is by observing whether the cantilever and lines are
parallel at the two null (zero) points.
4.2.3. Fixing cartridge:
The screws holding the cartridge must now be tightened and it is very important
to avoid moving the position of the cartridge, so tighten in the following way:
slowly, one screw at a time in extremely small stages. Before screws are
completely tight check that the cartridge is still in alignment. Then tighten screws firmly
bearing in mind whether the cartridge
body is made of metal or plastic!
Note: If you find it impossible to align the cartridge, ie. the cartridge cannot move far enough
forward in the slots of the headshell, then the tonearm is incorrectly positioned on the armboard,
being too far from the record centre. If the cartridge cannot be moved far enough back in the
headshell, then the arm is too near the centre of the record.
In either case the tonearm will have to be repositioned on the armboard. It should be noted
however, that different cartridges allow for more or less movement than others.
4.3. Adjustment of VTA:
VTA describes the angle between the record surface and the stylus. This angle changes as the
height of the tonearm is altered. The standard angle is 15° but cartridge manufacturers work
with degrees of anything between 10°- 30° so only by listening tests can one ascertain the
correct angle for your particular cartridge. The VTA also varies according to the tracking force
and thickness of records. An increase in tracking force is equivalent to lowering the tonearm
and vice-versa.
For your information to change the angle by 1° means a change in height of approximately 3mm
on the pillar. Some styluses need more precise adjustment of VTA than others.
The starting position is that the central axis of the tube is parallel to record surface.
With a felt pen mark the position where the pillar meets the base, as a point of
reference.
Use a good recording, preferably acoustic instruments and listen.
If the tonearm is too low the sound has a tendency to have an overblown base and
the stereo picture is imprecise.
9

If the tonearm is too high the sound tends to be too bright, ie. too aggressive,
especially on acoustic strings.
Try moving the tonearm up and down in 2mm steps to judge where the arm
sounds most balanced with a more precise stereo picture.
Fine adjustments can be made in the range of 0.5mm.
Now fix height firmly.
4.4. Adjustment of azimuth:
Azimuth describes the angle between the record surface and the stylus, viewed from the front of
the cartridge. This should be 90° and can be checked by observing if the cartridge body is
square with its mirror image on the blank part of a record or by putting a mirror under the stylus
(taking care that the stylus does not slide). If using a mirror ensure that it is absolutely flat.
4.4.1. Rough Azimuth adjustment:
If the cartridge is not square, the tube can be rotated slightly to obtain the correct azimuth.
Firstly the tube should be released by loosening the two screws on the top of the arm. Use Allen
key 2mm and turn screw for only 90°. Then (being careful not to push the tube off the armrest)
insert the Allen key into the screw on the right side of the arm (this screw is above the cueing
device). Observing the position of the marks on the tonearm and the cartridge body, this screw
should be turned for approximately 45° to alter the azimuth. A clockwise turn of the screw
causes a clockwise rotation of the arm and vice-versa. When the cartridge body is square fixed
the top two screws firmly but do not over tighten as the locking mechanism holds very quickly.
4.4.2. Fine Azimuth adjustment:
Note: See appendix 2 on our web site.
The easiest way is to use an appropriate program with a test record and PC.
It can also be done using an oscilloscope with a test record or by using good records in a good
system and listening to the sound. Cartridges with fine profiles (VDH, Microline etc.) are more
sensitive to this adjustment. On the other hand cheaper cartridges are not made so well, so
making fine adjustment is also useful.
Start listening with the tube in zero position, ie. with the marking lines aligned. Listen to the
sound-stage, the focus and the stability of the instruments. Release the two locking screws and
rotate the Allen key so that tube rotates for approximately the width of the mark. Listen and
then rotate tube for a similar amount in the opposite direction and again listen. Adjust the arm
to the position in which the best sound was obtained. In this position make further adjustments
by turning the Allen key for a quarter turn in one direction, listening and then turning a quarter
turn in the other direction and listening.
Continue this process making ever decreasing adjustments, 1/8 of a turn, then 1/16 and so on.
When optimum results are obtained fix the locking screws.
Note: During fine adjustment only gently fix locking screws during listening.
The adjustment screw is highly sensitive and the smallest pressure on the Allen key will alter
the azimuth and sound.
Do not attempt any adjustment when the locking mechanism is locked. Although no damage can
be done.
10

Significantly improved sound can be obtained by paying attention to azimuth adjustment prior
to final VTA adjustment.
To make azimuth adjustments, release the two screws locking the mechanism at the centre top
of the main tonearm tube, with Allen key 2mm. Under the main tube is a tiny rod with a
hexagonal screw. Insert the Allen key 2mm into the screw (it may feel loose), rotate it slightly
and it will alter the azimuth. (Fig.1)
Rotating it back will bring azimuth to its previous position. Changes can be seen by
misalignment of the white lines on the top of the centre of the tube. Even 15 degrees rotation of
the Allen key will make a significant difference.
4.5. Bias adjustment:
Note: see Appendix 3 on our web site.
The bias should be adjusted according to the tracking force. Use Allen key 1.5mm, until the
position of the weight is equivalent to your chosen tracking force. Lock the screw when in
position.
Fig. 6 Bias adjustment
For maximum trackability, it is advisable to set the bias by use of an appropriate test record, ie.
those with tracking bands. Please do not use test records with blank space where the tip of the
needle sits on the surface rather than in the groove.
Set bias and tracking force as previously described and listen to mistracking on highly
modulated tracking bands. On those bands can be heard as impure tones and there will be more
overtones. (See instructions on test record)
If mistracking is apparent, increase or decrease bias until minimum mistracking is found. If
mistracking is heard on the right channel only then the bias is too low, if on both channels the
bias is too high or the trackability limit of the cartridge has been reached.
Finally further decrease mistracking by increasing tracking force to the maximum
recommended for the cartridge.
Again try to optimize bias.
X P
mm gr
0 1.00
3 1.25
8 1.50
13 1.75
18 2.00
11
bias lock
X

4.6. Cueing device adjustment:
Should you find that in the ‘up’ position the cartridge is too high or too low above the record
then the cueing device can be raised or lowered. This can be done simply by using Allen key
1.5 mm:
Insert key into the screw on the side of the arm rest.
Release the screw, raise or lower the device and retighten.
Rotation of the cueing device can affect the drift of cartridge while traveling vertically down.
The cueing device may lift slightly as the screw is retightened. Do not over-tighten as this may
cause the cueing device to stick in the ‘up’ position. Should this occur, slightly release the
screw?
5.0. Maintenance:
5.1. General:
The bearing does not need maintenance. Dust only with a soft brush, do not blow away dust.
If the tonearm is mounted on a wooden armboard the base may need to be retightened in the
board after a few weeks.
5.2. Checking bearings for play:
Holding the headshell, gently try to rotate tube of arm. There should be no movement or
audible clicking. If there is, consult your dealer.
Note: Ensure that Azimuth and height adjustment screws are fixed before
attempting the above.
5.3. Checking bearings friction:
Replace stylus guard and balance the tonearm with bias at a minimum. The arm should
move slowly and smoothly from the inner groove towards the armrest.
Add a tracking force of 0.1gram. The tonearm should now go slowly down and
outwards towards the armrest.
Balance the tonearm again and set the tracking force to 0.1gram. Now the tonearm should
move slowly up and out towards armrest.
If the tonearm does not behave in this way, repeat tests before consulting your
dealer.
Note: Ensure that tube movement is unobstructed by the cueing device.
12

6.0. Transport:
During transport the tube should be locked in the armrest, secured with tape or wire and the
counterweight removed.
6.1. Tonearm with cartridge on turntable:
The tonearm can be left on the turntable when being transported short distances by: Placing the
tonearm in armrest.
Secure the arm to armrest with elastic band or tape.
Remove counterweight.
Secure movement of subchassis by insertion of wedges.
Many turntables, however, cannot be properly packed for longer transport with the tonearm in
position and the tonearm, therefore, must be removed and repacked in the original packing.
7.0. Troubleshooting:
If any problems occur with your tonearm please do not hesitate to contact your dealer. Many
audiophiles do, however, find it convenient to try and solve small problems themselves and,
therefore, the procedures outlined below may be followed if such difficulties should arise.
7.1. Pin connector broken off wire:
To repair this you will need a small soldering iron, non acid solder, tweezers, sharp knife, uncut
end of drill or nail about 1.3mm dia. x 30mm long minimum (of unsolderable material), bluetac
or plastecine.
Remove tonearm from turntable and place upside down. Remove cartridge.
Remove insulation plastic from pin connector.
Insert nail or drill into connector in the way cartridge pins would connect. This prevents the
connector becoming overheated and also stops solder entering the connector. Fix nail in bluetac
or other material to hold pin in position.
Gently pull out about 20 - 25mm or wire from the tonearm and with a sharp knife, carefully
strip insulation from wire for a length of about 3 - 4mm.
Note: It is important not to cut the wire conductor itself as this will weaken the wire.
With a clean solder tip, melt any solder left on the pin connector and blow away from hole.
Put plastic insulation tube on wire.
Place stripped end of wire through the hole in the connector and bend back to form a hook to
secure.
From underneath, place iron tip and from the top, the solder.
Replace insulation tube over the solder joint and gently remove the connector from nail or drill.
13

7.2. Broken bias thread:
You will need about 100mm of thin nylon fishing line, Allen key 2.5mm and a sharp knife.
You can get bias thread as a spare part from a dealer. Remove counterweight.
With Allen key remove the screw at the point where nylon is coming out from the metal part.
Note: This does not in any way affect the bearings.
At the end of the thread is a small plastic tube to which the thread is attached. Cut
away the broken thread and tie and knot new thread around tube.
Pull thread through screw and replace screw with Allen key.
Remove broken thread at bias. It may be necessary to pull aside the black plastic slightly to do
this.
Put new thread through and replace black plastic.
Position tonearm as if in the inner groove position and pull the thread until the rod with weight
is in a horizontal position, ie. maximum bias.
Knot thread three times and trim surplus.
If absolutely necessary the length of thread can be shortened by loosening the screw at
point ‘x’ with Allen key 1.5mm and pulling the rod out slightly from the main C metal part.
7.3. Hum and buzz:
Check to ensure that grounding wire has been connected.
If using an MC transformer, try connecting ground wire to this or to the
preamplifier.
Alternatively, connect grounding wire to preamplifier and run grounding wire from the MC
transformer ground, to the ground of the preamplifier.
This can be caused by the transformer in the power amplifier being situated too close to the
cartridge or by the tonearm output cable being too close to the mains cable. If cables must be
close together, try to ensure that they cross at right angles.
7.4. Cartridge jumps in the grooves:
See if the tube can travel towards the centre of the record and check that the tube is not
restricted by the cueing device height or holder.
See FAQ on our web site.
Kuzma Ltd
Hotemaze 17A
SI-4205 PREDDVOR
SLOVENIJA
14

/