Page is loading ...


2
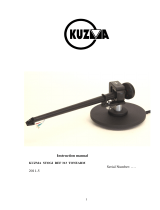
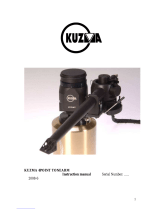
User Manual
1
User Manuals are updated regularly. Please be sure to check our support page for a newer
version of this guide: www.klaudio.com
GENERAL PRECAUTION
Please read this manual carefully before using your Klaudio product.
!WARNING: Indicates a potentially hazardous situation which, if not avoided,
could result in personal injury or be life-threatening.
!CAUTION: Indicates a potentially hazardous situation which, if not avoided,
may result in damage to equipment or property.
PROHIBITED: Indicates a prohibited action.
ABOUT SIGNS
Throughout this document, critical information is highlighted in gray-colored boxes. The
following symbols are intended to help prevent any situation which may cause personal
injury and/or damage to equipment:
TRADEMARKS
The Klaudio name and logo are trademarks or registered trademarks of Koolance, Inc.
Other company and product names used in this publication are for identication purposes
only and may be trademarks or registered trademarks of their respective companies.
COPYRIGHT
All rights reserved. Copyright (C) Klaudio.
CONTACT INFORMATION
Customer Support: [email protected]
Web: www.klaudio.com
Address: 2840 W Valley Hwy N, Ste. 101, Auburn, WA 98001, USA
Phone: +01 253-249-7813
(NOTE: A tonearm installation video is available on Klaudio’s YouTube page.)
Table of Contents
1. Base Mounting ...................................................................................... pg. 5
2. Coarse & Orientation Setting ................................................................ pg. 9
3. Needle Alignment, Horizontal Leveling ............................................... pg. 12
4. Counter-Weight Adjustment ................................................................ pg. 13
5. Miscellaneous ..................................................................................... pg. 14

4
3User Manual
Headshell
VTA Adjustment
Counterweight
Lift / Lower Platform
Adjustment
Pivot Bridge
Linear Bearing
Base Set Screw
Headshell Pivot
Arm Rest Base Stem
Longitudinal Set Screw
Klaudio Head Shell
Tonearm
Additional Counter Weight Posts
Alignment Tool
Base Bubble Level Orientation Jig Mounting Nut & Washer
Base Stem
1-1 Remove tonearm from case. Carefully remove the tonearm from its foam
packaging by lifting the temporary plastic handle strap.
Carry the tonearm exclusively by its base stem. Do not handle the tonearm
by its pivot bridge, pivot points, or linear bearing structure to avoid damaging
these very precisely machined and calibrated parts.
!
Chapter 1: Base Mounting

56
User Manual
1-2 Remove packaging material. Carefully remove all packaging material from the tone-
arm. This includes the plastic handle strap and any wire ties and foam pieces.
1-3 Decide on mounting method. The tonearm can be installed using screws (not includ-
ed) in the top ange, or the included threaded stem nut beneath the table.
Carefully remove all packaging material
Below-armboard stem mounting nut option
Above-armboard ange screw option
(screws not included)
1-4 Measure mounting points. The tonearm spindle-to-pivot distance depends on your
Klaudio tonearm model. For KD-ARM-MP10 (10.5-inch eective length), this distance is
258mm. For KD-ARM-MP12 (12-inch eective length), it is 298mm.
The center point for the 29mm mounting hole should be centered as illustrated below:
Spindle
29mm Hole
Spindle-to-Pivot Distance:
258mm for KD-ARM-MP10
298mm for KD-ARM-MP12

8
7User Manual
1-5 Mount tonearm to arm board. Once the hole(s) are prepared, place the tonearm
mounting sleeve with ange into the armboard hole. Insert the spring, followed by the tone-
arm. Complete mounting by installing either the top ange screws or underside stem nut
(Options 1 or 2) illustrated below.
Option 2: Underside
nut installation
Option 1: Top
ange installation
Tonearm
Mounting Sleeve
The hole(s) to be drilled are shown to the right
in millimeters. The center 29mm hole is re-
quired for all installations.
The four smaller 5mm holes are only needed
if mounting the tonearm using the top ange
screws.
2-3 Loosen upper longitudinal set
screw.
2-4 Detach the arm rest. Temporarily
detach the arm rest during the align-
ment process. To do this, press the
small release button behind it, then lift
up on the rest.
Longitudinal Set
Screw
Base Set Screw
2-1 Attach cables. It is advisable to connect the RCA and
Ground wires to the tonearm at this time before length
adjustment.
Arm Rest Release
Button
Platform Rest Lever
Chapter 2: Coarse & Orientation Setting
Note: Whenever replacing the
cartridge in the future, repeat
steps 2-3 through 2-7, then
continue onto chapter 3.
2-2 Loosen lower base set screw.

10
9User Manual
2-5 Install alignment tool. The included alignment tool is used to congure the tonearm’s
course (height) and orientation angle. The tool is anchored to the pivot bridge (#1, small
end), then extended to the platter spindle (#2, large end).
#2: Anchor
at Spindle
#1: Anchor
at Pivot Bridge
2-6 With the tonearm slightly inclined, hook alignment tool to pivot bridge. Hook the
small end of the alignment tool to the bottom of the pivot bridge (just below the arm itself).
Make sure both prongs t securely.
2-7 Attach alignment tool to spindle.
Extend the larger half of the alignment
tool so that the protruding tab latches
onto the spindle.
2-8 Install head shell and rest
tonearm in alignment tool. In-
stall your preferred head shell
and cartridge onto the tonearm for
needle alignment.
The headshell pivot should rest
in the sliding receptacle of the
alignment tool. Adjust the tonearm
counterweights to assist with this if
needed (described later).
Headshell Pivot Should Rest in the Alignment Tool
2-10 Level alignment tool to
set tonearm coarse. Gently
push down on the pivot bridge
until the alignment tool is at
against the platter.
If necessary, adjust the VTA
beforehand to assist with this
(usually 10% or higher).
2-9 Slide the tonearm to its rearmost position
and place the orientation jig onto the tonearm.
Grasp the longitudinal set screw and move the tone-
arm on its linear track to the rearmost position (far-
thest from the platter).
Temporary place the orientation jig onto the tonearm
as illustrated to the right. This will align the tonearm
base in parallel with the arm.
Orientation Jig

12
11 User Manual
2-11 Tighten lower set screw by hand, and
remove orientation tool. When the alignment
tool is level, tighten the base set screw gently
by hand.
The orientation tool can now be removed.
Base Set Screw
3-1 Align needle to tangent line. Move the arm rest base (tonearm length adjustment) until
the stylus needle is directly above the tangential line indicated on the alignment tool.
Tangential
Line
3-2 Check base with bubble level. Horizontal
leveling of the tonearm is especially important
for countering horizontal drift of the head shell.
Use the included bubble level tool to check for
level of the base stem. Sit it on the tonearm
base as illustrated to the right. The red arrow
should point towards the head shell.
Chapter 3: Needle Alignment, Horizontal Leveling
3-4 Tighten upper set screw, then remove
alignment tool and bubble level. Once the
needle is aligned, tighten the longitudinal set
screw gently by hand.
Remove the alignment tool and bubble level,
and reinstall the arm rest onto the tonearm.
Longitudinal
Set Screw
3-3 Adjust level with small screwdriver, if
needed. Using a small at screwdriver, slowly
adjust the leveling screw (clockwise or count-
er-clockwise) until the bubble level indicates
good horizontal alignment.
4-1 Weigh cartridge and balance arm. The tonearm can now be balanced for your head
shell and cartridge. Use a weight scale on the platter like a traditional tonearm.
If additional weight is needed,
add both threaded posts to the
rear of the counterweights.
There are two counterweights on the tonearm. They
should be moved loosely in tandem (parallel), but
individual adjustments can be made if necessary
based on scale weight.
The counterweights are moved by pulling both top
levers and sliding the weights along the tonearm.
Chapter 4: Counter-Weight Adjustment
3-5 Tighten upper and lower set screws a bit further with a hex wrench. To avoid dam-
aging the tonearm, do not excessively tighten either screw.

14
13 User Manual
Reference integrated bubble level for
VTA. When adjusting VTA, the tonearm’s
integrated bubble level should be refer-
enced.
It is not recommended to adjust the bub-
ble level’s screws. They are pre-calibrat-
ed.
Adjust azimuth by rotating head shell. The
head shell and tonearm have an indicator for
azimuth adjustments.
Adjust platform arm. The platform adjustment
lever can be rotated to a more convenient posi-
tion by temporarily loosening its set screw.
Rotate the lever and retighten the screw at the
desired position.
Adjust needle pitch with head shell
screw. The largest supplied head
shell has an adjustable needle pitch.
Use the included hex wrench to rotate
the top screw.
The angle marking reference is locat-
ed just below the screw.
Chapter 5: Miscellaneous Realign guide pin, if needed. The tonearm’s
guide pin should always stay behind the wire guard
(with arm at rest) or hidden within the groove in the
tonearm (with arm over the platter).
If the guide pin gets relocated in front of the wire
guard, the tonearm can not move properly. To x
this:
1. Remove the arm rest (see page 5).
2. Swing the tonearm o the platter.
3. Lightly push down on the head shell. This will lift
the rear of the tonearm.
4. Move the guide pin back into position.
5. Replace the arm rest.
Guide Pin
Wire Guard

16
15 User Manual
Limited Warranty
Disclaimer
Klaudio (“Klaudio”) warrants each new tonearm product against defects in materials
or workmanship for a period of two years from the date of purchase, and agrees to
repair or replace any defective Klaudio system without charge. Shipping costs are
non-refundable.
This warranty is non-transferable. All warranty claims must be accompanied by the original
proof of purchase.
THIS WARRANTY DOES NOT COVER DAMAGE RESULTING FROM ACCIDENT, MISUSE
OR ABUSE, LACK OF REASONABLE CARE, SHIPPING DAMAGE, MODIFICATIONS,
THE AFFIXING OF ANY ATTACHMENT NOT PROVIDED WITH THE PRODUCT, OR
LOSS OF PARTS .
Use of chemical cleaning agents or liquids will void this warranty. Klaudio will not pay
for warranty service performed by a non-authorized repair or diagnostic service and will
not reimburse the consumer for damage resulting from warranty service performed by a
non-authorized repair service. No responsibility is assumed for any special incidental or
consequential damages due to a defective Klaudio product.
In order to obtain warranty service, contact our RMA department for information. The product
must be shipped postage prepaid to an authorized Klaudio service location. It is suggested
that, for your protection, you return shipments of product by insured mail, insurance prepaid.
Damage occurring during shipment is not covered by this warranty. Shipping costs are non-
refundable. No other warranty, written or oral, is authorized by Klaudio.
IN NO EVENT SHALL KLAUDIO, PARENT COMPANY KOOLANCE, OR ITS EMPLOYEES,
AGENTS, SUPPLIERS, MANUFACTURERS, OR CONTRACTORS BE LIABLE FOR
ANY DAMAGES OF ANY KIND OR CHARACTER, INCLUDING WITHOUT LIMITATION
ANY COMPENSATORY, INCIDENTAL, DIRECT, INDIRECT, SPECIAL, PUNITIVE, OR
CONSEQUENTIAL DAMAGES, LOSS OF USE, LOSS OF DATA, LOSS OF INCOME OR
PROFIT, LOSS OF OR DAMAGE TO PERSONS OR PROPERTY, CLAIMS OF THIRD
PARTIES, OR OTHER LOSSES OF ANY KIND OR CHARACTER, AND WHETHER
OR NOT THE POSSIBILITY OF SUCH LOSS OR DAMAGE HAS BEEN NOTIFIED TO
KLAUDIO.

Head Shell and Wire Lead Installation v1.2
www.klaudio.com
Klaudio head shells have the option to
use Klaudio’s lead wires (#1), 3rd-par-
ty lead wires (#2), or Klaudio’s rigid
leads (#3).
This manual is for options #2 and #3
only.
The included leads have dierent diameters along
their length (sizes are in millimeters).
For exible wire leads, the 1.0mm section of each
rigid lead must be removed with wire cutters.
If you are using Klaudio’s rigid leads with your cartridge, skip to the next page.
Push leads through the head shell connector. The thinnest end of
the lead must be inserted through the connector.
It is easiest to trim the leads before they are inserted into the head
shell.
Once the leads are cut and inserted, connect the 3rd-party
lead wires to the remaining stubs.
#2 3rd-Party Wire Leads
#1 Klaudio Wire Leads #3 Klaudio Rigid Leads

2. Hold cartidge next to leads. Temporarily posi-
tion the cartridge next to the leads to estimate the
required lead lengths.
3. Bend blue & green leads upward. If the xed leads
naturally align with your cartridge connections, skip for-
ward to the cutting step. For other cartridges, the leads
must be shaped for each connection.
Using needle-nose pliers, carefully bend the blue and
green leads upward about 1/2-inch (13mm) before the
cartridge.
4. Bend red & white leads upward. Bend
white and red leads upward about 1/4-inch
(6mm) before the cartridge.
Visually check lead positions again with the
cartridge. See picture to the left.
Bending Locations
1. Push connectors onto cartridge terminals with dark
markings facing the cartridge. Push the included connectors
onto the appropriate color-coded cartridge terminals. The dark
markings on each connector should face the cartridge side. Markings
If you are using Klaudio’s rigid leads on your cartridge, please continue reading here.
Note: Rigid wire leads can only be routed straight-through. If cartridge terminals are reversed, the RCA
left/right channels to the amplier should also be swapped.

6. Trim leads. Trim the leads with wire cutters at the
appropriate lengths for the cartridge connections.
7. Push leads into connectors. Use the needle-nose pliers to push each lead into the colored con-
nectors on the cartridge.
Make sure each lead is also fully inserted into the headshell connector on the back side.
8. Add arm lift hook. Insert the arm lift hook between
the cartridge and head shell. Complete installation by
screwing these to the cartridge.
5. Bend all leads back towards cartridge.
At heights corresponding with the cartridge
connections, add another 90-degree bend to
each lead so they angle towards the cartridge.
Cutting Location
/