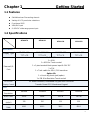
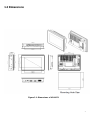
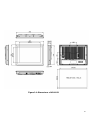
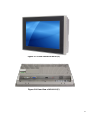
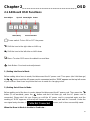
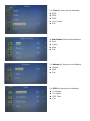
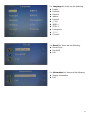
Acnodes APA9101 is a versatile 10.1-inch TFT LCD display with a 1280x800 resolution and a viewing angle of 160 degrees both horizontally and vertically, ideal for various monitoring and control applications. Its aluminum die-casting chassis and IP65-rated front bezel ensure durability in harsh environments.
Acnodes APA9101 is a versatile 10.1-inch TFT LCD display with a 1280x800 resolution and a viewing angle of 160 degrees both horizontally and vertically, ideal for various monitoring and control applications. Its aluminum die-casting chassis and IP65-rated front bezel ensure durability in harsh environments.


-
 1
1
-
 2
2
-
 3
3
-
 4
4
-
 5
5
-
 6
6
-
 7
7
-
 8
8
-
 9
9
-
 10
10
-
 11
11
-
 12
12
-
 13
13
-
 14
14
-
 15
15
-
 16
16
-
 17
17
-
 18
18
-
 19
19
-
 20
20
-
 21
21
-
 22
22
-
 23
23
-
 24
24
-
 25
25
-
 26
26
-
 27
27
-
 28
28
-
 29
29
-
 30
30
-
 31
31
-
 32
32
-
 33
33
-
 34
34
-
 35
35
-
 36
36
-
 37
37
-
 38
38
-
 39
39
-
 40
40
-
 41
41


Acnodes APA9101 is a versatile 10.1-inch TFT LCD display with a 1280x800 resolution and a viewing angle of 160 degrees both horizontally and vertically, ideal for various monitoring and control applications. Its aluminum die-casting chassis and IP65-rated front bezel ensure durability in harsh environments.
Ask a question and I''ll find the answer in the document
Finding information in a document is now easier with AI
Related papers


Other documents
-
Princeton LCD2000 Reference guide
-
Bematech LE1100 User manual
-
 Xenarc 104OTS User Manual & Installation Manual
-
Logic Controls LE1000, LE1015, LE1017, LE2000 User manual
-
AG Neovo TX-22 User manual
-
Huion GT-191 User guide
-
König CSEMSTYL100SI Datasheet
-
Nedis CSEMSTYL100SI Datasheet
-
 Digimate L-1517 User manual
-
Aplex ADP-1224A User manual

