Page is loading ...

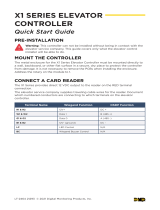
CP40 Controller
INSTALLATION MANUAL
October 2015


CP40 Page 3 of 43
Installation Manual October 2015 • Rev. 2.7
Table of Contents
Introduction .............................................................................................................................. 5
Specifications........................................................................................................................... 6
CP40 Controller Layout ........................................................................................................... 8
Important Installation Notes .................................................................................................... 9
New Panel Installation Instructions .......................................................................................10
Power up the Panel .......................................................................................................10
Set the Panel Address ...................................................................................................10
Clear the Panel Memory ................................................................................................11
Onboard LEDs .........................................................................................................................12
Communication LEDs ....................................................................................................12
Firmware Status LEDs ...................................................................................................12
Reader Status LEDs ......................................................................................................12
Options DIP Switch (S2) ................................................................................................13
Baud Rate DIP Switch (S3) ...........................................................................................14
Reader Type DIP Switch (S5) ........................................................................................14
Communications Wiring .........................................................................................................15
Using a CLAUSB (RS-485) ............................................................................................15
Using a CANLAN (RS-485) ...........................................................................................16
Using AIR-485 (RS-485) ................................................................................................17
Lock Output Relay Wiring ......................................................................................................19
Electric Strikes up to 250MA (Internal Power Supply) ....................................................20
Electric Strikes > 250MA (External Power Supply) ........................................................20
12 VDC Magnetic Locks UP TO 250MA (Internal Power Supply) ..................................21
12 VDC Magnetic Locks > 250Ma (External Power Supply) ..........................................22
AC Magnetic Locks (External Power Supply) ........................................................................23
Door Contacts ...............................................................................................................24
Exit Buttons ...................................................................................................................24
Tamper/Forced, Door-Held-Open and Alarm-Shunt Outputs ...............................................25
Tamper/Forced Entry Output (Shared outputs) ..............................................................25
Door Held Open Output .................................................................................................26
Alarm Shunt Output .......................................................................................................26
Input Point Wiring (supervised) ......................................................................................28

CP40 Page 4 of 43
Installation Manual October 2015 • Rev. 2.7
Input Point Wiring (nonsupervised) ................................................................................29
Output Point Wiring .......................................................................................................29
Fire Release and Fire Reset Inputs ........................................................................................30
Fire Alarm Release Input ...............................................................................................30
Fire Alarm Reset Input ...................................................................................................30
Communication Fail Output ...................................................................................................31
SIOPT-16 Input/Output Board ................................................................................................32
Layout ...........................................................................................................................32
Installing the SIOPT-16 Input/Output Board ...................................................................33
Input and Output Point Wiring ........................................................................................34
SIOPT-16 Board Fire-Alarm Release ............................................................................35
Elevator ControL Using the SIOPT-16 Input/Output Board ............................................36
Elevator Interface Board .........................................................................................................37
Troubleshooting ......................................................................................................................39
Communication Problems..............................................................................................39
Reader Problems ..........................................................................................................40
Input/Output Board Problems ........................................................................................41
Other Problems .............................................................................................................41
Appendix I ...............................................................................................................................42
RS-422 CLAUSB Wiring ................................................................................................42
Magstripe Reader Connection .......................................................................................43
Copyright 2008 - 2015 Cansec Systems Ltd.
All rights reserved.

CP40 Page 5 of 43
Installation Manual October 2015 • Rev. 2.7
Supports 65,000 users
Supports 2 readers
Supports 26-bit or 37-bit Wiegand
Two onboard inputs and outputs
Up to 16 optional inputs and outputs
Supplies 12VDC power to DC Locks
250mA or less
Provides onboard relays
for external lock power control
Introduction
Maestro's CP40 control panel is the ultimate in reliable, cost-effective, and
comprehensive access management for up to 65,000 users. Each CP40
supports two readers, including the CanProx One Proximity Reader as well
as many other popular readers. CP40 control panels support either industry-
standard 26-bit Wiegand or Cansec's proprietary 37-bit Wiegand. Each board
supports two on-board inputs (supervised or nonsupervised), and two on-
board outputs.
For projects that require additional supervised point monitoring capacity, the
optional SIOPT-16 module can be added onto the CP40 at anytime to
provide 16 points, which can be individually configured as supervised inputs
or as outputs for facility monitoring and elevator control.
Key Features
NOTE: Tech Support will only be provided where product installation guidelines
have been followed.

CP40 Page 6 of 43
Installation Manual October 2015 • Rev. 2.7
Specifications
Power Requirements
CP40 Controller: ............................................ 16 VAC, 40 VA, 60 Hz
.............................................................. or a 12 VDC/2A power supply
Current Draw
CP40
no readers/electric strikes ............................................................. 580 mA
with SIOPT-16 board or elevator interface board ............................ 900 mA
Locking Devices (electric strikes)/per 1 lock ................... 250-300 maA
Temperature Range
Operating .......................................................................... 0˚C to 70˚C
Storage ........................................................................... - 40˚C to 70˚C
Relative Humidity
Operating .......................................................................... 20% to 80%
Fuses
Main AC ........................................................................................... 3 A
Locks ................................................................................................ 1 A
Readers ......................................................................................... 0.75 A
Aux. 5 Volt ..................................................................................... 0.5 A
Battery .............................................................................................. 3 A
Output Relays
Lock (2 per panel) ............................................... SPDT 8 A @ 30 VDC
Communication Fail .......................................... SPDT 2 A @ 30 VDC
Alarm Shunt ....................................................... SPDT 2 A @ 30 VDC
Door Held Open ................................................ SPDT 2 A @ 30 VDC
Forced Entry (2 each per panel) ........................ SPDT 2 A @ 30 VDC
I/O Board (outputs) ........................................... SPDT 2 A @ 30 VDC

CP40 Page 7 of 43
Installation Manual October 2015 • Rev. 2.7
Inputs
Door Contact (2 per panel) ............... requires normally closed contact
Exit Button (2 per panel)………………..requires normally open contact
...............................................................................................................
Communications and Reader Cable
RS-485 Cable ...................... 22 AWG, stranded/shielded, twisted pair
............................................................ 609 m [2000 ft] max total length
................................................................... Belden 88761 or equivalent
NOTE: Up to 16 controllers may be connected on an RS-485 bus.
Wiegand Readers .................... 6 conductor (twisted pair not required)
.......................................................................... 22 AWG, overall shield
..................................................................... 152 m [500 ft] max. length
NOTE: consult reader specifications as 12-gauge wire may be required
for power.
Dimensions & Weight
CP40 Enclosure: .................... [33.3 cm (w) x 49.2 cm (h) x 9.2 cm (d)]
.................................................. [13 1/8”(w) x 19 3/8”(h) x 3 5/8”(d)]
Weight .......................................................................... 8.4 kg [18.5 lbs]
*Specifications subject to change without notice.
IMPORTANT: In some jurisdictions, the use of a UL approved power
supply and connection to the fire alarm system for emergency release may
be required. Installers should contact the local authority having
jurisdiction to verify the specific requirements. Also, a building permit
may be required in some jurisdictions for the installation of magnetic
locks.

CP40 Page 8 of 43
Installation Manual October 2015 • Rev. 2.7
CP40 Controller Layout

CP40 Page 9 of 43
Installation Manual October 2015 • Rev. 2.7
Important Installation Notes
1. Any changes made to the settings (addressing, dip switches, etc.)
will take place only after the panel is RESET or power off and on.
2. Each controller must have a unique address.
3. Before connecting ANY wires (readers, communication, locks)
the lithium battery has to be Enabled and the panel has to be cleared.
See instructions below.
CA-PS123A Specifications Notice:
When using a pluggable 16 VAC standard 40 VA transformer:
Maximum Continuous Current (no battery attached): 2 amps for 12 VDC on
the Output.
Maximum Continuous Current (battery attached): 1.5 amps for 12 VDC on
the Output (battery will be charging when needed).
Using a wire in 16 VAC standard 75 VA transformer:
Maximum Continuous Current (no battery attached): 2.5 amps for 12 VDC
on the Output.
Maximum Continuous Current (battery attached): 2.0 amps for 12 VDC on
the Output (battery will be charging when needed).
Surge currents need to be taken into account. High current devices like
electric strikes and magnetic locks have surge currents which are usually
double the running current.
The CA-PS123A’s DC output is fused at 2.5 amps.
An electrician is not required for installation of this supply.

CP40 Page 10 of 43
Installation Manual October 2015 • Rev. 2.7
New Panel Installation Instructions
POWER UP THE PANEL
OR
NOTE: If battery is attached to on board charger (battery wires), the 16V
AC input will charge it, the 13.8V DC will not.
SET THE PANEL ADDRESS
Set the panel address by rotating the address
dial clockwise to the desired address from 1 to 16.
(A=10, B=11, C=12, D=13, E=14, F=15, 0=16)
DC Input
AC Input
Controller
Address = 1
16 V. Max
13.8 V. Max

CP40 Page 11 of 43
Installation Manual October 2015 • Rev. 2.7
CLEAR THE PANEL MEMORY
1. On the Options DIP Switch (S2),
push switch 5 to the right (ON)
2. Press and Release the Reset button
3. Wait 15 seconds until LED 3 starts flashing quickly
4. Push switch 5 back to the left (OFF)
5. Press and release the Reset button
6. Panel is now cleared to virgin state and
ready for operation
DIP Switch 5
Reset Button

CP40 Page 12 of 43
Installation Manual October 2015 • Rev. 2.7
Onboard LEDs
CP40 panels are equipped with a number of LEDs that indicate various
processes.
COMMUNICATION LEDS
These bi-colored LEDS will flash between RED and GREEN when
communications are active with the host PC.
RED indicates that the panel is receiving.
GREEN indicates the panel is transmitting.
LED 2 (CH2)
This is the main Maestro software communication indicator. LED2 indicates
communications on Channel 2 which is used on all configurations including
RS-485. (Except the configurations listed below)
LED 1 (CH1)
LED 1 indicates communications on Channel
1. This port is only used for
Daisy-chain communications
Elevator interface boards
Cansec AKP-series keypads
FIRMWARE STATUS LEDS
LED 3 flashes every second to indicate proper operation
of the CP40 board.
READER STATUS LEDS
LED 8 and LED 18 indicate reader status. Normally,
both LEDs are solid RED. When a credential is
presented to the reader, the LED flashes GREEN
once to indicate that the credential has been read.
LED 18
Reader B
LED 8
Reader A

CP40 Page 13 of 43
Installation Manual October 2015 • Rev. 2.7
Onboard DIP Switches
There are 3 on-board DIP Switch sets:
1. Options (S2)
2. Baud Rate (S3)
3. Reader Type (S5)
DIP Switch Position (Panel is oriented with AC/DC connectors at the bottom)
ON – right side
OFF – left side
OPTIONS DIP SWITCH (S2)
The Options DIP Switch (S2) is used to set a proper CP40
configuration.

CP40 Page 14 of 43
Installation Manual October 2015 • Rev. 2.7
BAUD RATE DIP SWITCH (S3)
The Baud Rate DIP switch (S3) is used to set communication baud
rate. NOTE: Default is 9600 baud. Do not change this default rate.
READER TYPE DIP SWITCH (S5)
The Reader Type DIP Switch (S5) is used to specify the reader
type(s), exit button use, and the Wiegand data format.
* See Appendix for Magstripe Reader Jumper settings diagram.
NOTE: If switch #2 or #5 is off (exit button disabled) then there is no forced
entry alarm for that door/reader.
*
*

CP40 Page 15 of 43
Installation Manual October 2015 • Rev. 2.7
Communications Wiring
USING A CLAUSB (RS-485)
Read the CLAUSB Installation Manual for instructions on how to install the
CLAUSB software drivers.

CP40 Page 16 of 43
Installation Manual October 2015 • Rev. 2.7
USING A CANLAN (RS-485)
Read the CanLan Installation Manual for instructions on how to configure the
CanLan software.

CP40 Page 17 of 43
Installation Manual October 2015 • Rev. 2.7
USING AIR-485 (RS-485)
Read the Air-485 Installation Manual for instructions on how to configure
the Air-485

CP40 Page 18 of 43
Installation Manual October 2015 • Rev. 2.7
Wiegand-Compatible Reader Wiring
Wiring applies to all Wiegand-compatible readers with a standard 26-bit or
Cansec 37-bit format. Jumper settings for reader power are set to +12V by
default (JP24 for reader port A, and JP53 for reader port B).

CP40 Page 19 of 43
Installation Manual October 2015 • Rev. 2.7
Lock Output Relay Wiring
The lock output provides either:
Dry contact relay output (EXT jumper)
or 12 VDC @ 250-300 mA maximum to the locking device for each
reader (INT jumper)
Note: Use jumpers INT/EXT as shown in the next diagrams.
On board relays can supply 12VDC to compatible electric strikes or
maglocks, or can be configured as dry contacts to be used to control external
power supply.
See the following figures for configuration and wiring of:
Electric Strikes (internal DC power supply)
Electric Strikes (external DC power supply)
Magnetic Locks (internal DC power supply)
Magnetic Locks (external DC power supply)
Magnetic Locks (external AC power supply)
NOTE: Lock output relays are rated at 8 A, 30 VDC.

CP40 Page 20 of 43
Installation Manual October 2015 • Rev. 2.7
ELECTRIC STRIKES UP TO 250MA (INTERNAL POWER SUPPLY)
ELECTRIC STRIKES > 250MA (EXTERNAL POWER SUPPLY)
/