Page is loading ...

GrimmSpeed Install Guide Series
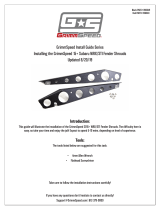
Installing the GrimmSpeed Version 2 Heat Shield -
WRX/STI/LGT/FXT
Updated 1/24/2020
Introduction:
This guide will walk you through the installation of the GrimmSpeed Version 2 Heat Shield. Installation is
simple and should take around 30-45 minutes including Intercooler removal. We started with the TMIC already
removed. If you need instructions on how to remove your intercooler, please refer to your factory manual or
the GrimmSpeed TMIC Installation Guides.
Tools:
• 10mm Socket wrench
NOTE: You will reuse the OEM heat shield brackets. Do not discard these pieces.
If you have any questions don’t hesitate to contact us directly!
[email protected] | 612-379-0000
Uncoated PART# 092007
Coated PART # 092008

Procedure:
1. Remove the 10mm bolts lining the top and sides of the OEM heatshield. These can be rusty and are prone to breaking.
2. Remove the 10mm bolt from the lower heatshield bracket.
3. Use the top bracket mounting holes to secure your new heat shield.
If you have any questions don’t hesitate to contact us directly!
[email protected] | 612-379-0000

If you have any questions don’t hesitate to contact us directly!
[email protected] | 612-379-0000
4. Place your GrimmSpeed Heat Shield over your turbo and align the mounting holes to the bracket.
5. Use the included 10mm hardware to secure it in place.
6. Make sure all bolts are tight. There should be little-to-no play in the heatshield when touched.
/