Connecting the Camera
Installing the Camera
B. Power Input: If not using PoE, connect the
camera to a 12V DC power source (420mA or
higher required).
A. Ethernet Connector: Connect the camera to an NVR
or a router or switch on your network using CAT5e or
better Ethernet cable (not included). PoE supported
(802.3af).
NOTE: For instructions on weatherproofing the
Ethernet connection, see “Using the RJ45 Cap
(Optional)” on reverse.
A B
ATTENTION:
Test your camera prior to selecting a permanent mounting location by
temporarily connecting the camera and cable to your NVR.
1. Use the included Allen key to loosen
the adjustment screw on the dome cover. Do
not loosen all the way.
2. Separate the camera base, ball camera, and
dome cover.
3. Use the included mounting template to mark holes for
the mounting screws and camera cable.
4. Drill holes for the mounting screws and camera cable.
5. Feed the camera cables through the camera base.
6. Connect the cables as shown in the section ‘Connecting
the Camera’.
7. Mount the camera base to the mounting surface using
the included screws and optional drywall anchors.
8. Place the dome cover over the ball camera.
9. Attach the dome cover to the camera base.
10. Use the included Allen key to tighten the adjustment
screw halfway onto the camera base. Do not tighten all
the way.
11. Move the ball camera to the desired position. Tighten the
adjustment screw all the way.
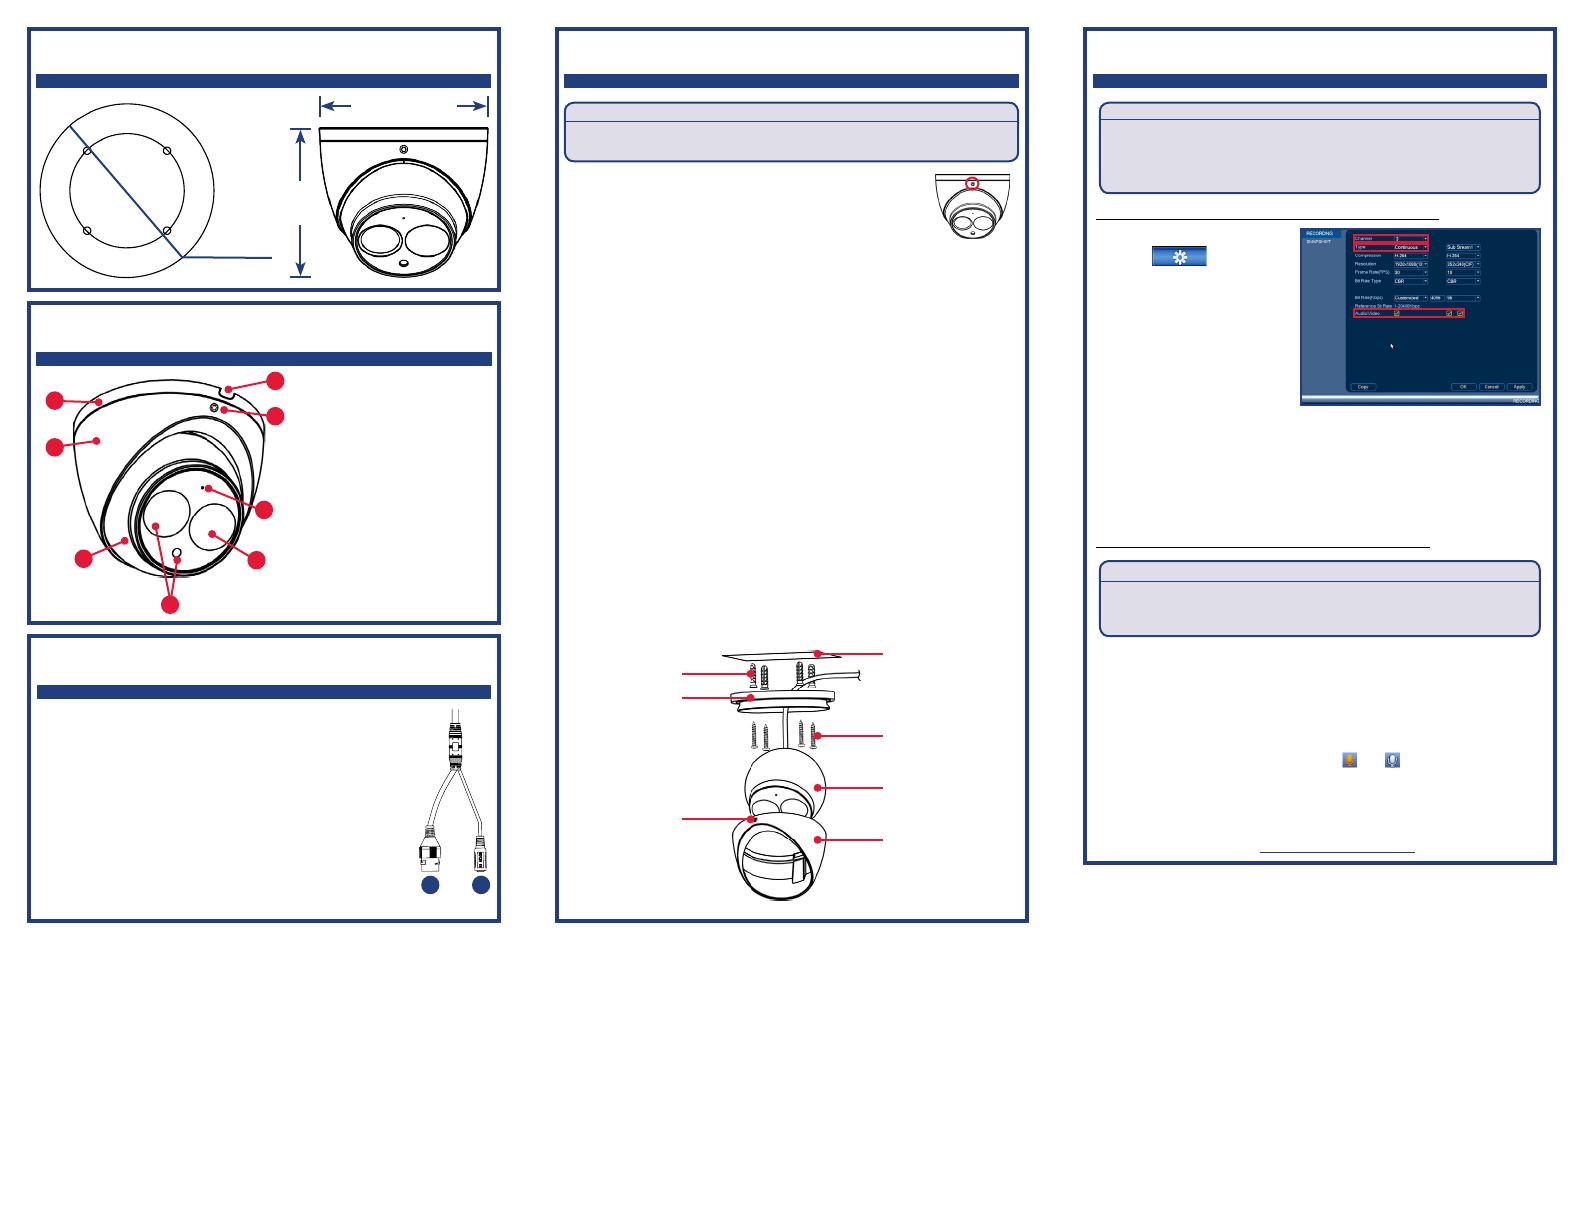
Camera Overview
A. Camera Base
B. Dome Cover
C. Ball Camera
D. Light Sensor and IR
LEDs
E. Camera Lens
F. Built-in Microphone:
See ‘Audio Settings’ for
details.
G. Adjustment Screw
H. Cable Notch
A
B
C
D
E
F
H
G
Mounting Surface
Camera Base
Ball Camera
Adjustment
Screw
Dome Cover
Drywall Anchors
Mounting Screws
Weight & Dimensions
4.2”
106mm
4.2” / 106mm
3.2”
82mm
1. From the Main Menu,
click
and select
Recording>Recording.
1. In Live View, double-click the camera channel to open in
full-screen.
2. Hover near the top of the channel where the camera is
connected and click to enable (
) / ( ) disable listen-in
audio.
2. Select the camera
under Channel.
3. Select Continuous or
Motion under Type.
4. Check the left
Audio/Video checkbox
to enable audio recording. Check the middle checkbox
to enable audio streaming to remote devices (such as a
smartphone). Check the right checkbox to enable video
streaming to remote devices.
Audio Settings
ATTENTION:
Audio is disabled by default. Audio recording and / or use of listen-in
audio without consent is illegal in certain jurisdictions. FLIR Systems,
Inc. assumes no liability for use of its products that does not conform
with local laws.
ATTENTION:
Enabling listen-in audio does not enable audio recording. To record
audio, follow the steps above to enable audio recording through a
FLIR NVR.
To enable audio recording through a FLIR NVR:
To enable listen-in audio through a FLIR NVR:
NOTE: These instructions are based on the current FLIR
4K NVR interface. For more information, see your NVR’s
instruction manual on flir.com/security/pro.
NOTE: Listen-in audio requires a monitor with speakers or
speakers connected to the NVR.
5. Click OK to save changes.


