Page is loading ...

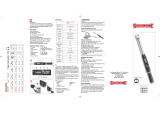
1/2” DRIVE
DIGITAL ELECTRONIC
TORQUE-ANGLE WRENCH
INSTRUCTIONS
Part #13622
IMPORTANT: Please read these instructions thoroughly and carefully before operation.
The instructions will provide you with important information regarding operation,
warnings, and safety precautions.

2 Eastwood Technical Assistance: 800.544.5118 >> techelp@eastwood.com
Your Eastwood Digital Electronic Torque-Angle Wrench is a professional-quality tool designed
for performing quick precision work on all vehicles. With care, it will provide many years of
reliable service.
FEATURES
• Large back-lit display shows both target torque and real time reading.
• 3-color, Green-Amber-Red LED light and beeper tone provide visual and audible indication
of when target torque and angle is reached.
• High accuracy within +/- 2%.
• Units of torque measure are selectable for maximum fl exibility.
• Auto power off feature saves batteries.
• Memory storage accepts up to 5 sets of target torque settings.
SPECIFICATIONS
Drive: 1/2” square drive (12.5 mm)
Measuring Range: 15-148 lb/ft [2-20 kg.m] / 177-1770 lb/in [20-200 N.m]
Accuracy: ±2% of reading @ 10% to 100% of full scale.
Display Resolution: 1°
Units of Measurement: lb/ft, lb/in, kg.m, N.m
Angle Range: 0° - 360° (C.W. / C.C.W.)
Angle Accuracy: ±1°
Display Resolution: 1°
Operating Voltage: 6V (4 x AAA batteries, supplied)
Operating Temperature: 32°F - 104°F [0° - 40° C].
DISPLAY
A: Real-time torque value
B: The unit of Angle
C: Torque units
D: Target Torque indicator
E: Target Angle indicator
F: Memory storage numbers
G: Battery indicator
H: Peak / Track mode
I: MINUS symbol for counter-clockwise rotation
DE A BC
F
GHI
To order parts and supplies: 800.345.1178 >> eastwood.com 3
CONTROL PANEL
A: Power ON / OFF button
B: Memory storage numbers selection / setting button
C: Memorize the torque or angle setting value / Change the
rotation of Angle in a CW or CCW direction / Enter
Program Settings Mode.
D: Button to zero out the torque and angle values
E: Button for display illumination / for selecting the next
decimal place / enter Angle measurement mode.
A B
DE
C
PREPARATION FOR USE
• Open the cover of the battery compartment by turning it counter-clockwise.
• Insert four AAA batteries as shown below
• Close the battery compartment by turning the cover clockwise.
• The torque wrench is now ready for use.
TURNING THE TOOL ON / OFF
• Press button to turn on. The buzzer sounds and all readouts on the display are shown at
the same time for just a moment.
• Press button again to turn off the unit.
PROGRAMMING SETTINGS
To enter Program Settings Mode, press the button. Once in the Program Setting Mode you can
make changes to the following settings.
PEAK AND TRACK MODE SETTINGS
After turning on the display, the unit automatically defaults to “Track” mode where the real-time
torque reached during operation will be displayed.
During the “Peak” mode, the maximum value reached will be saved and the value is shown on
the display for approx. 2 seconds. After that, the value fl ashes and you can continue to the next
application or press button to zero then keep going for the next application.
1. Press button to select “T” for Track mode or “P” for Peak mode.
2. Press button to confi rm the selection. The wrench will switch to UNIT setting
automatically.
NOTE: If there is no button activity for 3 seconds, the wrench will retain the last selection of Peak or
Track mode, and return to measurement mode.

4 Eastwood Technical Assistance: 800.544.5118 >> techelp@eastwood.com To order parts and supplies: 800.345.1178 >> eastwood.com 5
UNIT SELECTION
1. Once the Peak / Track mode has been set, the wrench switches to the setting of
“UNIT SELECTION”.
2. is shown on screen, select the units between lb/ft, lb/in, kg.m, N.m by
pressing button.
3. Press button to confi rm the unit selection. The wrench will switch to Auto Power Off
Settings when the button is pressed.
NOTE: If there is no button activity for 3 seconds, the wrench will retain the last selection of Units,
and return to measurement mode.
AUTO POWER-OFF SETTINGS
The torque wrench will be turned off automatically without any button activity over a selectable
period. Changing the auto –off setting as follows:
1. Once the unit is selected, the default Auto-Off time: 5 (5 minutes) will be shown on screen.
2. Wait for 2 seconds without touching any buttons, or press button to retain the default
setting.
3. Changing the wrench Auto-off time by pressing button. Select the shut-off time
between 5 minutes, 15 minutes or “OFF” to turn off the Auto-off function.
4. Press button to confi rm the selection. The wrench returns to measurement mode when
the button is pressed.
NOTE: If there is no button activity for 3 seconds, the wrench will retain the last selection of Auto
Power Off, and return to measurement mode.
PROGRAMMING THE TORQUE AND ANGLE
The wrench has 5 sets of memory storage for pre-setting the target Torque and Angle.
TARGET TORQUE SETTING
1. Press button to turn the wrench on.
2. Press button to select the memory storage number between M1~M5.
3. Once the memory number is chosen, access the target Torque/ Angle programming
by pressing and holding button for 5~10 seconds.
4. Release button when is shown on screen, and the last saved torque is dis-
played. The fi rst digit of this value (“0000” ) is fl ashing. Press button to zero the last
saved value. Or by repeatedly pressing button, the value of the fl ashing digit is gradually
increased. When the desired value is reached, press button to skip to the next decimal
place. Repeat this process for all numeric places. (ones, tens, hundreds etc.) Example: A cor-
rect setting for 75 lb/ft will read 075.0 in the display.
5. When the required torque level is set, press to save the value.
Ft/lb
SET
TARGET ANGLE SETTING
1. The display skips to Angle setting automatically once the target torque is set, and displays the
last saved angle value. The fi rst digit of this value (“0000”) is fl ashing.
2. Press the button to zero the last saved value. Or by repeatedly pressing button,
the value of the fl ashing angle digit is gradually increased. When the desired value for this digit
was achieved, press button to skip to the next digit. Repeat this process for all numeric
places in the angle value.
3. When the required angle is set, press to save the value.
NOTE: If there is no button activity for 5 seconds, the wrench will retain the last selection of
Angle Setting and automatically switch to Measurement Mode.
TURNING THE DISPLAY ILLUMINATION ON / OFF
1. The display illumination can be turned on prior to or after programming the torque.
2. In order to do this, press and release the button.
OPERATING THE TORQUE WRENCH
1. Select the socket required for your work.
2. Attach the socket fi rmly to the square drive of the torque wrench, it will be held in place by the
ball stop of the square drive.
3. If possible, do not use any extensions because they may distort the torque applied to a bolt.
APPLYING PROGRAMMED TORQUE
1. Program the value necessary following the instructions in the Target Torque Setting section.
2. Place the torque wrench on the fastener. Grip the torque wrench and PULL on the wrench with
a slow, easy movement. Avoid jerky movements.
3. With the target torque pre-set, the target value is indicated on the screen.
4. The LED will show GREEN when you are under 50% of the programmed torque value.
5. When approaching the target torque value,, the LED turns to YELLOW.
6. When you approach the programmed torque value, the buzzer will sound.
7. When you are within 2% of the programmed torque value, the RED LED will illuminate.
Once the torque is reached, the buzzer will emit quicker sound sequence.
8. If you exceed the programmed torque by 2%, the buzzer will emit a continuous tone and the
LED will turn GREEN.
ATTENTION: When you hear the continuous tone and the RED LED illuminates, stop pulling
immediately or target torque will be exceeded.
NOTE: If there is no button activity for 5 seconds, the wrench will retain the last selection of torque
and automatically switch back to Angle Programming.
NOTE: “Erro” (for ERROR will show on the display when the pre-set torque value exceeds 100% of the
maximum torque value. After 1 second, the display returns to torque Measurement Mode.
NOTE: After pressing the “+” button to access the torque setting mode, without any activity after
6 seconds, the display will return to Measurement Mode.

6 Eastwood Technical Assistance: 800.544.5118 >> techelp@eastwood.com
NOTE:
• NEVER USE THE TORQUE WRENCH WHEN THE BATTERIES ARE LOW. THE ACCURACY OF
READINGS WILL BE AFFECTED.
• The display will not show a reading until the applied force has exceeded 10% of full scale.
• “- - - -” will be shown on the screen, when applied torque has exceeded 5% of the maximum
of torque value. (See specifi cations)
APPLYING PROGRAMMED ANGLE
1. Program the value necessary following the instructions in the Target Angle Setting section.
2. Place the torque wrench on the fastener. Press the button to switch from torque
measurement to angle measurement. The screen will display “ - - - - ” while it calibrates
the orientation of the wrench. Once the screen displays “ 0° ”, you may proceed.
3. Grip the torque wrench and PULL on the wrench with a slow, easy movement. Avoid jerky
movements.
4. With the target angle pre-set, the target value is indicated on the screen.
5. The LED will show GREEN when you under 50% of the programmed angle value.
6. When approaching the target angle value, the LED turns to YELLOW.
7. When you approach the target angle value, the buzzer will sound.
8. When you are within 2% of the programmed value, the RED LED will illuminate.
Once the angle is reached, the buzzer will emit a quicker sound sequence.
9. If you exceed the programmed angle by 2%, the buzzer will emit a continuous tone and
the LED will turn GREEN.
ATTENTION: When you hear the continuous tone and the RED LED illuminates, stop pulling
immediately or target torque will be exceeded.
TORQUE WRENCH USE AND CARE
• Do not exceed the permitted maximum torque value for this tool. Over torquing the unit can
cause permanent damage.
• Be sure all accessories including adaptors, extensions and sockets are rated to match or
exceed the torque being applied.
• Use the correct size socket for the fastener.
• Do not use sockets that are cracked or damaged.
• Do not use the Torque Wrench near corrosive gas or liquid.
• Keep away from strong magnetic fi elds.
• Never hold or operate the unit with wet or greasy hands.
• Never apply torque when the tool is turned off or permanent damage can occur.
•
Check that the Torque Wrench capacity matches or exceeds each application before proceeding.
• Do not drop and avoid excessive bumps or shock to this tool.
• If the tool is to be unused for an extended period of time, remove the batteries to prevent
damage from leakage.
To order parts and supplies: 800.345.1178 >> eastwood.com 7

© Copyright 2012 Easthill Group, Inc. Instruction part #13622Q Rev. 11/12
If you have any questions about the use of this product, please contact
The Eastwood Technical Assistance Service Department: 800.544.5118 >> email: techelp@eastwood.com
PDF version of this manual is available online >> eastwood.com/13622manual
The Eastwood Company 263 Shoemaker Road, Pottstown, PA 19464, USA
US and Canada: 800.345.1178 outside US: 610.718.8335
Fax: 610.323.6268 eastwood.com
/
