Page is loading ...

2
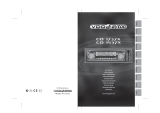
ENGLISH
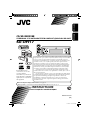
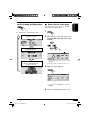
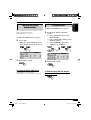
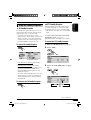
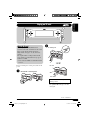
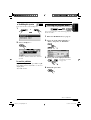
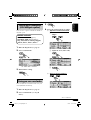
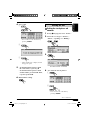
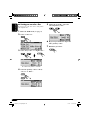
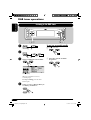
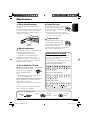
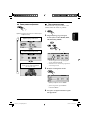
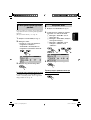
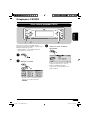
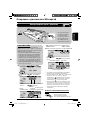
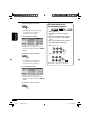
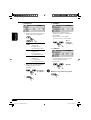
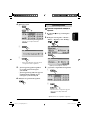
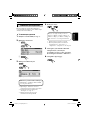
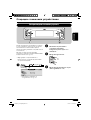
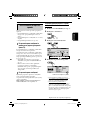
How to reset your unit
This will reset the microcomputer. Your
preset adjustments will also be erased.
Warning:
If you need to operate the receiver while
driving, be sure to look ahead carefully or
you may be involved in a traffic accident.
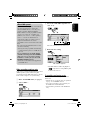
Cautions:
If the temperature inside the car is below
0°C, the movement of animation and text
scroll will be halted on the display to prevent
the display from being blurred.
appears on the display.
When the temperature increases, and the
operating temperature is resumed, these
functions will start working again.
Thank you for purchasing a JVC product.
Please read all instructions carefully before operation, to ensure your complete understanding and to
obtain the best possible performance from the unit.
IMPORTANT FOR LASER PRODUCTS
1. CLASS 1 LASER PRODUCT
2. CAUTION: Do not open the top cover. There are no user serviceable parts inside the unit; leave
all servicing to qualified service personnel.
3. CAUTION: Visible and invisible laser radiation when open and interlock failed or defeated.
Avoid direct exposure to beam.
4. REPRODUCTION OF LABEL: CAUTION LABEL, PLACED OUTSIDE THE UNIT.
EN02-07_LH917[EE]f.indd 2EN02-07_LH917[EE]f.indd 2 12/24/04 12:34:25 PM12/24/04 12:34:25 PM

3
ENGLISH
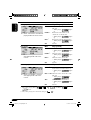
How to reset your unit ........................... 2
How to read this manual ........................ 4
How to forcibly eject a disc ................... 4
How to change the display pattern ........ 5
How to enter the various menus ............ 5
Control panel — KD-LH917 ........ 6
Parts identification ................................. 6
Remote controller —
RM-RK300 ............................. 7
Main elements and features ................... 7
Getting started ....................... 8
Basic operations .................................. 8
Canceling the display demonstrations ... 9
Setting the clock .................................... 9
Radio operations ................... 10
Listening to the radio ........................... 10
Storing stations in memory .................... 11
Listening to a preset station ................... 12
FM RDS operations ................. 13
Searching for your favorite FM RDS
programme
....................................... 13
Storing your favorite programmes ......... 14
Using the standby receptions ................. 15
Tracking the same programme—
Network-Tracking Reception ............ 16
Disc/SD card operations ......... 17
Playing a disc in the receiver ................ 17
Playing discs in the CD changer ............ 18
Playing an SD card .............................. 19
Other main functions ............................. 21
Selecting the playback modes ................ 23
Sound adjustments ................ 25
Setting the basic sound selection
menu — SEL ................................... 25
Selecting preset sound modes
(i-EQ: intelligent equalizer) ............... 27
Storing your own sound modes ............. 27
Graphic displays .................... 29
Basic procedure ................................... 29
Downloading the files ............................ 30
Deleting the files .................................... 31
Activating the downloaded files ............ 33
General settings — PSM ......... 34
Basic procedure ..................................... 34
Selecting the dimmer mode ................... 38
Changing the display color .................... 39
Other main functions ............. 41
Assigning titles to the sources ............... 41
Changing the control panel angle .......... 42
Detaching the control panel ................... 42
External component operations
... 43
Playing an external component ............ 43
DAB tuner operations
................ 44
Listening to the DAB tuner ................... 44
Storing DAB services in memory .......... 46
Tuning in to a preset DAB service ........ 46
Using the standby reception .................. 47
Tracing the same programme
—Alternative Reception
..................... 48
Maintenance .......................... 49
More about this receiver ........ 50
Troubleshooting ..................... 54
Specifications ......................... 57
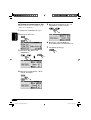
*Temperature inside the car....
If you have parked the car for a long time in
hot or cold weather, wait until the temperature
in the car becomes normal before operating the
unit.
Contents
*For safety....
• Do not raise the volume level too much, as
this will block outside sounds, making driving
dangerous.
• Stop the car before performing any
complicated operations.
EN02-07_LH917[EE]f.indd 3EN02-07_LH917[EE]f.indd 3 12/24/04 12:34:26 PM12/24/04 12:34:26 PM

4
ENGLISH
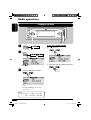
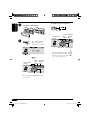
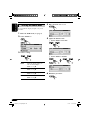
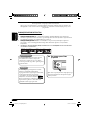
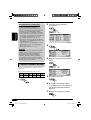
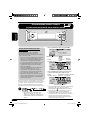
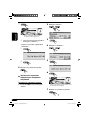
How to read this manual
The following methods are used to make the
explanations simple and easy-to-understand:
• Some related tips and notes are explained in
“More about this receiver” (see pages
50 – 53).
• Button operations are mainly explained with
the illustrations as follows:
Press briefly.
Press repeatedly.
Press either one.
Press and hold until
your desired response
begins.
Press and hold both
buttons at the same
time.
The following marks are used to indicate...
: Built-in CD player operations.
: External CD changer operations.
: SD player operations.
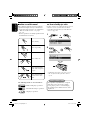
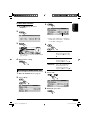
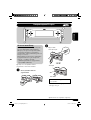
How to forcibly eject a disc
If a disc cannot be recognized by the receiver or
cannot be ejected, eject the disc as follows.
• If an SD card is inserted, eject the SD card
first (see page 19).
1
2
• If this does not work, reset your receiver.
• Be careful not to drop the disc when it
ejects.
Caution on volume setting:
Discs produce very little noise compared
with other sources. Lower the volume
before playing a disc to avoid damaging
the speakers by the sudden increase of the
output level.
EN02-07_LH917[EE]f.indd 4EN02-07_LH917[EE]f.indd 4 1/5/05 9:14:17 AM1/5/05 9:14:17 AM

5
ENGLISH
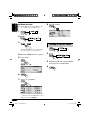
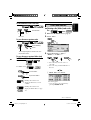
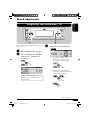
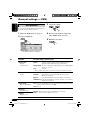
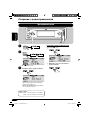
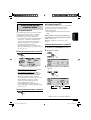
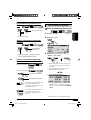
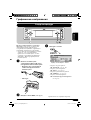
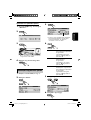
How to change the display pattern
Ex.: When tuner is selected as the source
Source display pattern /
Audio level meters
Clock display pattern
Graphic screen appears only after
you have downloaded a file,
(see pages 29 – 33).
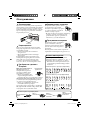
How to enter the various menus
The main menu contains six menus (MODE,
PSM, SEL, PICT, EQ, TITLE).
1
2 Move the cursor to select a menu you
want (MODE, PSM, SEL, PICT, EQ,
TITLE).
• To go back to the previous screen, press
BACK.
* Works as time countdown indicator.
3 Enter the selected menu.
Ex.: When MODE menu is selected
• To go back to the MENU screen, press
MENU.
4 Operate as instructed on the screen.
*
EN02-07_LH917[EE]f.indd 5EN02-07_LH917[EE]f.indd 5 12/24/04 12:34:27 PM12/24/04 12:34:27 PM

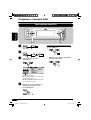
6
ENGLISH
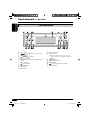
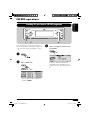
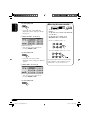
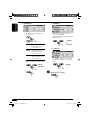
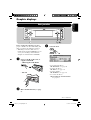
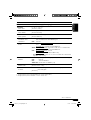
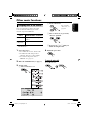
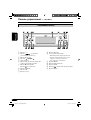
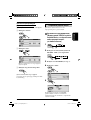
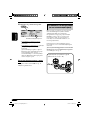
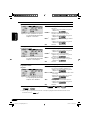
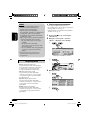
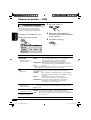
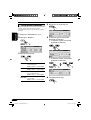
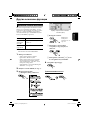
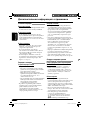
Control panel — KD-LH917
Parts identification
1 + / – button
2 (standby/on attenuator) button
3 5 (up) button
4
4/¢ buttons
5 Display window
6 T/P (traffic programme/programme type)
button
7 0 (eject) button
(angle) button
8 SOURCE button
9 OK button
p Reset button
q ∞ (down) button
w Remote sensor
• DO NOT expose the remote sensor to
strong light (direct sunlight or artificial
lighting).
e MENU button
r DISP (display) button
t BACK button
y
(control panel release) button
u BAND button
EN02-07_LH917[EE]f.indd 6EN02-07_LH917[EE]f.indd 6 1/11/05 2:00:03 PM1/11/05 2:00:03 PM

7
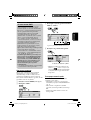
ENGLISH
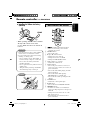
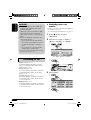
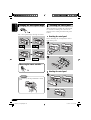
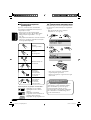
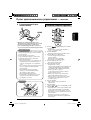
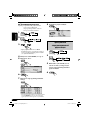
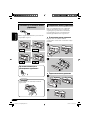
Remote controller — RM-RK300
Installing the lithium coin battery
(CR2025)
• When operating, aim the remote controller
directly at the remote sensor on the
receiver. Make sure there is no obstacle in
between.
Warning:
• Store the battery in a place where children
cannot reach to avoid risk of accident.
• To prevent the battery from over-heating,
cracking, or starting a fire:
– Do not recharge, short, disassemble, or
heat the battery or dispose of it in a fire.
– Do not leave the battery with other
metallic materials.
– Do not poke the battery with tweezers or
similar tools.
– Wrap the battery with tape and insulate
when throwing away or saving it.
Caution:
Main elements and features
1 (standby/on/attenuator) button
• Turns on and off the power and also
attenuates the sound.
2 SOURCE button
• Selects the source.
3 5 (up) / ∞ (down) buttons
• Changes the preset stations.
• Changes the services for DAB.
• Changes the MP3/WMA folders.
4 VOL (volume) + / – buttons
• Adjusts the volume level.
5 Number buttons
• Selects the preset station (or service) if
pressed, or store a station (or a service) if
pressed and held.
• Selects the tracks while playing an audio
CDs or CD Texts.
• Selects the folders while playing
MP3/WMA discs or an SD card.
• Selects the discs while operating the CD
changer.
6 ANGLE button
• Adjusts the control panel angle.
7 BAND button
• Selects the band for FM/AM and DAB.
8 4 / ¢ buttons
• Searches for stations (or ensembles) if
pressed, or skips frequencies after pressed
and held.
• Changes the tracks of the disc or of the
SD card if pressed.
• Fast-forwards or reverses the track if
pressed and held.
EN02-07_LH917[EE]f.indd 7EN02-07_LH917[EE]f.indd 7 1/3/05 11:04:13 AM1/3/05 11:04:13 AM

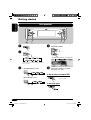
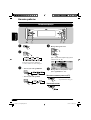
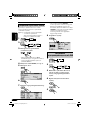
8
ENGLISH
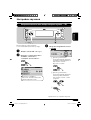
~
Ÿ
You cannot select some sources if they
are not ready.
! • For FM/AM tuner only
• For DAB tuner only
⁄ Adjust the volume.
To show the level meter (see page 36).
@ Adjust the sound as you want.
(See pages 25 – 28.)
To drop the volume in a moment (ATT)
To restore the sound,
press it again.
To turn off the power
Getting started
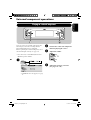
Basic operations
EN08-13_LH917[EE]f.indd 8EN08-13_LH917[EE]f.indd 8 12/24/04 12:34:38 PM12/24/04 12:34:38 PM

9
ENGLISH
Setting the clock
1 Enter the PSM menu (see page
5).
2 Set the hour, minute, and clock
system.
1 Select “Clock Hr” (hour), then
adjust the hour.
2 Select “Clock Min” (minute), then
adjust the minute.
3 Select “24H/12H,” then select
“24Hours” or “12Hours.”
3 Exit from the setting.
To check the current clock time when the
power is turned off
Canceling the display
demonstrations
If no operations are done for about 20 seconds,
display demonstration starts.
[Initial: Demo]—see page 34.
1 Enter the PSM menu (see page
5).
2 Select “Off.”
• Make sure “Demo/Link” is shown
on the display. If not, press 5 or ∞.
3 Exit from the setting.
To activate the display demonstration
In step 2 above, select “Demo” or
“Image Link.” For more details, see page 34.
EN08-13_LH917[EE]f.indd 9EN08-13_LH917[EE]f.indd 9 12/24/04 12:34:39 PM12/24/04 12:34:39 PM

10
ENGLISH
To tune in to a station manually
In step ! on the left...
1
2 Select the desired station frequencies.
Radio operations
~
Ÿ
! Start searching for a station.
When a station is received, searching
stops.
To stop searching, press the same
button again.
Note:
FM1 and FM2: 87.5 MHz – 108.0 MHz
FM3: 65.00 MHz – 74.00 MHz
Listening to the radio
Clock display
EN08-13_LH917[EE]f.indd 10EN08-13_LH917[EE]f.indd 10 1/3/05 11:04:39 AM1/3/05 11:04:39 AM

11
ENGLISH
When an FM stereo broadcast is hard to
receive
1 Enter the MODE menu (see page 5).
2 Select “Mono.”
3 Select “On.”
Reception improves, but stereo effect will
be lost.
4 Exit from the setting.
To restore the stereo effect, repeat the same
procedure and select “Off” on step 3.
Storing stations in memory
You can preset six stations for each band.
FM station automatic presetting —
SSM (Strong-station Sequential
Memory)
1
2
Select the FM band (FM1 – FM3)
you want to store into.
3 Enter the MODE menu (see page
5).
4 Select “SSM.”
5
Local FM stations with the strongest signals are
searched and stored automatically in the FM
band.
EN08-13_LH917[EE]f.indd 11EN08-13_LH917[EE]f.indd 11 12/24/04 12:34:39 PM12/24/04 12:34:39 PM

12
ENGLISH
Manual presetting
Ex.: Storing FM station of 92.5 MHz into the
preset number 4 of the FM1 band.
1
2
3
• By holding 5/∞, the Preset Station List
will also appears (see step 7 below).
4 Enter the MODE menu (see page
5).
5 Select “List.”
6
7 Select a preset number.
• If the current band is FM, you can move
to the lists of the other FM bands (except
FM3) by pressing 4/¢.
8 Store the station.
Listening to a preset station
1
2
3 Perform steps 4 to 7 (on left column)
to enter the Preset Station List.
4
EN08-13_LH917[EE]f.indd 12EN08-13_LH917[EE]f.indd 12 1/12/05 4:05:30 PM1/12/05 4:05:30 PM

13
ENGLISH
You can tune in to a station broadcasting your
favorite programme by searching for a PTY code.
•
To store your favorite programme, see page
14.
~
Ÿ Select a PTY code.
• You can move to the other lists by
pressing 4/¢.
FM RDS operations
Searching for your favorite FM RDS programme
! Start searching for your favorite
programme.
If there is a station broadcasting a
programme of the same PTY code as
you have selected, that station is tuned
in.
EN08-13_LH917[EE]f.indd 13EN08-13_LH917[EE]f.indd 13 1/13/05 4:26:35 PM1/13/05 4:26:35 PM

14
ENGLISH
2 Select a PTY code.
• You can move to the other lists by
pressing 4/¢.
3
4 Select a preset number.
5 Store the setting.
6 Repeat steps 2 to 5 to store other
PTY codes into other preset
numbers.
7 Exit from the setting.
What you can do with RDS
RDS (Radio Data System) allows FM
stations to send an additional signal along
with their regular programme signals.
By receiving the RDS data, this receiver can
do the following:
•
Programme Type (PTY) Search (see page 13)
• Temporarily switches to Traffic
Announcement—TA Standby Reception.
(See page 15.)
• Temporarily switches to your favorite
programme—PTY Standby Reception. (See
pages 14 – 16, and 36.)
•
Tracing the same programme automatically
—Network-Tracking Reception (see page 16)
• Programme Search (see page 36)
PTY codes
News, Affairs, Info, Sport, Educate, Drama,
Culture, Science, Varied, Pop M (music),
Rock M (music), Easy M (music),
Light M (music), Classics, Other M
(music), Weather, Finance, Children, Social,
Religion, Phone In, Travel, Leisure, Jazz,
Country, Nation M (music), Oldies, Folk M
(music), Document
Storing your favorite programmes
You can store six favorite programme types.
Preset programme types:
1
EN14-19_LH917[EE]f.indd 14EN14-19_LH917[EE]f.indd 14 1/13/05 4:30:04 PM1/13/05 4:30:04 PM

15
ENGLISH
Using the standby receptions
TA Standby Reception
TA Standby Reception allows the receiver to
switch temporarily to Traffic Announcement
(TA) from any source other than AM.
• If a station starts broadcasting a traffic
announcement, “Traffic News” appears on the
display, and this receiver temporarily tunes
in to the station. The volume changes to the
preset TA volume level (see page 36).
To activate TA Standby Reception
• If the TP indicator lights up, TA Standby
Reception is activated.
• If the TP indicator flashes, TA Standby
Reception is not yet activated. (This occurs
when you are listening to an FM station
without the RDS signals required for TA
Standby Reception.)
To activate TA Standby Reception, tune in to
another station (or service) providing these
signals. The TP indicator will stop flashing
and remain lit.
To deactivate the TA Standby Reception
The TP indicator goes off.
PTY Standby Reception
PTY Standby Reception allows the receiver
to switch temporarily to your favorite PTY
programme from any source other than AM.
• This function also takes effect for the DAB
tuner.
To select your favorite PTY code for PTY
Standby Reception, see page 36.
The PTY indicator either lights up or flashes.
To activate the PTY Standby Reception
1 Enter the MODE menu (see page 5).
2 Select “PTY.”
3 Select one of the PTY codes (see page
14).
To be continued...
TP indicator appears.
EN14-19_LH917[EE]f.indd 15EN14-19_LH917[EE]f.indd 15 12/24/04 12:34:51 PM12/24/04 12:34:51 PM

16
ENGLISH
4 Exit from the setting.
• If the PTY indicator lights up, PTY
Standby Reception is activated.
• If the PTY indicator flashes, PTY Standby
Reception is not yet activated.
To activate PTY Standby Reception, tune
in to another station (or service) providing
these signals. The PTY indicator will stop
flashing and remain lit.
To deactivate the PTY Standby Reception
Select “Off” in step 3 on page 15.
The PTY indicator goes off.
Tracking the same programme—
Network-Tracking Reception
When driving in an area where FM reception
is not sufficient enough, this receiver
automatically tunes in to another FM RDS
station of the same network, possibly
broadcasting the same programme with stronger
signals (see the illustration below).
When shipped from the factory, Network-
Tracking Reception is activated.
To change the Network-Tracking Reception
setting, see “AF-Regn’l” on page 36.
Programme A broadcasting on different
frequency areas (01 – 05)
PTY indicator appears.
EN14-19_LH917[EE]f.indd 16EN14-19_LH917[EE]f.indd 16 12/24/04 12:34:52 PM12/24/04 12:34:52 PM

17
ENGLISH
Disc/SD card operations
Playing a disc in the receiver
About MP3 and WMA discs
MP3 and WMA (Windows Media
®
Audio)
“tracks” (words “file” and “track” are used
interchangeably) are recorded in “folders.”
• When an MP3 or a WMA folder includes
an image <jll> file edited by Image
Converter (Wide Ver 1.2)—supplied in the
CD-ROM, you can show the image on the
display while the tracks in the folder are
played back—Image Link. (See pages 19,
34, and 52 for details.)
• When inserting an MP3 or a WMA disc:
All tracks will be
played repeatedly until
you change the source
or eject the disc.
• When inserting an audio CD or a CD Text
disc:
*
1
Either the MP3 or WMA indicator lights up
depending on the detected file.
*
2
The album name/performer with indicator
and the track title with
indicator will
appear if “ID3 Tag” is set to “On” (see
page 36).
*
3
Appear only for CD Texts and CDs if it has
been assigned or recorded. (“No Name”
appears for a while if no name is recorded
or assigned to an audio CD.)
To stop play and eject the disc
To return the control panel to
its previous position, press it
again.
Total playing
time
Clock display
Total track number
Total folder number
Total track number
File type
*
1
Track name*
3
Current track
number
Disc name
*
3
Current folder
number
Current
track
number
Folder name
*
2
Track name*
2
Elapsed
playing
time
Clock display
EN14-19_LH917[EE]f.indd 17EN14-19_LH917[EE]f.indd 17 12/24/04 12:34:52 PM12/24/04 12:34:52 PM

18
ENGLISH
• When the current disc is an MP3 disc:
• When the current disc is an audio CD or a
CD Text disc:
*
1
The album name/performer with indicator
and the track title with
indicator will
appear if “ID3 Tag” is set to “On” (see
page 36).
*
2
Appear only for CD Texts and CDs if it has
been assigned or recorded. (“No Name”
appears for a while if no name is recorded
or assigned to an audio CD.)
Playing discs in the CD changer
About the CD changer
It is recommended to use the JVC MP3-
compatible CD changer with your receiver.
• You can also connect other CH-X series
CD changers (except CH-X99 and
CH-X100). However, they are not
compatible with MP3 discs, so you cannot
play back MP3 discs.
• You cannot use the KD-MK series CD
changers with this receiver.
• Disc text information recorded in the CD
Text can be displayed when a JVC CD
Text compatible CD changer is connected.
• You cannot control and play any WMA
disc in the CD changer.
All tracks of the inserted discs in the magazine
will be played repeatedly until you change
the source or eject the magazine from the CD
changer.
~
*
If you have changed “Ext Input”
setting to “Ext In” (see page 37), you
cannot select the CD changer.
Current
folder
number
Current
track
number
Folder name*
1
Track name*
1
Current
disc
number
Track name*
2
Current track
number
Current disc
number
Disc
name*
2
Clock display
EN14-19_LH917[EE]f.indd 18EN14-19_LH917[EE]f.indd 18 12/24/04 12:34:52 PM12/24/04 12:34:52 PM

19
ENGLISH
Playing an SD card
To be continued....
About the SD card
You can play back MP3/WMA tracks
recorded on the SD card and show the stored
image on the display during playback—
Image Link. (See pages 17, 34, and 52 for
details.)
The required SD recording format is FAT
12/16 and the recommended storage type is
8 MB to 512 MB.
• You cannot use MMC or mini SD with this
receiver.
Before detaching the control panel, turn off the
power.
~ Detach the control panel.
Ÿ
Press in the SD card until you hear a
clicking sound.
To eject the SD card, press the SD
card again.
SD loading slot
SD card
EN14-19_LH917[EE]f.indd 19EN14-19_LH917[EE]f.indd 19 12/24/04 12:34:53 PM12/24/04 12:34:53 PM

20
ENGLISH
! Attach the control panel.
⁄ • The control panel goes
back to the previous
position (see page 42).
Playback starts automatically if tracks
are recorded.
If an SD Card has been loaded....
1
2
* The album name/performer with
indicator and the track title with
indicator will appear if “ID3 Tag” is
set to “On” (see page 36).
Track name*
Current
track
number
Current folder
number
Elapsed
playing
time
Folder name
*
Track name*
Current
track
number
Folder name
*
Current folder
number
Elapsed
playing
time
Clock display
EN20-25_LH917[EE]f.indd 20EN20-25_LH917[EE]f.indd 20 12/24/04 12:35:15 PM12/24/04 12:35:15 PM

21
ENGLISH
To fast-forward or reverse the track
Fast-forwards.
Reverses.
To go to the next or previous tracks
To the following
tracks.
To the beginning of the current track, then
the previous tracks.
To go to the next or previous folders (only
for MP3 and WMA tracks)
For MP3 tracks:
For WMA tracks:
To next folders.
To previous folders.
: Holding these buttons can
display the Disc List (see next
column).
: Holding these buttons can
display the Folder List (see page
22).
Other main functions
Selecting a disc/folder/track on the
list
1
Enter the MODE menu (see page
5).
2 Select “List.”
3 Select the list type—“Disc,”*
1
“Folder,”*
2
or “File.”*
2
*
1
Selectable only when the source is
“CD-CH.”
*
2
Selectable only for MP3/WMA disc or
SD card.
1 When “Disc” is selected:
Disc List appears.
• You can move to the other lists by
pressing 4/¢ (5/∞).
To be continued...
EN20-25_LH917[EE]f.indd 21EN20-25_LH917[EE]f.indd 21 12/24/04 12:35:16 PM12/24/04 12:35:16 PM
Page is loading ...
Page is loading ...
Page is loading ...
Page is loading ...
Page is loading ...
Page is loading ...
Page is loading ...
Page is loading ...
Page is loading ...
Page is loading ...
Page is loading ...
Page is loading ...
Page is loading ...
Page is loading ...
Page is loading ...
Page is loading ...
Page is loading ...
Page is loading ...
Page is loading ...
Page is loading ...
Page is loading ...
Page is loading ...
Page is loading ...
Page is loading ...
Page is loading ...
Page is loading ...
Page is loading ...
Page is loading ...
Page is loading ...
Page is loading ...
Page is loading ...
Page is loading ...
Page is loading ...
Page is loading ...
Page is loading ...
Page is loading ...
Page is loading ...
Page is loading ...
Page is loading ...
Page is loading ...
Page is loading ...
Page is loading ...
Page is loading ...
Page is loading ...
Page is loading ...
Page is loading ...
Page is loading ...
Page is loading ...
Page is loading ...
Page is loading ...
Page is loading ...
Page is loading ...
Page is loading ...
Page is loading ...
Page is loading ...
Page is loading ...
Page is loading ...
Page is loading ...
Page is loading ...
Page is loading ...
Page is loading ...
Page is loading ...
Page is loading ...
Page is loading ...
Page is loading ...
Page is loading ...
Page is loading ...
Page is loading ...
Page is loading ...
Page is loading ...
Page is loading ...
Page is loading ...
Page is loading ...
Page is loading ...
Page is loading ...
Page is loading ...
Page is loading ...
Page is loading ...
Page is loading ...
Page is loading ...
Page is loading ...
Page is loading ...
Page is loading ...
Page is loading ...
Page is loading ...
Page is loading ...
Page is loading ...
Page is loading ...
Page is loading ...
Page is loading ...
Page is loading ...
Page is loading ...
Page is loading ...
Page is loading ...
-
 1
1
-
 2
2
-
 3
3
-
 4
4
-
 5
5
-
 6
6
-
 7
7
-
 8
8
-
 9
9
-
 10
10
-
 11
11
-
 12
12
-
 13
13
-
 14
14
-
 15
15
-
 16
16
-
 17
17
-
 18
18
-
 19
19
-
 20
20
-
 21
21
-
 22
22
-
 23
23
-
 24
24
-
 25
25
-
 26
26
-
 27
27
-
 28
28
-
 29
29
-
 30
30
-
 31
31
-
 32
32
-
 33
33
-
 34
34
-
 35
35
-
 36
36
-
 37
37
-
 38
38
-
 39
39
-
 40
40
-
 41
41
-
 42
42
-
 43
43
-
 44
44
-
 45
45
-
 46
46
-
 47
47
-
 48
48
-
 49
49
-
 50
50
-
 51
51
-
 52
52
-
 53
53
-
 54
54
-
 55
55
-
 56
56
-
 57
57
-
 58
58
-
 59
59
-
 60
60
-
 61
61
-
 62
62
-
 63
63
-
 64
64
-
 65
65
-
 66
66
-
 67
67
-
 68
68
-
 69
69
-
 70
70
-
 71
71
-
 72
72
-
 73
73
-
 74
74
-
 75
75
-
 76
76
-
 77
77
-
 78
78
-
 79
79
-
 80
80
-
 81
81
-
 82
82
-
 83
83
-
 84
84
-
 85
85
-
 86
86
-
 87
87
-
 88
88
-
 89
89
-
 90
90
-
 91
91
-
 92
92
-
 93
93
-
 94
94
-
 95
95
-
 96
96
-
 97
97
-
 98
98
-
 99
99
-
 100
100
-
 101
101
-
 102
102
-
 103
103
-
 104
104
-
 105
105
-
 106
106
-
 107
107
-
 108
108
-
 109
109
-
 110
110
-
 111
111
-
 112
112
-
 113
113
-
 114
114
-
 115
115


Ask a question and I''ll find the answer in the document
Finding information in a document is now easier with AI
in other languages
Related papers
Other documents
-
SoundMax SM-CDM1033 Owner's manual
-
Kenwood KDC-152 User manual
-
 vdodayton CD 1537X User manual
-
Hyundai H-CDM8094 Black/Green User manual
-
Panasonic CQ-C1300AN Owner's manual
-
JLL Fitness S300 Installation guide
-
Arcam DT91 User manual
-
Rotel RT-11 Owner's manual
-
Panasonic CQDFX903N Owner's manual
-
