Page is loading ...

V1.01
HDSmartWi-FiCamera
HM203
UserManual
PleasereadallinstructionscarefullybeforeusingthisproductandkeepthisUserManualasa
referenceforfutureuse.Thisusermanualwillbeupdatedregularlyduetoproductupgradeorother
reasons.HeimVisionreservestherighttochangethecontentswithoutnotice.

ProductOverviewandMainFeatures..........................01
DownloadtheAppintoYourMobileDevice..................01
AccountRegistrationandLogin...................................................................02
ConnectingtheCameratoYourMobileDevice............02
1.Connecting by Scanning the QR Code.....................................................02
2.ConnectingbytheLANCable....................................................................04
3.ConnectingbyAPHotspot........................................................................05
*Off-line Direct AP Connection.................................................................07
FunctionsIntroduction...............................................09
1.Pan&TiltControlandPreset...................................................................09
2.VideoPlayback........................................................................................10
3.VideoCut( OnlyAvailableintheCamerawithCloudService)....................11
4.Messages( OnlyAvailableintheCamerawithCloudService).................12
5.ThemicroSDCard...................................................................................12
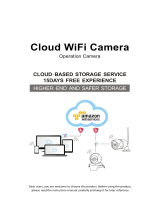
6.OptionalCloudService............................................................................13
7.OtherFunctionsIntroduction..................................................................14
HowtoWatchtheVideosontheComputer..................16
TroubleshootingGuide...............................................16

ProductOverviewandMainFeatures
DownloadtheAppintoYourMobileDevice
ForAndroid
ForiOS
Option1:SearchanddownloadYCC365PlusfromAppStoreorGooglePlay;
Option2:ScantheQRcodebelowtodownload.
01
CloudStorage
iOSSupported
MicroSDCardStorage
IR-CUT
HighDefinitionRecording
AndroidSupported
InfraredNightVision
RemoteSwitch
Two-wayAudio
P2PService
AudibleAlarm
RemoteMonitor
Pan&Tilt
ScheduledRecording
WirelessConnection
MotionDetection
NightVision
IRLED
Lens
Speaker
Reset
microSDcard
LAN
Microphone
PowerInput

AccountRegistrationandLogin
Note:LoginwithmobilephonenumberisonlyapplicabletoVietnam.
Hi,
You are welcome
Email address
Password
Sign Up Forget password
Log in
Local login
Email address
Email address
Next
Next
Password
Confirmation password
Password
The password length is 6-26 digits,
consisting of uppercase letters, lowercase
letters and numerals
PleaseregisteranaccountwithavalidemailaddressatyourfirstuseofthisApp,thenlogin.
ConnectingtheCameratoYourMobileDevice
⑶Forastablenetworkconnection,pleasemakesurethecameraandthemobiledevicearecloseto
therouter.
IMPORTANT:
⑴Forallconnectingoptions,youwillhear"PleaseconfigurecamerabyscanningcodeorAPhotspot"
afterthecameraispoweredon.UsethepintopressandholdtheResetbuttonfor5-6storesetthe
cameraifnovoiceprompts.Youwillhear"ResetSuccess"atasuccessfulreset;
⑵Thiscameraonlysupports2.4GHzWi-Fi;
1.ConnectingbyScanningtheQRCode
+
Step1:ConnectthemobiledevicetoyourWi-Fi,thenlogintoYCC365Plus.Clickintheupperright
corner,selecttheIntelligentcameraandDeviceaddingbyscanningthecode;
GUIDE
YCC365 Plus
The starter guide video
Add the device
Intelligent camera
Smart annunciator
Add the device
Device adding by scanning
the code
Pair with Wi-Fi by scanning QR code
on the mobile phone
AP
Addition by connecting to
network cable
Only applicable for the device with the
network cable socket
Addition of AP hotspot
Pair with Wi-Fi by connection with AP
hotspot of the device
02

Tip:ClickNetworkTesting intheupperrightcornerofConnecttoWi-Fiinterfacetocheckthestatus
ofyourWi-Ficonnection.
Step2:TickIfyouhavefinishedtheabovesteps,clickConnecttotheNetwork,thenclickConnect
tothenetwork.SelecttheWi-Fiyourmobiledeviceisconnected,enterthecorrectpassword
andclickNext tocontinue;
Add the device
3. Place the device as close to the router as
possible, and thus reduce the obstacle between
the router and the camera
If you have finished the above steps, click Connect
to the Network
Connect to the Network
1/3
Network testing
Switch the network
Input Wi-Fi name
Input Wi-Fi password
!
5GHz wireless network is not supported
What requirements does the device have on Wi-Fi>
Next
Exit
Network testing results:Normal
Network information
Wi-Fi frequency range
Wi-Fi quality
Server status
2.4G
Good
Network-induced
delay is 327ms
Network stability is
Good
Connection
success
Test results
Your network is normal
The network is normal
Finish
Connect to Wi-Fi
Step3:AligntheQRcodeonyourmobiledevicewiththecameralensandkeepadistanceof4-8inches;
Step4:Click toconnecttotheInternetafter2beepsfromthecamera.DuringIheardthe"beep"voice
theprocess,youwillhear"PleasewaitforWi-Ficonnecting "and"PleasewaitforInternet
connecting".Whenyouhear "Internetconnected,welcometousecloudcamera",thecamerais
connectedsuccessfully.
2/3
!
Align the QR code the camera lens
10~20cm
No voice is heard?
I heard the "beep" voice
2/3
The camera is connecting the the network
The connection will take about 1-2 minutes. Wait a moment
16%
The router and mobile phone shall be as close to the device as
possible
3/3
Addition is successful
Device name
Click to input the device name or choose the following name
Bedroom Living room
Second bedroom Entrance
Office Meeting Room
Start to experience
03

2. Connecting by the LAN Cable
)
)
Youwillhear"Pleasewaitforwiredconnection.PleasewaitforInternetconnecting.Pleasechoose
wiredconnectiontoaddcamera"afterthecameraisconnectedtotheLANcableandpoweredon.
PressandholdtheResetbuttonfor5-6storesetthecameraifnovoiceprompts.Youwillhear"Reset
Success"atasuccessfulreset;
GUIDE
YCC365 Plus
The starter guide video
Add the device
Intelligent camera
Smart annunciator
Add the device
Device adding by scanning the
code
Pair with Wi-Fi by scanning QR code on
the mobile phone
AP
Addition by connecting to
network cable
Only applicable for the device with the
network cable socket
Addition of AP hotspot
Pair with Wi-Fi by connection with AP
hotspot of the device
Step1:LogintotheYCC365Plus.Clicktheintheupperrightcorner,selecttheIntelligentcamera
andAdditionbyconnectingtonetworkcable;
Step2:TickIfyouhavefinishedtheabovesteps,clickNext,thenclickNexttoentertheinterfaceof
Configurethecamera.ScantheQRcodeonthebottomofthecameraandwaitforamoment.
Whenyouhear"Internetconnected,welcometousecloudcamera",thecameraisconnectedto
theAppsuccessfully.
Device configuration
3. keep pressing "SET'' or "RESE T" key, for at
least 5 seconds
If you have finished the a bove step s, click Ne xt
Next
Configure the camera
Keep the QR code of t he device body in the frame
for scanning
3/3
Addition is successful
Device name
Click to input the device name or choose the following name
Bedroom Living room
Second bedroom Entrance
Office Meeting Room
Start to experience
+
Tip:AfterthecameraisconnectedtotheAppwiththeLANCable,youcanswitchtoWi-Ficonnection
forflexibleplacement.GototheinterfaceofSettingandselecttheWi-Finetworktosetup.After
successfullyconnectedtotheselectedWi-Fi,unplugtheLANcableandrebootthecamera.
04

3.ConnectingbyAPHotspot
Step1:ConnectthemobiledevicetoyourWi-Fi,thenlogintoYCC365Plus.Clickintheupperright
corner,selectIntelligentcamera andAdditionofAPhotspot;
Step2:TickIfyouhavefinishedtheabovesteps,clickNext,thenclickNext toentertheNetwork
configurationinterface;
Step3:ClickGotoSettingtoenterthenetworksettinginterfaceofthemobiledevice,thenconnectto
theCLOUDCAM_XXXXWi-Fi;
Step4:Taptogetbackto YCC365PlustoenterNetwork configurationinterface,thenclickNextto
continue;
+
GUIDE
YCC365 Plus
The starter guide video
Add the device
Intelligent camera
Smart annunciator
Add the device
Device adding by scanning the
code
Pair with Wi-Fi by scanning QR code on
the mobile phone
AP
Addition by connecting to
network cable
Only applicable for the device with the
network cable socket
Addition of AP hotspot
Pair with Wi-Fi by connection with AP
hotspot of the device
Network configuration
Device configuration
2. Keep pressing "SET" or "RESET" key, for at
least 5 seconds
If you have finished the above steps, click Next
Next
1/3
The device will start Wi-Fi with " "CLOUDCAM_XXXX
field. Click the button in the lower part to the setting
interface for connecting to this Wi-Fi
How to connect the device>
Go to Setting
WLAN
WLAN
WLAN
Off
AVAILABLE NETWORKS
HeimVision
Enhanced Internet experience
Connected
CLOUDCAM_146b9c7cbe76
Saved
CLOUDCAM_146b9c7cbe76
Signal strength
Encryption Type
Excellent
None
CONNECT
FORGET
CANCEL
05

Tip:Therewillbeapop-upwindowiftheCLOUDCAM_XXXX Wi-Ficonnectionisfailed.ClickConfirm
toconnecttheWi-Fiagain.
Step5:SelecttheWi-Fiyourmobiledeviceisconnected,enterthecorrectpassword,thenclickNext.
ThecamerawillconnecttotheInternetafter2beepsfromthecamera.Duringtheprocess,you
willhear"PleasewaitforWi-Ficonnecting"and "PleasewaitforInternetconnecting".Whenyou
hear"Internetconnected,welcometousecloudcamera",thecameraisconnectedtoWi-Fi
successfully.
Network configuration
1/3
Set the Wi-Fi that has been connected with this device
How to connect the device>
Next
WLAN
WLAN
WLAN
Off
AVAILABLE NETWORKS
HeimVision
Enhanced Internet experience
Connected
CLOUDCAM_146b9c7cbe76
Saved,encrypted
2/3
The camera is connecting the the network
The connection will take about 1-2 minutes. Wait a moment
16%
The router and mobile phone shall be as close to the device as
possible
3/3
Addition is successful
Device name
Click to input the device name or choose the following name
Bedroom Living room
Second bedroom Entrance
Office Meeting Room
Start to experience
2/3
Connect to Wi-Fi
Choose Wi-Fi to be connected, and input Wi-Fi
password
HeimVision
Cannot find Wi-Fi to be connected?
Input Wi-Fi password
!
The device does not support 5G network
Next
Scan WLAN Di rect Confi gure More
Network configuration
1/3
How to connect the device>
Next
1
2
3
Confirm
Go to the setting page to start the Wi-Fi
function of the mobile device
Start the device Wi-Fi
In Wi-Fi list, choose and connect to
"CLOUDCAM_XXXX" network
Choose Wi-Fi for the device
Return to YCC365 Plus APP
CLOUDCAM_XXXX
Note:Additionbyconnectingtonetworkcableisnotsupportedcurrently.
06

*Off-lineDirectAPConnection
ConnectyourmobiledevicetotheWi-Fiofthecameratowatchthevideosorsetupthecamerawhen
thereisnonetworkconnection.However,yourmobiledevicemustbelocatedwithintherangeofthe
camera'sWi-Fisignal.
Step1:UsethepintopressandholdtheResetbuttonfor2s,thecamerawillberebooted.Youwill
hear"EnterdirectAPaccessmodeafterreboot".Therewillbenomorevoicepromptsafter
rebooting;
Step2:EnterthelogininterfaceoftheAppandclickLocalLoginortheicontoentertheTool
interface,thentapAPnetworkeddevicepreviewtocontinue.
Hi,
You are welcome
Email address
Password
Sign Up Forget password
Log in
Log in with mobile phone number
Tool
AP
AP networked device preview
Step3:ClickNext.Therewillbeapop-upwindowandclickConfirmtoentertheNetwork setting
interfaceoftheApp.ClickGotoSettingtoenterthenetworksettinginterfaceofthe
mobiledevice;
Network setting
1/3
How to connect the device>
Go to Setting
1
2
3
Confirm
Go to the setting page to start the Wi-Fi
function of the mobile device
Start the device Wi-Fi
In Wi-Fi list, choose and connect to
"CLOUDCAM_XXXX" network
Choose Wi-Fi for the device
Return to YCC365 Plus APP
CLOUDCAM_XXXX
Network setting
1/3
The device will start Wi-Fi with" "CLOUDCAM_XXXX
field.Click the button in the lower part to the setting
interface for connecting to this Wi-Fi
How to connect the device>
Go to Setting
AP networking device p...
Check the video by using the networking preview tool of
AP hot points of the device.Before the use,ensure that
the mobile phone has been connected with the device
supporting AP mode
2. Keep pressing "SET" or "RESET" key, for at
least 5 seconds
Next
07
Hi,
You are welcome
Email address
Password
Sign Up Forget password
Log in
Local login

AP networked device preview
Mac:xxxxS_146b9cbe76
IP:192. 168. 200.1
Port:8888
Step4:ConnecttotheCLOUDCAM_XXXXWi-Fi.Afterconnected,taptogetbacktoYCC365Plusto
entertheNetworksettinginterface,thenclickNexttocontinue;
Step5:Ifthescanningissuccessful,theAppwilldisplaytheinformationofthiscameraintheinterface
ofAPnetworkeddevicepreview.Tapit,entertheaccountnameYCC365andthepassword
0123456afterselectingthecamera,thenclickConfirmtowatchthevideosinthiscamera.
Note:
AllthecommunicationswillbedisconnectedfromthenetworkandsomefunctionsofYCC365Plus
arenotavailablewhenyourmobiledeviceisconnectingtothecamera'sWi-Fi.
WLAN
WLAN
WLAN
Off
AVAILABLE NETWORKS
HeimVision
Enhanced Internet experience
Connected
CLOUDCAM_146b9c7cbe76
Saved,encrypted
Scan WLAN Direct Configure More
AP networking device p...
Scanning the device in the WiFi network...
AP networked device preview
Mac:xxxxS_146b9cbe76
IP:192. 168. 200.1
Port:8888
YCC365
0123456
Cancel Confirm
Off
CLOUDCAM_146b9c7cbe76
Excellent
None
WLAN
WLAN
WLAN
AVAILABLE NETWORKS
HeimVision
Enhanced Internet experience
Connected
CLOUDCAM_146b9c7cbe76
Saved
Signal strength
Encryption Type
CONNECT
FORGET
CANCEL
Network setting
1/3
Set the WiFi that has been connected with this device
How to connect the device>
Go to Setting
08

My Camera
Device Message Cloud service Mine
YCC365 Plus
FunctionsIntroduction
ClickthepictureofthecamerainthemaininterfaceofYCC365PlustoentertheLIVEinterface.
A.Setting
B.Snapshot
C.FullScreen
D.Pan&TiltReset
E.Preset
F.Pan&TiltControl
G.Holdtotalk
*Clicktoplaythehistoricalvideos
*Clicktorotatethecamerabacktothedefaultfactoryposition
*Clicktopresetthecertainfocalpointsforthiscamera
*Touchtorotatethecamerafollowingyourfingertouch
*Holdtotalk,thenreleasetosendtheaudiotothecamera
*Clicktochangethequalityofimage
1.Pan&TiltControlandPreset
⑴Pan&TiltControl
*TouchintheLIVEinterfacetorotatethecamerafollowingyourfingertouch;
*Double-clickingofthepictureinthelivescreencandigitallyzoominandzoomoutthepicture;
*Rotatethecamerabyslidingthelivescreenwithyourfinger.
My Camera
LIVE | 10:56:49 AM
55.21KB/s
Play the video
Message Quality Sound More
Play the video
Play the video
A
B C
D E
F
G
Record Cloud Album
My Camera
LIVE | 10:56: 49 AM
My Camera
LIVE | 10:56: 49 AM
Qualit y
09
Baby Camera

⑵Preset
Clicktopresetthecertainfocalpointsforthiscamera,whichcanbeadded,calledanddeleted;
*AddaPreset:theclicktoaddapreset,enterthename,thenclickSave;
*CallaPreset:thecamerawilldirectlyrotatetothepresetfocalpointbyclickingthethumbnail.
2.VideoPlayback
Clicktoenterthevideoplaybackinterface.Itwillreplaythehistoricalvideosinthe
CloudServiceofthecamerabydefault.
*Darkblueinthetimelinemeansthevideosrecordedwhenthecameradetectsthesound,motion
andsoon,whilethelightbluemeansthenormalvideos;
*Clickthetoreplaythevideorecordedontheselecteddate;
*Clickthetocontroltheplaybackspeed,amongwhichisslowmotion,isnormal
speed,whileandarefastforward.
Sound More
LIVE | 10: 56:49 AM
Play the video
My Camera
55.21KB/s
Message Quality
Add the preset...
Input the name of the preset...
Cancel Save
Sound More
LIVE | 10: 56:49 AM
Play the video
My Camera
55.21KB/s
Message Quality
Add the preset...
Baby
Sound More
LIVE | 10: 56:49 AM
Play the video
My Camera
55.21KB/s
Message Quality
Add the preset...
Tip:
Duetothenetworkenvironment,therotationofthecameramaynotbesmoothandthestreamofthe
livevideomaylag.
Play the video
X1.0
X0.5
X1.0
X2.0 X4.0
+
10
Tip:
*EntertheinterfaceofSetting,clickPlayVideosFrom,thenselectMemorycardtowatchthevideosin
themicroSDcard;
*ColorsinthetimelineofthevideosinthemicroSDcardarethesame;
*FastforwardandSlowmotionarenotsupportedwhenplayingthevideosfrommicroSDcard.

3.VideoCu(t OnlyAvailableintheCamerawithCloudService)
Clicktoenterthevideoplaybackinterface.
Step1:Dragthetimeline,stoptothestartingtimeofthevideo,thenclick;
Step2:Slidetheorangebarleftwardandrightward,orsetuptheStarttimeandVideodurationtocut
thevideo;
Step3:EnterthenameandclickSavetocloud.
Cancel Done
11- 18 Sun
11- 19 Mon
11- 20 Tue
11- 21 Wed
06
07
08
09
10
11
11
12
13
14
15
16
17
07
08
09
10
11
12
13
Play back | 11/21/18 10: 56: 49 AM
live
Live play
My Camera
55.21KB/s
Sound R ecord
Play back | 11/21/18 10: 56: 49 AM
live
Live play
X1.0
08:50 AM 09:00 AM 09:10 AM 09:20 AM 09:30 AM 09:40 AM
My Camera
55.21KB/s
Messa ge Cloud Al bum
Clip
Sound R ecord
Play back | 11/21/18 10: 56: 49 AM
live
Live play
X1.0
08:50 AM 09:00 AM 09:10 AM 09:20 AM 09:30 AM 09:40 AM
My Camera
55.21KB/s
Messa ge Cloud Al bum
Clip
Play the video
11
10:11 AM 10:12 AM 10: 13 AM 10:14 AM 10:15 AM 10:16 AM
Start time
Video duration
2018-11-21 10:13:17
00:13
Cancel
Play back | 11/21/18 10: 56: 49 AM
My Camera
55.21KB/s
10:11 AM 10:12 AM 10: 13 AM 10:14 AM 10:15 AM 10:16 AM
Start time
Video duration
2018-11-21 10:13:17
00:13
Cancel Save to cloud album
Play back | 11/21/18 10: 56: 49 AM
My Camera
55.21KB/s
20180926-102651
Save to cloud...
Delete
Cancel Save to cloud...
Delete
PlayVideosFrom
Cloud
Memorycard
Tip:
ThecutvideoissavedtotheCloudAlbumbydefault.YoucanentertheCloudAlbumforwatching
andrenaming,forsharingonFacebook,Twitter,YouTube,etc.,andfordownloadingtothemobile
device.

4.Messages( OnlyAvailableintheCamerawithCloudService)
Clicktowatchallthevideosrecordedwhenthecameradetectsthesound,motionandsoon.
*Filterthevideosbydifferentcameras,messagetypesanddates;
*Clickthethumbnailtowatchthedetailoftheselectedvideo;
*Click,thenselectthevideotodelete.
Note:
Thedurationofvideosisthesameastherecordtimeoftheselectedcloudservicepackage,andthe
videosareautomaticallydeletedwhenthecloudserviceexpires.Thevideowilllooptorecordand
theformervideowillbeautomaticallycoveredbythenewvideo.
Mycamera
All messages 11- 21
11:41:14 11:38:32
11:34:51
11:08:10
11:07:42
11:07:08
11:04:33 11:03:03
Details
00:00:02 00:00:18
Save Speed multiplier
x1.0
2018/11/21 11:38:33
Messages
Mycamera
11:41:14
11:34:51
11:07:42
11:04:33
All messages 11- 21
11:38:32
11:08:10
11:07:08
11:03:03
Messages
12
5.ThemicroSDCard
Important:
InstallthemicroSDcardintothecamera,thenpoweronthecamerawhenusingthemicroSDcard;or
rebootthecameraafterinstallingthemicroSDcard.
*ThiscameracansupportthemicroSDcardupto128G;
*GotoSetting>Devicestorage>Memorycardmanagement:
**tocheckthemicroSDcardstatus;
**tochecktheremainingapacityofthemicroSDcard;
**toformatthemicroSDcard(itisrecommendedtoformatbeforeusingthemicroSDcard);
**tosetthememorycardrecordingmodesthemicroSDcard.SelectingNotRecordingmeansthat
thecamerawillnotsaveanyvideo,selectingEventrecordingmeansthatthecamerawillrecord
videoswhendetectinganysound,motionetc.,andselectingAll-dayrecordingmeansthatthe
camerawillalwaysrecordthevideo.
*microSDcardisaconsumable.GettingamicroSDcardwithbrands,suchasKingstonandSanDisk,is
recommended.

Cloud Recording Services
VIP
My Camera
Pay by activation code
No service at present
Cloud
storage
Safety
enciphering
Alarm
playback
Conwenient
check
Record Time
Gift parcel for the starter,for experience with Freel
3days 7days 15days
30days
Recording method
Continuous Recording
Record 24 hours a day
Service time length
$0/month
Immediately receive
Cloud Recording Services
VIP
My Camera
Pay by activation code
Cloud
storage
Safety
enciphering
Alarm
playback
Conwenient
check
Record Time
7days 15days 30days
Recording method
Continuous Recording
Record 24 hours a day
Service time length
$4.99/month
Immediately receive
3 days continuous recordi...
Trial expires on 2018/10/27
Alarm Recording
Record video when an abnormality
is detected
$49/year
$59/year
Works with Alexa
Save $10
* Control this device with your voice through select
Alexa devices
Cloud Recording Services
VIP
My Camera
Cloud
storage
Record Time
Continuous Recording
Record 24 hours a day
7days
Recording method
3 days continuous recordi...
Trial expires on 2018/10/27
Alarm Recording
Record video when an abnormality
is detected
Cancel
Please select payment method
PayPal payment
Credit-card payment
Pay by activation code
Safety
enciphering
Alarm
playback
Conwenient
check
15days 30days
Payment
Cloud storage management
My cloud packages
Delete the cloud storage vid...
Memory card management
SD card status
Memory card capacity
Used 6.78GB,remained 0.41GB
Memory card recording mode
Format the SD card
Expired
Available
All-day record...
Devicestorage
Cloud storage management
My cloud packages
Delete the cloud storage vid...
3 Day All-da...
Memory card management
SD card status
Failed to detect the SD card
Make sure to insert a SD card or reinsert the SD card
?
Devicestorage
6.OptionalCloudService
SelectCloudServiceinthemaininterfaceorgotoSetting>Devicestorage>Cloudstoragemanagement
tochecksubscriptionpackages.
*Weoffer30-dayfreecloudserviceandcansavethevideorecordedforthelatest3days(looptorecord);
*ThecamerawithacloudservicepackagethatispaidyearlycanbeupgradedtosupportAlexa;
*PayfortheselectedpackagebyPayPalorcreditcard;
*ThedataintheCloudServiceissafebecauseweareusingAmazon'scloudstorage.
Cloud storage management
My cloud packages
Delete the cloud storage vid...
Memory card management
SD card status
Memory card capacity
Used 6.78GB,remained 0.41GB
Memory card recording mode
Format the SD card
Expired
Available
All-day record...
Devicestorage
Not recording
Event recording
All-day recording
Cancel
13

7.OtherFunctionsIntroduction
NotificationSettings
Important:
Forreceivingthereal-timealertnotifications,pleaseswitchonalltheoptions:Motiondetection,
Sounddetection,ReceiveappnotificationandReceiveEmailnotifications.
*ReceiveEmailnotifications:ON
YCC365Pluswillsendthealertnotificationstoyouremail(onlyavailableinthecamerawithcloudservice).
*Receiveappnotifications:ON
YCC365Pluswillpushthealertnotificationstothenotificationbarofyourmobiledevice;
*Stopnotificationtime:
Youwillnotreceivealertnotificationsfromthecamerawithinacertaintimeafteraddingschedule(s);
PushNotificationSettings
*Receivenotification
Youcanselecttoreceiveallnotificationsorjustreceiveasummary.IfselectReceivesummary,you
cansetuptheintervaltimeforreceivingthealertnotificationswiththesametype;
Motiondetection:ON
Thecamerawillrecordthevideoswhendetectsthemovingobjects,thenYCC365Pluswillpushthe
alertnotificationtothenotificationbarofyourmobiledevice;
Sounddetection:ON
Thecamerawillrecordthevideoswhendetectsthesoundlikethebaby'scrying,thenYCC365Plus
willpushthealertnotificationtothenotificationbarofyourmobiledevice;
EntertheinterfaceofSettingtocheckotherfunctionsbyclickingtheinthemaininterfaceof
YCC365PlusortheintheLIVEinterface.
14
Push notification settin...
Notification settings
Receive notification
Stop notification time
Receive summary
No
Others
Receive app notifications
Receive Email notifications
Reboot device
Remove Device
Notification settings
Storage settings
Network setting
Motion detection
Sound detection
Push notification settings
Device storage
Play Videos From
Cloud
Change Wi-Fi network
HeimVision
Stop notification time
Your device will not send push notification within the
set time(up to 3 sets of plans)
Add a schedule
Turn off at
Turn on at
20:00
(next day)07:00
Note:
Sincethecloudservicepackageisboundtotheregisteredaccount,pleasecontactHeimVisionifyou
needtoswitchtoanotheraccount.

Morefunctions
A
B
C
B:switchesonandoffthemicrophoneofthecamera.
Youwillnothearthesoundfromthecameraand
thereisnosoundwhenrecordingthevideoswhen
it'soff;
A:switchesonandoffthecamera;
Setting
Share
Basic
15
Notification settings
Device time zone
Alarm Tone
Image rollover 180°
Intelligent Tracking
Device details
Device name MyCamera
Hawaii
Device off at
20:00-06:00
Device microphone
Night vision
Automatic
Private share
Motion detection
Sound detection
Push notification settings
Reboot device
Remove Device
Storage settings
Network setting
Device storage
Play Videos From
Cloud
Change Wi-Fi network
HeimVision
D
E
F
G
H
I
J
K
L
M
M:clicksthisbuttonwhenyouarenolongerusingthe
currentcameraorwhenconnectingthiscamerawith
anotherregisteredaccount.
L:rebootsthecameraremotely;
K:YoucanchangetheWi-Fiforthecamerawhenitneeds
toconnectanotherWi-Fi;however,itneedsthatthe
cameracanconnecttobothWi-Fisatthesametime;
G:checksthedeviceID,MacaddressandtheFirmware
versionofthedevice;
H:shareswithyourfamily,thentheycanwatchlive
videos,watchthevideoplaybackorcontrolthePTZ
ofthecameraaccordingtotheselectedfunction(s).
ThesharedaccountshouldregisterYCC365Pluswith
avalidemail.
F:thecamerawillrotatefollowingthemovingobject
whenit'son.Tokeepthecamerastillandtoreduce
thenoise,pleaseswitchoffIntelligentTracking.If
themovingobjectisoutoftherangeofmonitoring,
thecamerawillgetbacktothepositionbeforetracking.
However,thecamerawillnottrackthemovingobject
whenyouareusingPan&TiltControl;
J:thecamerawillnotrecordvideowhendetectsany
soundifyouswitchoffthisbutton;
D:turnsonandofftheIRLEDofthecamera.Youcanalso
setuptoautomaticallyswitchonorofftheIRLEDbased
ontheenvironment.AfterswitchingontheIRLED,the
imagewillbewhiteandblackunlessyouchangethe
setting;whileafterswitchingofftheIRLED,theimage
willbecolorfulunlessyouchangethesetting;
C:thebuilt-inbuzzerwillmakeansirenalertwhen
thecameradetectsthesound,motionandsoon
ifyouswitchonthisbutton;
I:thecamerawillnotrecordvideowhendetectsany
motionifyouswitchoffthisbutton;
E:flipsthepictureofthevideowhenthecameraismounted
undertheroofofthebuildings;

Simultaneouslywatchvideosfrommultiplecameras
Multiplecamerascanbeconnectedtothesameregisteredaccount.Youcanwatchthelivevideoof
multiplecamerasatthesametimethroughthesplitscreenbyclickingtheintheupperright
cornerofthemaininterface.
YCC365PlusandPCcansupport4splitscreenscurrently,whichmeansthatyoucansimultaneously
watchlivevideosfrom4camerasinthesamescreenatmost.Whentherearemorethan4cameras
connectingtothisApp,youcanslidethescreentowatchthelivevideoofeachcamera.
Tip:
Simultaneouslywatchingthelivevideosofmultiplecamerashashigherrequirementsfornetwork
bandwidth,soitmayoccurthevideobufferandlag.
HowtoWatchtheVideosontheComputer
Enteryouremailaddressandloginwithyourpasswordaftervisiting .www.ucloudcam.com
Fordetailedintroductionoffunctions,pleaserefertotheaboveintroductionforYCC365Plus.
TroubleshootingGuide
Q1:HowshouldIdowhenthecamerafailstoconnectduringtheprocess?
Device Message Cloud service Mine
YCC365 Plus
Camera1 Mycamera
Camera3Livingroom 17:18:57
11/20/18
My Camera
*UsethepintopressandholdtheResetbuttonfor5-6storesetthecamerabeforeconnectingthe
camera.Youwillhear"ResetSuccess"atasuccessfulreset;
*Thecameraonlysupports2.4GHzWi-Fi.PleasemakesuretoconnecttothecorrectWi-Fi;
*Youwillheardifferentvoicepromptswhenconnectingthecamera.Pleasetakecorresponding
measuresaccordingtothevoiceprompts.
16

"PleaseconfigurecamerabyscanningcodeorAPhotspot".Youwillhearthisafterthecamerais
poweredon.Ifnot,usethepintopressandholdtheResetbuttonfor6storesetthecamera,then
tryagain;
"PleasewaitforWi-Ficonnecting".YouwillhearthisafterselectyourWi-Fiaccountandenterthe
password.Ifnot,theWi-Ficonnectionisfailed.Pleasecheckwhetherthelensofthecamerais
blocked,whethertheaccountandpasswordarecorrect;
"PleasewaitforInternetconnecting".Ifyoucannothearthis,itmeansthatthecameracannotget
theIPaddressfromtherouter.Pleasemakesuretherouterworkswellandtrytoreducethe
numberofuserswhocanaccessthecurrentWi-Fi;or,restarttherouterandtryagain;
"Internetconnected,welcometousecloudcamera".Thisvoicepromptmeansthecamerahas
beenconnectedsuccessfully.Ifyoucannothearthisaftertryingmanytimes,pleasecontactus.
Tip:Whenthecameraisclearingcachememoryandrestarting,itwillalsomaketheblankpartsin
thetimelineofthevideo.
Tip:
*RebootthecameraafterinstallinganduninstallingtheSDcard.
*DonotinstalloruninstalltheSDcardwhenpoweringonthecamera,whichmaydamage
thevideosortheSDcard.
Q2:WhatcanIdoifYCC365Plusshows"Uh-oh!Devicedisconnected"?
*Makesurethecameraispoweredonandthenetworkoftherouterworkswell.
Solution1:ClickTroubleShootingonthesamepagetofix.
Solution2:Restartthecamera.Ifthecamerastilldisconnectsaftertherestart,pleaseremovethe
camerafromtheApp,thenconnectitagain.
Q3:HowcanIgetmycameraconnectedtoanotherWi-Fi?
*IfthecurrentWi-FiofthecameraandWi-Fiyouwouldliketoswitchcanbeconnectedatthesame
time,youcanswitchtheWi-FidirectlybyselectingWi-FiNetworkintheinterfaceofSetting.
*IfthecameraisdisconnectedtothecurrentWi-Fi,theAppwillsay"Devicedisconnected".Click
TroubleShootingtoconnecttoanotherWi-Fidirectly.OrremovethecamerafromYCC365Plus,
thenconnectthecameratotheWi-Fiyouwouldliketoswitch.
Q4:Whyarethereblankpartsinthetimelineofthevideo?
*IfyouareusingtheTrialpackageorAlarmRecordingpackageofCloudService,oryouselect
EventRecordinginMemorycardrecordingmode,itwillhaveblankpartsinthetimelineofthe
video.Becausethoseoptionsmakecamerarecordingvideoswhenitdetectsthesound,motionetc..
Q5:IinstalledthemicroSDcard,selectedAll-dayRecordinginMemorycardrecordingmode,butwhy
arethereblankpartsinthetimelineofthevideo?
*MakesureyouselectSDCardinPlayVideosFrom;
*MakesuretheSDcardstatusisNormal;Ifnot,pleaseformattheSDcard.Ifthereareblankpartsin
thetimelineofthevideoafterformatting,pleasechangetoanotherSDcard.
Q6:WhycannotthecamerareadtheSDcard?
*PleasemakesuretheSDcardisnotdamaged.IftheSDcardisdamaged,pleasechangeto
anotherSDcard.
* Whenthequalityofthenetworkispoor,thecameramaynotreadtheSDcard.Youcanchangethe
qualityofthepicturefromHDtoSDintheLIVEinterface.
Q7:WhyisthetimelineofthevideoblankwhenusingSDcardafterthecloudserviceexpires?
*VideosintheCloudServicecan'tbeplayedifthecloudservicepackageexpires.Ifthecamera
hasn'tinstalledtheSDcardbefore,therewouldhavenovideos.
17

Tip:Whenyouwatchthelivevideoofthecamera,themobiledevicewillnotgetanynotification.
Q8:HowcanIwatchtheSDcardvideosonthemobiledeviceandcomputer?
*Watchonthemobiledevice:IftheSDcardstatusisNormal,changePlayVideosFromtoSDCard.
*Watchonthecomputer:InstalltheSDcardintothecomputer,orcopythevideostothecomputer,
thenwatchthemwiththeplayerthatsupportsMP4format.
Q11:Whycan'tthesharedaccountoperatethecamera?
*Forsecurity,thesharedaccountcan'toperatethecamera.Iftheotheruserwouldliketooperate
thecamera,pleasedirectlyusetheaccountwhichisboundtothecameratologin.
Q12:Whyisthereacircleinthevideoandwhydoesthevideohavebufferswhenwatchingthevideo?
*Thecircleinthevideomeansit'sstillloading,pleasecheckthenetworkconnectionofthecameraand
themobiledevice.YoucanalsochangethequalityofthevideofromHDtoSDforsmootherstreaming.
Q13:Whyisthereimagenoisewhentheenvironmentisdark?
*Thisisanormalphenomenon.However,toimprovetheimagequality,theIRLEDcanbeturnedon
whentheenvironmentisdark;atthesametime,thecoloroftheimagewillbeblackandwhite.
Q14:Whydoesthecameramakenoise?
*Whenthecamerarotates,themotorwillmakeasubtlesound,thentheAppwillrecordthenoise
throughthecamera'smicrophone.ItcanbeeliminatedbyswitchingofftheSoundintheLIVE
interface,orswitchingofftheMicrophoneintheinterfaceofSetting.Inaddition,itwill
occuranechowhenthedistancebetweenthemobiledeviceandthecameraisveryclose.Itcan
beeliminatedbymovingthemobiledeviceawayfromthecamera.Ifthecameramakesanunusual
noisethatcannotbeeliminated,pleasecontactus.
Q15:DoIhavetosubscribetothecloudservicepackagetousethiscamera?
*Youdon'thavetosubscribetothecloudservicepackage.Weoffer30-dayfreecloudservice.You
canusetheSDcardforvideorecordingaftertheexpiration;otherwise,youcanonlywatchthe
real-timevideo.
*Forbetterexperienceandsaferstorage,HeimVisionrecommendsrenewingthefreetrialpackage
afterexpiration.Ifyouhavesubscribedacloudservicepackage,pleaserenewitbeforeexpiration.
Otherwise,pleasegetanSDcardintimetoavoidtheinterruptionofvideorecording;andbackup
theimportantvideosintheCloudServiceintimetoavoidthesituationthatyoucan'twatchthem
afterthecloudserviceexpires.
Q10:HowmanyaccountscanIsharewhenIselectPrivateShare?HowcanIcancelthesharing?
*Thelimitationofnetworkbandwidthandtoomanyusersaccessingthecameraatthesametime
willaffecttheconnectionandthevideoqualityofthecamera.Thecamerawithcloudservice
subscriptionpackagecansharewith10accountsatmost;whilethecamerawithoutcanshare
with3accountsatmost;
*IntheinterfaceofPrivateShare,pressandholdtheaccountyouwanttocancelthesharing,then
click.
Q9:Whycan'tIgetthenotificationsonmyphone?
*MakesureyouallowYCC365PlustosendyounotificationsintheSettingsofyourmobiledevice.
*MakesureyouswitchonalltheoptionsinPushNotificationSettings.
*Makeusethecurrenttimeisnotduringthescheduledtimethatstopsthenotification.
Usually,YCC365Pluswillpushnotificationstoyourmobiledevicewhenthecamerarecords
videosafterdetectingthesoundormotion;however,notifyingbythesoundorthevibration
dependsonthesettingofthemobiledeviceitself.
18
/