How to Locate and Space
Wind Driven Turbine Ventilators
WhirlyBird
A Properly Ventilated Attic Must
Have Intake and Exhaust Ventilators
WhirlyBirds
®
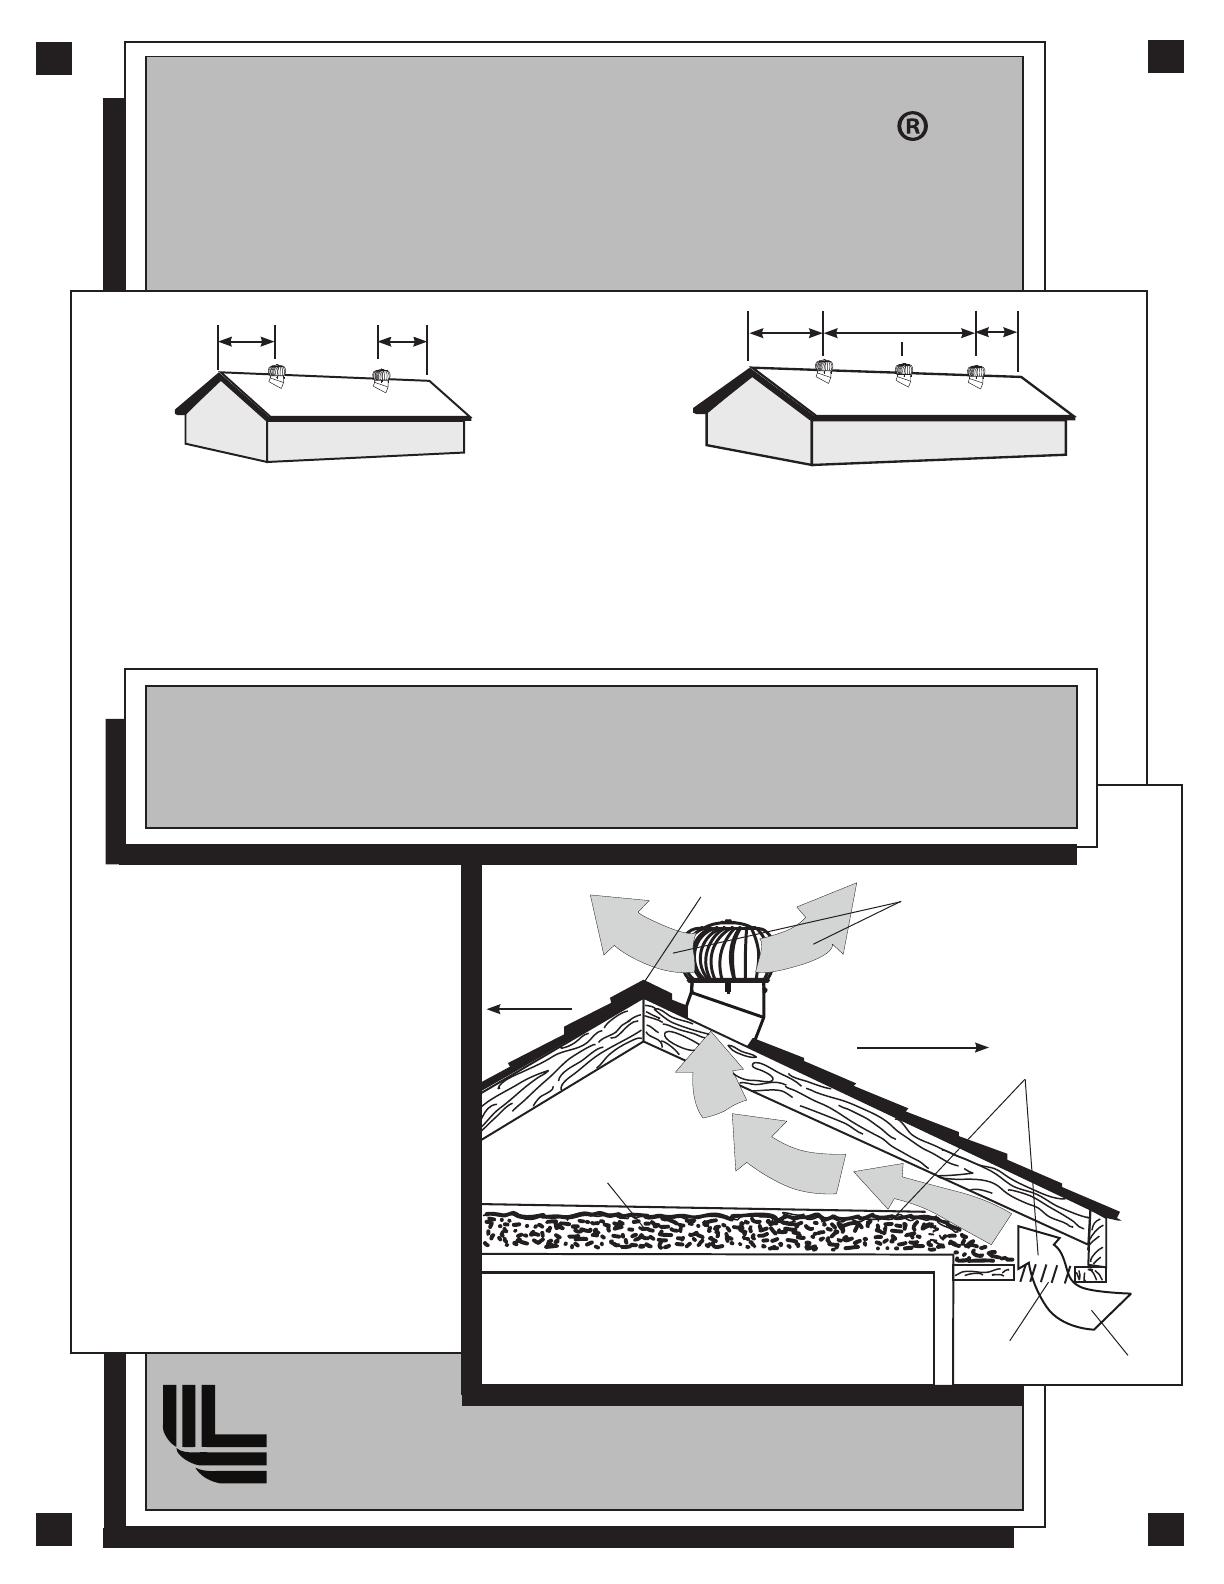
should be located near the peak of the roof on
the rear slope, exposed to the wind from all directions. When
installing two, place each one ¼ of the total length of the roof
peak from each end of the house.
For example, on a 40′ roof, each WhirlyBird
®
should be 10′
from each end of the house.
Do’s anD Don’ts for
attic ventilation.
DO install all Exhaust Ventilation at the SAME
HEIGHT within a common attic area. Installation
of exhaust vents at more than one level on a roof
allows the upper exhaust vent to wrongly pull air
in from lower exhaust vent rather than from the
soft Intake Vents.
DON’T install exhaust vents at different heights.
DON’T install Ridge Vents down the hip.
DO install ONLY ONE TYPE of Exhaust Ventilation
within a common attic area. Exhaust Vents pull air
from the easiest Intake source. The use of two or
more types of exhaust vents such as Power Vents
with Roof Vents or Gable Vents with Ridge Vents
or Roof Vents could make one of these vents act as
intake instead of pulling air from the soft vents.
DON’T mix different types of exhaust vents.
DO install a BALANCED SYSTEM of Intake and
Exhaust Ventilation. 50% Intake and 50% Exhaust
is a balanced system. Improper intake may lead to
snow or rain inltration into the exhaust vents.
Proper Spacing With
Two WhirlyBirds
®
Installed
Proper Spacing With
Three WhirlyBirds
®
Installed
WhirlyBirds
®
should be located near the peak of the roof on the
rear slope, exposed to the wind from all directions. When installing
three, one should be installed 1/6 of the total length of the roof peak
from each end of the house and one should be installed in the center.
For example, on a 60′ roof, the two outside Whirlybirds
®
should
be 10′ from each end of the house – and the center one should be 30′
from either end of the house.
IMPORTANT Do not cover WhirlyBirds® in colder
months. WhirlyBirds® will help remove damaging
moisture present in all attics. If this moisture is not
removed, it could condense and ruin your insulation.
loManco
Back of H o use
Back of H o use


