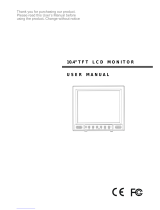
ViewZ VZ-LX SERIES User manual
- Category
- TVs & monitors
- Type
- User manual


2User ManualVisit the ViewZ USA website at https://www.viewzusa.com
Safety Instrucon
Installaon
Funcon
Trouble Shoong
Mounng Guide
RMA
Specicaon
Warranty
1. Mark Indicaon & Substance
1. Package
2. OSD Control and Funcon
1. Monitor Buon Funcon
2. Warning
2. Interface
3. Cauon
3. Remote Control Funcon
4. Operaonal Temperature & Humidity
5. Dot Defect (dead pixel) of TFT
6. FCC RF INTERFERENCE STATEMENT
3
7
10
19
17
20
18
22
4
7
11
4
8
5
9
5
5
6
10
CONTENTS
.......................................................................................................................................................................................
.......................................................................................................................................................................................................
...............................................................................................................................................................
..........................................................................................................................................................................................
............................................................................................................................................................................................
..................................................................................................................................................................................................................
...................................................................................................................................................................................................
........................................................................................................................................................................................................
.......................................................................................................................................................
................................................................................................................................................................................................ ..
..............................................................................................................................................................
................................................................................................................................................................................................
................................................................................................................................................................................................
..................................................................................................................................................................................................
..............................................................................................................................................................
.....................................................................................................................................
.....................................................................................................................................................
..........................................................................................................................................
..........................................................................................................................................................................................................

3User Manual Visit the ViewZ USA website at https://www.viewzusa.com
1. Read all warnings.
2. Follow all instrucons to ensure longevity of monitor.
3. Do not place the monitor near water.
4. Clean only with dry cloth.
5. Do not block any venlaon openings. Install in accordance with the manufacturer’s instrucons.
6. Do not install near any heat sources such as radiators, heat registers,stoves, or other heat generang
devices.
7. Do not override the safety purpose of the polarized or grounding-type plug.
8. A polarized plug has two blades with one wider than the other.
9. A grounding type plug has two blades and a third grounding prong.
10. The wide blade or the third prong are provided for your safety.
11. If the provided plug does not t into your outlet, consult with electrician for replacement of the outlet.
12. Protect the power cord from being walked on or pinched parcularly at plugs, convenience receptacles
and the point where it connects to the monitor.
13. Only use aachment/accessories specied by the manufacturer.
14. Use only with the cart, stand, tripod, bracket or table specied by the manufacturer or sold with the
monitor. When a cart is used, use cauon when moving the cart & monitor in combinaon to avoid
injuries.
15. Unplug the monitor during lightning storms or when unused for long periods of me.
16. Refer all servicing to qualied service personnel. Servicing is required when the monitor has been
damaged in any way.
The monitor shall not be exposed to dripping or splashing and objects containing liquids, such as vases
shall be placed near the monitor.
The monitor should have ample distance (e.g. 10cm) from the wall for sucient venlaon.
Important Safety Instruction
SAFETY INSTRUCTION

4User ManualVisit the ViewZ USA website at https://www.viewzusa.com
This symbol is intended to alert the user to the presence of uninsulated & dangerous voltage
within the monitor’s enclosure that may be of sucient magnitude to constute a risk of
electric shock to persons.
This symbol is intended to alert the user to the presence of important operang and
maintenance (servicing) instrucons in the literature accompanying the monitor.
Important Safety Instruction
Mark Indication and Substance
Warning
SAFETY INSTRUCTION
CAUTION : TO REDUCE THE RISK OF ELECTRICAL SHOCK,
DO NOT REMOVE COVER (OR BACK). NO USER
SERVICEABLE PARTS INSIDE. REFER SERVICING TO
QUALIFIED SERVICE PERSONNEL
• Do not use damaged or loose cables and plug.
• Do not pull the plug out by the wire nor touch the plug with wet hands.
• Use only a properly grounded plug and receptacle.
• Do not connect too many extension cords or plugs to one outlet.
• Do not excessively bend the plug and wire.
• Do not disconnect the power cord while it's sll plugged into the monitor.
• Do not place any heavy objects on the power cord. Damage to the cord may cause shock or re.
• Never open the monitor. There are no user-serviceable parts inside and opening will void warranty.
• Removing covers may expose you to dangerous shock hazards or other risks.
• Keep any heang devices away from the power cable and monitor.
• Do not place the monitor near water.
• Do not insert objects of any kind into the monitor's open slots, as they may touch dangerous voltage points.
• Please follow the laws and regulaons of your municipality to dispose the monitor properly.
• Do not use the monitor in high temperature, humid, dusty or oily areas.
• Do not install the monitor where it will be exposed to connual vibraon.
• Keep the plasc packaging out of children’s reach.
• If any damage is detected upon rst opening the box, contact agency from which you bought the monitor directly.
• If your monitor does not operate normally – in parcular, if there is any unusual sound or smell coming from the
monitor – unplug it immediately and contact an authorized dealer or the service center.

5User Manual Visit the ViewZ USA website at https://www.viewzusa.com
Important Safety Instruction
Caution
Available Temperature & Humidity
Dot Defect (dead pixel) of TFT
SAFETY INSTRUCTION
• If the connector between the plug and the pin is dusty or dirty, clean it properly using a dry cloth.
• Make sure to unplug the power cord before cleaning the monitor.
• Make sure to leave a gap between monitor and wall.
• Do not drop the monitor when moving it.
• Place your monitor in a locaon with low humidity and a minimum dust.
• Install the monitor base on a showcase or shelf so that the end of the base does not protrude from the
showcase or shelf.
• Do not place the monitor on an unstable or small surface area.
• Do not install inside a vehicle.
• Disconnect the plug from the outlet during storms or lightning or if it has not been used for a long me.
• Do not try to move the monitor by pulling on the power cord.
• Do not cover the vents on the monitor.
• When moving the monitor, turn o and unplug the power cord. Make sure that all cables, including HDMI
cable and cables connected to other devices, are disconnected before moving it.
• Place the monitor out of children’s reach, as they could damage it by hanging onto it.
• Operang Temperature : 14°F ~ 122°F / -10°C ~ 50°C
• Operang Humidity : 20 ~ 70% RH
ViewZ monitors are manufactured using high-end semiconductor technology with precision rangs of 99.9%
and above. However, it may be the case that certain RGB and white pixels seem darker (or enrely unlit i.e.
black).
Modern producon methods cannot guarantee an absolute fault-free monitor. To this eect, no LED
manufacturer can guarantee a defect free panel. A few isolated pixel or sub-pixel faults are considered
tolerable and dierent policies exist that govern the amount of these tolerable values.
While most pixel faults occur in isolated regions, a cluster of dead pixels or sub-pixels can somemes form for
which a separate ruling applies. A cluster is dened as an area of 5x5 pixels. ViewZ’s policy on pixel failure:
either as an isolated fault or in the form of a cluster is outlined on the website: www.viewzusa.com

6User ManualVisit the ViewZ USA website at https://www.viewzusa.com
Note
FCC RF INTERFERENCE STATEMENT
This equipment has been tested and found to comply with the limits for a Class A digital device, pursuant to Part 15 of
the FCC Rules. These limits are designed to provide reasonable protecon against harmful interference in a residenal
installaon.
This equipment generates, uses and can radiate radio frequency energy and, if not installed and used in accordance
with the instrucons, may cause harmful interference to radio communicaons. However, there is no guarantee that
interference will not occur in a parcular installaon.
If this equipment does cause harmful interference to radio or television recepon which can be determined by
turning the equipment o and on, the user is encouraged to try to correct the interference by one or more of the
following measures.
• Reorient or relocate the receiving antenna.
• Increase the separaon between the equipment and receiver.
• Connect the equipment into an outlet on a circuit dierent from that to which the receiver is connected.
• Consult the dealer or an experienced radio, TV technician for help.
• Only shielded interface cable should be used.
Finally, any changes or modicaons to the equipment by the user not expressly approved by the grantee or
manufacturer could void the users authority to operate such equipment.
► DOC COMPLIANCE NOTICE
This digital apparatus does not exceed the Class A limits for radio noise emissions from digital apparatus set out in the
radio interference regulaon of Canadian Department of communicaons.

7User Manual Visit the ViewZ USA website at https://www.viewzusa.com
The following tools may be required depending on your installaon.
Wall Mount
Ceiling Mount
Your ViewZ monitor is shipped with all proper installaon hardware and components. If there are parts missing
and/or damaged, please stop the installaon and contact ViewZ USA at (888)-998-4399.
Your ViewZ monitor is compable with ViewZ monitor mounts. For more informaon, please contact ViewZ USA at (888)-998-4399.
Electronic Stud Finder Protecve Eye-wearPencil Level Phillips Screwdriver
Assembly Components - provided
Mounting Option
Installation Tools
TFT-LED Monitor (Qty 1)
Monitor Stand Set (Qty 1)
110V Power Cable (Qty 1) HDMI Cable (Qty 1) User Manual (Qty 1)
Remote Controller (Qty 1)
INSTALLATION
• Part #
• Part #
• Part #
• Part #
• Part #
• Part #
WM50
CM-6/18
WM71
CMKiT-02
AM02-A
CMKiT-04
• Tilng -15° ~ 0°
• VESA 75 ~ 200
• VESA 75 ~ 200
• Tilng -15° ~ 0°
• Tilng -12° ~ +5°
• Universal Mount
• Compable with
• Compable with • Compable with
• Compable with
• Compable with
• Compable with
24LX, 27LX, 32LX
24LX, 27LX, 32LX
24LX,27LX,32LX,42LX
24LX, 27LX, 32LX
42LX
42LX
• Black / White
• 6 ~ 18
• Universal Mount
• Rotaon 360°
• 35" ~ 70" • 35" ~ 70"
• Tilng -15° ~15°
• Tilng -12° ~ +5°
• Swivel 180°
• Universal Mount

8User ManualVisit the ViewZ USA website at https://www.viewzusa.com
The following image is the descripon of interface input ports
Interface Input Ports
CONNECT EXTERNAL EQUIPMENTS
w
eq
r
t
y u s d f g
1. AV AUDIO IN ( L / R )
2. YPbPr AUDIO IN ( L / R )
3. AV ( BNC ) #1 IN
4. AV ( BNC ) #1 OUT
5. AV ( BNC ) #2 IN
6. AV ( BNC ) #2 OUT
7. YPbPr ( BNC ) IN
8. AV ( BNC ) #3 IN
9. AV ( BNC ) #4 IN
10. AV ( BNC ) #5 IN
11. VGA (15 Pin D-Sub) IN
12. DVI IN
13. HDMI IN
14. AC 110V IN
i oa

9User Manual Visit the ViewZ USA website at https://www.viewzusa.com
Remote Controller (#16)
REMOTE FUNCTION
q
w
e
t
r
y
u
i
1. Power
2. Picture
3. Freeze
4. Up
5. Le
6. Menu
7. Right
8. Down
9. Mute
10. Input
11. VGA Input Select
12. YPbPr Input Select
13. HDMI Input Select
14. AV Input Select
15. S-Video Input Select - N / A
16. DVI Input Select
o
a
d
s
f
g
h
j
Display image, sound and custom sengs can be adjusted in OSD (On Screen Display) menu by remote controller.
To adjust monitor seng value :
1. Press the 'MENU' buon to enter the OSD menu
2. Press the 'INPUT' buon to select input source
3. Press the 'FREEZE' buon to freeze current display image On / O - only available on the remote controller
4. Press the ▲ / ▼ buons to select the desired sub-menu. The selected submenu will be highlighted
5. Press the 'MENU' buon to enter the sub-menu for adjusng items
6. Change the value you wish to adjust by using the ◄ / ► buons
7. Press the 'MENU' buon to conrm / exit for saving adjustment value on sub-menu
8. Without entering OSD MENU, press ◄ / ► buons to adjust the audio volume
9. Without entering OSD MENU, press VGA, YPbPr, HDMI, AV & DVI buons to select desired input source
10. Press the 'MUTE' buon to on / o audio - audio only works with VGA / AV input

10 User ManualVisit the ViewZ USA website at https://www.viewzusa.com
All picture, sound sengs and setup can be adjusted in OSD (On Screen Display) menu.
To adjust the OSD screen:
1. Press the MENU buon to enter the OSD MENU
2. Press the ◄ / ► buons to select the desired main-MENU. The selected main-MENU is highlighted
3. Press the ▲ / ▼ buons to select the desired sub-MENU. The selected sub-MENU is highlighted
4. Change the value you wish to adjust by using the ◄ / ► buons
5. Press the MENU buon to conrm the adjustment on sub-MENU
6. Press the MENU buon to exit the sub-MENU and go back to the main-MENU
7. Press the MENU buon to exit the OSD MENU
CONTROL AND FUNCTION
q w e r t y u
1. Source
Select an input source
2. Menu
Enter or exit the OSD / Select a menu on OSD
3. Le & Right ◄ (VOL) ►
Change the value on selected menu
4. Up & Down ▲ ▼
Switch a menu on OSD
On Monitor, Button Control
Monitor Button Function
5. Power
Monitor power on / o
6. IR Receiver
7. LED Indicator
Green color: monitor on
Red color : monitor o

11User Manual Visit the ViewZ USA website at https://www.viewzusa.com
CONTROL AND FUNCTION
Volume
Detect Source Signal Message
Select Input Source
Press◄ / ► buons to adjust volume on monitor
Press◄ / ► buons to adjust volume on remote controller
Press 'SOURCE' buon on monitor or 'INPUT' buon on remote controller
Press ▲ / ▼ buon to change input source and then press
◄ / ►
buon to select input source on monitor
Press ▲ / ▼ buon to change input source and then press
◄ / ►
buon to select input source on remote controller
VGA
HDMI
DVI
AV1
AV2
AV3
AV4
AV5
YPBPR
If you connect any input source, monitor will display current input source resoluon and frequency.

12 User ManualVisit the ViewZ USA website at https://www.viewzusa.com
CONTROL AND FUNCTION
Picture
▲/▼ MOVE ◄/► SELECT(ADJUST) MENU RETURN
1) Only available in Composite ( video ) input
BRIGHTNESS
USER
16 : 9 1) 2) 3)
WARM
OFF-LOW-MID-HIGH
OFF-LOW-HIGH
CONTRAST
HUE 1)
DYNAMIC
4 : 3 1) 2) 3)
NORMAL
SATURATION
STANDARD
ASPECT RATIO
Adjust the Brightness
Apply user selected values - brightness, contrast, color and hue
Set the image size to 16 : 9
Give the white color a reddish tint
Estimates the amount of noise automatically and applies suitable noise reduction processing
Reduces noise on MPEG pictures such as mosquito-noise and block-noise
Adjust the contrast
Adjust the hue
Provide enhanced contrast and sharpness
Set the image size to 4 : 3
Give the white color a neutral tint
Adjust the color saturation
Provide standard contrast and sharpness
Adjust the video format
0 ~ 100
0 ~ 100
0 ~ 100
0 ~ 100
See table below
SHARPNESS
MILD
UNDER 2) 3)
ZOOM 3)
COOL
PICTURE MODE
3D NR
MPEG NR
COLOR TEMP
Adjust the sharpness
Reduce contrast and sharpness
Adjust the image size based on input resolution
Zoom the image size as factory preset zoom level
Give the white color a blue-ish tint
Adjust the image color setting
Reduce the noise
Reduce the noise
Adjust the color setting
0 ~ 100
See table below
See table below
See table below
See table below
FUNCTION
PICTURE MODE
ASPECT RATIO
COLOR TEMP.
3D NR
MPEG NR
VALUE
1) VGA-input support
2) AV-input support
3) HDMI-input support

13User Manual Visit the ViewZ USA website at https://www.viewzusa.com
CONTROL AND FUNCTION
Sound
EQUALIZER
SOUND MODE
LOUDNESS
BASS
MUTE
Adjust the balance between frequency components within an electronic signal
120 Hz / 500 Hz / 1K 5 Hz / 5K Hz / 10K Hz
Select one of the presets
Adjust preset sound mode
Adjust the bass level
Mute the sound
0 ~ 100
USER / MUSIC / MOVIE / STANDARD
MODE 1 / MODE 2/ MODE 3 / MODE 4 / OFF
ON /OFF / 1 - 12
ON / OFF
BALANCE Adjust the balance -50 ~ +50
FUNCTION VALUE
▲/▼ MOVE ◄/► SELECT(ADJUST) MENU RETURN Equalizer Option Window

14 User ManualVisit the ViewZ USA website at https://www.viewzusa.com
CONTROL AND FUNCTION
System - OSD SETUP
▲/▼ MOVE ◄/► SELECT(ADJUST) MENU RETURN
OSD LANGUAGE
HDMI - CHANNEL 1)
OSD DURATION
RESTORE DEFAULT
Set the language of the OSD menu
HDMI connection to set for PC
Set the OSD display time
HDMI connection to set for DVD & PC
HDMI connection to set for DVI Channel
Reset the monitor settings to the factory default
English, Spanish, French
Russian, Portuguese
PC MODE
0 ~ 60 sec
DVD MODE
DVI MODE
FUNCTION VALUE
1) HDMI input support

15User Manual Visit the ViewZ USA website at https://www.viewzusa.com
CONTROL AND FUNCTION
Advance
H-POSITION 1)
SLEEP TIMER
V-POSITION1)
Adjust the horizontal picture position
Set the time interval for the sleep mode to activate
Adjust the vertical picture position
1 ~ 100
0 / 15 / 30 / 45 / 60 sec
1 ~ 100
CLOCK 1)
PHASE 1)
PREVENT BURN-IN
Adjust the number of horizontal picture elements
Adjust the vertical noise of screen image
Set periodic image retention
1 ~ 100
1 ~ 100
1 HR / 2 HR / 4 HR / TEST / OFF
FUNCTION VALUE
1) Only available in VGA input
▲/▼ MOVE ◄/► SELECT(ADJUST) MENU RETURN

16 User ManualVisit the ViewZ USA website at https://www.viewzusa.com
CONTROL AND FUNCTION
PIP / PBP
▲/▼ MOVE ◄/► SELECT(ADJUST) MENU RETURN
MULTI WINDOW
PIP (Picture in Picture)
DVI
VGA
AV
YPbPr
SMALL, MEDIUM, LARGE
SUB SOURCE
PIP SIZE
PBP (Picture by Picture)
PIP / PBP input source
PIP H-POSITION
SWAP
Select PIP or PBP option
Separates the screen into two parts. One source device is displayed on the main screen
at the same time the another source device is displayed in inset windows
DVI, YPBPR, HDMI, VGA, AV1, AV2, AV3, AV4, AV5
on the left and right sides of the screen
Display small, medium, large size PIP window on main display
Select PIP input source
Adjust PIP window size
Separates the screen in half displaying output from two different source devices simultaneously
Adjust PIP horizontal position
Swap the main display
See table below
See table below
See table below
0 ~ 100
PIP V-POSITION
OFF
HDMI
SOUND SELECT
Adjust PIP vertical position
PIP / PBP function off
HDMI
X
X
X
O
O
DVI
X
X
X
O
O
VGA
X
X
X
O
O
AV
O
O
O
X
O
YPbPr
O
O
O
O
X
Select sound source input
0 ~ 100
MAIN, SUB
FUNCTION
MULTI WINDOW
PIP MODE
SUB SOURCE
PIP SIZE
VALUE

17User Manual Visit the ViewZ USA website at https://www.viewzusa.com
STAND GUIDE
Installing the Monitor Stand
To install the monitor stand
Aenon!
For VZ-24LX, VZ-27LX, VZ-32LX and VZ-42LX : You must use 4 * M6 x L40 screws to install the monitor stands
Installing Safety & Cauon !
At least two people are recommended to safely install the stands.
If you use the wrong size screws, it may cause damage to the monitor.
If the monitor is damaged by using wrong size screws, ViewZ will not be held responsible.
WARNING !
If screws longer than M6 x L40 mm are used for VZ-24LX, VZ-27LX, VZ-32LX and VZ-42LX,
they may cause damage to the unit. Please use bolt of correct size and length as instructed.
M6 x L40 screws for VZ-24LX, VZ-27LX, VZ-32LX & VZ-42LX

18 User ManualVisit the ViewZ USA website at https://www.viewzusa.com
MOUNTING GUIDE
Wall Mounting (Optional)
VZ-LX monitors are suitable for VESA wall mount (not included).
1. VZ-24LX, VZ-27LX : VESA WALL MOUNT 75mm x 75mm, 100mm x 100mm
2. VZ-32LX : VESA WALL MOUNT 200mm x 200mm
3. VZ-42LX : VESA WALL MOUNT 300mm x 300mm
Aenon!
VZ-24LX, VZ-27LX : You must use 4 * M4 x L10 screws to assemble this monitor and the wall mount bracket.
VZ-32LX : You must use 4 * M6 x L8 screws to assemble this monitor and the wall mount bracket.
VZ-42LX : You must use 4 * M8 x L8 screws to assemble this monitor and the wall mount bracket.
Mounng Safety !
At least two people are recommended to safely install the mount.
WARNING !
If user uses screws longer than
M4 x L10 mm for VZ-24LX, VZ-27LX,
M6 x L8 mm for VZ-32LX,
M8 x L8 mm for VZ-42LX,
it may cause damage to the unit. Please use bolt of correct size and length as instructed.
M4 x L10 screws for VZ-24LX , VZ-27LX
M6 x L8 screws for VZ-32LX
M8 x L8 screws for VZ-42LX

19User Manual Visit the ViewZ USA website at https://www.viewzusa.com
SPECIFICATION
LCD
INTERFACE
Panel Type
Active Display Area (mm)
Aspect Ratio
Frequency
Color Temperature
Speaker
Operating Temperature
Operating Humidity
Weight
Safety & EMC Certification
Electrical Ratings
Power Consumption
Accessories
Resolution
Case Type
Pixel Pitch (mm)
Brightness
Contrast Ratio
Display Color
Viewing Angle
Response Time
Black Metal
1920 (H) x 1080 (V)
5 ms (Gray to Gray)
250 cd/m²
1200 : 1
R/L : 89°/ 89° U/D : 89°/ 89° (CR > 10)
16 : 9
2 x 5W ( 8Ω )
AC 100-240V, 50/60Hz
VIDEO #3, VIDEO #4, VIDEO #5, YPbPr 1, VGA (RGB-PC) 1, DVI 1, HDMI 1
14°F ~ 122°F / -10°C ~ 50°C
YPbPr AUDIO INPUT / AV AUDIO INPUT / PC STEREO INPUT
16.7 Million Colors
Warm / Normal / Cool
30-80KHz(H) / 50-75Hz(V)
CE / FCC / RoHS
VIDEO #1 & #2 (2ch input 1.0 Vp-p, 75Ω terminated, 2ch loop-through out)
20 ~ 70% RH
HDMI cable, AC 110V Power cable, User’s Manual, Remote controller
Model No. VZ-27LXVZ-24LX VZ-32LX VZ-42LX
Size & Type 27"24"
27'' LED Backlit Monitor24'' LED Backlit Monitor
0.311 (H) x 0.311 (V)0.2715 (H) x 0.2715 (V)
250 cd/m²250 cd/m²
1000 : 11000 : 1
R/L : 85°/ 85° U/D : 80°/ 80° (CR > 10)
597.6 (H) x 336.15 (V)521.28 (H) x 293.22 (V)
Net : 20.65 lb / 9.37 kgNet : 17.63 lb / 8.0 kg
Gross : 29.80 lb / 13.52 kgGross : 25.35 lb / 11.5 kg
≤ 40 W≤ 40 W
32"
32'' LED Backlit Monitor
0.36375 (H) x 0.36375(V)
698.4 (H) x 392.85 (V)
Net : 27.62 lb / 12.53 kg
Gross : 34.43 lb / 15.62 kg
≤ 48 W
42"
42'' LED Backlit Monitor
0.4833 (H) x 0.4833 (V)
300 cd/m²
1800 : 1
954.6 (H) x 557.3 (V)
Net : 34.54 lb / 15.67 kg
Gross : 43.05 lb / 19.53 kg
≤ 70 W

20 User ManualVisit the ViewZ USA website at https://www.viewzusa.com
At start
We recommend that you test with dierent input sources when you have trouble with
the current input source. If symptom persists, follow the instrucons below. Aer
following the instrucons below, please contact us at 1-888-99-VIEWZ.
TROUBLESHOOTING GUIDE
- Check the following before calling for service.
- If the same problems connue aer checking, contact the reseller you purchased the monitor from.
No image or
Noise on the screen
Incorrect display or
Half display
Flickering and
shadow image
LED is ickering
or no image
The audio funcon is
not working
- Make sure the cable is correctly plugged into the outlet
- Make sure the power cable is correctly plugged into the monitor
- Make sure the cable is correctly connected between monitor & source
- Check brightness and see if brightness is set to 'Ø'
- Check video source
- Check your video source
- Reset video source : connecon, cable replacement, seng & more
- Check your input source setting for resolution and phase (Hz)
- Check the interface cable connecon and make sure it's plugged in correctly
- Check the input source
- Check the volume and make sure MUTE is not on
- Check HDMI / Audio port cable connection
Page is loading ...
Page is loading ...
Page is loading ...
-
 1
1
-
 2
2
-
 3
3
-
 4
4
-
 5
5
-
 6
6
-
 7
7
-
 8
8
-
 9
9
-
 10
10
-
 11
11
-
 12
12
-
 13
13
-
 14
14
-
 15
15
-
 16
16
-
 17
17
-
 18
18
-
 19
19
-
 20
20
-
 21
21
-
 22
22
-
 23
23


ViewZ VZ-LX SERIES User manual
- Category
- TVs & monitors
- Type
- User manual
Ask a question and I''ll find the answer in the document
Finding information in a document is now easier with AI
Related papers
-
ViewZ VZ-AM03 Installation Instructions Manual
-
-
-
-
-
-
-
-
-
Other documents
-
 Hi Sharp HS-ML1002 User manual
-
PROAIM P-RVMT-01 User manual
-
GRAPHTEC FC7000-130 User manual
-
Acnodes APH9220 User manual
-
 Acnodes PMW6173 User manual
-
 Acnodes APH9420 User manual
-
NEC MultiSync UX552 Owner's manual
-
NEC MultiSync UN552S User manual
-
NEC UN552V-TMX9P User manual
-
ViewSonic CDP5560-L User guide


