©Copyright Task Force Tips LLC 2008-2023 7 LIY-500 February 15, 2023 Rev18
3.2 ELECTRICAL CONTROLS
The electric TFT RC monitor is controlled by a very powerful, state-of-the-art electronic system. The key components of the system are
the motor control boards and a communication board. Each motor control board has its own microprocessor and a sophisticated motor
control chip. The communication board also has a microprocessor, which handles the interface to the operator stations. All the
components on these boards are solid state; there are no relays or electromechanical devices to wear out over time. The hardware and
software have been designed with several key features.
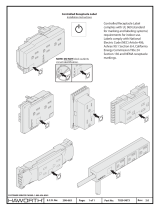
3.2.1 MOTOR CONTROL BOARD (MCB) AUTO CONFIGURE
Each monitor has three MCBs, one for each motor. The MCB controls motor movement and direction for horizontal rotation, elevation,
and nozzle pattern. In the unlikely event of a MCB failure, the failed board can be removed and one of the other two remaining MCBs
can be moved into that position. This MCB will then auto configure itself to take over the control of that axis, so that the monitor can
continue to be used, with two of the three motors. This is also a helpful benefit when troubleshooting and requires fewer spare parts to
be stocked.
3.2.2 MOTOR CURRENT LIMITING
The microprocessor on the MCB continuously monitors the motor current. As the motor reaches an end stop or if there is an obstruction,
the motor current rises very quickly and the motor control chip automatically shuts down the motor in a few milliseconds. This eliminates
the need for any type of external limit switches and the associated wiring. The microprocessor also locks the operator from moving in the
stopped direction again, until the operator first moves in the opposite direction.
3.2.3 MOTOR SOFT STOPS
The horizontal and vertical motors are equipped with feedback encoders which allow the microprocessor to know the motor position at
all times. The first time a motor reaches an end stop or strikes an obstruction, the microprocessor sets a new soft stop position just
before the end stop. From that point on, when the axis approaches the stop, the MCB automatically slows down the motor until the end
stop is reached. This significantly reduces the wear on the motor, gearbox, and gear drives.
3.2.4 MOTOR SLOW/FAST SPEED
When an operator presses one of the buttons, the associated motor starts in low speed mode for accurate control of the water stream.
For Tornado Monitors, after approximately ½ second the motor automatically ramps up to high speed, for quickly moving into position.
For all other monitors, the speed ramps up after 2 seconds. When quickly changing directions, monitor remains at speed of prior move.
If low speed is selected, monitor does not ramp to high speed but remains in low speed.
3.2.5 COMMUNICATION PROTOCOL
The communication from the monitor to the operator stations is performed over two wires using RS-485 serial protocol. Multiple operator
stations can be added with only two wires for power and two wires for the RS-485 protocol between each station.
3.2.6 OSCILLATE AND PARK FEATURES
The OSCILLATE feature allows the user to program up to 60 points of continuous movement of the horizontal and vertical axes. The
OSCILLATE pattern can be programmed from any operator station that has the OSC button. The PARK feature allows the user to move
the monitor, with one touch of a button, to a safe position before moving the fire truck. The monitor will always move to two end stops to
verify the correct position. During the programming procedure, the user has the ability to select which axis moves first. This is helpful to
avoid lights, hoses, obstructions, etc. The user can program up to 10 points of movement to reach the final park position. The PARK
pattern can be programmed from any operator station that has low profile keypad buttons. A relay contact is available for connection to
the truck alarm.
3.2.7 SMART STREAM TECHNOLOGY
This technology, only available with TFT RC nozzles, utilizes a position encoder in the nozzle actuator to give the user greater control on
the stream pattern, especially at FOG position. Nozzles equipped with a FLUSH position are programmed to stop and pause at full FOG
position when moving towards the FLUSH position, preventing unwanted water flow. A second press on the button will cause the nozzle
shaper to continue to move to FLUSH position for removing debris from the nozzle.
3.2.8 MONITOR DISABLE LOCK
This feature, only available with TFT RC Extend-A-Guns and Ladder/Platform versions of monitors, provides an interlock for RC
monitors that are installed on trucks in extremely confined spaces. This interlock can also be used to prevent a RC monitor from moving
and potentially damaging surrounding equipment. TFT RC Extend-A-Guns are shipped with the Monitor Disable Interlock feature
enabled. This feature prevents the monitor from moving when the RC Extend-A-Gun is in the retracted position. Ladder/ Platform
versions of monitors require a signal wired to an inhibit input in the aerial electronics interface box. Once active this interlock will prevent
the monitor from damaging the apparatus that the monitor is installed on and prevent operator error from causing costly damage.