Page is loading ...

User’s Manual 9R000045-G
June, 2016
1
M2 – Series Smart Manometer
USER’S MANUAL
Meriam Process Technologies’ M2 Series Products (M200 Smart
Manometer, M200-DI Wet / Wet Smart Manometer, M200LS Lab
Standard Smart Manometer and M201 Rotary Gas Meter Tester)
are microcontroller based devices used to directly measure and
display pressure. Differential (dry/dry), Differential (wet/wet),
Gauge, Compound and Absolute type pressure sensors are
supported. Pressure can be displayed in user-selected engineering
units. Differential units also have a square root flow unit selection.
Data Logging and Leak Test functions are standard.
M2 Series models are available for general purpose use or with
optional Intrinsically Safe certification to the specification shown
below (all models except M200LS).
Optional ATEX rating (not available on M200LS models):
0539 II 1 G; DEMKO 06 ATEX 0615699
Ex ia IIC T4
(Tamb. -5ºC to +50ºC)
IP40

2
Safety Information
Failure to follow all instructions could result in injury. Read,
understand and follow all safety warnings and instructions
provided with this product. Also, meet or exceed your
employer’s safety practices.
In no event shall Meriam be liable for any indirect, special, incidental,
consequential or punitive damages or for any lost profits arising out
of or relating to any services provided by Meriam or its affiliates. It is
not possible for Meriam to identify all foreseeable uses/misuses,
therefore all persons involved in commissioning, using or maintaining
this product must satisfy themselves that each intended application
is acceptable.
Safety Warnings
The table below defines the safety symbols, signal words and
corresponding safety messages used in the manual to identify
potential hazards and are intended to warn persons about hazards
that could result in personal injury or equipment damage.
This is the Read Instruction Manual symbol. This symbol indicates
h that you must read the instruction manual.
This is the Safety Alert symbol. This symbol indicates a WARNING.
Warnings alert you to actions that can cause personal injury or pose
a physical threat. Please read these carefully.
This is the Safety Glasses symbol. This symbol indicates that you
must wear approved safety glasses during the task.
This is the Safety Gloves symbol. This symbol indicates that you
must wear approved safety gloves during the task.
Indicates a potentially hazardous situation which, if
not avoided, will result in death or serious injury.
Indicates a potentially hazardous situation which, if
not avoided, could result in death or serious injury.
Indicates a potentially hazardous situation which, if
not avoided, could result in minor or moderate injury.
Indicates information essential for proper product
installation, operation or maintenance.
Information in this document is subject to change without notice. Check
the Meriam web site (www.meriam.com) for the latest manual revision.


4
Table of Contents
Certification/Safety/Warnings ................................................... 1
User Interface ............................................................................... 4
1. Keypad Functions ............................................................ 4
On/Off & (backspace) Key ................................................. 4
Min/Max & (up) Key ........................................................... 4
Hold & (down) Key .............................................................. 4
Prgm & (enter) KEY ............................................................. 5
Backlight Key ........................................................................... 5
2. Zeroing the Manometer .................................................. 5
To Zero DN, DI, GI or CI Type Manometers ........................ 5
To Zero AI (Absolute) Type Manometers ............................. 6
3. Program Mode.................................................................. 6
Units Select .............................................................................. 7
User Unit Select ....................................................................... 8
Flow Unit Select ....................................................................... 9
Damp Rate Select .................................................................. 10
User Info Select (Accuracy, SW version, Mfr date, SN) ..... 11
Auto Shut-Off ........................................................................ 12
Lockout Select ....................................................................... 13
Header Name ......................................................................... 14
Contrast Select ...................................................................... 15
Data Logging ......................................................................... 16
Leak Test ................................................................................ 17
Re-Calibration ........................................................................... 18
Re-Calibration – 1 Point EDIT and START ......................... 19
Re-Calibration – 5 Point EDIT ............................................. 20
Re-Calibration – 5 Point START .......................................... 21
Re-Calibration – Restore Factory Defaults ........................ 22

5
Specifications ............................................................................. 23
Changing the Batteries ............................................................. 27
User Connections ...................................................................... 29
Service and Calibration ............................................................. 31
Appendix 1: Rotary Gas Meter Tester
Instructions ................................................................................ 32
Appendix 2: M200-DI Application Notes .............................. 33
Zeroing for Position Sensitivity ............................................... 33
Zeroing for Static Pressure Effect on Zero ............................. 33
Appendix 3: M200LS Lab Standard Smart
Manometer ................................................................................. 34


User’s Manual 9R000045-G
June, 2016
1
Certification/Safety/Warnings
All M2 Series models are available for general purpose use (non-
hazardous areas). Optional Intrinsically Safe (I.S.) certification for
hazardous area use is available for all models except the
M200LS.
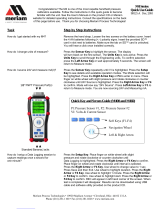
General Purpose (G.P.) versions are identified by the name plate
located on the rear of the unit under the protective rubber boot. A
sample of the General Purpose name plate is shown below:
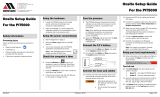
Intrinsically Safe versions are identified by the name plate located
on the rear of the unit under the protective rubber boot. A sample
of the I.S. name plate is shown below:
Intrinsically Safe versions are shipped with Dwg. No. 9R000056
“M2 Series Intrinsically Safe Control Document”. Refer to this
document for details of the certification, a list of warnings and a list
of approved batteries for use in Intrinsically Safe versions.
For Intrinsically Safe M2 Series
Use Intrinsically Safe versions in accordance with Dwg. No.
9R000056 “M2 Series Intrinsically Safe Control Document”
only. This document accompanies each I.S. unit. Failure to

2
use the unit in accordance with this document will void the
certification and may cause potentially dangerous conditions.
For Intrinsically Safe M2 Series
Restrictions apply to the use of Intrinsically Safe
models in hazardous areas. Refer to the Intrinsic
Safety Control Drawing No. 9R000056 for more
information.
Substitution of components will void the Intrinsically
Safe Certification and may impair operation and safety.
Do not substitute components. Repairs must be made
at the factory to retain the Intrinsically Safe
Certification.
Service only in safe areas. Customer service is limited
to battery replacement and field recalibration only. All
other service must be provided by the factory to retain
the Intrinsically Safe Certification.
To prevent ignition of flammable or explosive
atmospheres, disconnect power before servicing in a
safe area.
To prevent ignition of flammable or explosive
atmospheres,
DO NOT open or service unit, including battery
compartment, in flammable or explosive
atmosphere
DO NOT rub, clean or wipe the surface of the
membrane keypad as it may build a static
charge
DO NOT mix old batteries with new or mix
batteries from different manufacturers
DO NOT replace batteries in explosive or
hazardous atmosphere
DO NOT use any battery type other than those
listed on Dwg. No. 9R000056 “M2 Intrinsically
Safe Control Document”.
For General Purpose M2 Series
Fire/Explosion Hazard. Do not use General Purpose versions
in hazardous areas. DO NOT use General Purpose versions in
areas that may contain flammable gas or vapors, combustible
dusts or ignitable fibers where an unintended spark can cause
a fire/explosion.

3
For General Purpose M2 Series
Substitution of components may impair operation and
safety.
Disconnect power before servicing.
The product should not be powered with a
combination of new and old batteries.
The product should not be powered with a
combination of batteries from different manufacturers.
For All Models
Do not exceed the Pressure Limits listed in the
Specifications section of this manual. Failure to operate
within the specified pressure limit could result in minor or
moderate injury.
For All Models
User must use a wrench on the pressure manifold when
installing user’s 1/8” NPT fitting. Do not tighten the fitting
without using a wrench on the pressure manifold. Failure to
use a wrench on the manifold will damage the plastic
enclosure and void warranty No torque should be applied to
the manifold with respect to plastic enclosure.

4
User Interface
1. Keypad Functions
On/Off & (backspace) Key
Turns the manometer on and enters the unit into the
Measure Mode. Pressing the key while in the Measure
Mode turns the unit off. It also serves as a backspace key
when editing in the Program Mode. The key takes the
user out of a programmable register without changing the
previous setting. Pressing this key repeatedly will return
the user to the Measure Mode and then shut off the
manometer.
Min/Max & (up) Key
In the Measure Mode activates the Min/Max function of
the manometer. When activated the minimum value is
displayed on the upper left of the display and the
maximum value on the upper right. This key also
deactivates and resets this function. The key is used to
scroll through the programmable registers when the unit is
in the Program Mode. Once a programmable register is
selected the key can be used to edit that register.
Hold & (down) Key
In the Measure Mode toggles on/off the display Hold
function. This freezes the value displayed. If the Min/Max
function is activated, those values are also frozen. With
HOLD activated, the letter “H” appears in the lower left of

5
the display. The key is used to scroll through
programmable registers with the unit in the Program
Mode. Once a programmable register is selected the
key can be used to edit that register.
Prgm & (enter) KEY
Puts the manometer into the Program Mode from the
Measure Mode. When in the Program Mode, pressing
this key selects the programmable register to be edited
(with prompt for password if Lockout is set). After the
register has been edited, pressing the PRGM key enters
the new setting into the manometer’s non-volatile memory.
This key also acts as a key when editing user input
such as the header name and user units.
Backlight Key
The BACKLIGHT key, represented by the standard light
bulb symbol, toggles the display backlight between green
and off.
The backlight consumes additional
battery energy. Turn the backlight off
to optimize battery life.
2. Zeroing the Manometer
To Zero DN, DI, GI or CI Type Manometers
Disconnect from pressure sources and vent the pressure
port(s) to atmosphere (do not remove the factory installed
P2 plug if present). The display should read close to zero.
Press the Min/Max and Hold keys at the same time (see
inset photo below) and then release. The top line of the
display reads “ZERO IN PROGRESS” and the bottom line
counts down from 9. The process is complete when the
unit returns to Measure Mode. The lockout function, if
enabled, does not prevent zeroing of the manometer.
NOTE: The smart manometer can
only be zeroed if the new zero value
is within +/-5% (of FS) of the original
factory calibrated zero. If the zero
procedure generates a new zero
value outside this limit a “ZERO
RANGE ERROR” message appears
indicating that the procedure failed.
Factory service may be required.

6
To Zero AI (Absolute) Type Manometers
Start with the unit turned OFF and use the following
keystroke sequence:
Keystroke
Display
1. Press ON/OF button.
The display briefly shows header
name and full scale range in the
last engineering unit selected.
Then goes into the Measure Mode
to display pressure
2. Connect the M200 to a
vacuum source capable of
a vacuum of 100 microns
absolute pressure or less.
3. Pull a full vacuum.
Display should read close to zero.
(See note on next page)
4. Press Min/Max and
Hold keys at the same
time. (See figure 1
above.)
Top line of display reads
“ZEROING SOURCE:” Bottom line
of display reads “REF TO ABS
ZERO”
5. Press the PRGM key.
Top line of display reads “ZERO IN
PROGRESS” while bottom line
counts down from 9. Zeroing is
complete when unit returns to
Measure Mode.
3. Program Mode
The program mode is used to configure the manometer for
Measure Mode operation. After the PRGM key is pressed
in Measure Mode, the top line of the display reads
“PROGRAM MODE”. The bottom line reads “UNITS
SELECT”. Press the or arrow keys to scroll through
the Program Mode to the desired register. The
configurable registers that are found in Program Mode
are Units Select, Damp Rate Select, User Info Select,
Contrast Select, Data Logging, Leak Test and Exit.
Two sub-modes under “Units Select” are provided: User
Unit Select and Flow Unit Select. Press the PRGM key
to select either of these sub-modes and set up their
respective function. The manometer can be put into
Program Mode at any time during Measure Mode
operation by pressing the PRGM key. If Lockout is set, the
correct code must be entered when prompted.

7
Units Select
The standard engineering units available on the Smart
Manometer are:
PSI
inH20 (@20°C, 60°F and 4°C)
Kg/cm2
kPa
mbars
Bars
cmH2O (@ 20°C)
inHg (@ 0°C)
mmHg (@ 0°C)
User Units
Flow Units
To change the engineering units the manometer should be
“ON” and in Measure Mode. Then follow these steps:
Keystroke
Display
1. Press the PRGM
key.
Top line reads “PROGRAM
MODE” and bottom line
reads “UNITS SELECT”.
2. Press the PRGM
key.
Top line reads “UNITS
SELECT” and bottom line
shows current engineering
units.
3. Press the up or down
arrow key until desired
engineering unit is
displayed.
Engineering units on bottom
line of display change.
4. Press the PRGM key
to select the
engineering unit.
Top line reads “PROGRAM
MODE” and bottom line
reads “UNITS SELECT”.
5. Press the down
arrow key.
Bottom line reads “EXIT”.
6. Press the PRGM
key.
Display returns to Measure
Mode in new engineering
unit.

8
User Unit Select
Engineering units not included in the standard selection
can be programmed into the manometer using the Units
Select register in the program mode. The value
programmed into this register is used to calculate the
desired unit of measure. An example of converting to
“Feet of H2O” will be shown in the following steps, using
the conversation factor of 1 PSI = 2.30894 FT H2O.
Keystroke
Display
1. Press the PRGM
key.
Top line reads “PROGRAM
MODE” and bottom line
reads “UNITS SELECT”.
2. Press the PRGM
key.
Top line reads “UNITS
SELECT” and bottom line
shows current engineering
units.
3. Press the up or
down arrow key until
“USER UNIT SELECT”
is displayed.
Top line reads “UNITS
SELECT”
Bottom line reads “USER
UNIT SELECT”.
4. Press the PRGM
key. See note 1 at
bottom of this table.
Top line reads “VALUE=”.
Bottom line reads
“CHANGE?: YES”.
5. Press the PRGM
key to change the
value.
Top line reads “USER UNIT
VALUE”.
6. Start entering the
conversion factor by
pressing the up arrow
key until the first digit
reads 2.
Top line reads “USER UNIT
VALUE”.
Bottom line reads
“20000000”.
7. Press the right arrow
key to enter the value
“2” and advance the
cursor to the next digit.
Cursor flashes to the right of
the “2”. Now numbers,
decimal point or blank space
can be entered.
8. Repeat step 6 and 7
until bottom line reads
2.30894
Bottom line reads “2.30894”.
Last digit “4” is blinking.
9. If an error is made
use the left arrow key
to move the cursor
back to the incorrect
digit. Then press up or
The digit that is corrected is
blinking.

9
down arrow keys to
display the correct
value.
10. Press the PRGM
key until the display
changes. See note 1
at bottom of this table.
Top line reads “VALUE=”.
Bottom line reads
“CHANGE?: YES”.
11. Press the PRGM
key.
Top line reads “USER UNIT
NAME”.
12. Follow steps 6-8
above to enter “FT
H2O”.
Bottom line reads “FT H2O”.
Last letter “O” is blinking.
13. Press the PRGM
key.
Top line reads “PROGRAM
MODE”.
Bottom line reads “UNITS
SELECT”.
14. Press the down
arrow key.
Bottom line reads “EXIT”.
15. Press the PRGM
key.
Manometer returns to
Measure Mode. Units Display
shows “FT H2O”.
Note 1: If at steps 4 or 10 the “VALUE=” is the desired
value, press the up or down arrow key. This will toggle
the bottom line from the default “CHANGE?: YES” to
“CHANGE?: NO”. Step 5 would then jump to step 10.
Step 11 would then jump to step 13.
Flow Unit Select
Smart Manometers that use differential pressure sensors
can be programmed to display flow measurement units
such as CFM or L/min. The primary element must be a
differential pressure - square root - type device such as a
pitot tube, orifice plate or venturi.
The flow constant and flow units description are
programmed into the manometer using the same
keystrokes used in the User Unit Select programming. At
step 3 choose “FLOW UNIT SELECT” instead of “USER
UNIT SELECT”.
Calculate the Flow constant from the following equation:
Fc = Q ÷ DP½
where: Fc = Flow constant
Q = Flow rate (from the flow element

10
calculation sheet), any flow unit
DP = Differential pressure corresponding to Q,
unit must be inches H20 @20°C
Example: If the DP is 25 inches H20 @20°C when the flow
rate is 10,000 units, then the Flow constant is 2,000.
Damp Rate Select
Adjustable exponential type damping is available to steady
the display when measuring pulsating pressure or flow.
The Smart Manometer has a range of damping rates; 0.1,
0.2, 0.5, 1, 2, 5, 10, or 25 seconds. Exponential damping
shows approximately 70% of a step change in pressure
upon the next display update. When set for 5 second time
constant, it takes 5 seconds from the time of the step
change until the manometer displays the full value of the
new pressure.
To set the damp rate, follow the steps below:
Keystroke
Display
1. Follow the steps
on page 4 to put the
unit in Program
Mode
Top line reads PROGRAM
MODE” and bottom line
reads “UNITS SELECT”.
2. Press the
arrow key.
Bottom line reads “DAMP
RATE SELECT”.
3. Press the PRGM
key.
Top line reads “DAMP
RATE SELECT”.
4. Press the or
arrow key until the
desire desired damp
rate is displayed on
the bottom line.
Bottom line shows damp
rate in seconds.
5. Press the PRGM
key.
Top line reads
“PROGRAM MODE” and
bottom line reads “UNITS
SELECT”.
6. Press the
arrow key.
Bottom line reads “EXIT”.
7. Press the PRGM
key.
Returns to Measure
Mode.

11
User Info Select (Accuracy, SW version, Mfr date, SN)
The User Info Select registers are designed to provide the
user with information about the manometer’s hardware
and software. This register provides read only information
on the sensor’s accuracy, software version, date of
manufacture and serial number. It also allows the user to
edit the Auto Shut-Off, Lockout and Start-Up Header
Name features.
To configure the User Info Select registers, follow the
steps below.
Keystroke
Display
1. From the Measure
Mode press the PRGM
key.
Top line reads “PROGRAM
MODE” and bottom line
reads “UNITS SELECT”.
2. Press the up arrow
key twice
Bottom line changes to
“USER INFO SELECT”.
3. Press the PRGM
key.
Bottom line shows accuracy
in % of Full Scale
4. Press the up arrow
key.
Bottom line shows software
version number.
5. Press the up arrow
key.
Bottom line shows sensor
manufacture date.
6. Press the up arrow
key. Instructions to set
AUTO SHUT-OFF are
in this manual.
Top line reads “AUTO SHUT
OFF” and bottom line reads
“ENTER TO SELECT”.
7. Press the up arrow
key.
Bottom line shows serial
number of the manometer.
8. Press the up arrow
key. Instructions for
using LOCKOUT are
on page 12.
Top line reads “LOCKOUT
CODE” and bottom line reads
“ENTER TO SELECT”.
9. Press the up arrow
key. Instructions for
editing the Header are
on page 13.
Top line reads “HEADER
NAME” and bottom line reads
“MERIAM”. The cursor
flashes at bottom left.
10. Press the left arrow
key to go back to
“USER INFO SELECT”
screen.
Top line reads “PROGRAM
MODE” and bottom line
reads “USER INFO
SELECT”.

12
Auto Shut-Off
Enabling the Auto Shut-Off feature allows the manometer
to turn itself off after a user selected period of keypad
inactivity. Selectable options include DISABLED, 10
Minutes (which is the factory shipped default), 20 Minutes,
30 Minutes, 45 Minutes and 60 Minutes. Disabling this
feature requires the manometer to being turned off
manually using the On/Off key.
To configure auto shut-off follow these steps:
Keystroke
Display
1. Follow steps 1-6 in
the User Info Select
table.
Top line reads “AUTO SHUT-
OFF” and bottom line reads
“ENTER TO SELECT”.
2. Press the PRGM
key, then the up or
down arrow keys, until
the desired shut-off
time is shown.
Top line reads “AUTO SHUT-
OFF” and bottom line toggles
to “DISABLED”, “10”, “20”,
“30”, “45” and “60” minutes .
3. Press the PRGM
key.
Desired Auto Shut-Off time is
selected, top line reads
“AUTO SHUT-OFF” and
bottom line reads “ENTER
TO SELECT”.
4. Press the left arrow
key twice.
Returns to Measure Mode.
The “Auto Shut-Off” timer is suspended during Data
Logging and Leak Test sessions to prevent accidental loss
of information. Auto Shut-Off is automatically re-instated
after completion of Data-Logging or Leak Test sessions.

13
Lockout Select
Enabling the Lockout feature prevents unauthorized users
from making changes to the configuration of the
manometer. To enter the Program Mode when Lockout is
active, the user must first enter the “password” (two-digit
Lockout Code) within approximately 40 seconds of the
display prompt. Failure to enter the correct two digit code
within approximately 40 seconds will return the unit to
Measure Mode. Any two-digit numeric code can be
programmed. The factory Lockout Code of 00 (which is
the default as shipped from the factory) disables the
Lockout.
To set the Lockout Code, follow these steps:
Keystroke
Display
1. From Measure
Mode press the PRGM
key. (If the Lockout is
set, enter the correct
“password” when
prompted.)
Top line reads “PROGRAM
MODE” and bottom line reads
“UNITS SELECT”.
2. Press the up arrow
key twice.
Bottom line reads “USER
INFO SELECT”.
3. Press the right
arrow key then the up
arrow key five times.
Top line reads “LOCKOUT
CODE” and bottom line reads
“ENTER TO SELECT”.
4. Press the right
arrow key, then press
the up or down arrow
keys to change the
first digit. Press the
right arrow key to
proceed to second
digit.
Bottom line shows the old
Lockout Code. The cursor
flashes at the first position
while the value is changed,
then cursor moves to
thesecond position once the
right arrow key is pressed.
5. Press the right
arrow key when the
desired code is set.
Top line reads “LOCKOUT
CODE” and bottom line reads
“ENTER TO SELECT”.
Lockout is activated.
6. Press the left arrow
key twice.
Returns to Measure Mode.

14
Header Name
Follow the steps below to edit the Header Name.
Keystroke
Display
1. From the Measure
Mode press the PRGM
key.
Top line reads “PROGRAM
MODE” and bottom line
reads “UNITS SELECT”.
2. Press the up arrow
key twice.
Bottom line changes to
“USER INFO SELECT”.
3. Press the PRGM key.
Bottom line shows serial
number.
4. Press the up arrow
key six times.
Top line reads “HEADER
NAME” and bottom line
reads “MERIAM”. The
cursor flashes at bottom
left.
5. If header is correct
press backspace key. If
editing is desired
proceed to step 7.
Top line reads “PROGRAM
MODE” and bottom line
reads “USER INFO
SELECT”.
6. Press the left arrow
key.
Returns to Measure Mode.
7. Press the up or down
arrow keys to set the
correct alpha-numeric
value.
Displays a number between
0 and 9, a letter from A to
Z, / or a blank space.
8. Press the right arrow
key to accept entry.
Cursor advances one
space to right.
9. Repeat steps 8 and 9
until the desired Header
is shown.
10. If an error is made
press the back arrow
key until the cursor is
over the incorrect value.
Follow step 8 to correct.
Press the right arrow
key to advance the
cursor without changing
values.
11. When the Header is
complete press the
PRGM key until header
accepted.
Top line reads “PROGRAM
MODE” and bottom line
reads “UNITS SELECT”.
12. Press the left arrow
key.
Returns to Measure Mode.
/