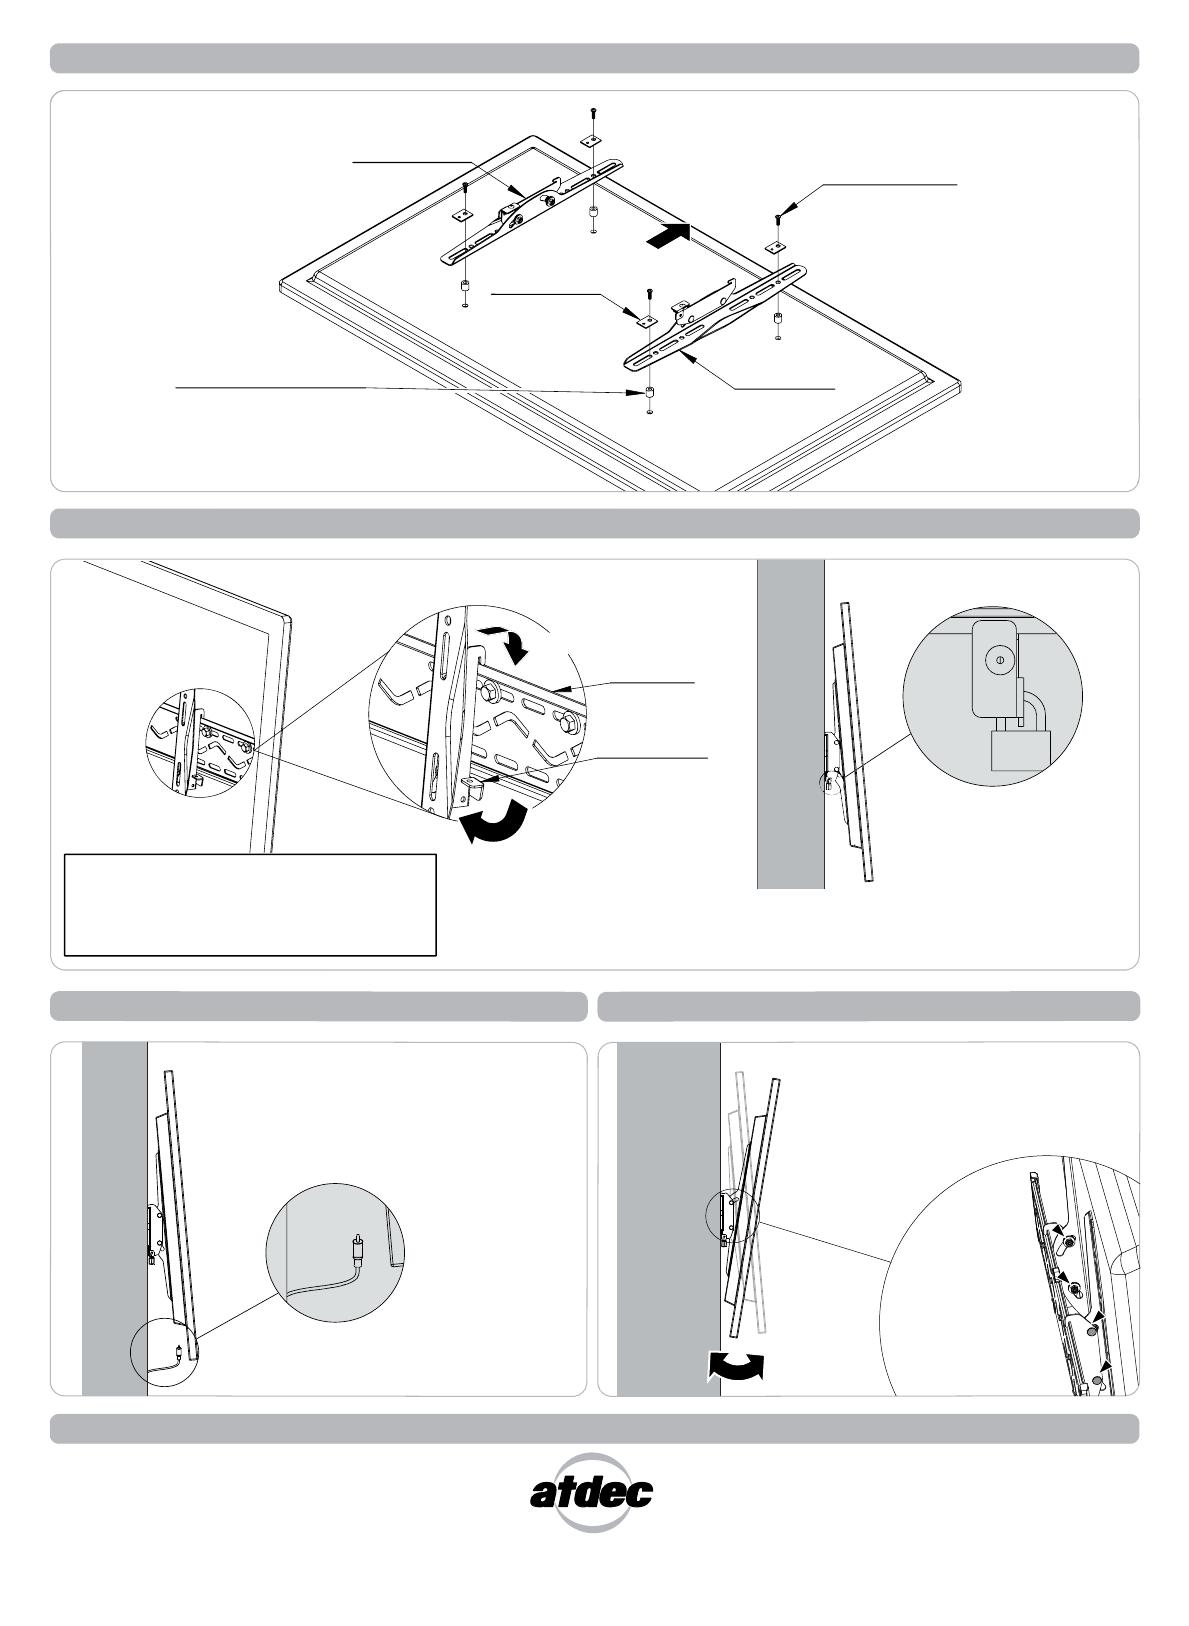
Atdec TH-3060-UT User manual

Category
Flat panel wall mounts
Type
User manual
Note:
Use a stud finder to accurately locate the centre of
the stud. Ensure that all screws fix securely into the stud.
Installation Instructions
TH-3060-UT
Component Checklist
Wall Plate
Right Mounting
Bracket
IMPORTANT INFORMATION
! IMPORTANT - Install Telehook 3060 Wall Mount as per Installation Instructions.
! This product supports a maximum load of 50kg (110lbs).
! This product only supports displays with mounting hole configurations from 100mm wide x 100mm
high up to 600mm wide x 400mm high.
! The manufacturer does not accept responsibility for incorrect installation.
! Before installing this Telehook product, please check the display ventilation requirements with your
LED/LCD manufacturer.
Step 1. Check Components
Step 2. Mounting the Wall Plate
Tools Required:
Power Drill
5mm ( ”) drill bit
Phillips Head screwdriver
10mm
(”)
masonry drill bit
10mm
(”)
Socket Wrench or Shifter
Tip: Use the built-in spirit level to ensure wall plate is horizontal
Masonry Wall
Timber Stud
Check you have received all parts against the Component Checklist and Hardware above.
Left Mounting
Bracket
Timber Stud
Wall Plate
Coach Screw
OR
Nylon Anchor
Coach Screw
Wall Plate
M6 Washer
Flat screen wall mount | tilt
10mm
(”)
hole
depth: 55mm (2.2”)
5mm
(”)
hole
depth: 55mm (2.2”)
M6 Washer
End Cap (x2)
End Cap
End Cap
0.2
0.2
0.39
0.39
0.39
Display Mounting
Screws
Hardware
Nylon Anchor (x4)
M6 Washer (x4)
M5/M6 Spacer (x4)
M8 Spacer (x4)
Coach Screw (x4)
Multi-washer (x4)
M4x16/25/30mm (x4 each)
M5x14mm (x4 each)
M6x14/30mm (x4 each)
M8x 20/30mm (x4 each)
WALL
HOOK
Locking Plate
Wall Plate
ROTATE 90°
TO LOCK
No portion of this document or any artwork contained herein should be reproduced in anyway without the express written consent Atdec Pty Ltd.
Due to continuing product development, the manufacturer reserves the right to alter specifications without notice. Published 18
/09/2015
©
Step 5. Cable Management
Installation Complete
Detaching Display from Wall Plate:
Open the padlock. Rotate the Locking Plate
90° to unhook. Lift the Display away from
the Wall Plate.
Tilt the Display to the desired viewing
angle.
Adjustment range is from -5°
backward tilt to +15° forward tilt.
Spacer
(optional, use only for
recessed mounting holes)
Mounting Screw
Multi-washer
Left Mounting
Bracket
Right Mounting
Bracket
WALL
Th
e pa
dl
oc
k
is not inc
l
u
d
e
d
(pa
dl
oc
k
s
h
ac
kle
d
iameter 4mm max.)
A. Hook the TV mounted display brackets over the top of the wall plate.
B. Turn the locking plate downward to 90° and lock it with padlock.
Note: Make sure the TV is correctly hooked before releasing the Display.
Step 4. Attaching/Detaching Display to Wall Plate (2 people required)
Step 3. Attaching Brackets to Display
Step 6. Pitching Angle Adjustment
WALL
-5°
BACKWARD
+15°
FORWARD
Slowly pull bottom of display away
from wall and then attach or adjust
cables on back of display. Slowly
allow display to return to the wall
after finishing cable management.
TOP
If necessary,
adjust the
tension of the
tilt mechanism
by tightening or
loosening 4x nuts.
  • Page 1 1
  • Page 2 2

Atdec TH-3060-UT User manual

Category
Flat panel wall mounts
Type
User manual

Ask a question and I''ll find the answer in the document

Finding information in a document is now easier with AI