Page is loading ...

Wrench or Socket
1/2 inch
M4 Washer
(4)
M4 x 12
(4)
M4 x 25
(4)
6mm Hex Key
(1)
5mm Hex Key
(1)
4mm Hex Key
(1)
Cable Tie
(2)
M5 x 12
(4)
M5 Washer
(4)
M6 x 25
(4)
M6 x 12
(4)
M6 Washer
(4)
MM-1232
AUDIO VISUAL FURNITURE INTERNATIONAL
288 Don Hillock Drive Aurora , Ontario L4G 0G9 www.video-furn.com
Toll Free: 1-877-834-3876 Fax: 1-905-751-1488 Local: 905-751-1459
Note:
If you cannot understand these instructions or are concerned about safety of the installation
Contact a qualified contractor or contact AVFI at 1-877-834-3876.
Confirm all hardware is included before you begin assembly.
Not all hardware supplied will be used depending on the manufacturer of your display/s.
Assembly and Mounting Instructions
Thank you for purchasing AVFI's small-medium display mounting system.
This product was designed for tabletop mounting of a
single LCD display sized 12-32" and weighing
no more than 60 lbs.
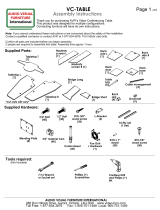
Supplied Parts:
Supplied Hardware:
Tools required:
Page 1
of 2
Place TV Bracket over the TV's
mounting holes. Attach
using the provided bolts and Hex
key. Spacer and longer bolts may
be required if TV is not flat or inputs
are blocked.
Step 1
Camera Neck 1x
Spine 1x
TV Bracket 1x
Clamp 1x
Hardware Bag
1x
(See Hardware Bag)
Cable Tie Mount
(2)
Spacer
(4)
M5 x 25
(4)
M3 x 8
(4)
1/4-20 x 3/8
(1)
5/16 Nut
(3)

(Camera and
TV hidden)
AUDIO VISUAL FURNITURE INTERNATIONAL
288 Don Hillock Drive Aurora , Ontario L4G 0G9 www.video-furn.com
Toll Free: 1-877-834-3876 Fax: 1-905-751-1488 Local: 905-751-1459
Feed cables for camera and TV through spine.
Use cable ties and cable tie mounts to restrain
loose cables.
Step 2
Page 2
of 2
Using the M6 Bolt
and Wing nut.
Tighten using 5mm
Hex Key.
Step 3
Attach camera to the camera neck using
M3 bolts or 1/4-20. (depending on camera model)
Step 4
If you have any problems,questions or suggestions, we value your feedback. Toll free 1-877-834-3876
You're Done!
Place the spine over the grommet hole.
Then feed the cables though before tightening.
Tighten the clamp against the cart surface
using a 5/16 nut and wrench.
Step 5
Alighn the TV and camera neck at the desired height.
Use 5/16 nuts and wrench to secure in place.
/


