Page is loading ...

WARNING:
EXISTING IN-PLACE RESILIENT FLOOR COVERING AND ASPHALTIC ADHESIVES.
DO NOT SAND, DRY SWEEP, DRY SCRAPE, DRILL, SAW, BEADBLAST, OR MECHANICALLY CHIP
OR PULVERIZE EXISTING RESILIENT FLOORING, BACKING, LINING FELT, ASPHALTIC “CUTBACK”
ADHESIVE, OR OTHER ADHESIVE.
These existing in-place products may contain asbestos fibers and/or crystalline silica.
Avoid creating dust. Inhalation of such dust is a cancer and respiratory tract hazard.
Smoking by individuals exposed to asbestos fibers greatly increases the risk of serious bodily harm.
Unless positively certain that the existing in-place product is a non-asbestos-containing material, you must
presume it contains asbestos. Regulations may require that the material be tested to determine asbestos content
and may govern removal and disposal of material.
See current edition of the Resilient Floor Covering Institute (RFCI) publication Recommended Work Practices for
Removal of Resilient Floor Coverings for instructions on removing all resilient floor covering structures or contact
your retailer or Armstrong World Industries, Inc. 1 800 233 3823.
The floor covering or adhesive in this package does NOT contain asbestos.
NETTOYANTS RECOMMANDÉS : Nettoyant pour revêtements de sol en bois
dur et stratifiés Bruce
®
LIMPIADOR RECOMENDADO: Limpiador para pisos de madera dura o laminados
de Bruce
®
ATTENTION INSTALLERS
Sawing, sanding and machining wood products can produce wood dust. Airborne wood dust can cause
respiratory, eye and skin irritation. The International Agency for Research on Cancer (IARC) has
classified wood dust as a nasal carcinogen in humans.
Precautionary Measures: If power tools are used, they should be equipped with a dust collector. If high dust
levels are encountered, use an appropriate NIOSH-designated dust mask. Avoid dust contact with eye and skin.
First Aid Measures in Case of Irritation: In case of irritation, flush eyes or skin with water for at least
15 minutes.
If you have any technical or installation questions, or to request a Material Safety Data Sheet,
please call 1 800 233 3823 or visit www.floorexpert.com, our technical website.
CAUTION: WOOD DUST
GENERAL INFORMATION
Owner/Installer Responsibility
NOTE: Lock&Fold hardwood flooring is installed using a floating floor installation. A 1/2˝ expansion zone must be maintained
at all vertical obstructions including doorways and transition strips. The flooring cannot be fit tight against any vertical surface
such as stairways, walls or pipes. Do not attach or pinch the flooring to the subfloor at any point in the installation when using
a floating installation, including gluing, nailing or by any other methods. Do not restrict horizontal motion of the floor by
wedging planks under other surfaces, such as door jambs, base molding, or existing transition strips.
Beautiful hardwood floors are a product of nature and therefore, not perfect. Our hardwood floors are manufactured in
accordance with accepted industry standards, which permit grading deficiencies not to exceed 5%. These grading deficiencies
may be of a manufacturing or natural type. When flooring is ordered, 5% must be added to the actual square footage needed
for cutting and grading allowance (10% for diagonal installations).
• The owner/installer assumes all responsibility for final inspection of product quality. Inspection of all flooring should be done
prior to installation. Carefully examine flooring for color, finish and quality before installing it. If material is not acceptable,
do not install it. Contact the seller immediately.
• Prior to installation of any hardwood flooring product, the owner/installer must determine that the job-site environment and
the sub-surfaces involved meet or exceed all applicable standards. Recommendations of the construction and materials
industries, as well as local codes, must be followed. These instructions recommend that the construction and subfloor be
clean, dry, stiff, structurally sound and flat. The manufacturer declines any responsibility for job failure resulting from, or
associated with, subfloor and substrates or job-site environmental deficiencies.
• Prior to installation, the owner/installer has final inspection responsibility as to grade, manufacture and factory finish. The
installer must use reasonable selectivity and hold out or cut off pieces with deficiencies, whatever the cause. Should an
individual piece be doubtful as to grade, manufacture or factory finish, the installer should not use the piece.
• Use of stain, filler or putty stick for touch-up and appropriate products for correcting subfloor voids is accepted as part of
normal installation procedures.
Tools & Accessories Needed
• Broom • Pencil • Safety glasses • Matching filler • Moisture meter (wood, concrete or both)
• Transition and wall moldings as needed • Hand saw, table saw, circular saw or band saw
• Armstrong Quiet Comfort Premium Or Armstrong Quiet Comfort • Tape measure • Carpenter square
• Hammer or rubber mallet • Vinyl/plastic tapping block • Pull bar • Utility knife
• NIOSH – designated dust mask • Recommended wood glue • 3M Scotch-Blue
™
2080 Tape
• Recommended hardwood flooring cleaner
(Add for Glue-Down Installation)
• Recommended adhesive and adhesive remover • 1/4˝ x 1/2˝ x 3/16˝ (6 mm x 13 mm x 8 mm) V-Notch trowel
• 3M Scotch-Blue
™
2080 tape • Armstrong VapArrest S-135 Professional Moisture Retardant System on concrete (if
needed). Use with urethane adhesive only.
(Add for Mechanically Fastened/Staple-Down Installations)
• Stanley-Bostitch 2025K (Only) • 1˝ Staples/fasteners (minimum) • Compressor and hose
• Nylon/Plastic tapping block • In-line regulator
Storage and Handling
Handle and unload with care. Store in a dry place being sure to provide at least a 4ʺ (10 cm) air space under cartons, which are
stored upon “on-grade” concrete floors. Flooring shall not be delivered until the building has been enclosed with windows, doors
are in place, and cement work, plastering and all other “wet” work is completed and dry. Concrete should be at least 60 days old.
Although it is not necessary to acclimate engineered flooring it is best to store it in the environment in which it is expected to
perform prior to installation. Do not open cartons of locking hardwood flooring in advance of installation. Air conditioning/heating
systems should be in place and in operation at least 14 days prior, during and after installation of the flooring.
INSTALLATION INSTRUCTIONS
BRUCE
®
PROSHIELD
™
3/8˝ (10 MM)
For stAplE DoWN, MECHANICAllY FAstENED,
FloAtINg AND glUE DoWN ApplICAtIoNs
INSTRUCTIONS D’INSTALLATION
BRUCE
®
PROSHIELD™
10 MM (3/8 PO)
poUr posEs AvEC AttACHEs MÉCANIQUE,
AgrAFEs, À CloUEr oU À tAssEAU
INSTRUCCIONES DE INSTALACIÓN
BRUCE
®
PROSHIELD™
3/8˝
FIJACIÓN MECÁNICA; CoN grApAs,
ClAvos o tAblIllAs
For complete
warranty information call 1
800
233
3823
RECOMMENDED CLEANER: Bruce
®
Hardwood & Laminate Floor Cleaner
Subfloor Conditions
Floating floors may be installed over any subfloor that is structurally sound, flat, clean and dry on all grade levels. All substrates
must meet or exceed all applicable building codes and be:
• CLEAN – Subfloor must be free of wax, paint, oil, sealers, adhesives and other debris.
• LEVEL/FLAT – Within 3/16˝ in 10´ (5 mm in 3 m) and/or 1/8˝ in 6´ (3 mm in 2 m). Sand high areas or joints. Fill low areas
with a latex additive cementitious leveling compound of 3,000-PSI minimum compressive strength such as Armstrong
S-194 Patch, Underlayment & Embossing Leveler with S-195 Underlayment Additive. Follow the instructions of the leveling
compound manufacturer. Leveling compounds must be tested for moisture to ensure they are within the specified
requirements for proper installation.
• DRY – Check and document moisture content of the subfloor using the appropriate moisture test. Moisture content of wood
subfloors must not exceed 13% on a wood moisture meter, or read more than a 4% difference from the moisture level of
the product being installed.
• STRUCTURALLY SOUND – Nail or screw any loose areas that squeak. Wood panels should exhibit an adequate nailing
pattern. A typical pattern is 6˝ (15 cm) along bearing edges and 12˝ (30 cm) along intermediate supports. Flatten edge swell
as necessary. Replace any water-damaged, swollen or delaminated subflooring or underlayments.
NOTE: Avoid subfloors with excessive vertical movement. Optimum performance of hardwood floor covering products occurs
when there is little horizontal or vertical movement of the subfloor. If the subfloor has excessive vertical movement (deflection)
before the installation of the flooring it is likely it will do so after installation of the flooring is complete. As flooring
manufacturers we are unable to evaluate each engineered system. Spacing and spans, as well as their engineering methods,
are the responsibility of the builder, engineer, architect on consumer, who is better able to evaluate the expected result based
on site related performance.
INSTALLING THE FLOOR
Before You Start
• Before installing the planks, central heat or air conditioning should be operating for 14 days.
• Install only at room temperature above 60˚F (16˚C) and 35-55% humidity conditions.
• In rooms with under-floor (radiant) heating, the surface temperature of the subfloor may not, under any circumstances,
exceed 85˚F (29˚C). Increasing heat should be done in 5-degree increments. Ascertain that the subfloor is properly
engineered or controlled for the flooring being installed. Subfloors designed for materials with higher resistance to heat
transfer, such as carpet, WILL damage the flooring. Installations that include multiple floor covering products on a single
heating circuit must be adjus3ted for the flooring product with the highest heat transfer or lowest temperature requirement.
• When possible, preselect and set aside boards that blend best with all horizontally mounted moldings (reducer/stair nose
etc.) This will assure a uniform final appearance. Install these boards adjoining the moldings.
• Floor should be installed from several cartons at the same time to ensure good color and shade mixture.
• Be attentive to staggering the ends of the boards at least 4˝-6˝ (10-15 cm) when possible, in adjacent rows. This will help
ensure a more favorable overall appearance of the floor.
STEP 1: Doorway and Wall Preparation (All Installations)
• Undercut door casings and jambs. Remove any existing base, shoe mold or doorway thresholds. These items can be
replaced after installation. When undercutting door casings the installer should confirm there is the recommended expansion
space. The floor must have 1/16˝ clearance under the door casing to be able to float freely without vertical restriction.
STEP 2: Plan Your Layout Using the Following Steps (All Installations)
• Decide the direction of the floor installation in the room. Planks installed parallel to windows accent the floor the best. Floors
should be installed perpendicular to the floor joists. Stiffen subfloors as necessary to prevent vertical movement.
NOTE: If your room exceeds a maximum room width of 30’ (9 m) or a maximum room length of 30’ (9 m) additional expansion
space is required. T- Moldings may be used at doorways or intersections to increase the expansion space.
STEP 3: Laying the Underlayment (Floating Installations)
• Install the underlayment in the same direction that the hardwood flooring is to be installed.
• Extend the underlayment a few inches up the wall.
• Trim excess prior to installing trim or moldings.
• The floating floor underlayment already has double-sided tape for ease of taping the precut overlapping seams. If a non-
adhesive underlayment is used, tape all seams with the included tape.
STEP 4: Installing First Row (Floating Installations)
• Select a board to begin installation of the first row using the longest boards available.
• Starting from the LEFT with the tongue facing the wall, carefully place the first board in place. Use wedges or 1/2˝ (13 mm)
scrap along the wall to hold plank in place while allowing the required expansion space.
• Align the next piece by overlapping the end of the first board so that the joint is tight when the board lays flat. Some slight
adjustment of the board may be necessary to assure a tight fit.
• Again, place wedges or 1/2˝ (13 mm) scrap as necessary to restrain movement and maintain expansion zone.
• Continue in this manner until the first row is complete.
• Cut the final board to length allowing the necessary expansion zone.
• Place wedges to restrain movement and maintain expansion zone.
• A 1/2˝ expansion space is required throughout the installation. Do not attach or pinch the flooring to the subfloor at any point
of the installation including gluing, nailing, or by any other methods.
• If the wall is not straight, scribe the first board as necessary to maintain alignment.
• Continue to Step 7.
Room Width Room Length Expansion Space Required
30´ 30´ 1/2˝
40´ 40´ 3/4˝
50´ 50´ 1˝
60´ 60´ 1-1/4˝

General Information for Glue-Down Installations
• Maximum adhesive working times: Urethane adhesive - 60 minutes; ArmstrongProConnect
™
Professional Hardwood
Flooring Adhesive - 60 minutes. When not in use, keep the adhesive container tightly closed to prevent thickening.
Thickening will cause difficulty in spreading the adhesive.
• Open times and curing times of ALL adhesives vary dependent upon subfloor porosity, air movement, humidity and room
temperature. Urethane adhesive has a shortened working time in high humidity environments, whereas the working time for
ProConnect
™
and polymeric resin adhesives will be lengthened. In areas of low humidity, open time will be longer with
urethane adhesives and shorter with ProConnect
™
. Adjust the amount of adhesive spread on the subfloor accordingly. The
adhesive should not be applied if subfloor or room temperature is below 60°F (16°C). WORKING TIME WILL VARY
DEPENDING ON JOB SITE CONDITIONS.
• Hold trowel at a minimum 45° angle firmly against the subfloor to obtain a 40-60 ft.
2
(4-5.5 m
2
) per gallon spread rate. The
trowel will leave ridges of adhesive and very little adhesive between the ridges. This will allow you to still see the chalk lines
between the ridges and provide the recommended spread rate.
• For additional application instructions, follow the recommendations on the adhesive container.
• Proper ventilation within the room must be provided. An electric fan is helpful.
• Rolling is not required, but if desired, do not do so until the adhesive has cured for two hours.
STEP 3: Spread the Adhesive (Glue-Down Installations)
• Spread sufficient amounts of the recommended adhesive with the recommended trowel in an area that can be covered in
60 minutes (see adhesive information).
• If necessary, nail a sacrificial row with 1˝ (2.5 cm) nails on the dry side of your chalk line to help hold the first row in place.
NOTE: Avoid installing on the surface of the flooring. If necessary, distribute weight using a kneeler board.
STEP 4: Installing the Floor (Glue-Down Installations)
• Select a board to begin installation of the first row using the longest boards available.
• Starting from the LEFT with the tongue facing the wall, carefully place the first board in place. Use wedges or 1/4˝ (6 mm)
scrap along the wall to hold plank in place while allowing the required expansion space.
• Align the next piece by overlapping the end of the first board so that the joint is tight when the board lays flat. Some slight
adjustment of the board may be necessary to assure a tight fit.
• Again, place wedges or 1/4˝ (6 mm) scrap as necessary to restrain movement and maintain expansion zone.
• Continue in this manner until the first row is complete.
• Cut the final board to length allowing the necessary expansion zone.
• Place wedges to restrain movement and maintain expansion zone.
• If the wall is not straight, scribe the first board as necessary to maintain. For random and alternate width products, use the
widest plank for the first row. The first row of planks should be installed with the edge of the groove lined up on the chalk
line. The tongue should be facing the starting wall. The first row must be aligned and seated in the adhesive, as all additional
rows will be pushed back to this original row. Remove tongue to allow for expansion space, if necessary, on the row
adjoining the wall.
• During the installation occasionally remove a piece of flooring from the subfloor and inspect the back for proper adhesive
transfer. Adequate adhesive transfer is necessary to ensure sufficient holding strength.
• If the adhesive skins over and fails to transfer, remove and spread new adhesive to achieve proper bonding.
NOTE:Clean adhesive from the surface of the floor frequently, using the recommended adhesive cleaner. Urethane adhesives
become extremely difficult to remove when cured. Do not use 3M Scotch-Blue™ 2080 Tape before adhesive is removed from
the surface. Use clean towels, changed frequently, to prevent haze and adhesive residue.
• Check for a tight fit between all edges and ends of each plank. End-joints of adjacent rows should be staggered 4˝-6˝ (10-
15 cm) when possible, to ensure a more favorable overall appearance.
• To eliminate minor shifting or gapping of product during installation, use 3M Scotch-Blue
™
2080 Tape to hold the planks
together. After installation is complete, remove all of the 3M Scotch-Blue
™
2080 Tape from the surface of the newly installed
flooring. Do not let the tape remain on the flooring longer than 24 hours. Avoid the use of masking or duct tape, which leaves
an adhesive residue and may damage the finish.
• If necessary, use weights to flatten boards with bows until adhesive cures, in order to prevent hollow spots. Boards that
cannot be flattened should be cut in length to reduce the bow, or not used.
• Be sure not to spread adhesive too far ahead of your work area.
• Complete the installation using this same technique for the remainder of the floor.
• Avoid heavy foot traffic on the floor for at least 24 hours. Lift the furniture or fixtures back into place after 24 hours.
STEP 3: (Staple Down Installation)
• Select a board to begin installation of the first row using the longest boards available.
• Starting from the LEFT with the tongue facing the wall, carefully place the first board in place. Use wedges or 1/4˝ (6 mm)
scrap along the wall to hold plank in place while allowing the required expansion space.
• Align the next piece by overlapping the end of the first board so that the joint is tight when the board lays flat. Some slight
adjustment of the board may be necessary to assure a tight fit.
• Again, place wedges or 1/4˝ (6 mm) scrap as necessary to restrain movement and maintain expansion zone.
• Continue in this manner until the first row is complete.
• Cut the final board to length allowing the necessary expansion zone.
STEP 3: (Mechanically Fastened/Staple-Down Installations)
• Use the longest, straightest boards available for the first two rows. For random and alternate width products, use the widest
plank for the first row. Align groove of first row on chalk line. The tongue should be facing the starting wall. Pre-drill 1/2˝
(13 mm) from back (tongue) edge, 1˝-2˝ (2.5-5 cm) from each end, and at 6˝ (15 cm) intervals when possible. Fasten using
4 or 6d finishing nails or 1˝ (2.5 cm) pneumatic finish nails/brads. Countersink the nails.
• Pre-drill and blind-nail at a 45° angle through the tongue of the first row every 1˝-2˝ (2.5-5 cm) from the ends and spaced
in 3˝-4˝ (7.6-10 cm) intervals. Countersink nails to ensure flush engagement of groove with the following row(s). Continue
blind nailing using this method with following rows until stapler can be used. Alternatively use a pneumatic finish nailer and
install nails/brads at the same intervals with a minimum length of 1˝ (2.5 cm).
• End-joints of adjacent rows should be staggered a minimum of 4˝-6˝ (10-15 cm) when possible, to ensure a more favorable
overall appearance.
STEP 4: Installing First Row (Mechanically Fastened/Staple-Down Installations)
• Always use the recommended stapler for the specific product being installed (see “Installation Applications”). Use a
minimum 1˝ (2.5 cm) staple recommended by the stapler manufacturer, 1˝-2˝ (2.5-5 cm) from the ends spaced a 3˝-4˝ (8-
10 cm) intervals.
• Set compressor at 70 PSI. If tongue damage occurs, lower air pressure.
• Fasten several sacrificial boards to the floor. At least two boards, stapled side by side, must be used to indicate proper
machine adjustments.
• Check for surface damage, air pressure setting, groove damage, edge blistering, etc. before proceeding. Make all
adjustments and corrections before installation begins. Once proper adjustments have been made, remove and destroy the
boards.
• Install the remainder of the floor working from several cartons.
• The last 1-2 rows will need to be face-nailed when clearance does not permit blind nailing with a stapler or a brad nailer. Pre-
drill and face-nail or pneumatically nail on the groove side, following the nailing pattern used for the first row.
STEP 5: Installing Remaining Rows (All Installations)
• Begin the second row with the cut piece from the first row. If the cut piece is shorter than 8˝ (20 cm) do not use it. Instead,
begin with a new board that exceeds 8˝ (20 cm) in length and allows 6˝ (15 cm) spacing between the end joints.
• Place the first board in place by angling it up slightly, pushing forward and interlocking the side tongue. Slide the board to
the LEFT as necessary to align the edges of the end joint.
• Carefully push the board down until tongue and groove lock together on the side and ends.
• A slight tap with a tapping block may be necessary to complete the interlock.
• Restrain the movement of the board by installing a wedge in the expansion zone.
• Install all remaining boards and rows in the same manner.
• Cut the last board to size, allowing for the expansion zone, and install as above.
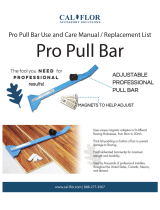
• If necessary, complete the tight fit by tapping the board into place with a pull bar.
• Whenever practical, use cut pieces from previous rows as a starter board to reduce waste.
• Maintain 6˝ (15 cm) spacing between end joints after the first four rows for best appearance.
STEP 6: Installing Final Row (All Installations)
• The last row may need to be cut lengthwise (ripped).
• Place the row of planks to be fit on top of the last row of installed planks. Use a piece of plank as a scribe to trace the contour
of the wall.
• Mark where the board will be cut. If the fit of the wall is simple and straight, just measure for the correct fit and cut
• After the last row is cut, use the pull bar to tighten the joint.
STEP 7: Installing Under a Door Jamb (All Installations)
• Installations of locking engineered floors under moldings, such as a door jamb, may require that the top lip of the groove on
the end be reduced in size.
• Using a small plane or knife plane, shave off the ledge off the groove.
• After the groove edge has been trimmed, place the board into place and tighten with a pull bar to test for fit. The installer
must be certain that the proper expansion space is maintained and the flooring is not pinched.
• If fit is incorrect, trim as necessary.
• Place a bead of recommended wood glue on the bottom lip of the groove.
• Reinsert the tongue into the groove and tighten the board with a pull bar. Hold the board in place with painters tape (3M
Scotch-Blue
™
2080 Tape) until the glue is dry. Do not use masking tape or duct tape, as the finish may be damaged.
STEP 8: Completing The Installation (All Installations)
• Remove all wedges and tape if used.
• Clean floor with the recommended hardwood flooring cleaner.
• Trim all underlayment and install, or re-install, all base and/or quarter round moldings. Nail moldings into the wall, not the
floor. Inspect the floor, filling all minor gaps with the appropriate blended filler.
• If the floor is to be covered, use a breathable material such as cardboard. Do not cover with plastic.
• Leave warranty and floor care information with the owner. Advise them of the product name and code number of the flooring
they purchased.
• To prevent surface damage, avoid rolling heavy furniture and appliances on the floor. Use plywood, hardboard or appliance
lifts if necessary. Use protective castors/castor cups or felt pads on the legs of furniture to prevent damage to the flooring.
INSTALLERS — ADVISE YOUR CUSTOMER OF THE FOLLOWING
Seasons: Heating and Non-heating
Recognizing that hardwood floor dimensions will be slightly affected by varying levels of humidity within your building, care
should be taken to control humidity levels within the 35-55% range. To protect your investment and to assure that your floors
provide lasting satisfaction, we have provided our recommendations below.
• Heating Season (Dry): A humidifier is recommended to prevent excessive shrinkage in hardwood floors due to low humidity
levels. Wood stoves and electric heat tend to create very dry conditions.
• Non-heating Season (Humid, Wet): Proper humidity levels can be maintained by use of an air conditioner, dehumidifier, or
by turning on your heating system periodically during the summer months. Avoid excessive exposure to water from tracking
during periods of inclement weather. Do not obstruct in any way the expansion joint around the perimeter of your floor.
2
Pour les détails de la garantie complet appelez 1 800 233 3823
INFORMATION D’ORDRE GÉNÉRAL
Responsabilité du propriétaire/poseur
Remarque : Le revêtement de sol en bois dur Lock N Fold se pose comme un revêtement de sol flottant. Un espace de 1,3 cm
(1/2 po) doit être maintenu en prévision de la dilatation à toutes les obstructions verticales, notamment aux entrées de porte
et aux bandes de transition. Le revêtement de sol ne peut pas être posé directement contre une surface verticale telle que les
marches d’escalier, les murs ou les tuyaux. Ne fixez ou ne pincez le revêtement de sol à aucun endroit du plancher brut lorsque
vous le posez comme un revêtement de sol flottant ou collé, cloué ou de quelque méthode que ce soit. Ne restreignez pas le
mouvement horizontal du revêtement de sol en coinçant les planches sous les surfaces telles que les montants de porte, les
plinthes ou les bandes de transition existantes.
Les beaux revêtements de sol en bois durs sont des produits naturels et sont donc imparfaits. Ils sont fabriqués conformément
aux normes établies dans l’industrie, autorisant une tolérance aux défauts qui ne doit pas dépasser 5 %. Il peut s’agir d’un
défaut de fabrication ou d’un défaut naturel. Lors de la commande du revêtement de sol, vous devez ajouter 5 % à la surface
réelle nécessaire pour tenir compte des coupes et des défauts (10 % pour la pose en diagonale).
• Le propriétaire/poseur assume toutes les responsabilités relatives à l’inspection finale de la qualité du produit. Une inspection
de tout le revêtement de sol devrait être exécutée avant la pose. Examinez minutieusement la couleur, la finition et la qualité
du revêtement de sol avant de le poser. Si le produit n’est pas acceptable, ne le posez pas. Contactez immédiatement le
vendeur.
• Avant de poser tout revêtement de sol en bois dur, le propriétaire/poseur doit s’assurer que le site du chantier et les sous-
planchers visés par la pose sont conformes à toutes les normes applicables ou les dépassent. Les recommandations des
industries de la construction et des matériaux doivent être observées. Selon ces recommandations, la construction et le
plancher brut doivent être propres, secs, structurellement sains et plats. Le fabricant n’assume aucune responsabilité quant
aux défauts de la pose liés à des défaillances environnementales du plancher brut et des supports ou du lieu de travail.
• Avant la pose, le propriétaire/poseur a la responsabilité d’exécuter l’inspection finale relative à la catégorie, à la fabrication
et à la finition effectuée à l’usine. Le poseur doit effectuer la sélection de façon raisonnable et rejeter ou couper les morceaux
de planche qui ont des défauts, quelle qu’en soit la cause. Si le poseur doute de la classe, de la fabrication ou de la finition
d’une section de planche, il ne devrait pas l’utiliser.
• Les retouches effectuées à l’aide de teinture, de bouche-pores ou de bâton de mastic et autres produits appropriés pour
corriger les aspérités des planchers bruts font partie des procédures de pose normales.
/