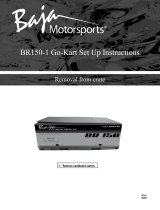
Baja BR150-1 is a high-performance go-kart designed for adults and teenagers. It features a powerful 150cc, 4-stroke engine with a recoil starter, providing a thrilling and adrenaline-pumping riding experience. With its sturdy steel frame and durable construction, the Baja BR150-1 can handle rough terrain, making it ideal for off-road adventures. It also boasts adjustable seats, a rear luggage rack for storage, and a safety flag for increased visibility.
Baja BR150-1 is a high-performance go-kart designed for adults and teenagers. It features a powerful 150cc, 4-stroke engine with a recoil starter, providing a thrilling and adrenaline-pumping riding experience. With its sturdy steel frame and durable construction, the Baja BR150-1 can handle rough terrain, making it ideal for off-road adventures. It also boasts adjustable seats, a rear luggage rack for storage, and a safety flag for increased visibility.


-
 1
1
-
 2
2
-
 3
3
-
 4
4
-
 5
5
-
 6
6
-
 7
7
-
 8
8
-
 9
9
-
 10
10
-
 11
11
-
 12
12
-
 13
13
-
 14
14
-
 15
15
-
 16
16
-
 17
17
-
 18
18


Baja BR150-1 is a high-performance go-kart designed for adults and teenagers. It features a powerful 150cc, 4-stroke engine with a recoil starter, providing a thrilling and adrenaline-pumping riding experience. With its sturdy steel frame and durable construction, the Baja BR150-1 can handle rough terrain, making it ideal for off-road adventures. It also boasts adjustable seats, a rear luggage rack for storage, and a safety flag for increased visibility.
Ask a question and I''ll find the answer in the document
Finding information in a document is now easier with AI
Related papers
Other documents
-
 Baja motorsports BR150-1 Assembly Instructions
-
Crossfire 150 Owner's manual
-
Power Wheels JEEP ADVENTURE TEAM User manual
-
Argo Frontier 650 8x8 User manual
-
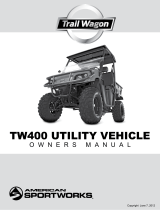 American Sportworks Trail Wagon TW400 Owner's manual
-
Baja motorsports CN90-U Assembly Instructions
-
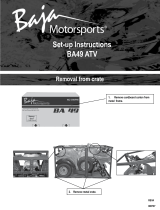 Baja motorsports BA49 Assembly Instructions
-
Power Wheels Ford F150 User manual
-
Toro KIT-BUMPER, FRONT [PROWLER] User manual
-
Argo 6x6 Frontier 650 User manual


