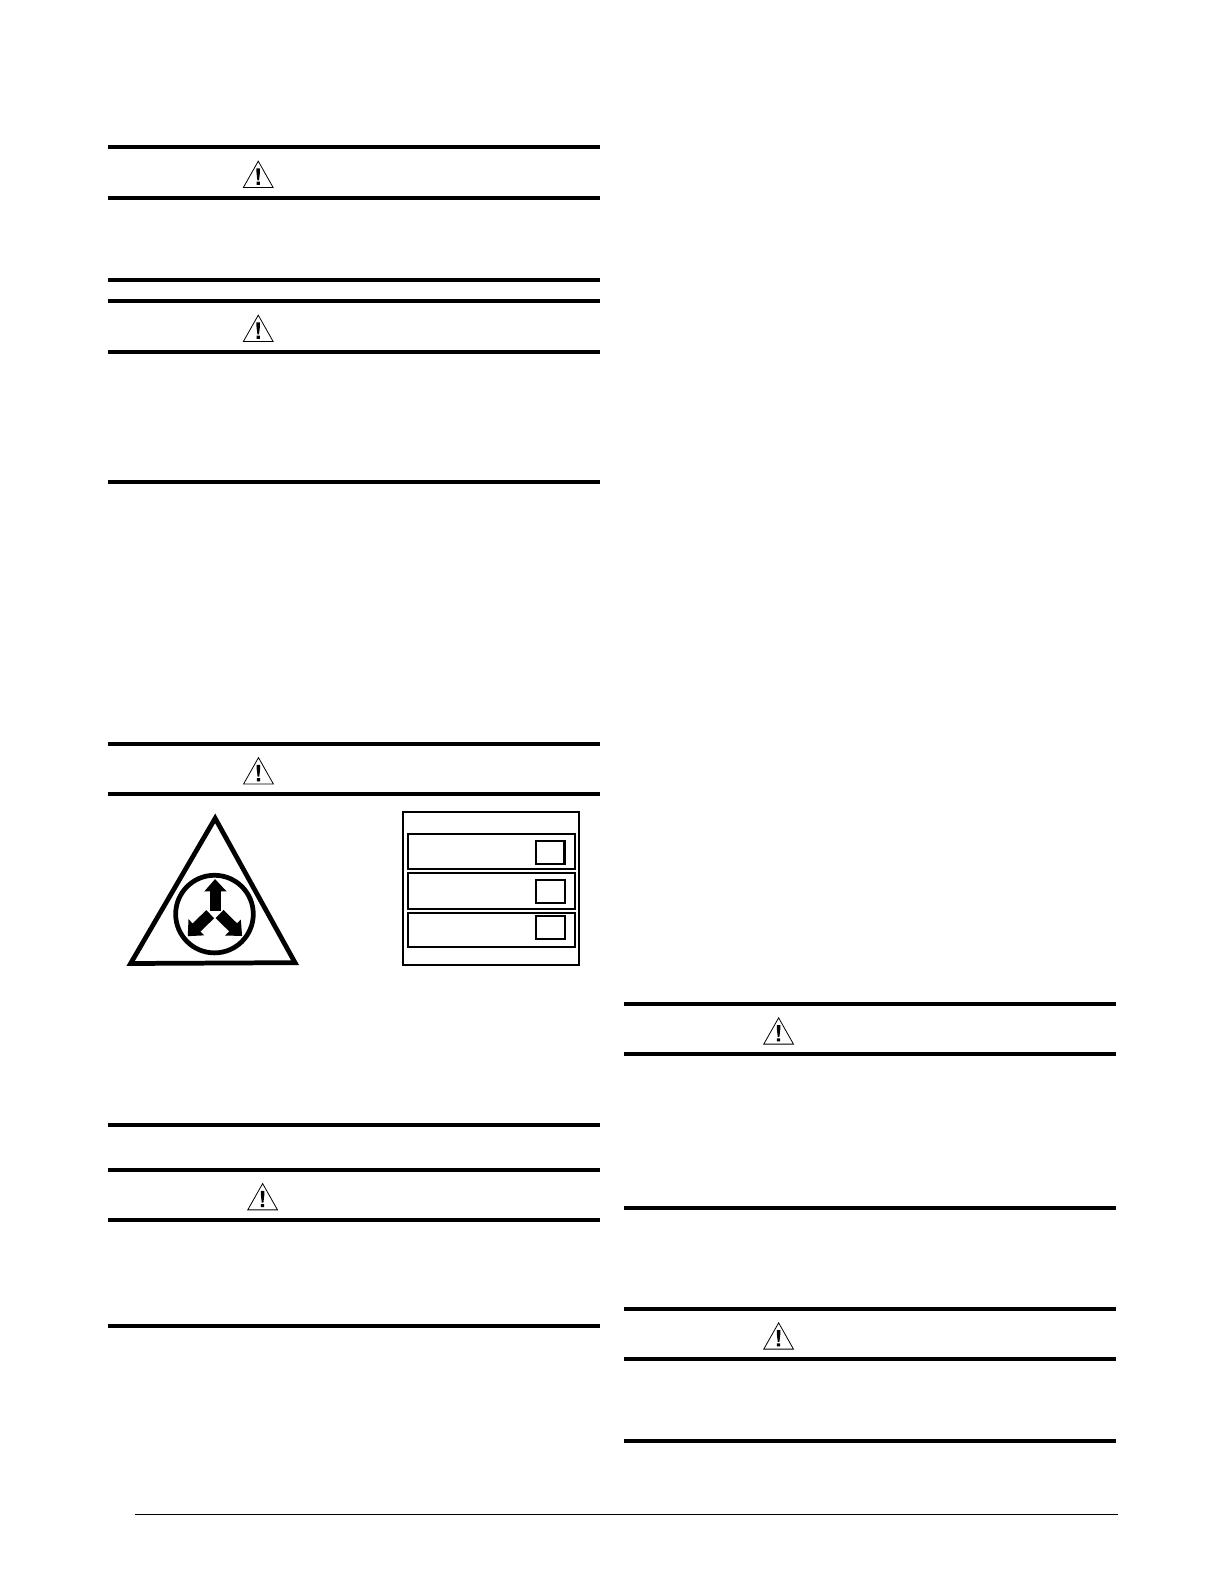
Broan TXV Kit Installation guide

Type
Installation guide
IMPORTANT SAFETY INFORMATION
Please read all instructions before servicing this
equipment. Pay attention to all safety warnings and any
other special notes highlighted in the manual. Safety
markings are used frequently throughout this manual to
designate a degree or level of seriousness and should not
be ignored. WARNING indicates a potentially hazardous
situation that if not avoided, could result in personal injury
or death. CAUTION indicates a potentially hazardous
situation that if not avoided, may result in minor or moderate
injury or property damage.
Installation Instructions
THERMAL EXPANSION VALVE (TXV) KIT FOR HEAT PUMP & AIR CONDITIONING
WARNING:
The coil is pressurized with Nitrogen. Avoid
direct face exposure or contact with valve
when gas is escaping. Always ensure
adequate ventilation is present during the
depressurization process. Any uncertainties
should be addressed before proceeding
.
NITROGEN
HEALTH
FLAMMABILITY
REACTIVITY
0 Minimal Hazard
1 Slight Hazard
1
0
0
WARNING:
Improper installation, service, adjustment,
or maintenance may cause explosion, fire,
electrical shock or other hazardous conditions
which may result in personal injury or property
damage. Unless otherwise noted in these
instructions, only factory authorized kits or
accessories may be used with this product.
WARNING:
PROPOSITION 65 WARNING: This product
contains chemicals known to the state of
California to cause cancer, birth defects or other
reproductive harm.
ABOUT THE TXV KIT
The thermal expansion valve kit is designed for use in
air conditioner and heat pump systems. The kit consists
of a thermal expansion valve with an external equalizer,
a copper fitting assembly (for external equalizer), and
sensing bulb clamp. Once installed, the TXV will adjust
the refrigerant flow by monitoring the superheat of the
system. See Table 1 to determine the proper kit based
on the refrigerant type and tonnage of the unit.
• Ifpreciseformingofrefrigerantlinesisrequired,acopper
tubing bender is recommended. Avoid sharp bends and
contact of the refrigerant lines with metal surfaces.
• Refrigerant lines should be wrapped with pressure
sensitive neoprene or other suitable material where
they pass against sharply edged sheet metal.
• Itisgoodpracticetoaddadropofrefrigerantoilonall
threaded connections.
REFRIGERANT
TYPE
KIT P/N
SIZE OF A.C. OR
HEAT PUMP (TONS)
R22
920662 1.5 or 2
920663 2.5
920664 3
920665 3.5
920666 4
920667 5
R410A
920668 1.5 or 2
920669 2.5
920670 3
920671 3.5
920672 4
920673 5
Table 1. Kit Part Numbers
2
WARNING:
The coil is pressurized with Nitrogen. Avoid
direct face exposure or contact with valve
when gas is escaping. Always ensure
adequate ventilation is present during the
depressurization process. Any uncertainties
should be addressed before proceeding
.
NITROGEN
HEALTH
FLAMMABILITY
REACTIVITY
0 Minimal Hazard
1 Slight Hazard
1
0
0
INSTALLATION WITHIN C5 COILS
CAUTION:
To prevent damage to the unit or internal
components, it is recommended that two
wrenches be used when loosening or removing
nuts. Do not over tighten!
1. Using two wrenches, loosen the distributor and liquid line
body halves. Turn the assembly nut counter-clockwise.
2. Unscrew the swivel nut and remove the fixed orifice
from the distributor. See Figure 1 (page 3).
3.Install the thermal expansion valve between the
distributor and the 3/8 liquid line (Figure 2, page 3).
a.) Connect the liquid line to the inlet side of the valve.
b.) Connect the distributor to the outlet side of the
valve.
c.) Tighten the nut finger tight.
d.) Using a permanent marker or scribe, mark a line
lengthwise from the TXV’s female coupling nut to
the distributor body.
e.) Tighten an additional wrench at (60°). Refer
to the marking on the coupling nut to confirm
that one wrench flat rotation has occurred.
NOTE: This final wrench flat is necessary to ensure
the formation of the metal to metal leak-proof seal.
4. Modify the close off plate by bending back a section of
the top right corner (Figure 3, page 3). NOTE: This will
allow the external equalizer and sensing bulb to reach
the refrigerant lines outside of the coil box.
5.Reinstallthecloseoffplateandroutethesensingbulb
and external equalizer through the opening.
6.Installthegrommetinthesuctionlineholeoftheclose
off plate. Verify the grommet is evenly aligned around
the tube and securely positioned.
7.Installthettingassemblythatissuppliedwiththekit
on the end of the suction line.
IMPORTANT NOTES:
• The tting assembly must be positioned close
enough to the indoor coil so that the external
equalizer tube from the TXV can reach the fitting,
but still but still allow room for the sensing bulb to
fit flush against the suction line without hitting the
braze joint of the external equalizer.
• Positionthettingassemblyonthesuctionlineso
that the 1/4” access fitting is pointing vertically. If
the access fitting is pointed downwards, oil from
the suction line will drain into the external equalizer.
• Depending on the suction line diameter, two
reducers may need to be added to the suction line
before the fitting assembly is brazed on.
CAUTION:
It is recommended that a wet rag be wrapped
around the suction line in front of the close
off plate before applying heat. Failure to keep
components cool during brazing may result
in structural damage, premature equipment
failure, or possible personal injury.
8.Routeandcut bothlineset tubesto properlength in
accordance with the outdoor unit specifications. Verify
the ends are round, clean, and free of any burrs.
CAUTION:
To prevent damage to the TXV, brazing should
be done prior to the attachment of the liquid
line to the fitting assembly.
PRE-INSTALLATION
WARNING:
Shut off all electrical power to the furnace and
outdoor condensing unit before performing any
maintenance or service on the system.
WARNING:
Read the Installation Instructions supplied
with the furnace/air handler. Always observe
all safety requirements outlined in this manual
and on the furnace/air handler markings before
installing the valve.
1. Disconnect all electrical power to the furnace/air handler.
IMPORTANT NOTE: The unit may have more than
one power supply. Refer to the manufacturer’s
instructions for additional electrical information.
2.Removecoilaccessdoorfromindoorunit(ifapplicable)
to expose the A-coil and distributor. NOTE:Itmaybe
necessary to remove the coil from the coil case.
3.Recoverallrefrigerantinthesystem(ifapplicable).
3
Distributor
Thermal
Expansion
Valve (TXV)
Sensing Bulb - to
original location
Equalizer - to
original location
Suction Line
Liquid Line
Figure 2. C5 Coil With TXV Installed
9. Braze the fitting assembly, reducers (if applicable), and
individual lineset connections together with dry nitrogen
flowing through the joints. This will prevent internal
oxidation and scaling from occurring.
IMPORTANT NOTES:
• The sensing bulb must be located flush against the
suction line for optimum heat transfer.
• Avoid attaching the sensing bulb to the lowest part of
the suction line where condensate may accumulate.
• Do not locate the sensing bulb on vertical sections
of the lineset.
• For horizontal lines, the bulb should not be located
at 12 or 6 o’clock position of the suction line. The
best location is at 4 or 8 o’clock.
• The external equalizer and sensing bulb may be
installed on the refrigerant lines outside of the
coil cabinet. Both tubes will need to pass through
the close off plate to get to the outside of the coil
cabinet.
• For additional information on proper sensing bulb
locations, please refer to the valve manufacturer’s
instructions.
10.Installtheexternalequalizerandsensingbulb.
a.) Connect the equalization line from the TXV to the
fitting assembly.
b.) Secure the sensing bulb to the suction line using
the clamp supplied with the kit.
c.) Wrap the bulb and suction line together with tar
tape or other insulating material.
Close Off
Plate
Suction
Line
Sensing
Bulb
Liquid
Line
Fitting
Assembly
Clamp
Grommet
Figure 3. Sensing Bulb Mounted Externally
INSTALLATION WITHIN C6 FLEX COILS
1.Removethecap(Figure4,page4)fromthevalveholder.
2. Verify coil pressurization by depressing the Schrader
valve.Listenforanyescapinggas.Ifthereisnopressure,
test the coil for leakage.
• Ifleakageisfound,clearlymarkthelocationoftheleak
and return the coil to the distributor for processing.
• Ifnoleaksarefound,theTXVmaybeinstalled.
3. Depress the valve until all pressure is released from
the coil.
WARNING:
This coil is pressurized with Nitrogen.
Avoid direct face exposure or contact with
valve when gas is escaping. Always ensure
adequate ventilation is present during the
depressurization process. Any uncertainties
should be addressed before proceeding
.
NITROGEN
HEALTH
FLAMMABILITY
REACTIVITY
0 Minimal Hazard
1 Slight Hazard
1
0
0
Figure 1. Distributor & Orifice
4
CAUTION:
To prevent damage to the unit or internal
components, it is recommended that two
wrenches be used when loosening or removing
nuts. Do not over tighten!
4. Using two wrenches, remove the valve holder nut from
the liquid line. Keep the nut for future use.
5.Remove and discard the Schrader valve and valve
holder from the liquid line. NOTE: Do not reuse the
O-ring, valve, or threaded valve holder.
6.Remove the retaining nut securing the dogleg or
bulkhead extension to the case (See Figure 4). Keep
the retaining nut for future use.
CAUTION:
To prevent damage to the unit or internal
components, it is recommended that two
wrenches be used when loosening or removing
nuts. Do not over tighten!
7. Using two wrenches, loosen the distributor and bulkhead
extension, turning the nut counter-clockwise.
8.Removeanddiscardthebulkheadextensionfromthe
distributor (cased coils only).
9.Routeandcuttheliquidlinesettubetoproperlengthin
accordance with the outdoor unit specifications. Verify
the ends are round, clean, and free of any burrs.
10.Installtheaccessoryretainingnutandtheliquidline
stub onto the liquid lineset (Figure 5, page 5).
11. Braze the lineset and liquid line stub together with dry
nitrogen flowing through the system. This will prevent
internal oxidation and scaling from occurring.
12.Installthethermalexpansionvalve(Figure5).
a.) Fasten the outlet end of the TXV to the threaded
end of the distributor.
b.) InstallthebulkheadttingontotheendoftheTXV
(Ifapplicable).
c.) Installtheinternaltoothedwasherovertheinlet
end of the TXV or bulkhead fitting (if applicable).
d.) Installthecondensationdeectorovertheinletend
of the TXV or the bulkhead fitting (if applicable).
e.) InsertthethreadedendoftheoftheTXVorthe
bulkhead fitting (if applicable) thru the hole in the
case.
f.) InstalltheTXVretainingnut(removedearlierinstep
6) onto the TXV or bulkhead fitting (if applicable).
g.) Installtheliquidlineandretainingnutontotheend
of the TXV or the bulkhead fitting (if applicable).
CAUTION:
To prevent damage to the unit or internal
components, it is recommended that two
wrenches be used when loosening or removing
nuts. Do not over tighten!
h.) Tighten the nut finger tight.
i.) Using a permanent marker or scribe, mark a line
lengthwise from the TXV’s female coupling nut to
the distributor body.
j.) Tightenanadditionalwrenchat(60°).Referto
the marking on the coupling nut to confirm that
one wrench flat rotation has occurred.
NOTE: This final wrench flat is necessary to ensure
the formation of the metal to metal leak-proof seal.
Distributor
Door
Retaining Nut
Valve Holder
Schrader
Valve
Valve Holder Nut
Cap
Toothed
Washer
Bulkhead (Dogleg) Extension
(”A” size Cabinets Only)
Bulkhead Extension
(“B”, “C”, “DCabinets Only)
Grommet
Figure 4. C6 Coil Assembly As Shipped
5
Distributor
Thermal Expansion
Valve (TXV)
Internal Toothed
Washer (PN 612068)
Condensation
Deflector
Door
TXV Retaining
Nut (PN 606287)
Liquid Line Stub w/
Screen (PN 664378)
Accessory Retaining
Nut (PN 664387)
Bulkhead Fitting
(See Note)
Grommet
NOTE: The bulkhead fitting is included
with those TXV kits that do not have
a set of threads already on the TXV.
Figure 5. TXV Assembly As Installed
Sensing
Bulb
External
Equalizer
From TXV
Clamp
Suction Line
Ext. Eq.
Port
Figure 6. Sensing Bulb & External Equalizer
13.Installtheexternalequalizerandsensingbulb.
IMPORTANT NOTES:
• The sensing bulb must be located flush against the
suction line for optimum heat transfer.
• Avoid attaching the sensing bulb to the lowest part of
the suction line where condensate may accumulate.
• Do not locate the sensing bulb on vertical sections
of the lineset.
• For horizontal lines, the bulb should not be located
at 12 or 6 o’clock position of the suction line. The
best location is at 4 or 8 o’clock.
• For additional information on proper sensing bulb
locations, please refer to the valve manufacturer’s
instructions.
a.) Connect the equalization line (Figure 6) from the
TXV to the 1/4 port located on the suction line.
b.) Secure the sensing bulb to the suction line using
the clamp supplied with the kit.
c.) Wrap the bulb, clamp, and suction line together
with tar tape or other insulating material.
6
INSTALLATION WITHIN C7 OR
(C,V,M)MG COILS
NOTE: This final wrench flat is necessary to ensure
the formation of the metal to metal leak-proof seal.
6.Installtheexternalequalizerandsensingbulb.
IMPORTANT NOTES:
• Thesendingbulbmustbelocatedushagainstthe
suction line for optimum heat transfer.
• Avoidattachingthesensingbulbtothelowestpartof
the suction line where condensate may accumulate.
• Donotlocatethesensingbulbonverticalsections
of the lineset.
• Forhorizontallines,thebulbshouldnotbelocated
at 12 or 6 o’clock position of the suction line. The
best location is at 4 or 8 o’clock.
• Foradditionalinformationonpropersensingbulb
locations, please refer to the valve manufacturer’s
instructions.
a.) RemovetheSchradervalve.
b.) Connect the equalization line from the TXV to the
port located on the suction line.
c.) Secure the sensing bulb to the suction line using
the clamp supplied with the kit.
d.) Wrap the bulb, clamp, and suction line together
with tar tape or other insulating material.
7.Ifusingapurchasedliquidlinethefollowingadditional
stepsmustbetaken.RefertoTable2(page7)forliquid
line kit numbers.
a. While restrictor housing is still open/disassembled,
cut off the existing inlet side tubing 1” above the
end of the coupling nut assembly. Referto the
addendum that is supplied in the tube kits for
proper cut location.
b. Braze the supplied liquid tube onto the liquid line
stub that is still brazed to the coupling nut.
WARNING:
This coil is pressurized with Nitrogen.
Avoid direct face exposure or contact with
valve when gas is escaping. Always ensure
adequate ventilation is present during the
depressurization process. Any uncertainties
should be addressed before proceeding
.
NITROGEN
HEALTH
FLAMMABILITY
REACTIVITY
0 Minimal Hazard
1 Slight Hazard
1
0
0
1. Verify coil pressurization by depressing the Schrader
valve.Listenforanyescapinggas.Ifthereisnopressure,
test the coil for leakage.
• Ifleakageisfound,clearlymarkthelocationoftheleak
and return the coil to the distributor for processing.
• Ifnoleaksarefound,theTXVmaybeinstalled.
2. Depress the valve until all pressure is released from
the coil.
CAUTION:
To prevent damage to the unit or internal
components, it is recommended that two
wrenches be used when loosening or removing
nuts. Do not over tighten!
3. Using two wrenches, loosen the distributor from the
liquid line, turning the nut counter-clockwise.
4.Removetherestrictorfromtheinsideofthedistributor.
See Figure 1 (page 3)
5.Installthethermalexpansionvalve.
a. Fasten the outlet end of the TXV to the threaded
end of the distributor that is still attached to the
coil.
CAUTION:
To prevent damage to the unit or internal
components, it is recommended that two
wrenches be used when loosening or removing
nuts. Do not over tighten!
b. Tighten the nut finger tight.
c. Using a permanent marker or scribe, mark a line
lengthwise from the TXV’s female coupling nut to
the distributor body.
d. Tighten an additional wrench at (60°). Refer
to the marking on the coupling nut to confirm
that one wrench flat rotation has occurred.
Figure 7. Tube Kit
1.00”
8.Ifreusingtheexistingliquidlinethencarefullymodify
the tube as needed for the application.
9.Routeandcuttheliquidlinesettubetoproperlengthin
accordance with the outdoor unit specifications. Verify
the ends are round, clean, and free of any burrs.
7
COMPLETING THE INSTALLATION
1. Check the system for leaks, including the lineset and the
brazed joints. Pressurize the system with nitrogen and
apply a soap and water solution to each joint or union
with a small paintbrush. NOTE:Ifbubblingisobserved,
the connection is not adequately sealed.
2. Evacuate the system of moisture and non-condensables
to prevent low efficiency operation or damage to the
unit. The suggested range of evacuation is 250 - 500
microns.
3. Charge the system with refrigerant. Please Refer to
the outdoor unit installation manual for charging
instructions.
4.Installthe coil or coil accessdoorif removed. Apply
power to the unit.
10. Attach the liquid line to the inlet of TXV.
CAUTION:
To prevent damage to the unit or internal
components, it is recommended that two
wrenches be used when loosening or removing
nuts. Do not over tighten!
a. Tighten the nut finger tight.
b. Using a permanent marker or scribe, mark a line
lengthwise from the TXV’s female coupling nut to
the distributor body.
c. Tighten an additional wrench at (60°). Refer
to the marking on the coupling nut to confirm
that one wrench flat rotation has occurred.
NOTE: This final wrench flat is necessary to ensure
the formation of the metal to metal leak-proof seal.
COIL HEIGHT CABINET
LIQUID LINE
TUBE KIT
18” A 921824
18” B 921825
24” B 921826
18” C 921827
24” C 921828
28” C 921829
24” D 921830
28” D 921831
Table 2. Liquid Line Tube kits
The installer performing this work assumes all responsibility for this installation. These instructions are primarily
intended to assist qualified individuals experienced in the proper installation of these components. Some local codes
may require licensed installation/service personnel for this type of equipment. Safety should always be the deciding
factorwheninstallingthisproductandusingcommonsenseplaysanimportantroleaswell.Improperinstallation
of the components or failure to follow safety warnings could result in serious injury, death, or property damage.
After completing the installation, return these instructions to the homeowner’s package for future reference.
7095250 (Replaces709003A)
Specifications & illustrations subject to change without notice or incurring obligations (05/15).
O’Fallon,MO,©NortekGlobalHVACLLC2015.AllRightsReserved.
  • Page 1 1
  • Page 2 2
  • Page 3 3
  • Page 4 4
  • Page 5 5
  • Page 6 6
  • Page 7 7
  • Page 8 8

Broan TXV Kit Installation guide

Type
Installation guide

Ask a question and I''ll find the answer in the document

Finding information in a document is now easier with AI