Page is loading ...

Installation Instructions
ID:
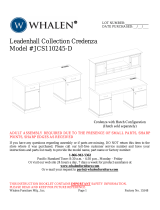
Ascari Multi-Piece Credenza

Before Beginning Installation
•Read through the entire instruction thoroughly
•A minimum of 2 persons is required for this assembly
•These instructions reflect typical assemblies. They may not match your specific configuration.

Required Tools
•Drill Driver
•Allen Wrenches
•#2 Phillips
•Clamps

Provided Hardware
A. Joint Connector #0.25-20 x 1.378
B. Joint Connector 0.25-20
C. Dog Bone Connector
D. Screw #10-12 x 0.75, PHL, PN
E. Screw #10-12 x 1.75 PHIL, PN
F. Screw #8-15 x 0.75, PH, TR

Step 1: Remove Internal Components
•Remove internal components from each case
(including drawers, shelves, waste units, etc.)
•**Note: There are two slides located under
fridge and trash receptacle drawers**
•Drawer slides: Squeeze the orange release
clamp and push slide track away from clamp

Step 2: Flip On Back
•Flip all cases onto their backs within the packaging pallet

Step 3: Fasten Cases Together
•Align cases so the tops and bottoms are flush
•Fasten the joint connector bolts on the interior of each case
•Hardware: Joint Connectors - Hardware A AND Hardware B

Step 4: Join Cases Together
•Fasten dog bone joint connectors in top and bottom
•Hardware: Dog Bones - Hardware C

Step 5: Attach Base
•Arrange extra cardboard pieces provided as
shown
•Rest base on cardboard pieces, align left-side
base plate with pilot hole and fasten this screw
•Pivot base on cardboard to align the right-side
base plate with pilot hole
–*IF NEEDED* Loosen bolts that secure
base rod to allow for movement of right-
side base plate to align with pilot hole
•Then screw in all remaining screws
•Hardware: Screws –Hardware D (Short) AND
Hardware E (Long)

Step 6: Attach Metal Trim
•Install metal trim to top of cases
•Hardware: Screws –Hardware F
**Notes: If order has veneer top, see step 8B before reinstalling internal components (Step 7)**


Step 8A: Place Glass/Stone Top
•Lift and place glass/stone top on cases resting it on rubber stoppers


Step 9: Fridge Installation
•If specified, consult fridge instructions provided with fridge front
/