Page is loading ...

FP14KCX-ALIGNKIT
JAN 2023
FP14KCX-ALIGNKIT
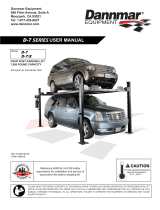
FP14KC-X
Runway ‘Bolt-On’ Alignment Kit
Installation Instructions
NOTE!
(Supplement to the FP14KC-X Lift Installation & Operation Manual)
IMPORTANT!!
READ MANUAL THOROUGHLY BEFORE ASSEMBLING, INSTALLING, OPERATING, OR
MAINTAINING ALIGNMENT KIT. WHEN DONE WITH INSTALLATION BE SURE TO RETURN
DOCUMENTS TO PACKAGE AND GIVE ALL MATERIALS TO LIFT OWNER / OPERATOR.

2
FP14KCX-ALIGNKIT
JAN 2023
FP14KCX-ALIGNKIT
FP14KC-X Runway 'Bolt-On' Alignment Kit
Product Description:
The iDEAL Runway 'Bolt-On' Alignment Kit (FP14KCX-ALIGNKIT) is designed to be applied to the FP14KC-X
four post, closed front Service Lift model, allowing to easily convert into a premium Alignment Lift. The FP14KCX-
ALIGNKIT will increase the Runway height by 2 inches. Alignment Turntables not included in Kit.
NOTE: Mounting holes are already predrilled in Runways for quick Runway Alignment Kit
installation.
Main Kit Components:
1. Alignment Wheel Stop
2. Front Spacer
3. ‘Sliding’ Turntable Pad
4. ‘Movable’ Spacer
5. Long Spacer
6. Rear Slip Plate
7. Ramp Support
8. Ramp Extension
9. Ramp Pivot Pin
Fig. 1
Required Tools:
Ø Fork Lift (Recommended to offload Kit package upon delivery & installation assist)
Ø Crow Bar
Ø Metric Sockets or Open Wrench Set (13mm thru 18mm)
Ø Medium Flat & Philip Screwdrivers
Ø Needle Nose Pliers
Ø Safety Glasses
Ø Gloves

3
FP14KCX-ALIGNKIT
JAN 2023
Installation Instructions:
1) Remove bolts that attaches the Wheel Stop & Runway to the Front Crossbeam, if required.
2) Position the Front Spacer (#2) on Runway, so the bolt holes align with the Wheel Stop holes and the
center hole in Runway - Fig. 2.
Fig. 2
3) Secure back of Front Spacer to Runway using M8 Bolt & Nut, while also securing the front using M12 x
40mm Bolts - Fig. 2. NOTE: Alignment Wheel Stop is mounted between Front Spacer & Runway.
4) Position the ‘sliding’ Turntable Pad (#3), so the front edge is positioned against the rear of the Front
Spacer - Fig. 3.
Fig. 3 Fig. 4
5) Center and square the Long Spacer (#5) on Runway. Align the Tab Holes, bolting only the Front Tab to
the Runway, secure using M8 Bolt & Nut - Fig. 4.
M8 Nut
(Under Runway)
Front Spacer
Align Tab hole
with hole on
top of Runway
M8 Bolt
M12 x 40mm Bolts
NOTE:
Wheel Stop is mounted between
Front Spacer & Runway
‘Sliding’
Turntable
Pad
Long
Spacer
NOTE:
Only secure the Front Tab to
Runway with M8 Bolt & Nut

4
FP14KCX-ALIGNKIT
JAN 2023
6) Position Movable Spacer (#4) on Runway behind Turntable Pad. Insert the hooks of Movable Spacer
into the holes of the Long Spacer - Fig. 5.
7) Carefully, center and square the Rear Wheel Slip Plate (#6) on Runway - Fig 6. NOTE: Slip Plate Tabs
to be positioned above the top of the Long Spacer Tabs. Also Ensure Pins are positioned to the
outside of Runway.
8) Remove the Slip Plate L-Pins to gain access to the front holes by angling the front of the Slip Plate.
Align the Slip Plate holes to the Tab Holes for the Long Spacer & Runway, secure using M8 Bolts &
Nuts noted for - Fig. 6. NOTE: DO NOT Bolt the back end of Slip Plate at this time.
Fig. 5 Fig. 6
9) Position and slide the Ramp Support (#7) Tabs under the rear of the Slip Plate. Access the rear Slip
Plate holes by angling the rear of the Slip Plate. Align the rear Slip Plate holes to the Tab Holes for the
Ramp Support & Runway, secure using M8 Bolts & Nuts - Fig. 7.
Fig. 7
‘Movable’
Spacer
Rear Wheel
Slip Plate
M8 Bolts
NOTE:
L-Pins to outside
of Runway
Turntable
Pad
M8 Bolts
M8 Nuts
(Under Runway)
M8 Nut
(Under Runway)
Ramp
Support
M8 Nut
(Under Runway)

5
FP14KCX-ALIGNKIT
JAN 2023
10) Insert L-Pins back in Slip Plate holes to secure - Fig 6.
11) Remove the Pivot Pin (#9) from Ramp - Fig. 8.
12) Position the Ramp Extension (#8) bracket holes to align to the outside of the pivot tube holes on end of
Runway. Insert Pivot Pin to secure Ramp Extension & Spacer to end of Runway. Center & secure Pivot
Pin with Cotter Pins at each end - Fig 8.
Fig. 8
13) Ensure all ‘bolt-on’ Alignment Kit components are properly aligned & fully tightened to Runway.
14) Apply the same installation steps for the other Runway.
Ramp
Support
Ramp
Extension
Pivot Pin
Cotter Pin
Cotter Pin

6
FP14KCX-ALIGNKIT
JAN 2023
Exploded View

7
FP14KCX-ALIGNKIT
JAN 2023
Parts List
ITEM
Tux P/N
M
-
REF P/N
DESCRIPTION
QTY
1 FP14KCX-ALIGNKIT-001
TT-8861-700-01 ‘Align’ Wheel Stop (9.8” Ht.) 2
2 FP14KCX-ALIGNKIT-002
TT-8861-700-02 ‘Align’ Pivot Pin (Long) 21.7”L
2
3 FP14KCX-ALIGNKIT-003
TT-8861-700-03-HJ Ramp Extension 2
4 FP14KCX-ALIGNKIT-004
TT-8861-700-05-HJ Ramp Support 2
5 FP14KCX-ALIGNKIT-005
TT-8861-700-06-HJ Top Plate 2
6 FP14KCX-ALIGNKIT-006
TT-8861-700-07 Roller Ball Retainer 6
7 FP14KCX-ALIGNKIT-007
TT-8861-700-08 Pin Plug 24
8 FP14KCX-ALIGNKIT-008
TT-8861-700-09 Retainer Ring 6
9 FP14KCX-ALIGNKIT-009
TT-8861-700-10 Spring 12
10 FP14KCX-ALIGNKIT-010
TT-8861-700-11-HJ Base Plate 2
11 FP14KCX-ALIGNKIT-011
TT-8861-700-12 Nylon Pin 24
12 FP14KCX-ALIGNKIT-012
TT-8861-700-13 Nylon Washer 6
13 FP14KCX-ALIGNKIT-013
GB70.3-2000 M8X16
Screw, M8 x 16mm 6
14 FP14KCX-ALIGNKIT-014
TT-8861-700-14 Roller Balls 396
15 FP14KCX-ALIGNKIT-015
TT-8861-700-15 Link Chain 4
16 FP14KCX-ALIGNKIT-016
TT-8861-700-16 Ring 8
17 FP14KCX-ALIGNKIT-017
TT-8861-700-17 Terminal Ring 4
18 FP14KCX-ALIGNKIT-018
GB818-2000 M6X10 Screw, M6 x 10mm 4
19 FP14KCX-ALIGNKIT-019
TT-8861-700-18 L-Pin 4
20 FP14KCX-ALIGNKIT-020
TT-8861-700-19-HJ Long Spacer 2
21 FP14KCX-ALIGNKIT-021
TT-8861-700-20-HJ Movable Spacer 2
22 FP14KCX-ALIGNKIT-022
TT-8861-700-21 Plastic Handle Pocket 4
23 FP14KCX-ALIGNKIT-023
TT-8861-700-25-HJ Sliding Turntable Pad 2
24 FP14KCX-ALIGNKIT-024
TT-8861-700-26 Nylon Guide Plug 8
25 FP14KCX-ALIGNKIT-025
TT-8861-700-27 Rubber Pad 2
26 FP14KCX-ALIGNKIT-026
GB819-2000 M6X10 Recessed Screw, M6 x 10mm
8
27 FP14KCX-ALIGNKIT-027
TT-8861-700-28-HJ Front Spacer 2
28 FP14KCX-ALIGNKIT-028
GB5783/2000 Bolt, M8 x 40mm 12
29 FP14KCX-ALIGNKIT-029
GB/T5789-1986 Bolt, M12 x 40mm 4
30 FP14KCX-ALIGNKIT-030
GB6170-2000 M8 Nut, M8 12
31 FP14KCX-ALIGNKIT-031
GB/T91-2000 5X40 Cotter Pin 4
32 FP14KCX-ALIGNKIT-032
GB93-1987 D8 Lock Washer, D8 12
33 FP14KCX-ALIGNKIT-033
GB95-1985 D8 Flat Washer, D8 12

8
FP14KCX-ALIGNKIT
JAN 2023
LIMITED WARRANTY
Structural Warranty:
The following parts and structural components carry a five-year warranty:
Columns Arms Uprights Swivel Pins
Legs Carriages Overhead Beam
Tracks Cross Rails Top Rail Beam
Limited One-Year Warranty:
Tuxedo Distributors, LLC (iDEAL) offers a limited one-year warranty to the original purchaser of Lifts and Wheel Service
equipment in the United States and Canada. Tuxedo will replace, without charge, any part found defective in materials or
workmanship under normal use, for a period of one year after purchase. The purchaser is responsible for all shipping
charges. This warranty does not apply to equipment that has been improperly installed or altered or that has not been
operated or maintained according to specifications.
Other Limitations:
This warranty does not cover:
1. Parts needed for normal maintenance
2. Wear parts, including but not limited to cables, slider blocks, chains, rubber pads and pulleys
3. Replacement of lift and tire changer cylinders after the first 30 days. A seal kit and installation instructions will be
sent for repairs thereafter.
4. On-site labor
Upon receipt, the customer must visually inspect the equipment for any potential freight damage before signing clear on
the shipping receipt. Freight damage is not considered a warranty issue and therefore must be noted for any potential
recovery with the shipping company.
The customer is required to notify Tuxedo of any missing parts within 72 hours. Timely notification must be received to be
covered under warranty.
Tuxedo will replace any defective part under warranty at no charge as soon as such parts become available from the
manufacturer. No guarantee is given as to the immediate availability of replacement parts.
Tuxedo reserves the right to make improvements and/or design changes to its lifts without any obligation to previously
sold, assembled, or fabricated equipment.
There is no other express warranty on the Tuxedo lifts and this warranty is exclusive of and in lieu of all other warranties,
expressed or implied, including all warranties of merchantability and fitness for a particular purpose.
To the fullest extent allowed by law, Tuxedo shall not be liable for loss of use, cost of cover, lost profits, inconvenience,
lost time, commercial loss or other incidental or consequential damages.
This Limited Warranty is granted to the original purchaser only and is not transferable or assignable.
Some states do not allow exclusion or limitation of consequential damages or how long an implied warranty lasts,
so the above limitations and exclusions may not apply. This warranty gives you specific legal rights and you may
have other rights, which may vary from state to state.
8320 E Hwy 67, Alvarado, TX 76009
Ph. 817-558-9337 / Fax 817-558-9740
/