Page is loading ...

Dannmar Equipment
646 Flinn Avenue, Suite A
Moorpark, CA 93021
Tel: 1-877-432-6627
www.dannmar.com
PLEASE READ THE ENTIRE CONTENTS OF THIS MANUAL PRIOR TO INSTALLATION AND OPERATION. BY PROCEEDING WITH LIFT
INSTALLATION AND OPERATION YOU AGREE THAT YOU FULLY UNDERSTAND AND COMPREHEND THE FULL CONTENTS OF THIS
MANUAL. FORWARD THIS MANUAL TO ALL OPERATORS. FAILURE TO OPERATE THIS EQUIPMENT AS DIRECTED MAY CAUSE
INJURY OR DEATH.
Rev G 06012016
P/N# 199818
D-7
SERIES
USER MANUAL
Reference ANSI/ALI ALIOM safety
requirments for installation and service of
automotive lifts before installing lift.
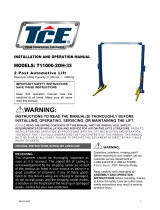
D-7
D-7/X
Model:
FOUR POST PARKING LIFT
7,000 POUND CAPACITY
Dannmar
R
EQUIPMENT
Also known as Commander 7000

PRODUCT SPECIFICATIONS .......................................... 2
IMPORTANT NOTICE ....................................................... 3
DEFINITIONS OF HAZARD LEVELS ............................... 3
IMPORTANT SAFETY INSTRUCTIONS ........................... 4
OWNER/EMPLOYER RESPONSIBILITIES ...................... 6
PRODUCT DIMENSIONS ................................................. 7
INSTALLATION INSTRUCTIONS ...................................... 8
POST-INSTALLATION CHECK-OFF ................................. 17
OPERATION TEST ........................................................... 18
D-7 PARTS LIST ............................................................... 21
D-7 ASSEMBLY DIAGRAM ............................................... 23
D-7/X PARTS LIST ............................................................ 24
D-7/X ASSEMBLY DIAGRAM ............................................ 26
TROUBLESHOOTING GUIDE .......................................... 27
LIFT LOCKOUT/TAGOUT PROCEEDURE ....................... 28
PREVENTIVE MAINTENANCE SCHEDULE .................... 30
CABLE INSPECTION GUIDE ........................................... 32
REQUIRED SAFETY LABELS .......................................... 35
WARRANTY INFORMATION ............................................ 36
MAINTENANCE RECORDS ............................................. 40
MODEL D-7 D-7/X
Maximum Lift Capacity 7000-lbs 7000-lbs
Power Unit 110 V, 60 Hz, 13 Amp, Single Ph. 110 V, 60 Hz, 13 Amp, Single Ph.
Power Plug 3-Prong, Grounded 3-Prong, Grounded
Power Cord 12 Gauge 12 Gauge
Max. Lifting Height 75" (1905mm) 85" (2261mm)
Min. Runway Height 4-1/2" (114mm) 4-1/2" (114mm)
Min. Wheelbase for Rail Jacks 128" with two Center Jacks 128" with two Center Jacks
Rail Jack Capacity 3,500-lb Each (Max. 2 per lift) 3,500-lb Each (Max. 2 per lift)
Hydraulic Oil Capacity/Type 10-qt AW-32 Fluid or Dexron III or VI ATF 10-qt AW-32 Fluid or Dexron III or VI ATF
Overall Dimensions 82" H x 203" L x 105" W 92" H x 226" L x 117" W
Shipping Weight 1635-lbs 1895-lbs
TABLE OF CONTENTS
PRODUCT SPECIFICATIONS
For technical questions, please call 877.432.6627
Page 2

IMPORTANT NOTICE
1. Read this manual thoroughly before installing, operating, or maintaining this lift.
2. This lift is designed for indoor use only, and should not be installed in a pit or depression.
3.
The floor on which the lift is to be installed must be 4" inch minimum thickness concrete, with a
minimum compressive strength of 3000 PSI, and reinforced with steel bar.
4.
The lifts have specific electrical equirements as described in the Installation Instructions section
of this manual.
5. This lift has a minimum ceiling height requirement as described in the Installation Instructions
section of this manual.
6. Failure by the owner to provide the recommended shelter, mounting surface, electrical supply,
and ceiling height could result in unsatisfactory lift performance, property damage, or personal
injury.
7. Do not attempt to install this lift if you have never been trained on basic automotive lift installation
procedures. Reference ANSI/ALI ALIOM Safety requirements for Installation and Service of
Automotive Lifts.
8. Never attempt to lift components without proper lifting tools such as forklift or cranes. Stay clear
of any moving parts that can fall and cause injury. These instructions must be followed to insure
proper installation and operation of your lift. Failure to comply with these instructions can result
in serious bodily harm and void product warranty.
9. Dannmar Equipment will assume no liability for loss or damage of any kind, expressed or implied
resulting from improper installation or use of this product.
DEFINITIONS OF HAZARD LEVELS
Identify the hazard levels used in this manual with the following definitions and signal words:
Watch for this symbol: Alerts to immediate hazards which will result in severe personal injury or
death.
Watch for this symbol: Alerts to hazards or unsafe practices which could result in severe personal
injury or death.
WARNING
Watch for this symbol: Alerts to hazards or unsafe practices which may result in minor personal
injury, product or property damage.
Lubricate all cable sheaves, bearings, and shafts with grease prior to operating the lift. Lubricate on
an annual basis.
Motors and all electrical components are not sealed against the weather and moisture. Install this lift
in a protected indoor location. Failure by the owner to provide the recommended shelter could result
in unsatisfactory lift performance, property damage, or personal injury.
Page 3
For technical questions, please call 877.432.6627
DANGER
CAUTION

Page 4
For technical questions, please call 877.432.6627
IMPORTANT SAFETY INSTRUCTIONS
1. READ ALL INSTRUCTIONS.
2. CARE MUST BE TAKEN as burns can occur from touching hot parts.
3.
DO NOT operate equipment with a damaged power cord or if the equipment has been dropped
or damaged until it has been examined by a qualified service person.
4. DO NOT let the power cord come in contact with hot manifolds or moving fan blades.
5. IF AN EXTENSION CORD IS NECESSARY, a cord with a current rating equal to or more than that
of the equipment should be used. Cords rated for less current than the equipment may overheat.
Care should be taken to arrange the cord so that it will not be tripped over or pulled.
6.
ALWAYS UNPLUG EQUIPMENT FROM ELECTRICAL OUTLET WHEN NOT IN USE. Never use
the power cord to pull the power plug from the outlet. Grasp the plug and pull to disconnect.
7.
LET EQUIPMENT COOL COMPLETELY BEFORE PUTTING AWAY. Loop power cord loosely
around equipment when storing.
8.
TO REDUCE THE RISK OF FIRE, do not operate equipment in the vicinity of open containers of
flammable liquids (i.e., gasoline)
9.
ADEQUATE VENTILATION SHOULD BE PROVIDED when working on operating internal
combustion engines.
10.
KEEP HAIR, LOOSE CLOTHING, FINGERS, AND ALL PARTS OF THE BODY AWAY FROM
MOVING PARTS.
11. TO REDUCE THE RISK OF ELECTRIC SHOCK, do not use on wet surfaces or expose to rain.
12.
USE ONLY AS DESCRIBED IN THIS MANUAL. Use only manufacturer’s recommended
attachments.
13. DO NOT raise vehicle on the lift until installation is completed as instructed in this manual.
14.
KEEP HANDS AND FEET CLEAR. Remove hands and feet from any moving parts. Keep feet
clear of lift when lowering. Avoid pinch points.
15. KEEP WORK AREA CLEAN. Cluttered work areas invite injuries.
16.
CONSIDER WORK AREA ENVIRONMENT. Do not expose equipment to rain. DO NOT use in
damp or wet locations. Keep area well lit.
17.
ONLY TRAINED OPERATORS should operate this lift. All non-trained personnel should be
kept away from work area. Never let non-trained personnel come in contact with, or operate
lift.
18. USE LIFT CORRECTLY. Use lift in the proper manner. Never use lifting adapters other than what
is approved by the manufacturer.
19. DO NOT override self closing lift controls.
20. REMAIN CLEAR of lift when raising or lowering vehicle.
21. CLEAR AREA if vehicle is on danger of falling.

22.
ALWAYS ENSURE that the safety locks are engaged before any attempt is made to work on or
near vehicle.
23.
DRESS PROPERLY. Non-skid steel-toe footwear is recommended when operating lift.
24. GUARD AGAINST ELECTRIC SHOCK. This lift must be grounded while in use to protect the
operator from electric shock. Never connect the green power cord wire to a live terminal. This is
for ground only.
25.
DANGER! The power unit used on this lift contains high voltage. Disconnect power at the
receptacle before performing any electrical repairs. Secure plug so that it cannot be accidentally
plugged in during service.
26. ALWAYS WEAR SAFETY GLASSES. Everyday eyeglasses only have impact resistant lenses.
They are not safey glasses.
27. MAINTAIN WITH CARE. Keep lift clean for better and safe performance. Follow manual for proper
lubrication and maintenance instructions. Keep control handles and / or buttons dry, clean and
free from grease and oil.
28.
STAY ALERT. Watch for dangers while working on or around lift.
29. CHECK FOR DAMAGED PARTS. Check for alignment of moving parts, breakage of parts or any
condition that may affect its operation. Do not use lift if any component is broken or damaged.
30. NEVER remove safety related components from the lift. Do not use lift if safety related
components are damaged or missing.
31. NOTE: If attachments, accessories, or configuration modifying components that a e located in
the load path, affect operation of the lift, affect the lift electrical listing or affect intended vehicle
accommodation are used on this lift and, if they are not certified for use on this lift, then the
certification of this lift shall become null and void. Contact Dannmar Equipment for information
pertaining to certified attachments, accessories, or configuration modifying component
Page 5
For technical questions, please call 877.432.6627

Page 6
For technical questions, please call 877.432.6627
SAVE THESE INSTRUCTIONS
OWNER / EMPLOYER RESPONSIBILITIES
•
Shall ensure that lift operators are qualified and that they are trained in the safe use and operation
of the lift using the manufacturer’s operating instructions; ALI/SM10-1, ALI Lifting it Right safety
manual; ALI/ST-10 ALI Safety Tips card; ANSI/ALI ALOIM-2008, American National Standard for
Automotive Lifts-Safety Requirements for Operation, Inspection and Maintenance; ALI/WL Series,
ALI Uniform Warning Label Decals/Placards; and in the case of frame engaging lifts, ALI/LP-GUIDE,
Vehicle Lifting Points/Quick Reference Guide for Frame Engaging Lifts.
•
Shall establish procedures to periodically inspect the lift in accordance with the lift manufac-
turer’s instructions or ANSI/ALI ALOIM-2008, American National Standard for Automotive Lifts-
Safety Requirements for Operation, Inspection and Maintenance; and The Employer Shall ensure
that lift inspectors are qualified and that they a e adequately trained in the inspection of the lift.
•
Shall establish procedures to periodically maintain the lift in accordance with the lift manufac-
turer’s instructions or ANSI/ALI ALOIM-2008, American National Standard for Automotive Lifts-
Safety Requirements for Operation, Inspection and Maintenance; and The Employer Shall
ensure that lift maintenance personnel are qualified and that they a e adequately trained in the
maintenance of the lift.
•
Shall maintain the periodic inspection and maintenance records recommended by the
manu-facturer or ANSI/ALI ALOIM-2008, American National Standard for Automotive Lifts-
Safety Requirements for Operation, Inspection and Maintenance.
•
Shall display the lift manufacturer’s operating instructions; ALI/SM10-1, ALI Lifting it Right safety
manual; ALI/ST-10 ALI Safety Tips card; ANSI/ALI ALOIM-2008, American National Standard for
Automotive Lifts-Safety Requirements for Operation, Inspection and Maintenance; and in the
case of frame engaging lifts, ALI/LP-GUIDE, Vehicle Lifting Points / Quick Reference Guide for
Frame Engaging Lifts; in a conspicuous location in the lift area convenient to the operator.
• Shall not modify the lift in any manner without the prior written consent of the manufacturer.
• Shall provide necessary lockout / tagout means for energy sources per ANSI Z244.1-1982
(R1993), safety requirements for the lockout / tagout of energy sources, before beginning any lift
repairs.

D-7
D-7/X
Page 7

INSTALLATION INSTRUCTIONS
TOOLS REQUIRED
1. Rotary Hammer Drill Or Similar (If Anchoring)
2. 3/4” Masonry Bit (If Anchoring)
3. Hammer
4. Foot Level
5. Open End Wrench Set: Metric
6. Socket And Ratchet Set: Metric
7. Hex Key / Metric Allen Wrench Set
8. Medium Crescent Wrench
IMPORTANT NOTICE!
These instructions must be followed to ensure proper installation and operation of your lift. Failure
to comply with these instructions can result in serious bodily harm and void product warranty.
Manufacturer will assume no liability for loss or damage of any kind, expressed or implied resulting
from improper installation or use of this product.
STEP 1
( Selecting Site )
BEFORE INSTALLING YOUR NEW LIFT, CHECK THE FOLLOWING:
1. LIFT LOCATION: Always use architects plans when available. Check layout dimension against
floor plan equirements making sure that adequate space is available.
2. OVERHEAD OBSTRUCTIONS: The area where the lift will be located should be free of overhead
obstructions such as heaters, building supports, electrical lines etc.
3.
CLEARANCES: Be sure you have 4' on the Power Unit side and 10' on the opposite end to allow
space to install long safety linkage rods.
IMPORTANT NOTICE!
DO NOT install this lift on any asphalt surface or any surface other than concrete.
DO NOT install this lift on expansion seams or on cracked or defective concrete.
DO NOT install this lift on a elevated floor without first consulting building chitect.
DO NOT install this lift outdoors unless special consideration has been made to protect the power
unit from damp weather conditions.
DO NOT install this lift on slopped floor with mo e than 3
" front to back or 2" side to side.
Page 8
For technical questions, please call 877.432.6627

STEP 2
(Column & Cross Bar Installation)
1.
IMPORTANT! DO NOT begin installation with lift close to wall. It is necessary to leave adequate
clearance for installing safety linkage rods. Allow 120" on opposite side of power unit location
and 60” on the Safety Handle Side (power unit side) for clearance.
2.
Make a chalk line on the floor following the floor plan above to ensure unit is square.
3.
Stand the columns in place making sure to position the power unit mounting bracket at the
correct location ( see “X” above ) and making sure the extended lip on all the posts are facing the
inside of the lift ( see fig. 4 ) Note: You can also lay the columns down and slide the cross tubes
in, you may need to disengage the spring on the primary safety.
4.
Remove safety covers for installation and replace
when final assembly is done. Raise one of the
cross bars ( both cross bars ar
e the same ) and
slide it into the two front columns making sure to
position the primary lock devise OUTWARD and
the cable pulleys INWARD. Manually clear the lock
devise on each side of the cross bar and slide the
cross bar down until it rests on the safety lock
position closest to the floor. (Be sure to re-engage
safety spring if it was removed.)
5. Repeat this process for the rear cross bar. You will
then have the columns and cross bars in position
and spaced properly for the runways.
6. With the columns and cross bars in place, secure
the column TOP CAPS using the M12 X 130MM Hex
Bolt, Nylon Lock Nut & Washer. (See Fig. 4)
Page 9
For technical questions, please call 877.432.6627
“X” Indicates your two options
for Power Unit Location (Passen-
ger Rear recommended).
WARNING
Be very careful not to disturb the columns and
cross bars at this time as they may tip over causing
personal injury or harm.
Fig. 4
Notice the extended
lip on the post, this
should always face
the inside of the lift.
INSIDE
OUTSIDE
Please note the differences on
each side of the posts. The lock
blocks extend further out on one
side, this side should always
face the inside of the lift.

Page 10
For technical questions, please call 877.432.6627
Line up runway and
drive up ramp tie
plate and bolt in
position.
Line up runway and
front tire stop plate
and bolt in position.
Fig. 6 Fig. 7
STEP 3
(Runway Installation)
1.
Locate the runway with the cylinder attached
underneath. This runway will be located adja-
cent the column with power unit bracket
attached.
2.
Position the 1/2" holes on the side of the run-
way near the power unit location. (See Fig. 5)
3.
Line up the front of the cylinder runway with
the
cross bar bolt holes, then temporarily bolt
in
position using the M14 x 100mm hex bolt,
nut and washers making sure to pass bolts
through the front tire stops. (See Fig. 7)
4.
Line up the rear of the cylinder runway with
the cross bar bolt holdes, then temporarily
bolt in
position using the M14 x 100mm hex
bolt, nylon nut and washers making sure to
pass bolts through the drive up ramp
brackets. (See Fig. 6)
Match Power
Unit Post with
bracket and
Power Runway
with 1/2" holes
for routing
hoses.
Fig. 5

Page 11
For technical questions, please call 877.432.6627
Cable “B”
Cable “A”
Cable “D”
Cable “C”
CABLE ROUTING
Fig. 1-2
D-7
Cable “A” 2591mm
Cable “B” 4013mm
Cable “C” 6502mm
Cable “D” 7925mm
3029mm
4464mm
7588mm
8992mm
Fig. 1-3
Fig. 1-3
Fig. 1-4
Cable Stop
Cable Stop
D-7/X

Page 12
For technical questions, please call 877.432.6627
STEP 4
(Cable Installation)
IMPORTANT! Do not damage the chrome cylinder rod during this process. This can ruin the seals
of the cylinder resulting in fluid leakage
1. Inspect cylinder nut and tighten if necessary. Be sure to have at least 4-6 threads past the nylon
on the nut.
2. Inspect cables to ensure proper lengths. All cables should have ID tags showing proper cable
lengths. (See Table on page 11 for proper lengths.)
3. Make sure both the cylinder flange plates a e installed with the thin plate backing the nut.
4.
In order to install the cables it is necessary to first remove the cylinder port plugs, then use
an air blow gun or come along to extend the cylinder.
5. Place the M18 washer and locknut on the threaded end of the cable hand tight. Take the smaller
plug end of the cable and begin to route it according to the cable routing guide on the previous
page making sure to start the process at the top of the correct column.
6.
The threaded end of the cable will end up at the top of each column. Make sure to route the
cable on the inside of the slack cable safety as shown in figures 1-2 on the previous page.
Run the cable between the slots on the 2 flange plates resting the back of the plug end
against the large flange plate as shown in figur
e 1-3.
7.
After the routing of all the cables has been completed install the 8 cable stop plates with the
provided M8 x 16mm hex head bolts, M8 flat washers and the M8 spring washers.
(See Figures 1-4 and 1-5 on the previous page)
NOTE: The cables will remain loose until start up is completed later in this manual.
STEP 5
( Power Unit Installation )
1.
Mount the power unit to the mounting bracket using the M8 x 25mm hex bolts and nylon nuts
then fill the eservoir with 10 quarts of 10-wt non foaming hydraulic oil. IMPORTANT: Use only a
dedicated 120V/20 Amp circuit system and, if necessary, a 12 gauge extension cord.
(See Fig. 9, next page.)
STEP 6
(Routing Hydraulic Hoses)
1.
Install the one O-ring style 90-degree fitting in the power unit port that has the plastic plug in it.
It is not necessary to use Teflon tape on O-ring fittings. Install one of the pneumatic push-t
connect 90-degree fittings with teflon tape in the power unit port with the Allen set screw.
2.
Install the JIC straight bulkhead fitting inside the 1/2" hole on the cylinder runway furthest f om
the power unit. DO NOT USE TEFLON TAPE on JIC flared ends.
3. Install the push-to-connect straight bulkhead fitting inside the 1/2” hole on the cylinder runway
closest to the power unit.
4.
Install the standard 90-degree fitting at the cylinder port furthest from the power unit making

Page 13
For technical questions, please call 877.432.6627
sure to point the fitting towa ds the power unit. On the pipe thread side of the fitting use teflon
tape or pipe sealer. DO NOT USE TEFLON TAPE on JIC flared end.
5.
Install the pneumatic push-to-connect 90-degree fitting at the cylinder port closest to the power
unit making sure to point the fitting towards the power unit. On the pipe thread side of the fitting
use Teflon tape or pipe sealer.
6.
Connect hydraulic hoses as shown below making sure to first pass through the retaining rings
located on the inside of the runway. MAKE SURE HOSES ARE KEPT CLEAR OF CABLES.
NOTE: When tightening connections with flared (JIC) fittings, always follow the tightening
instructions. Failure to follow these instructions may result in cracked fittings and / or leaks.
1.
Screw the fittings in HAND TIGHT.
2.
The nut portion of the fitting is the only part that should turn during tightening. The fitting
MUST NOT turn.
3.
Then use the proper size wrench to tighten the nut portion of the fitting. Do not over-tighten.
4.
Back the nut portion of the fitting off one full turn.
5.
Again, tighten the nut portion hand tight without moving the fitting.
Insert Spacer
as shown.
Fig. 10.2
Insert Spacer
as shown.
Fig. 10.1
Fig. 9
Return
Air
Vent
Pressure
Port
Filler Cap

Page 14
For technical questions, please call 877.432.6627
Fig. 10.3
STEP 7
(Connecting Safety Linkage Rods)
Install the Linkage Rods as shown below, making sure to position the Safety Handle adjacent to the
Power Unit. Pay careful attention to assemble the FRONT and REAR Linkage assemblies as shown.
Improper assembly will result in Safety Lock failure. (See Fig. 10.1, 10.2 on previous page & 10.3 )

Page 15
For technical questions, please call 877.432.6627
STEP 8
(Inspecting Pulley Guards)
1.
After the lift is installed, lightly oil the cable roller shafts with lubrication (gear grease).
2.
Before proceeding, double check to make sure the locking shaft collars for the cross bar cable
pulleys and pulley guards are tightened securely.
To prevent personal injury or death, cross bar lock collars must remain tight at all times. Before rein-
stalling pulley guard covers, check to make sure the rollers and pins are installed per diagram below.
Locking
Shaft
Collar
DANGER

Page 16
For technical questions, please call 877.432.6627
STEP 9
(Anchoring: Optional)
Proceed to Step 10 if not anchoring.
1.
Concrete shall have compression strength of at least 3,000 PSI and a minimum thickness of 4"
in order to achieve a minimum anchor embedment of 3¼". NOTE: When using (¾" x 5½") long
anchors; if the top of the anchor exceeds 2¼" above the floor grade, you DO NOT have enough
embedment.
2.
Maintain a 6" minimum distance from any slab edge or seam. Hole to hole spacing should be a
minimum 6½" in any direction. Hole depth should be a minimum of 4".
3.
Shim each column base as required until each column is plumb. If one column has to be elevated
to match the plane of the other column, full size base shim plates should be used. Shim thickness
MUST NOT exceed ½" when using the 5½" long anchors with the lift. Adjust the column
extensions plumb.
4.
Before proceeding, double check the measurements and make certain that the bases of each
Column are square and aligned with the chalk line. Raise the lift up and down and make sure it
operates properly at the locations prescribed by the markings on the floor .
5.
Using the base plate on each column as a guide, drill each anchor hole approximately 4½"
deep using a rotary hammer drill and ¾"
concrete bit.
6. After drilling, remove dust thoroughly from each hole using compressed air and / or bristle brush.
Make certain that the columns remain aligned with the chalk line.
7.
Assemble the Washers and Nuts on the anchors then tap each hole with a hammer until the
washer rests against base plate. Be sure that if shimming is required, enough threads are left
exposed. (see fig. 11)
8.
After any necessary shims are installed, tighten each nut 3-5 turns past hand tight. IMPORTANT
If anchor bolts do not hold when torqued to required amount, concrete must replaced. Saw cut
and remove 24" x 24" square area each column base then re-pour with reinforced 3,000 PSI
concrete to a depth of six inches minimum, keying new concrete under existing floor
. (See fig.
11,11.2 )
ALWAYS WEAR SAFETY GOGGLES!
Fig. 11
Fig. 11.2
Tap anchor bolts into each hole
with a hammer until the washer
rests against the base plate.
Tighten Nut
3-5 turns.
DO NOT
use impact wrench!
CAUTION

Page 17
For technical questions, please call 877.432.6627
POST-INSTALLATION CHECK-OFF
; Columns Properly Shimmed And Stable Anchor Bolts Tightened (Optional)
; Pivot / Sheave Pins Properly Attached
; Electric Power Supply Confirmed
; Cables Adjusted Properly
; Safety Locks Functioning Properly
; Slack Cable Safety secure and engaged.
; Check For Hydraulic Leaks
; Oil Level
; Lubrication of Critical Components (Cables, Pulleys, Inside Columns, and all other moving parts)
; Check For Overhead Obstructions
; Runways Level
; All Screws, Bolts, and Pins Secured (Re-install Safety Cover)
; Surrounding Area Clean
; Operation, Maintenance and Safety Manuals on Site
; Cylinder Nut secure.
; Runway Pulley set screws secure.
; All Lift Operators have read this manual

Page 18
For technical questions, please call 877.432.6627
STEP 10
( Operational Test )
1.
Make sure power unit reservoir is full with 10-qts of AW-32 hydraulic oil or Dexron III or VI ATF.
2. Spray the inside of the columns where the slide blocks glide with a white lithium grease.
3. Press the UP SWITCH on the power unit.
4. The lift will slowly raise.
5.
Once the lift starts to raise, simultaneously press the lowering handle at the same time you are
pressing the raise button. This will allow any air trapped in the cylinder and lines to escape and
vent into the fluid reservoir.
6.
Continue raising the lift slowly until all the slack in the cables is taken out. Raise the lift until the
safety lock closest to the power unit comes within 1" to the bottom of the lowest lock position.
7.
Tighten the cable adjusting nut on top of each column until all remaining safety locks comes
within 1" to the bottom of the lowest lock position. This will assure that the cables are adjusted
evenly. At this time the lift should raising level and all four safety locks engage simultaneously.
NOTE:
There will be some initial stretching of the cables in the beginning. It will be necessary to re-adjust
the cables a week after first use, then every six months ther
eafter.
8.
Run the lift up and down a few times to ensure that the locks are engaging uniformly and that
the safety release mechanisms are functioning properly. Re-adjust if necessary.
When lowering the lift pay careful attention. ALWAYS make sure that all four locks are disengaged. If
one of the locks inadvertently locks on descent the lift and / or vehicle may disrupt causing personal
injury or death.
9.
Install the approach ramps on the entry side of the lift. Drive a vehicle onto the lift runways then
remove the ramps and install the rear tire stops. Run the lift up and down a few times to ensure
that the locks are engaging uniformly and that the safety release mechanisms are functioning
properly. Re-adjust if necessary.
DANGER

IMPORTANT INSTRUCTIONS
PLEASE READ!
LIFT OPERATION:
To Raise Lift:
1. Position vehicle tires in the center of each runway.
2. Set parking brake and use wheel chocks to hold vehicle in position.
3. Before raising the vehicle make sure you replace the drive up ramps with the tire stops, make
sure all personnel are clear of the lift and surrounding area. Pay careful attention to overhead
clearances.
4. Raise the lift to the desired height by pressing the push button of the power unit.
5. Lower lift on nearest safety ladder to support load.
6. Do not permit the cables to go slack.
Page 19
For technical questions, please call 877.432.6627
Safety
Lock
Block
Safety
SAFETY IN LOCKED POSITION
VISUALLY CONFIRM THAT ALL PRIMARY SAFETY LOCKS ARE ENGAGED BEFORE ENTERING
WORK AREA.
Hydraulic components used on this lift are intended to raise and lower lift only and are not meant
to be load holding devices. Remain clear of elevated lift unless visual confirmation is made that all
primary safety locks are fully engaged and the lift is lowered onto the safety locks. Refer to manual
for proper safety lock procedures.
DANGER

Page 20
For technical questions, please call 877.432.6627
TO LOWER THE LIFT:
1. First, raise the lift to clear the safety locks.
2. Depress air safety release button and hold. (If not so equipped, release safety locks manually.)
3. Push the lowering handle and hold until the lift has descended completely.
4. If the lift is shaking, vibrating, or swaying, reduce the descending speed.
WEEKLY MAINTENANCE:
1. Lubricate all rollers with general purpose lubricating oil.
2. Check all connections, bolts, and pins to ensure proper mounting.
3.
Lubricate primary safety pivot pin with white lithium grease.
MONTHLY MAINTENANCE:
1. Check all safety devices to make sure they are in good operating condition.
2. Inspect all anchor bolts and retighten if necessary.
3. Make a visual inspection of all moving parts for wear. If worn parts are evident, DO NOT USE
LIFT. Replace all worn parts before lift is put back into operation.
1. If any component of the lift is found to be defective, DO NOT USE LIFT!
2. Never operate the lift with any person or equipment below.
3. Always stand clear of lift when lowering or raising.
4. Never exceed the rated capacity.
5. Always ensure the safety devices are engaged before any attempt is made to work on or near the
vehicle. Never leave lift in an elevated position unless the safety devices are engaged.
WARNING
/