Bestop 52821 Installation Instructions Manual
- Type
- Installation Instructions Manual
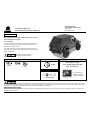
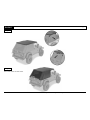
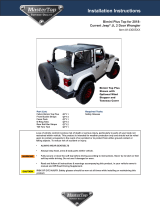
Bestop 52821 is a fabric replacement top for Trektop NX, designed for Jeep Wrangler Unlimited TJD models from 2004 to 2006. It enhances the vehicle's appearance and provides protection from ordinary weather conditions. The top is made of durable fabric that resists contraction and wrinkles, ensuring a snug fit and long-lasting performance. Installation is relatively easy and can be completed in about half an hour, making it a convenient upgrade for your vehicle.
Bestop 52821 is a fabric replacement top for Trektop NX, designed for Jeep Wrangler Unlimited TJD models from 2004 to 2006. It enhances the vehicle's appearance and provides protection from ordinary weather conditions. The top is made of durable fabric that resists contraction and wrinkles, ensuring a snug fit and long-lasting performance. Installation is relatively easy and can be completed in about half an hour, making it a convenient upgrade for your vehicle.


-
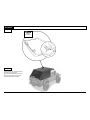
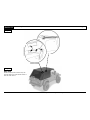
 1
1
-
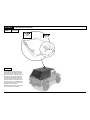
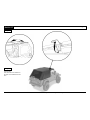
 2
2
-
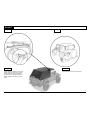
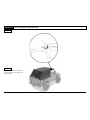
 3
3
-
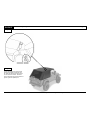
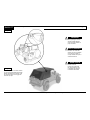
 4
4
-
 5
5
-
 6
6
-
 7
7
-
 8
8
-
 9
9
-
 10
10
-
 11
11
-
 12
12
-
 13
13
-
 14
14
-
 15
15
-
 16
16
-
 17
17
-
 18
18
-
 19
19
-
 20
20
-
 21
21
-
 22
22
-
 23
23
-
 24
24
-
 25
25
-
 26
26


Bestop 52821 Installation Instructions Manual
- Type
- Installation Instructions Manual
Bestop 52821 is a fabric replacement top for Trektop NX, designed for Jeep Wrangler Unlimited TJD models from 2004 to 2006. It enhances the vehicle's appearance and provides protection from ordinary weather conditions. The top is made of durable fabric that resists contraction and wrinkles, ensuring a snug fit and long-lasting performance. Installation is relatively easy and can be completed in about half an hour, making it a convenient upgrade for your vehicle.
Ask a question and I''ll find the answer in the document
Finding information in a document is now easier with AI
in other languages
- français: Bestop 52821
- español: Bestop 52821
Related papers
-
Bestop RoughRider Seat Back Organizer Installation guide
-
-
-
-
-
-
-
-
-
Other documents
-
Intermec 600 Series 602 Installation guide
-
 RAMPAGE PRODUCTS 901007 Installation guide
-
Sentry CD048 Datasheet
-
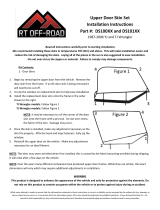 Crown Automotive Upper Door Skin Set Installation guide
-
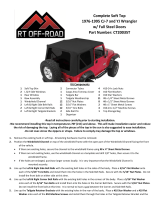 Crown Automotive Complete Top CT20035T Operating instructions
-
 Surco DH1002 Installation guide
-
 MasterTop Factory Style Bow Replacement Bow Assembly Installation guide
-
 Rugged Ridge 11650.40 Installation guide
-
 Crown Automotive HK8795YJ Installation guide
-
 MasterTop Summer Combo Top Plus Installation guide


