Page is loading ...

Soft Top Hardware Kit
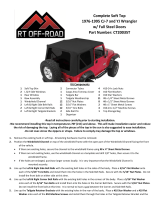
1987-1995 YJ Wrangler
w/ Half Steel Doors
Part Number: HK8795YJ
Kit Components
- Tailgate Bar & Tonneau Cover Qty: 1 - #10-24 x 1/2” Phillips Machine Screws Qty: 4
- Bow Assembly Halves Qty: 2 - #10-24 Nylon Locking Nuts Qty: 4
- Windshield Channel Qty: 1 - #10 Flat Washers Qty: 4
- Door Channels Qty: 2 - #10 Star Lock Washers Qty: 4
- Side Belt Rails Qty: 2 - 5/16” Nut Plates Qty: 12
- Corner Belt Rails Qty: 2 - 5/16” Flat Washers Qty: 12
- Tailgate Retainer Brackets Qty: 2 - 5/16” Torx® Screws Qty: 12
- Connection Tubes Qty: 2 - #8 x 1” Sheet Metal Screws Qty: 2
- Side Belt Rail Pins Qty: 2 - #8 x 1/2” Sheet Metal Screws Qty: 8
- Tailgate Weatherstrip Qty: 1 - #8 x 1/4” Sheet Metal Screws Qty: 12
-Read all instructions carefully prior to starting installation.
-Upper door frames are not included. (Sold Separately P/N DF100YJ)

1. Position the windshield channel on top of the windshield frame with the open part of the channel facing the front of
the vehicle.
-If there are existing holes: Secure the channel using the #8 x 1/4” Sheet Metal Screws.
-If there are not existing holes: Use the windshield channel as a template, drill 1/8” holes, and secure using the #8 x
1/4" Sheet Metal Screws.
-If the holes are enlarged: Purchase larger screws locally and secure using those screws.
NOTE: It is very important that the windshield channel is mounted securely. An improperly
mounted windshield channel will result in a poorly fitting and/or a leaking soft top.
2. Position the Door Channels to the sides of the windshield frame. The pin on
the Door Channel should be on the top of the windshield frame with the
pin facing out. The pinch seam on the side of the windshield frame
should be used to align the channels. See Figure 1.
-If there are existing holes: Secure the Door Channels using the #8 x 1/2”
Sheet Metal Screws. See Figure 2.
-If there are not existing holes: Use the Door Channels as a template, drill
1/8” holes, and secure using the #8 x 1/2" Sheet Metal Screws.
-If the holes are enlarged: Purchase larger screws locally and secure using
those screws.
3. Place the Side Belt Rails on top of the sides of the body. The open end of the Side Belt Rail should face the rear of
the Jeep. Line the holes in the Side Belt Rails with the holes in the body and secure them using the 5/16” Torx®
Screws, 5/16” Flat Washers, and 5/16” Nut Plates. DO NOT install the front bolt. See Figure 3.

4. Place the Corner Belt Rails on top of the rear corners of the body (they are not side specific). Line the holes in the
Corner Belt Rails with the holes in the body and secure them using 5/16” Torx® Screws, 5/16” Flat Washers, and
5/16” Nut Plates. It is normal to have a gap between the corner and side belt rails. See Figure 4 and Figure 5.
5. Place the Tailgate Retainer Brackets inboard of the Corner Belt Rails. The slot with the open end should be oriented
toward the center of the Jeep. Line up the holes in the Tailgate Retainer Brackets with the holes in the body and
secure them using #10-24 x 1/2” Phillips Machine Screws, #10 Star Lock Washers, #10 Flat Washers, #10-24
Nylon Locking Nuts to fasten. See Figure 6. If the holes do not line up, enlarge the existing holes or drill 3/16”
holes in either the body or the brackets, taking care to not drill through any wiring in the body.
6. To assemble the Bow Assembly Halves, lay them on a clean flat surface to identify the front and rear bow (the front
bow will have foam padding). Attach the two halves together using the Connecter Tubes by engaging the
buttons in the Connector Tubes with those in the Bow Assembly Halves. The button should pop out of the hole
and lock in place. See Figure 7.

7. Slide the Bow Assembly into the tracks at the open end (rear) of the Side Belt Rails on both sides. See Figure 8.
Once both bows are installed into the tracks insert the Side Belt Rail Pins into the hole on either side of the Side
Belt Rails. See Figure 9.
8. Slide the front bow as far forward as possible in the Side Belt Rails. See Figure 10. Unfold the door surrounds and
lock them to the Door Channels by inserting the pin in the Door Channels into the hole in the Door Surrounds.
Lock the pin into place by sliding the plastic sliding lock backward. See Figure 11.
9. Move the rear bow back and straighten the spreader bars connecting the front and rear bows. Insert the pin that is
tethered to the spreader bars to lock them into place. Be sure the spreader bars are securely locked prior to
installing the fabric. Failure to do so can cause personal injury or damage to the vehicle.
10. To adjust the spreader bars (located just in front of the hinge) simply remove the locking pin, twist it to loosen or
tighten the top, and re-install the locking pin. See Figure 12.

11. Slide the Tailgate Bar into the Tailgate Retainer Brackets with the Tonneau Cover facing up. Position the straps of
the Tonneau Cover on the fender well with the straps as straight as possible. Mark the location of the ring in the
strap on the fender well. Drill an 1/8” hole and secure the straps to the fender well with the #8 x 1” Sheet
Metal Screws. See Figure 13 and Figure 14.
12. Install the Tailgate Weatherstrip by pressing it onto the top of the tailgate with the seal facing the tailgate. See
Figure 15. Trim it to the overall length of the tailgate if necessary.
While every attempt is made to ensure that the information contained in these instructions is correct, no liability can be accepted by the authors for loss, damage, or
injury caused by any errors in, or omissions from the information given. All service should be performed by qualified mechanics. Crown Automotive Sales Co .,Inc.
cannot be held responsible for any mechanical work performed. Standard and accepted safety precautions should be used in every procedure
/