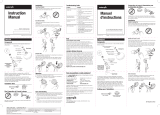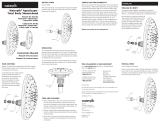
Pivot Ball
Showerhead
Bracket
Large Nut
Articulation
sphérique
Bride de montage
de la douchette
Gros écrou
Nut
Pivot Ball
Washer
Filter Screen
Flow
Regulator
Écrou
Articulation
sphérique
Rondelle
Tamis-filtre
Regulateur de
débit
Hand Held
Showerhead
Douchette
manuelle
Hand Held
Showerhead
Douchette
manuelle
Adjustable Wrench
(not included)
Clé réglable
(non incluse)
3
3
4A
4A
4B
4B
5
5
6
6
7
7
2
2
3
3
ENGLISH
FRANÇAIS
EN FRANÇAIS AU VERSO
Waterpik
®
brand showerheads are equipped with an OptiFLOW
®
regula-
tor that limits maximum water flow to 2.5 gallons per minute at 80 psi as
mandated by U.S. federal law.
The flow regulator may be removed for cleaning debris to improve water
flow in the showerhead. To remove, unscrew filter screen from pivot ball
by turning counterclockwise. Remove regulator with needle-nose pliers
and replace filter screen.
Les pommes de douche de la marque Waterpik
®
sont pourvues d’un
régulateur OptiFLOW
®
qui limite le débit maximal à 2,5 gallons par minute
à une pression de 80 lb/po
2
, en vertu de la loi fédérale aux É.-U.
Le régulateur de débit peut être retiré pour permettre le nettoyage des
résidus afin d’améliorer le débit dans la pomme de douche. Pour retirer le
régulateur, séparer le tamis du filtre du pivot à rotule en le dévissant dans
le sens inverse des aiguilles d’une montre. Ôter le régulateur à l’aide de
pinces à bec effilé et remettre en place l’écran du filtre.
FN 20011364-F AG
Note: Drawings may not match your product. Remarque: Les illustrations peuvent ne pas
correspondre a´votre produit. Nota: Es posible que los dibujos no coincidan con su producto.
EasySelect
Showerhead
Pomme de douche
Waterpik
®
EasySelect
®
Cabezal de ducha
Waterpik
®
EasySelect
®
Instruction Manual
Manuel d’instructions
Manual de instrucciones
Thank you for purchasing this Waterpik
®
EasySelect
®
brand
Showerhead, and welcome to a new level of showering enjoyment!
Since we invented the massaging showerhead in 1974, we’ve been
constantly working to improve the showering experience for our
customer. Our latest generation shower technology delivers both pure
relaxation and rejuvenation with the selection at your finger tips.
COMPONENTS
(Side Entry Bracket, some models)
Your showerhead comes with the respective hardware set
shown below.
COMPONENTS
(Front Entry Bracket, some models)
Your showerhead comes with the respective hardware set
shown below.
COMPOSANTS
(Support pour insertion frontale;
certains modèles)
La pomme de douche est fournie avec les accessoires appropriés
pour l’une des configurations de montage ci-dessous.
Nous vous remercions pour votre acquisition de cette pomme de douche
Waterpik
®
de marque EasySelect
®
; celle-ci vous fera connaître
un nouveau niveau de plaisir et confort sous la douche! Depuis que
nous avons inventé la douche d’hydro-massage en 1974, nous avons
constamment amélioré l’expérience de la douche pour nos clients. Notre
toute dernière technologie de douche nouvelle génération vous offre à
portée de main un moment de pure détente et revigorant à la fois.
COMPOSANTS
(Support pour insertion latérale;
certains modèles)
La pomme de douche est fournie avec les accessoires appropriés
pour l’une des configurations de montage ci-dessous.
OPERATION
Turn spray selector on handle
in either direction to control
spray pattern.
UTILISATION
Orienter le sélecteur d’aspersion
situé sur la poignée d’un côté
ou de l’autre pour choisir le type
d’aspersion désiré.
INSTALLATION
(Side Entry Bracket)
1. Remove old showerhead.
2. Remove large nut from EasySelect
®
bracket and
remove pivot ball.
NOTE: This nut and bracket have a left handed
thread. The large nut tightens when turned
clockwise as viewed from the front of the
bracket.
3. Place large nut over shower pipe (narrow end
toward wall).(3
)
4. Thread pivot ball onto shower pipe and hand
tighten clockwise to a snug fit. (4A) Use an
adjustable wrench or pliers to tighten an
additional ¼ turn. (4B)
IMPORTANT: Do not over tighten.
INSTALLATION
(Front Entry Bracket)
1. Remove old showerhead.
2. Slightly loosen nut on bracket assembly and
position hose connection downward. Tighten
pivot ball to pipe. Ensure nut is secure by
hand tightening. (2)
3. Hand tighten hose end to bracket
and handle. Do not use pliers or
wrench to connect hose ends to
showerhead or bracket. (3)
INSTALLATION
(Support pour insertion
frontale)
1. Démonter l’ancienne pomme de douche.
2. Pour les modèles à main, desserrer
légèrement la écrou sur l’ensemble de la
bride et positionner le raccord de tuyau vers
le bas. (2)
3. Serrer la boule d’articulation sur le
tuyau. S’assurer que la base de la
écrou est bien fixée en la serrant
manuellement. (3)
INSTALLATION
(Support pour insertion
latérale)
1. Démonter l’ancienne pomme de douche.
2. Retirer le gros écrou de la bride de pomme de
douche EasySelect
®
et ôter la rotule de pivot.
REMARQUE : Cet écrou et ce support sont
filetés sur la gauche. Le gros écrou est serré
lorsqu’on le fait pivoter dans le sens horaire en
se plaçant face au support. Veiller à bien serrer.
3. Placer le gros écrou sur le tuyau de
raccordement de la pomme de douche
(extrémité étroite vers le mur). (3)
4. Enfiler le raccord articulé sur le tuyau de
douche et serrer fermement à la main dans
le sens horaire pour bien l’ajuster. (4A) Serrer
d’un quart de tour supplémentaire à l’aide
d’une clé à molette ou pinces. (4B)
IMPORTANT : Ne pas trop serrer.
5. Fixer la pomme de douche à la main en ser-
rant le gros écrou sur l’adaptateur fileté situé
à l’arrière du support. (5)
6. Fixer manuellement l’extrémité du
tuyau sur le support et la poignée.
Ne pas utiliser de pinces, de clé
ou de ruban pour tuyauterie pour
raccorder les extrémités du tuyau à
la pomme de douche ou au support.
7. Positionner la pomme de douche à la
position désirée. Pour immobiliser la
pomme de douche, serrer le gros écrou
(rotation dans le sens horaire, comme pour
l’articulation sphérique).
Troubleshooting Guide
Problem Solution
No water flow from installed
shower head:
a Confirm previous shower washer is not in
the j-pipe.
b Confirm the hose is properly installed, try
switching ends.
c Confirm there is only one washer in the
pivot ball.
Low water pressure or
missing spray patterns
a Clean shower head in vinegar/water
solution. (See care section).
b Clean screen and flow regulator.
Leaking at pipe pivot ball
connection:
a Confirm one single washer is seated on
top of the screen.
b Grate bar of soap across the j-pipe
threads to act as a sealant.
Showerhead and/or bracket
stiff to change angle
a Immerse pivot ball and large nut of the
bracket in hot water or use a blow dryer
for several minutes and then use a towel
to loosen the large nut.
CARE AND CLEANING
• Clean filter screen at least once a year or whenever you notice a drop
in water pressure. To clean, remove bracket from large nut. Remove
the pivot ball from the shower pipe and gently brush the filter screen,
located in the pivot ball. You can also back flush the filter screen by
holding the pivot ball under a running faucet with the small end (non-
threaded) up in the water stream. To replace showerhead, follow steps
2-4 of installation.
• To clean mineral deposits, gently rub the rubber nozzles on the face of
the showerhead to dislodge. For deeper cleaning, remove showerhead
and place in 1-1½ cups of white vinegar for 2-3 hours. Reattach
showerhead and run in all modes for 1-2 minutes to clean out vinegar.
Vacuum Breaker (some models)
Vacuum breakers are required on hand-held showers in the State of
Wisconsin and the City and County of Los Angeles, California, by plumbing
code in order to protect water supplies from potential back-flow.
The vacuum breaker (located within the bracket or hose) may discharge a
small amount of water when you turn on your shower. It will also drain a
small amount of water when you turn off your shower. Both are normal
operative conditions.
LIMITED LIFETIME WARRANTY
Water Pik, Inc. warrants to the original purchaser of this product that
it is free from defects in material and workmanship for as long as the
original purchaser owns this product. Water Pik, Inc. will replace any
part of the product which in our opinion is defective, provided that the
product has not been abused, misused, altered or damaged after pur-
chase. (This includes damage due to use of tools or harsh chemicals.)
In the event an item has been discontinued we will replace with what
we deem to be the closest product. Water Pik, Inc. is not responsible
for labor charges, installation, or other consequential cost. The respon-
sibility of Water Pik, Inc. shall not exceed the original purchase price of
the product. This warranty gives you specific legal rights. You may also
have other rights that vary where you reside. Save your receipt as proof
of purchase is required for warranty action.
Have any questions or need assistance?
In the U.S., call our toll-free
Customer Assistance Line,
1-800-525-2774.
If in Canada call our toll-free
Customer Assistance Line,
1-888-226-3042
Outside the U.S., write us at:
Water Pik, Inc
1730 East Prospect Road
Fort Collins, CO 80553-0001 USA
www.waterpik.com
If product malfunctions or becomes damaged, stop use and contact
Water Pik, Inc. for replacement.
Waterpik
®
(stylized) is a trademark of Water Pik, Inc. registered in the EU,
Switzerland, Mexico, Canada, and United States.
Waterpik
®
is a trademark of Water Pik, Inc. registered in Argentina, Australia,
Austria, Canada, China, Czech Republic, Hungary, India, Japan, Poland, Russian
Federation, South Africa, Switzerland, Ukraine, and the United States.
OptiFlow
®
is a trademark of Water Pik, Inc. registered in Australia, Canada, the EU,
Hong Kong, Korea and the United States.
Medallion
®
is a trademark of Water Pik, Inc., registered in Australia, the EU, and
the United States.
EasySelect
®
is a trademark of Water Pik, Inc. registered in Australia, the EU,
Mexico and the United States.
Treat yourself better
™
is a trademark of Water Pik, Inc.
© 2010 Water Pik, Inc.
Printed in China.
Water Pik, Inc.
1730 East Prospect Road
Fort Collins, CO 80553-0001 U.S.A.
www.waterpik.com
5. Attach bracket by hand tightening the large
nut to the threaded back of the bracket. (5)
6. Hose Attachment: Hand tighten
hose end to bracket and handle. Do
not use pliers, wrench, or pipe tape
to connect hose ends to showerhead
or bracket.
7. If showerhead or bracket becomes
loose during use, re-tighten large nut as
described above.
®
DATE: 30 June 2010 CLIENT: Water Pik, Inc.
FILENAME: FN20011364-FAG_LAR-LAOInst.indd DESCRIPTION: EasySelect LAR/LAO Showerhead Instruction Manual
FILE TYPE: Adobe InDesign CS4 PREPARED BY: Brian Colon FORM: 20011364-F AG
SIZE FLAT: 20.4” x 11.25” SIZE FOLDED: 3.4” x 3.8125” FOLDS: Indicated
DIELINE: N/A INK: Black
NOTES: No embedded color profile.


