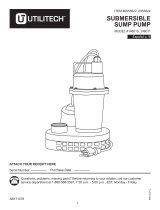
Everbilt HDEFR50W Operating instructions

Category
Water pumps
Type
Operating instructions

Everbilt HDEFR50W is a submersible effluent pump designed for pumping effluent, wastewater, or flooded water with up to 3/4 in. solids. It operates automatically and features overload thermal protection with auto reset, a 20 ft. power cord, and a tethered float switch. The pump can handle solids up to 3/4 in. and is suitable for use in typical dewatering and effluent applications.

Everbilt HDEFR50W is a submersible effluent pump designed for pumping effluent, wastewater, or flooded water with up to 3/4 in. solids. It operates automatically and features overload thermal protection with auto reset, a 20 ft. power cord, and a tethered float switch. The pump can handle solids up to 3/4 in. and is suitable for use in typical dewatering and effluent applications.

THANK YOU
We appreciate the trust and condence you have placed in Everbilt through the purchase of this efuent pump. We strive to continually create
quality products designed to enhance your home. Visit us online to see our full line of products available for your home improvement needs.
Thank you for choosing Everbilt!
USE AND CARE GUIDE
SUBMERSIBLE EFFLUENT PUMP
Questions, problems, missing parts? Before returning to the store,
call Everbilt Customer Service
8 a.m. - 7 p.m., EST, Monday - Friday, 9 a.m. - 6 p.m., EST, Saturday
1-844-883-1872
HOMEDEPOT.COM
Item #
Model #
1004 118 476
HDEFR50W
2
Table of Contents
Table of Contents ...................................2
Safety Information ..................................2
Warranty ..........................................3
Pre-Installation .....................................4
Installation ........................................8
Operation. . . . . . . . . . . . . . . . . . . . . . . . . . . . . . . . . . . . . . . . . . 9
Care & Cleaning ...................................10
Troubleshooting ...................................10
Safety Information
Do not splice the electrical power cord.
Do not allow the electrical cord to become submerged.
Do not use extension cords. They are a re hazard and can
reduce voltage sufciently to prevent pumping and/or damage
the motor.
Do not handle or service the pump while it is connected to a
power supply.
DO NOT remove the grounding prong from the plug or modify
the plug to protect against electrical shock. The power cord
is a three-wire conductor and includes a 3-prong grounded
plug. Plug the pump into a 3-wire, grounded, grounding type
receptacle. Connect the pump according to electrical codes that
apply.
DANGER: Do not pump ammable or explosive liquids
such as oil, gasoline, kerosene, ethanol, etc. Do not use
in the presence of ammable or explosive vapors. Using
this pump with or near ammable liquids can cause an
explosion or re, resulting in property damage, serious
personal injury, and/or death.
DANGER: ALWAYS disconnect the power to the pump
before servicing.
DANGER: Do not touch the motor housing during
operation. The motor is designed to operate at high
temperatures. Do not disassemble the motor housing.
DANGER: Do not handle the pump or pump motor with
wet hands or when standing on a wet or damp surface, or in
water before disconnecting the power.
WARNING: Release all pressure and drain all water from
the system before servicing any component.
WARNING: Secure the discharge line before starting
the pump. An unsecured discharge line will whip, possibly
causing personal injury, and/or property damage.
WARNING: Extension cords may not deliver sufcient
voltage to the pump motor. Extension cords present a
life threatening safety hazard if the insulation becomes
damaged or the connection ends fall into water. The use of
an extension cord to power this pump is not permitted.
WARNING: Wear safety goggles at all times when
working with pumps.
WARNING: This unit is designed only for use on 115
volts (single phase), 60 Hz, and is equipped with an
approved 3-conductor cord and 3-prong grounded plug.
Do not remove the ground pin under any circumstances.
The 3-prong plug must be directly inserted into a properly
installed and grounded 3-prong, grounding-type receptacle.
Do not use this pump with a 2-prong wall outlet. Replace
the 2-prong outlet with a properly grounded 3-prong
receptacle (a GFCI outlet) installed in accordance with the
National Electrical Code and local codes and ordinances. All
wiring should be performed by a qualied electrician.
WARNING: Protect the electrical cord from sharp objects,
hot surfaces, oil, and chemicals. Avoid kinking the cord. Do
not use damaged or worn cords.
WARNING: Failure to comply with the instruction and
designed operation of this unit may void the warranty.
ATTEMPTING TO USE A DAMAGED PUMP can result in
property damage, serious personal injury, and/or death.
WARNING: Ensure that the electrical circuit to the pump
is protected by a 15 Amp fuse or circuit breaker.
CAUTION: Do not lift the pump by the power cord.
CAUTION: Know the pump and its applications,
limitations, and potential hazards.
3 HOMEDEPOT.COM
Please contact 1-844-883-1872 for further assistance.
Safety Information (continued)
CAUTION: Secure the pump to a solid base. This will aid
in keeping the pump in a vertical orientation. This is critical
in keeping the pump operating at maximum efciency. It
will also help prevent the pump from clogging resulting in
premature failure.
CAUTION: Periodically inspect the pump and system
components to ensure the pump suction screen is free
of mud, sand, and debris. Disconnect the pump from the
power supply before inspecting.
CAUTION: Follow all local electrical and safety codes,
along with the National Electrical Code (NEC). In addition,
all Occupational Safety and Health Administration (OSHA)
guidelines must be followed.
IMPORTANT: Ensure the electrical power source is
adequate for the requirements of the pump.
IMPORTANT: This pump is made of high-strength,
corrosion-resistant materials. It will provide trouble-free
service for a long time when properly installed, maintained,
and used. However, inadequate electrical power to the
pump, dirt, or debris may cause the pump to fail. Please
carefully read the manual and follow the instructions
regarding common pump problems and remedies.
IMPORTANT: The motor of this pump has a thermal
protector that will trip if the motor becomes too hot. The
protector will reset itself once the motor cools down and an
acceptable temperature has been reached. The pump may
start unexpectedly if it is plugged in.
Warranty
The manufacturer warrants the products to be free from defects in materials and workmanship for a period of three years from date of
purchase. This warranty applies only to the original consumer purchaser and only to products used in normal use and service. If within
two years this product is found upon examination by the manufacturer to be defective in materials or workmanship, the manufacturers
only obligation, and your exclusive remedy, is the repair or replacement of the product at the manufacturer’s discretion, provided that the
product has not been damaged through misuse, abuse, accident, modications, alterations, neglect or mishandling. Your original receipt of
purchase is required to determine warranty eligibility.
The purchaser must pay all labor and shipping charges necessary to replace the product covered by this warranty.
This Limited Warranty does not cover products which have been damaged as a result of an accident, misuse, abuse, negligence, alteration,
improper installation or maintenance, or failure to operate in accordance with the instructions supplied with the products, or operational
failures caused by corrosion, rust, or other foreign materials in the system.
Requests for service under this warranty shall be made by returning the defective product to the manufacturer as soon as possible after the
discovery of any alleged defect. The manufacturer will subsequently take corrective action as promptly as reasonably possible.
The manufacturer does not warrant and especially disclaims any warranty, whether express or implied, of tness for a particular purpose,
other than the warranty contained herein. This is the exclusive remedy and any liability for any and all indirect or consequential damages or
expenses whatsoever is excluded.
Some states do not allow the exclusion or limitation of incidental or consequential damages or limitations on how long an implied warranty
lasts, so the above limitations or exclusions may not apply to you. This warranty gives you specic legal rights and you may also have other
rights which vary from state to state.
Contact the Customer Service Team at 1-844-883-1872 or visit www.HomeDepot.com.
4
Pre-Installation
PLANNING INSTALLATION
This submersible efuent pump is designed for pumping efuent, wastewater, or ooded water with up to 3/4 in. solids. The pump is built
with overload thermal protections and auto reset. The pump is equipped with a 20 ft. 3-prong grounding-type power cord and tethered oat
switch. This pump operates automatically. Ball bearings on motor shafts never need lubrication.
INSTALLATION REQUIREMENTS
NOTICE: Install the pump on a hard, level surface (cement, asphalt, etc.). Never place the pump directly on earth, clay, or gravel surfaces.
For a typical dewatering installation (3/4 in. or less solids):
Piping must be 2 in. minimum to carry the volume of pump discharge. Check local codes to determine if a check valve is required
in your system. In cold climates, check valves are not used to prevent efuent from freezing in piping. If using the pump as a sump
pump, a check valve is recommended.
Use a 2 in. (5.1 cm) swing check valve in the pump discharge to prevent backow of liquid into the sump basin. The check valve should
be a free ow valve that will easily pass solids.
NOTICE: For best performance, do not install the pump with the discharge angled more than 45º above the horizonal. Do not install the
check valve in a vertical position, as solids may settle in the valve and prevent opening on startup.
Drill a 1/8 in. (3.2 mm) hole in the discharge pipe about 2 – 3 in. (5.1 – 7.6 cm) above the pump discharge connection (but below the
check valve) to prevent air from locking the pump.
For a typical efuent installation:
Electrical wiring and protection must be in accordance with the National Electrical Code and any other applicable state and local
electrical requirement.
Install a proper unicheck (combination union and check valve), preferably just above the basin to allow easy removal of the pump for
cleaning or repair. If high head or below cover installation is required, use a 1-1/2 in. minimum pipe.
All installations require a basin cover to prevent debris from falling into the basin and to prevent accidental injury.
When a unicheck is installed, drill a 1/8 in. (3.2 mm) dia. hole in the discharge pipe even with the top of the pump.
NOTE: The hole must also be below the basin cover and cleaned periodically. Water stream will be visible from this hole during pump run
periods.
Securely tape or clamp the power cord to the discharge pipe, clear of the oat mechanism(s).
Use a full-size discharge pipe.
The basin must be in accordance with applicable codes and specications.
The pump must be level and oat mechanism(s) clear of the sides of the basin before starting the pump.
The basin must be clean and free of debris after installation.
The installer must supply the gate valve or ball valve and it must be installed according to any and all codes.
Make sure nothing interferes with switch operation. This pump is preassembled with a piggyback tethered oat switch. Do not change
the preassembled switch location.
Install the pump stand under the pump to provide a settling basin.
Septic tank risers must be used for easy pump and lter access.
5 HOMEDEPOT.COM
Please contact 1-844-883-1872 for further assistance.
Pre-Installation (continued)
ELECTRICAL REQUIREMENTS
Connect the pump to an individual branch circuit with no other outlets or equipment in
the circuit.
Size fuses or circuit breakers according to this chart:
HP Voltage Individual Branch Circuit Required (Amps)
1/2 115 15
PERFORMANCE CHART
SKU HP GPM of Water @ Total Feet of Lift Max. Lift
0 ft. 5 ft. 10 ft. 15 ft. 20 ft.
1/2 64 58 53 47 40 38 ft.
SPECIFICATIONS
Power supply
115 V, 60 Hz, 15 Amp circuit
Liquid temperature range
32º – 131ºF (0º – 55ºC)
Discharge size
2 in. FNPT
Sump basin
Minimum 18 in. (460 mm) diameter, 30 in. (760 mm) depth
Switch on/off
ON: 17 in., OFF: 9.91 in.
TOOLS REQUIRED
Flathead
screwdriver
Phillips
screwdriver
Safety goggles Cable Ties
Pipe wrench Channel locks Tape measure Hacksaw
1004 118 476
6
Pre-Installation (continued)
MATERIALS REQUIRED (NOT INCLUDED)
NOTE: Hardware not shown to actual size.
AA
BB
CC
DD
EE
FF
GG
Part Description Quantity Part Description Quantity
AA Threaded adapter (Pipe to Pump) 1 EE 2 in. Check valve 1
BB 2 in. ABS or PVC pipe 1 FF ABS or PVC cement (to match the pipe) 1
CC Thread tape 1 GG 2 in. 90° Elbow 1
DD Ball valve 1
7 HOMEDEPOT.COM
Please contact 1-844-883-1872 for further assistance.
Pre-Installation (continued)
PACKAGE CONTENTS
A
Part Description Quantity
A Pump 1
B
B Adapter 1
8
Installation
1
Connecting a discharge pipe to the
pump
Wrap the threads of the 2 in. discharge pipe (1) with thread
sealant tape.
Attach the discharge pipe (1) to the discharge of the
pump(A).
1
A
2
Placing the pump in a basin
3
Connecting the check valve
Connect the discharge pipe to the elbow, union, check
valve, and ball valve in the order appropriate for the
inatallation.
installed. This vent hole will help to prevent air lock.
Place the pump (A) on a hard surface inside a basin.
Drill a 1/8 in. (3.2 mm) hole in the discharge pipe about
2 – 3 in. above the pump discharge (but below check valve)
NOTICE: Pump is equipped with a . This hole prevents
air lock. A small stream of water may flow from this hole during
operation and it is normal.
“weep
hole”
1/8 in.
A
9 HOMEDEPOT.COM
Please contact 1-844-883-1872 for further assistance.
Operation
1
Connecting power
Make sure the pump is submerged in water.
WARNING: Do not handle this pump or plug in or unplug
this pump with wet hands or while standing in water,
unless you are certain all power has been turned off to the
pump. Remember, the pump should be connected only to a
properly grounded, GFCI outlet.
2
Operating the pump
After connecting power to the pump and periodically
afterwards, test the pump:
Fill the basin to above the Float Switch Operation ON
Height. The pump should start pumping.
The pump should pump the water down to below
its Float Switch Operation OFF Height and then stop
pumping.
If the water drains back into the basin and restarts the
pump, make sure the check valve is properly installed
and working. Make sure that all pipe connections are
tight.
The motor is equipped with an automatically resetting
thermal overload protector. If the motor gets too hot,
the overload protector will shut off the pump before it is
damaged. When the motor has cooled sufciently, the
overload protector will reset, and the motor will restart.
NOTICE: If the overload protector stops the pump
repeatedly, disconnect the power from the pump and check
to nd the problem. Low voltage, a long extension cord,
clogged impeller, screen blocked by debris, or water that is
too hot can cause motor overheating.
Plug the pump power cord plug into a 115V G
FCI power
outlet.
10
Care and Cleaning
Before removing the pump from the basin for service, always disconnect electrical power to the pump and control switch. Do not lift
the pump by the power cord.
Submerge the pump in a disinfectant solution (bleach) for at least one hour before disassembling the pump.
Unscrew the bolts (1) and remove the volute (2).
Remove debris from around the impeller (3).
Reassemble the pump.
1
2
3
1
Troubleshooting
Problem Solution
The pump fails to operate. Check to be sure that the power cord is securely plugged into an outlet. Disconnect power to
the outlet before handling the pump or motor.
Check to be sure you have electrical power.
Check that liquid uid levels are high enough to activate the switch or controller.
Check to be sure that a 1/8 in. (3.2 mm) vent hole in the discharge pipe is not plugged.
Check for blockage in the pump inlet, impeller, check valve or discharge pipe.
Thermal overload may have tripped. Test start the pump. If it starts and then stops immediately,
disconnect from the power source for 30 minutes to allow the motor to cool, then reconnect to
the power source. Check for cause of overheating/overloading.
The pump fails to empty sump. Be sure all valves in the discharge are fully open.
Clean out the discharge pipe and check valves.
Check for blockage in the pump inlet or impeller.
The pump will not shut off. Check the switch or controller automatic oats for proper operation and location.
If the pump is completely inoperative or continues to malfunction, call customer service.
(Impeller is shown removed for clarity. Do not remove impeller.)
Questions, problems, missing parts? Before returning to the store,
call Everbilt Customer Service
8 a.m. - 7 p.m., EST, Monday-Friday, 9 a.m. - 6 p.m., EST, Saturday
HOMEDEPOT.COM
Retain this manual for future use.
1-844-883-1872
GRACIAS
Agradecemos la conanza que ha puesto en Everbilt con la compra de esta bomba para euentes. Nos esforzamos continuamente para crear
productos de calidad diseñados para mejorar su hogar. Visítenos en línea para ver nuestra línea completa de productos disponibles para sus
necesidades de mejoramiento del hogar. ¡Gracias por elegir a Everbilt!
GUÍA DE USO Y CUIDADO
BOMBA PARA EFLUENTES SUMERGIBLE
¿Tiene preguntas o problemas, o le faltan piezas? Antes de devolver a la tienda,
llame a Atención al Cliente de Everbilt
Lunes a viernes de 8:00 a.m. a 7:00 p.m., EST y los sábados de 9:00 a.m. a 6:00 p.m., EST
1-844-883-1872
HOMEDEPOT.COM
Artículo n.o
Modelo n.º HDEFR50W
1004 118 476
2
Índice
Índice ............................................2
Información de seguridad ............................2
Garantía. . . . . . . . . . . . . . . . . . . . . . . . . . . . . . . . . . . . . . . . . . . 3
Antes de la instalación ...............................4
Instalación ........................................8
Funcionamiento ....................................9
Cuidado y limpieza .................................10
Resolución de problemas ............................10
Información de seguridad
No empalme el cable de alimentación.
No permita que el cable eléctrico quede sumergido.
No use cables de extensión. Estos representan un peligro de
incendio y pueden reducir el voltaje lo suciente para detener
elbombeo o dañar el motor.
No manipule ni le dé mantenimiento a la bomba mientras está
conectada al suministro eléctrico.
NO quite la clavija de conexión a tierra del enchufe ni modique
al enchufe para estar protegido de descargas eléctricas. El cable
de alimentación es un conductor de tres cables que incluye un
enchufe de 3 clavijas con conexión a tierra. Conecte la bomba
aun tomacorriente de 3 clavijas con conexión a tierra. Conecte
la bomba de acuerdo a las normas eléctricas correspondientes.
PELIGRO: No bombee líquidos inamables o explosivos
como aceite, gasolina, queroseno, etanol, etc. No la use
cerca de vapores inamables o explosivos. Usar esta
bomba con o cerca de líquidos inamables puede provocar
una explosión o incendio, lo que resultaría en daños a la
propiedad, lesiones graves o la muerte.
PELIGRO: SIEMPRE desconecte la alimentación de la
bomba antes de darle mantenimiento.
PELIGRO: No toque la carcasa del motor mientras
esté funcionando. El motor está diseñado para funcionar
atemperaturas altas. No desarme la carcasa del motor.
PELIGRO: No manipule la bomba o el motor de la
bomba con las manos húmedas o si está parado sobre
una supercie mojada o húmeda, o en agua antes de
desconectar la electricidad.
ADVERTENCIA: Libere toda la presión y drene toda el
agua del sistema antes de dar mantenimiento a cualquier
componente.
ADVERTENCIA: Fije la línea de descarga antes de
arrancar la bomba. Una línea de descarga que no esté ja
se moverá como un látigo, lo cual puede causar lesiones
personales o daños a la propiedad.
ADVERTENCIA: Los cables de extensión podrían no
proporcionar suciente voltaje al motor de la bomba.
Loscables de extensión presentan peligros de seguridad
que ponen en riesgo la vida en caso de que el aislamiento
se dañe o el extremo de la conexión caiga al agua. No se
permite el uso de cables de extensión para alimentar esta
bomba.
ADVERTENCIA: Use anteojos de seguridad en todo
momento cuando trabaje con bombas.
ADVERTENCIA: Esta unidad está diseñada solo para su
uso en líneas de 115 voltios (monofásicas), 60 Hz, y está
equipada con un cable de 3 conductores y un enchufe de
3clavijas con conexión a tierra, ambos aprobados. No quite
la clavija de conexión a tierra bajo ninguna circunstancia.
El enchufe de 3 clavijas debe insertarse directamente en un
tomacorriente de 3 clavijas con conexión a tierra instalado
correctamente. No use esta bomba con un tomacorriente
de 2 clavijas. Cambie el tomacorriente de 2 clavijas por uno
de 3 con conexión a tierra (un tomacorriente GFCI) instalado
de acuerdo con el Código Eléctrico nacional y los códigos
yordenanzas locales. Un electricista certicado debe
realizar todo el cableado.
ADVERTENCIA: Proteja el cable eléctrico de objetos
losos, supercies calientes, aceite y sustancias
químicas. Evite retorcer el cable. No use cables dañados
odesgastados.
ADVERTENCIA: No cumplir con las instrucciones y el
uso designado para esta unidad puede anular la garantía.
INTENTAR USAR UNA BOMBA DAÑADA puede provocar
daños a la propiedad, lesiones graves o la muerte.
ADVERTENCIA: Asegúrese de que el circuito eléctrico
de la bomba esté protegido por un fusible o disyuntor
eléctrico de 15 A.
PRECAUCIÓN: No levante la bomba tirando del cable de
alimentación.
PRECAUCIÓN: Conozca la bomba, sus usos, limitaciones
y peligros posibles.
3 HOMEDEPOT.COM
Comuníquese con el 1-844-883-1872 para obtener más ayuda.
Información de seguridad
(continuación)
PRECAUCIÓN: Fije la bomba a una base sólida.
Estoayudará a mantener la bomba en posición vertical.
Estoes esencial para mantener la bomba funcionando
con la eciencia máxima. También ayudará a evitar que la
bomba se obstruya y cause una avería prematura.
PRECAUCIÓN: Inspeccione periódicamente los
componentes del sistema y la bomba para garantizar que
el ltro de succión de la bomba esté libre de barro, arena
y desechos. Desconecte la bomba del suministro eléctrico
antes de inspeccionarla.
PRECAUCIÓN: Cumpla con todas las normas eléctricas
y de seguridad locales, así como con el Código Nacional
Eléctrico (NEC, por sus siglas en inglés). Además, se deben
seguir todas las pautas de la Administración de Seguridad
ySalud Ocupacional (OSHA, por sus siglas en inglés).
IMPORTANTE: Asegúrese de que la fuente de
alimentación eléctrica sea la adecuada para los requisitos
de la bomba.
IMPORTANTE: Esta bomba está hecha de materiales
de alta dureza y resistentes a la corrosión. Funcionará
sin problemas por mucho tiempo si se instala, mantiene
yutiliza correctamente. Sin embargo, un suministro
eléctrico inadecuado, la suciedad y los desechos pueden
hacer que la bomba se averíe. Lea detenidamente el manual
y siga las instrucciones relacionadas con los problemas
comunes de la bomba y sus soluciones.
IMPORTANTE: El motor de esta bomba tiene un
protector térmico que se activará si el motor se calienta
demasiado. El protector se reiniciará por sí solo cuando
el motor se enfría lo suciente y alcanza una temperatura
aceptable. La bomba puede arrancar inesperadamente si
está conectada.
Garantía
El fabricante garantiza los productos contra los defectos en el material y la mano de obra durante un periodo de tres años a partir de la
fecha de compra. Esta garantía aplica solo al consumidor que hace la compra original y solo a productos que se usan para servicio y uso
normales. Si en el plazo de dos años el fabricante encuentra defectos en este producto, la única obligación del fabricante, y su exclusivo
remedio, es la reparación o reemplazo del producto, a criterio del fabricante, suponiendo que el producto no haya sido dañado debido al
uso inadecuado, abuso, accidente, modicaciones, alteraciones, negligencia o manejo inadecuado. Se requiere el recibo de compra original
para determinar la elegibilidad de la garantía.
El comprador debe pagar por todos los costos de mano de obra y envío necesarios para reemplazar el producto cubierto por esta garantía.
Esta garantía limitada no aplica a productos con daños resultado de un accidente, uso indebido, abuso, negligencia, alteración, instalación
o mantenimiento inapropiado, no operar los productos de acuerdo a las instrucciones incluidas, o fallas de funcionamiento causadas por
corrosión, óxido u otros materiales extraños en el sistema.
Las solicitudes de servicio bajo esta garantía se realizarán retornando el producto defectuoso al fabricante lo antes posible una vez
descubierto el supuesto defecto. El fabricante tomará acciones correctivas tan pronto como sea razonablemente posible.
El fabricante no garantiza la idoneidad para cualquier propósito en particular y en especial renuncia a cualquier garantía expresa o implícita
sobre ella, aparte de la garantía contenida en el presente documento. Este es su exclusivo remedio y se excluye cualquier responsabilidad
por daños o gastos indirectos o consecuentes.
Algunos estados no permiten la exclusión o limitación de los daños incidentales o resultantes, ni las limitaciones en la duración de las
garantías implícitas, de manera que las limitaciones o excepciones mencionadas quizás no se apliquen en su caso. Esta garantía le brinda
derechos legales especícos y quizás usted tenga otros derechos que varían según el estado.
Comuníquese con el equipo de Atención al Cliente al 1-844-883-1872 o visite www.HomeDepot.com.
4
Antes de la instalación
PLANIFICACIÓN DE LA INSTALACIÓN
Esta bomba para euentes sumergible está diseñada para bombear euentes, aguas residuales o aguas de inundaciones con sólidos de
hasta 3/4 pulgadas. La bomba está construida con protecciones térmicas por sobrecarga y reinicio automático. La bomba incluye un cable
de alimentación de 20 pies (6 m) con enchufe de 3 clavijas con conexión a tierra y un interruptor ligado a un otador. Esta bomba funciona
automáticamente. Los rodamientos de bola de los ejes del motor nunca necesitan lubricación.
REQUISITOS DE INSTALACIÓN
AVISO: Instale la bomba sobre una supercie dura y nivelada (cemento, asfalto, etc.). Nunca coloque la bomba directamente sobre
latierra, arcilla o grava.
Para una instalación típica de desagüe (sólidos de 3/4 pulgadas o menos):
La tubería debe ser de 2 pulgadas como mínimo para transportar el volumen de descarga de la bomba. Verique las normas locales
para determinar si el sistema requiere una válvula de retención. En climas fríos, no se utilizan válvulas de retención para evitar que los
euentes se congelen en las tuberías. Si se usa la bomba como bomba de sumidero, se recomienda el uso de una válvula deretención.
Use una válvula de retención oscilante de 2 pulgadas (5.1 cm) en la descarga de la bomba para evitar el reujo de líquido hacia
elestanque sumidero. La válvula de retención debe ser una válvula de ujo libre que permita que los sólidos pasen con facilidad.
AVISO: Para obtener el mejor desempeño, no instale la bomba con la descarga en un ángulo de más de 45° por encima del nivel
horizontal. No instale la válvula de retención en posición vertical, ya que los sólidos pueden acumularse en la válvula y evitar que se abra
enel arranque.
Taladre un oricio de 1/8 pulgada (3.2 mm) en la tubería de descarga a unas 2 o 3 pulgadas (5.1 o 7.6 cm) sobre la conexión de la
descarga de la bomba (pero debajo de la válvula de retención) para evitar que el aire bloquee la bomba.
Para una instalación típica de euentes:
El cableado eléctrico y la protección deben cumplir con el Código Nacional Eléctrico y cualquier otro requisito eléctrico local y estatal
que apliquen.
Instale una válvula de retención y unión adecuada, de preferencia justo por encima del estanque para permitir la fácil extracción
dela bomba para su limpieza o reparación. Si se requiere una instalación debajo de la cubierta o de cabezal alto, use una tubería
de1-1/2pulgada como mínimo.
Todas las instalaciones requieren una cubierta de estanque para evitar que los desechos caigan al estanque y para evitar lesiones
accidentales.
Cuando se instala una válvula de retención y unión, taladre un oricio de 1/8 pulgada (3.2 mm) de diámetro en la tubería de descarga
anivel con la parte superior de la bomba.
NOTA: El oricio también debe estar por debajo de la cubierta del estanque y se debe limpiar con frecuencia. Se verá un chorro de agua
através de este oricio durante el funcionamiento de la bomba.
Fije con cinta o abrazadera el cable de alimentación a la tubería de descarga, lejos del mecanismo de otación.
Use una tubería de descarga de tamaño completo.
El estanque debe cumplir con todas las normas y especicaciones.
La bomba debe estar nivelada y el mecanismo de otación debe estar lejos de los lados del estanque antes de arrancar la bomba.
El estanque debe estar limpio y sin desechos después de la instalación.
El instalador debe suministrar la válvula de compuerta o la válvula de bola y esta se debe instalar de acuerdo a todas las normas.
Asegúrese de que nada interera con el accionamiento del interruptor. Esta bomba está preensamblada con un interruptor ligado
aunotador. No cambie la ubicación preensamblada del interruptor.
Instale el soporte de la bomba debajo de esta para proporcionar un depósito para la sedimentación.
Se deben utilizar elevadores de tanque séptico para facilitar el acceso a la bomba y al ltro.
5 HOMEDEPOT.COM
Comuníquese con el 1-844-883-1872 para obtener más ayuda.
Antes de la instalación
(continuación)
REQUISITOS ELÉCTRICOS
Conecte la bomba a un circuito independiente sin otros tomacorrientes o equipos en el circuito.
Tamaño de fusibles o disyuntores según esta tabla:
CV Voltaje Requiere un circuito derivado independiente (A)
1/2 115 15
TABLA DE DESEMPEÑO
SKU CV LPM de agua a pies de elevación total Elevación
máx.
0 pies 5 pies 10 pies 15 pies 20 pies
1004 118 476 1/2 242 219 200 177 151 38 pies
ESPECIFICACIONES
Alimentación
Circuito de 115V, 60Hz, 15A
Rango de temperatura del líquido
32° – 131°F (0° – 55°C)
Tamaño de descarga
2 pulgadas FNPT
Estanque sumidero
Mínimo 18 pulg. (460 mm) de diámetro, 30 pulg. (760 mm) de profundidad
Interruptor de encendido/apagado
ENCENDIDO: 17 pulg., APAGADO: 9.91 pulg.
HERRAMIENTAS REQUERIDAS
Destornillador
de cabeza
plana
Destornillador
Phillips
Gafas de seguridad
Amarres
decable
Llave para
tuberías
Pinza ajustable Cinta métrica Segueta
6
Antes de la instalación
(continuación)
MATERIALES REQUERIDOS (NO INCLUIDOS)
NOTA: El herraje no se muestra en su tamaño real.
AA
BB
CC
DD
EE
FF
GG
Pieza Descripción Cantidad Pieza Descripción Cantidad
AA Adaptador roscado (tubería a bomba) 1 EE Válvula de retención de 2 pulgadas 1
BB Tubería de PVC o ABS de 2 pulgadas 1 FF Cemento para PVC o ABS (que coincida
con la tubería)
1
CC Cinta para rosca 1 GG Codo de 90° de 2 pulgadas 1
DD Válvula de bola 1
7 HOMEDEPOT.COM
Comuníquese con el 1-844-883-1872 para obtener más ayuda.
Antes de la instalación
(continuación)
CONTENIDO DEL PAQUETE
A
Bomba
B
A 1
B 1
Pieza Descripción Cantidad
Adaptador
8
Instalación
1
Conexión de la tubería de descarga
ala bomba
Coloque cinta selladora de rosca en la rosca de la tubería
de descarga de 2 pulgadas (1).
Fije la tubería de descarga (1) a la descarga de la
bomba(A).
1
A
2
Colocación de la bomba
enunestanque
Taladre un oricio de 1/8 pulgada (3.2 mm) en la tubería de
descarga a unas 2 – 3 pulgadas (5.1 o 7.6 cm) por encima
de la descarga de la bomba (pero por debajo de la válvula
de retención) instalada. Este oricio de ventilación ayudará
a evitar un bloqueo por aire.
Coloque la bomba (A) sobre una supercie dura dentro del
estanque.
AVISO: La bomba posee un “oricio de drenaje”.
Esteoricio evita los bloqueos por aire. Puede uir
un pequeño chorro de agua de este oricio durante el
funcionamiento y será algo normal.
A
1/8 pulg
3
Conexión de la válvula de retención
Conecte la tubería de descarga al codo, la unión, la válvula
de retención y la válvula de bola en el orden apropiado para
la instalación.
9 HOMEDEPOT.COM
Comuníquese con el 1-844-883-1872 para obtener más ayuda.
Funcionamiento
1
Conexión de la alimentación
Asegúrese de que la bomba esté sumergida en agua.
Enchufe el cable de alimentación de la bomba a un
tomacorriente GFCI de 115V.
ADVERTENCIA: No manipule esta bomba ni la enchufe
o desenchufe con las manos húmedas, o si está parado en
agua, a menos que esté seguro de que se ha desconectado la
alimentación de la bomba. Recuerde, la bomba solo se debe
conectar a un tomacorriente GFCI bien conectado a tierra.
2
Funcionamiento de la bomba
Pruebe la bomba una vez conectada la alimentación y con
frecuencia posteriormente:
Llene el estanque por encima de la altura de encendido
del funcionamiento del interruptor de otación.
Labomba debe comenzar a bombear.
La bomba debe bombear el agua hasta la altura de
apagado del funcionamiento del interruptor de otación
y luego apagarse.
Si el agua drena de regreso al estanque y reinicia la
bomba, asegúrese de que la válvula de retención esté
bien instalada y que funcione. Asegúrese de que todas
las conexiones de la tubería estén apretadas.
El motor posee un protector de sobrecarga térmica con
reinicio automático. Si el motor se calienta demasiado,
elprotector por sobrecarga apagará la bomba antes de que
se dañe. Cuando el motor se haya enfriado lo suciente,
elprotector por sobrecarga se reiniciará, y el motor volverá
a encenderse.
AVISO: Si el protector por sobrecarga detiene la bomba
repetidas veces, desconecte la alimentación de la bomba
yrealice una vericación para encontrar el problema.
Lasposibles causas de que el motor se sobrecaliente son la
baja tensión, un cable de extensión largo, un propulsor atascado,
queel ltro esté obstruido con desechos o el agua muy caliente.
  • Page 1 1
  • Page 2 2
  • Page 3 3
  • Page 4 4
  • Page 5 5
  • Page 6 6
  • Page 7 7
  • Page 8 8
  • Page 9 9
  • Page 10 10
  • Page 11 11
  • Page 12 12
  • Page 13 13
  • Page 14 14
  • Page 15 15
  • Page 16 16
  • Page 17 17
  • Page 18 18
  • Page 19 19
  • Page 20 20
  • Page 21 21
  • Page 22 22

Everbilt HDEFR50W Operating instructions

Category
Water pumps
Type
Operating instructions

Everbilt HDEFR50W is a submersible effluent pump designed for pumping effluent, wastewater, or flooded water with up to 3/4 in. solids. It operates automatically and features overload thermal protection with auto reset, a 20 ft. power cord, and a tethered float switch. The pump can handle solids up to 3/4 in. and is suitable for use in typical dewatering and effluent applications.

Ask a question and I''ll find the answer in the document

Finding information in a document is now easier with AI

in other languages