Page is loading ...

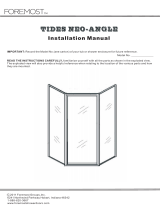
COVE FRAMELESS PIVOT
Installation Manual
IMPORTANT: Record the Model No.(see carton) of your tub or shower enclosure for future reference.
Model No.
READ THE INSTRUCTIONS CAREFULLY, familiarize yourself with all the parts as shown in the exploded view.
The exploded view will also provide a helpful reference when relating to the location of the various parts and how
they are mounted.
C 2011 Foremost Groups,Inc.
6241 Northwind Parkway Hobart, Indiana 46342
1-888-620-3667
www.foremostshowerdoors.com

TOOLS.
PART LIST.
4x9mm
SCREW (2 pcs)
4x35mm
SCREW CAP ( 7
pcs)
SUPPORT PIVOT (2 Pcs)
PLASTICS (1 Pcs) BOTTOM TRACK (1 Pcs)
MAGNET WALL JAMB (1 Pcs)
WALL PLUG (8 pcs)
SCREW (
8
pcs)
4 x 38mm
SU P PORT PIVO T P LASTI CS(2 pcs)
SU P PORTPIV O T SCREW(4 p cs )
PLASTICS
MAGNET PLASTICS
(1 pcs)
WALL JAMB(1 Pcs)
METAL PIVOT(2 pcs)
1 2
4
5
6
8 9 10
11
12 14
7
PIVOT JAMB(1 Pcs)
DOOR PANEL (1 Pcs)
13
3
15
16
17 1918
METAL PIVOT SCREW(2 pcs)
HANDLE(1 pcs) WRENCH(1 pcs)
2x50mm
DOOR PANEL
LE VEL
MEASURE TAPE
DR ILL
RU BBER M ALLET
SCRE W DRIVERS
PENCIL
SILICON
HANDSAW
DRILL BI TS
1/8
"
1/4
"
1
14
1
2
3
4
5
6
7
8
8
7
9
9
10
11
12
12
12
13
13
13
12
12
12
13
13
13
10
11
14
15
15
16
17
18
20
WALL JAMB (1 pcs)
20
PLASTICS
(1 pcs) PLASTICS
(1 pcs)
22
21
22
21

2
7
9
1
8
CAULK GLUE
When attaching your door to Fiberglass or Acrylic
you must use a 1/8" drill bit and NO WALL ANCHORS.
Step 1) Measure and cut threshold
to your exact opening size.
Step 2) Silicone or Caulk bottom of
threshold.
Next:
Step 1) Attach support pivots(#7 on parts list)
to bottom of pivot jamb(#1 on parts list).
Step 2) Set pivot jamb on the threshold.
Step 3) Mark your holes, remove jamb
Step 4) Drill holes and then attach pivot jamb.

3
TOP VIEW
17
3
SIDE VIEW
14
16
TOP VIEW
18
SIDE VIEW
STEP 5
INSTALL DOOR PANEL
METAL PIVOT
STEP 6
INSTALL MAGNET PLASTIC
STEP 7
INSTALL PLASTIC
STEP 8
INSTALL PLASTIC
STEP 9
INSTALL HANDLE
22
21
Step 5) Attach support pivot arm to top of pivot jamb,
screw together, but do not tighten.
Set glass door (#2) into the metal support pivot
arm at top and bottom of door (pin at top of bracket).
Step 6) Attach magnetic plastic to end of the door.
Step 7) Attach plastic (#16) to back of the glass door.
Step 8) Attach plastic (#3) to bottom
of glass and (#21) to the bottom
of the bracket and the back of the bracket.
Step 9) Screw on handle to the door.

4
5
2020
Step 1) Line up wall jamb (#5)
and mark holes.
Step 2) Drill holes.
Step 3) Insert wall plugs (optional)
Do not use plugs if attaching to
a fiberglass unit.
Step 3a) Silicone holes-
Step 3b) Attach open wall jamb
(#5) to the closed wall jamb (#20).
Step 3c) Then screw them
together in to the wall.
For the opposite side of the Unit!
Step 4) Attach magnetic jamb (#6) to the wall jamb (#5).
Step 5) Using screws (#10) for the inside of the magnetic jamb
and the wall jamb to fasten together, once all adjustment are made
tighten screws, then attach screw caps over screws.
screw 3/8(#10) and screw cap (#11)

19
15
1/4" GLASS
17
5
6
PLEASE CLOSE THE PIVOT DOOR AND CHECK TO SEE IF THE DOOR IS
CLOSE (FLUSH) TO THE MAGNET WALL JAMB(#6). IF THE MAGNETIC PLASTIC
ON THE GLASS PANEL DOES NOT REACH THE WALL JAMB. YOU WILL HAVE
TO REMOVE THE GLASS DOOR PANEL, AND READJUST THE THAT
IS ATTACHED TO THE TOP AND BOTTOM OF THE BRACKET. (YOU SHOULD
HAVE RECVIEVED A SMALL ALLEN WRENCH) THAT FITS INSIDE OF THE PIN
AT THE TOP OF THE BRACKET. THERE IS A SET SCREW INSIDE THE PIN THAT
YOU CAN MOVE TO ADJUST YOUR UNIT TO THE CORRECT SIZE OPENING
YOU WILL NEED.
***PLEASE ENSURE TO LOOSEN TOP AND BOTTOM PINS FOR ADJSUTMENT,
AND TO RETIGHTEN THEM ONCE ADJSUTMENT IS MADE.***
ALSO, YOU CAN ADJUST THE MAGNETIC PLASTIC ON THE GLASS IN OR OUT
TO ENSURE UNIT FITS CORRECTLY.
PIVOT PIN
/